
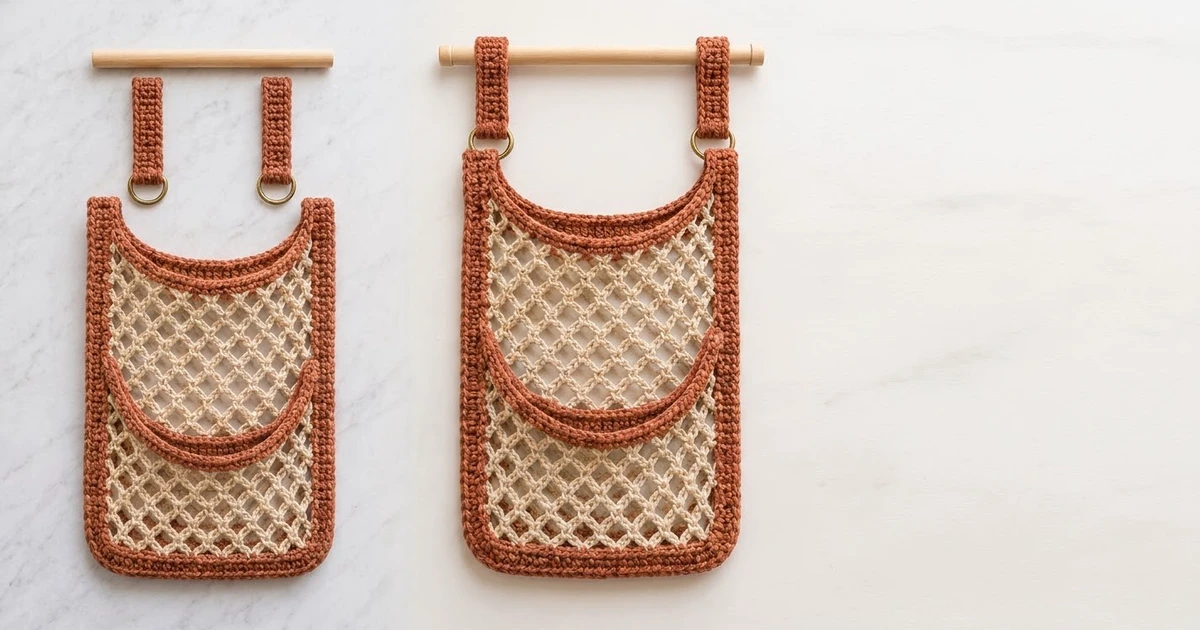
This wall-hanging organizer pairs an open cream lattice with a solid rust-terracotta frame. Two stacked mesh pockets, each with a curved rust band along the top, hold pan lids upright and keep them easy to grab. The whole thing hangs from a wooden dowel on two short rust straps with metal rings.
The look is warm farmhouse with a little boho in it. The cream net stays light and airy, and the rust stitches give it a firm, tailored outline. Sturdy cotton keeps it washable and stops it sagging under the weight of glass lids.
This pattern uses US crochet terms. The finished panel measures 11 in wide × 18.5 in tall (27.9 × 47.0 cm), not counting the straps and dowel.
You will make three mesh pieces: a back panel, an upper pocket and a lower pocket. Each pocket gets a shaped rust band, then both pockets are layered on the back. One rust border, worked through every layer, joins them all. Two ring tabs, two straps and a dowel finish it off.
Finished Size and Construction
- Finished size: 11 × 18.5 in (27.9 × 47.0 cm), panel only
- Skill level: Intermediate
- Terminology: US crochet terms
- Yarn weight: Worsted (#4) cotton
- Hook: 5.0 mm (H-8)
- Number of pieces: 3 mesh pieces, 2 straps, plus 2 small tabs worked onto the border
- Layout: pockets stacked on the front of the back panel, all lined up at the bottom and sides
- Back panel mesh size: 9 × 16.5 in (22.9 × 41.9 cm)
- Size before border: 9 × 16.5 in (22.9 × 41.9 cm)
- Border depth: 1 in (2.5 cm) on every side
Materials
Pick a smooth, firm worsted-weight cotton or cotton blend. Acrylic will stretch under the lids, so stay with cotton.
- Color A, Cream: 110 g / 190 m
- Color B, Rust (terracotta): 130 g / 220 m
- 5.0 mm (H-8) crochet hook
- Two 1.25 in (3.2 cm) metal O-rings or D-rings, brass or gold finish
- One wooden dowel, 14 in (35.6 cm) long and 0.75 in (1.9 cm) thick
- Two wall hooks or dowel brackets
- Tapestry needle, scissors, stitch markers, locking pins
- Blocking mats and rustproof pins
These quantities already include a margin of about 15 percent for your gauge swatch and weaving in ends.
Abbreviations (US Terms)
- ch – chain
- sk – skip
- sc – single crochet
- hdc – half double crochet
- dc – double crochet
- tr – treble crochet
- sp – space
- st(s) – stitch(es)
- rep – repeat
- RS / WS – right side / wrong side
Special stitch – Net loop: ch 5, sc in the next ch-5 space. Rows of net loops stack to make the diamond lattice.
Gauge and Checkpoints
- Mesh (Color A): 5 loops = 5 in (12.7 cm) wide; 10 rows = 5 in (12.7 cm) tall. That is 1 loop per inch and 2 rows per inch.
- Single crochet (Color B): 16 sc and 16 rows = 4 in (10.2 cm).
Start by making the lower pocket, since it is the smallest piece. It will tell you whether your mesh and sc gauges match.
Checkpoints:
- After Row 13 of the lower pocket the mesh should measure 9 × 6.5 in (22.9 × 16.5 cm).
- After trim Row 1, the 36 sc should span 9 in (22.9 cm).
- Before you add the border, the back panel should be 9 × 16.5 in (22.9 × 41.9 cm).
- After border Rnd 4 the panel should be 11 × 18.5 in (27.9 × 47.0 cm).
Too big? Go down to a 4.5 mm hook, or tighten up your chains. Too small? Go up to a 5.5 mm hook. Get the mesh right first. Tight sc can be fixed with a hook change for Color B only.
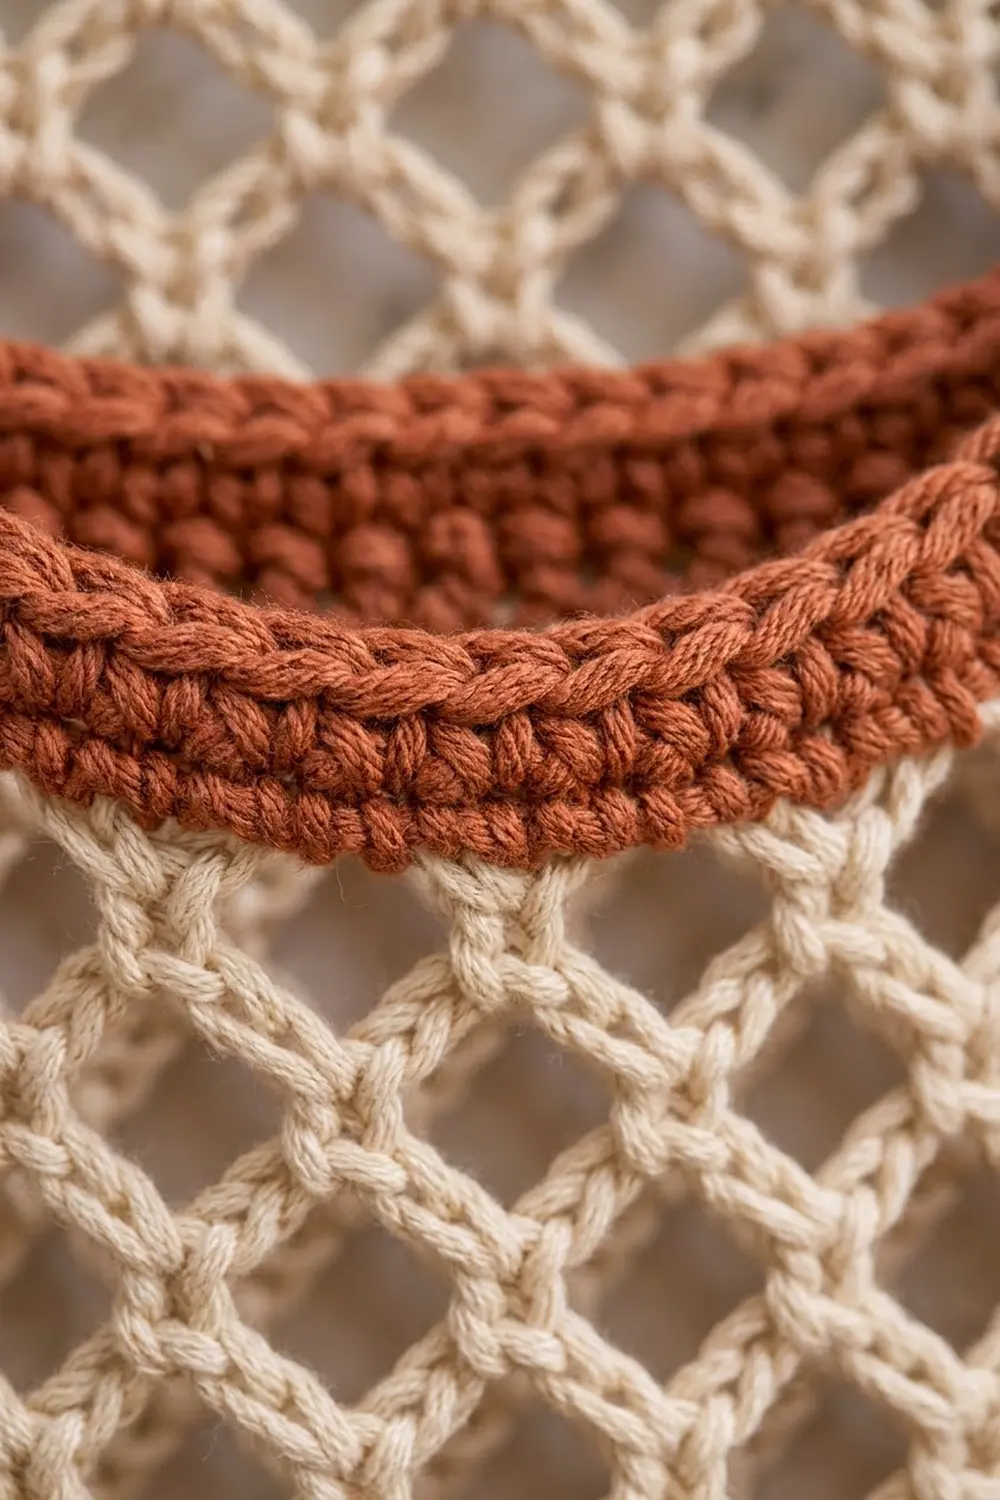
Mesh Fabric (All Three Pieces)
Every mesh piece is 9 loops wide and starts on 37 chains (4 × 9 + 1).
Foundation: With Color A, ch 37.
Row 1 (RS): Sc in 2nd ch from hook, ch 5, sk 3 ch, sc in next ch; rep from * 8 more times, turn. (9 loops, 10 sc)*
Row 2: Ch 5 (counts as dc + ch 2), sc in first ch-5 loop, ch 5, sc in next ch-5 loop; rep from * across, ending ch 2, dc in last sc, turn. (8 full loops + 2 half loops, 9 sc)*
Row 3: Ch 1, sc in first dc, ch 5, sc in next full ch-5 loop; rep from * 7 more times, ch 5, sc in 3rd ch of turning ch-5, turn. (9 loops, 10 sc)*
Repeat Rows 2 and 3 for the pattern. Odd rows always end with 9 full loops. That gives a flat top for the trim or border.
Back Panel
Work the mesh fabric for 33 rows, ending on an odd row. Fasten off.
Checkpoint: 9 loops wide, 33 rows, 9 × 16.5 in (22.9 × 41.9 cm).
Upper Pocket
Work the mesh fabric for 27 rows, ending on an odd row. That makes 9 × 13.5 in (22.9 × 34.3 cm). Fasten off Color A.
Curved Pocket Trim
The trim’s taller stitches sit at the edges and its short stitches sit in the middle. That makes the sides rise higher than the center, which gives the shallow inward curve. Work the trim the same way on both pockets.
Trim Row 1 (conversion row): Join Color B in the first sc. Ch 1, work 4 sc in each of the 9 ch-5 loops, turn. (9 loops × 4 sc = 36 sc; the sc between loops are not worked)
Trim Row 2 (shaping): Ch 4 (counts as first tr), tr in next 3 sts, dc in next 4 sts, hdc in next 4 sts, sc in next 12 sts, hdc in next 4 sts, dc in next 4 sts, tr in last 4 sts, turn. (4 tr + 4 dc + 4 hdc + 12 sc + 4 hdc + 4 dc + 4 tr = 36 sts)
Trim Rows 3–4: Repeat Trim Row 2. (36 sts each)
Trim Rows 5–6: Ch 1 (does not count), sc in each st across, turn. (36 sc each)
Fasten off and leave a tail.
Checkpoint: The trim stands about 3 in (7.6 cm) tall at each side and about 1.5 in (3.8 cm) tall in the center. The pocket’s side edges measure 16.5 in (41.9 cm), the same as the back panel. The center top sits 1.5 in (3.8 cm) lower.
Lower Pocket
Work the mesh fabric for 13 rows, ending on an odd row. That makes 9 × 6.5 in (22.9 × 16.5 cm). Work Trim Rows 1–6 exactly as for the upper pocket.
Checkpoint: side edges 9.5 in (24.1 cm), center top 8 in (20.3 cm).
Straps (Make 2)
With Color B, ch 7.
Row 1: Sc in 2nd ch from hook and in each ch across, turn. (6 sc)
Rows 2–28: Ch 1, sc in each st across, turn. (6 sc)
Fasten off. Each strap is 1.5 × 7 in (3.8 × 17.8 cm).
Make All Pieces
| Piece | Qty | Color | Size |
|---|---|---|---|
| Back panel | 1 | A | 9 × 16.5 in (22.9 × 41.9 cm) |
| Upper pocket + trim | 1 | A + B | 9 × 16.5 in (22.9 × 41.9 cm) at the sides |
| Lower pocket + trim | 1 | A + B | 9 × 9.5 in (22.9 × 24.1 cm) at the sides |
| Strap | 2 | B | 1.5 × 7 in (3.8 × 17.8 cm) |
Layer layout (side view, front on the left):
LOWER POCKET | UPPER POCKET | BACK PANEL
rows 1-13    | rows 1-27    | rows 1-33
+ trim       | + trim       |
(top at 9.5) | (top at 16.5)| (top at 16.5)
Front view (heights in inches from the bottom edge):
16.5  +--upper pocket curve--+  back top
 9.5  +--lower pocket curve--+
 0    +-------all bottoms----+
Joining
Instead of seaming, you join the pieces by working the border through all the layers at once.
- Lay the back panel RS up.
- Lay the upper pocket on top, RS up, with its foundation edge on the back panel’s foundation edge. Its 9 bottom gaps sit on the back’s 9 gaps, and its rows sit on rows 1–27 of the back. The trim’s side edges sit on back rows 28–33.
- Lay the lower pocket on top of that, also RS up and lined up at the bottom. Its rows sit on back rows 1–13, and its trim sits on back rows 14–19.
- Pin each side edge every 1 in (2.5 cm). Every layer should line up row for row. Mesh rows are 0.5 in (1.3 cm) tall and the trim is 3 in (7.6 cm) tall, which is exactly 6 back rows.
Stitch-to-stitch logic: Each border stitch goes through the back panel and through any pocket edge sitting on top of it at that height. You never add stitches for the extra layers. The stitch count comes only from the back panel.
Tension: Keep your sc relaxed when you are going through three layers. If you pull the edge tight, the pockets pucker. If an edge feels bulky, use a slightly larger hook for Rnd 1 only.
Size checkpoint: the pinned stack measures 9 × 16.5 in (22.9 × 41.9 cm). The pocket curves lie flat with no pull.
Border
Border gauge: 4 sc per inch along the edges, and 4 rounds = 1 in (2.5 cm).
Counting rule: Each corner has one corner center st. The side counts below include every st between two corner center sts, and they do not include the corners. Round total = 4 side counts + 4 corner center sts.
Top corners: work 3 sc in the corner center st.
Bottom corners (rounded): 2 sc in the st before the corner center, sc in the center, 2 sc in the st after. This adds the same 2 sts as a top corner, but spreads them out to make a soft curve.
Rnd 1: With RS facing, join Color B in the top right corner sc of the back panel’s Row 33.
– Top: 3 sc in the corner sc, then 4 sc in each of the 9 ch-5 loops (36 sc).
– Left side: 3 sc in the corner st, then 2 sc in each of the 33 row ends, going through the pocket layers wherever they overlap (66 sc).
– Bottom: 3 sc in the corner, then 4 sc in each of the 9 foundation gaps, going through all three layers (36 sc).
– Right side: 3 sc in the corner, then 2 sc in each of the 33 row ends (66 sc).
– Sl st to the first sc.
Each 3-sc corner group has 1 center st and 2 flank sts, and the flanks count toward the sides.
Per side: top 38, bottom 38, left 68, right 68; total 38 + 38 + 68 + 68 + 4 = 216 sts.
Rnd 2: Ch 1, sc in each st, working top or bottom corners as described above. Per side: 40 / 40 / 70 / 70; total 224.
Rnd 3: Repeat Rnd 2. Per side: 42 / 42 / 72 / 72; total 232.
Rnd 4: Repeat Rnd 2. Per side: 44 / 44 / 74 / 74; total 240. Sl st to join and fasten off.
Why the math works: At 4 sc per inch, 36 sc covers exactly 9 in (22.9 cm), the width of 9 one-inch loops. Then 66 sc covers 16.5 in (41.9 cm), which is 33 rows × 2 sc each. The pockets are stacked, not placed side by side, so only one panel width runs along each side: 1 × 36 = 36 sc. Nothing is added at the layers. All increases happen at the corners, 2 per corner per round, so the sides stay flat. Four rounds add 1 in (2.5 cm) all round: 9 + 2 = 11 in (27.9 cm) and 16.5 + 2 = 18.5 in (47.0 cm).
Ring Tabs (Make 2)
With RS facing, join Color B in the top corner center st. Work over that st and the 3 top-edge sts next to it, heading toward the center.
Rows 1–6: Ch 1, sc in 4 sts, turn. (4 sc each row)
Slide a ring onto the tab. Fold Rows 4–6 to the back and sew them down. The tab stands 0.75 in (1.9 cm) above the corner. Repeat on the other top corner.
Hanging
Pass one end of each strap through a ring, fold back 1 in (2.5 cm) and sew it securely. Wrap the other end over the dowel, fold back 2 in (5.1 cm) and sew. Slide the straps 1 in (2.5 cm) in from each dowel end.
Final Blocking
- Soak the panel (before you add the straps) in cool water for 10 minutes.
- Press the water out in a towel. Do not wring it.
- Lay it RS up and pin the outer edge to 11 × 18.5 in (27.9 × 47.0 cm).
- Pin each mesh diamond square and the rows level, working from the center out.
- Pin each pocket’s curve into a smooth, even arc, with its center 1.5 in (3.8 cm) below its side corners.
- Let it dry completely, then add the straps and dowel.
Final Quality-Control Checklist
- Panel is 11 × 18.5 in (27.9 × 47.0 cm), with all four border sides straight.
- Border Rnd 4 total is 240 sts.
- Both pocket curves are symmetrical and their trim ends are caught in the border.
- Pocket rows line up with the back rows, with no ripples.
- Bottom corners are rounded and top corners are square.
- Ring tabs and straps are sewn securely, and the tails are woven into the rust stitches.
- Lids slip into both pockets and stand upright.
Troubleshooting
- Mesh is narrower than 9 in (22.9 cm): Your chains are tight. Use a larger hook for the ch-5 loops only.
- Pocket curve looks flat: Your tr are too short. Pull up a taller loop, or add one more shaping row and drop one sc row.
- Border ruffles: Your sc gauge is loose. Go down a hook size for the border.
- Border pulls in the sides: Recount the 66 row-end sc and keep them at 2 per row end.
- Pockets bag outward: Re-pin them to the back before Rnd 1 and match the layers row for row.
- Panel tilts on the dowel: Even out the strap lengths and re-center the straps.
Care
Hand wash in cool water with a mild soap, then reshape and dry flat. Do not tumble dry, because the mesh can stretch out of shape.

Final Notes
The measurement chain is simple. Each loop is 1 in (2.5 cm) and each mesh row is 0.5 in (1.3 cm), so the back is 9 × 16.5 in (22.9 × 41.9 cm). Each pocket trim adds 3 in (7.6 cm) at the sides, so the pocket corners sit at 16.5 in (41.9 cm) and 9.5 in (24.1 cm). The 1 in (2.5 cm) border brings the panel to 11 × 18.5 in (27.9 × 47.0 cm). Check gauge early and count the stitches at every checkpoint, and both lids will sit neatly in their pockets.
Happy crocheting!