
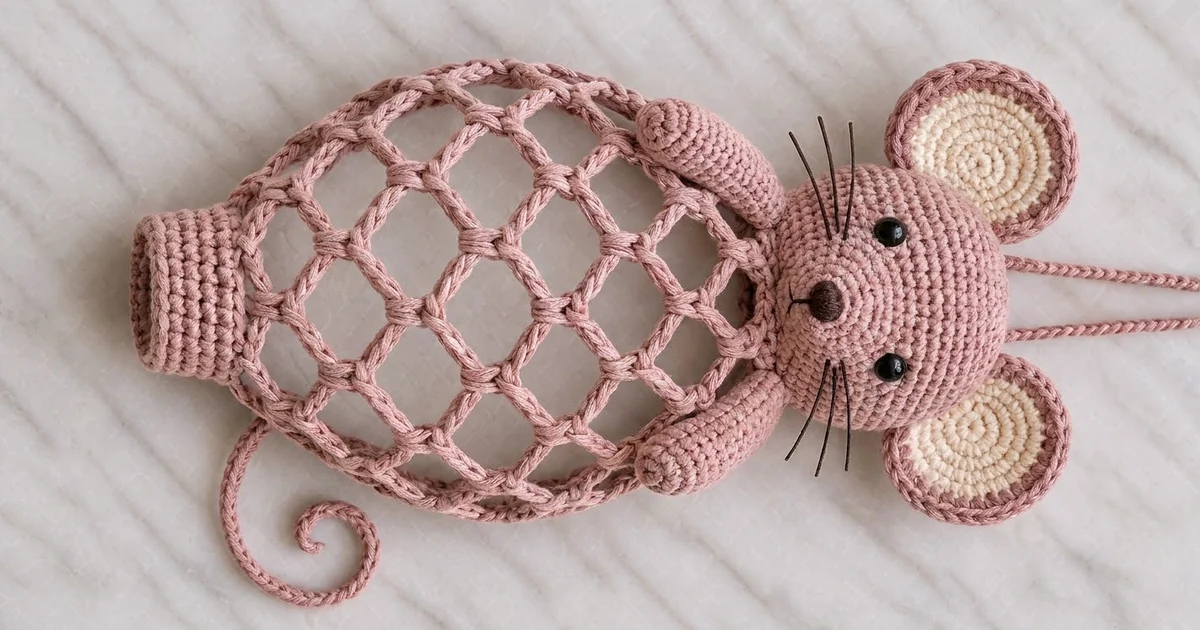
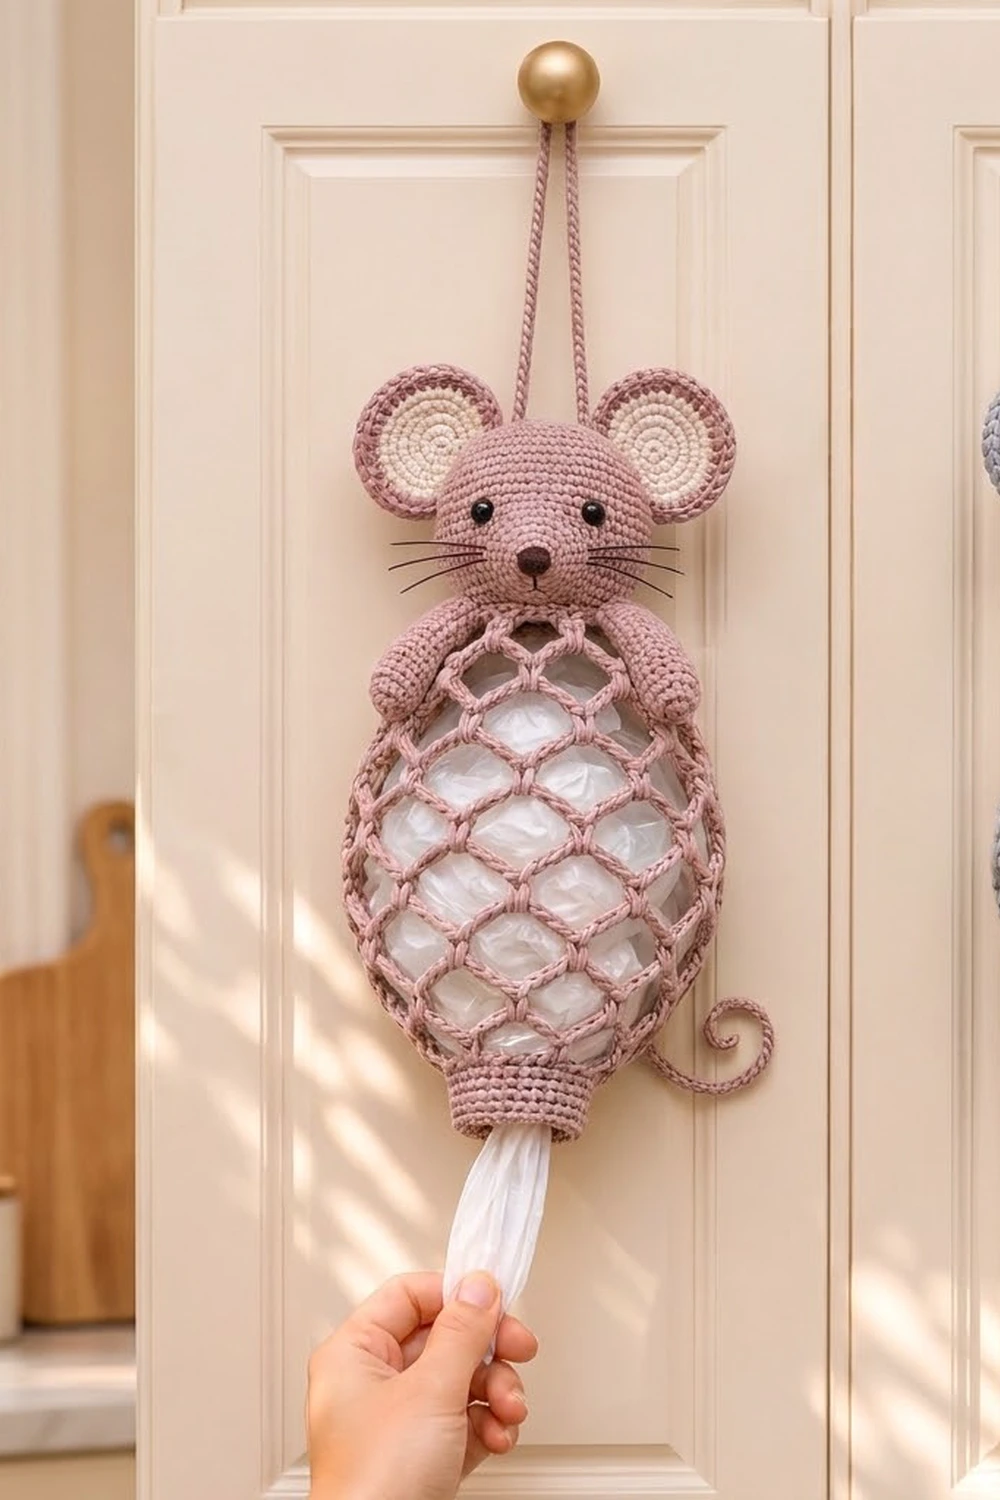
Mabel is a mouse-shaped plastic bag holder. Her body is an open diamond mesh, so you can see how many bags are left inside, and a solid cuff at the bottom lets you pull out one bag at a time. A round stuffed head, two cream-lined ears, little hugging arms and a curly tail make her a cute addition to a kitchen door or a pantry hook.
The sample is worked in dusty rose/mauve with cream ear centers, black safety eyes, a dark brown nose and black whiskers. Light grey with the same cream ears works just as well. The style is a mix of amigurumi and simple mesh.
This pattern uses US crochet terms. Mabel measures about 16.5 in (41.9 cm) tall from the bottom of the cuff to the top of the head, not counting the ears and the hanging loop, and about 7 in (17.8 cm) wide across the widest part of the mesh.
You crochet the body in one piece from the bottom up: first the solid cuff, then 12 rounds of spiral chain mesh, then a solid top rim. You make the head, ears, arms, tail and hanging cord separately and sew them on. The head is sewn only to the back half of the rim, so it lifts like a lid when you want to fill the holder from the top.
Finished Size and Construction
- Finished size: 16.5 in (41.9 cm) tall × 7 in (17.8 cm) wide
- Skill level: Intermediate
- Terminology: US
- Yarn weight: Worsted (#4), cotton or cotton blend
- Hook: 4.0 mm (US G-6)
- Number of pieces: 1 finished holder, made from 1 body, 1 head, 2 ears, 2 arms, 1 tail and 2 hanging cords
- Layout: one vertical body with the head on top; there is no grid
- Body size: 7 in (17.8 cm) wide × 12.6 in (32.0 cm) tall, flat
- Size before rim and cuff edging: about 12 in (30.5 cm) tall
- Edging depth: top rim 0.6 in (1.5 cm); bottom edge is a single round of slip stitches
Materials
Use a smooth worsted-weight cotton. Cotton holds the mesh shape and doesn’t stretch out much when the holder is full of bags. Acrylic works too, but the mesh will droop more.
- Color A, dusty rose/mauve: 150 g / 255 m
- Color B, cream: 15 g / 26 m
- Black embroidery floss or fingering-weight yarn: 2 m, for the whiskers
- 2 black safety eyes, 9 mm
- 1 dark brown safety nose, 8 mm (or embroider the nose with brown yarn)
- Polyester fiberfill: about 25 g
- 4.0 mm (US G-6) hook
- Tapestry needle, 4 stitch markers, scissors, pins
All yarn quantities include a margin of about 15%.
Abbreviations (US Terms)
- ch – chain
- sc – single crochet
- sl st – slip stitch
- inc – 2 sc in the same stitch
- dec – single crochet 2 together (invisible decrease recommended)
- MR – magic ring
- sk – skip
- sp – space
- st(s) – stitch(es)
Special stitch – mesh sc: insert the hook under the whole chain loop of the previous round, not into a single chain, and work 1 sc. This wraps the chains together and makes the small knotted-looking junctions where the diamonds meet.
Gauge and Checkpoints
Gauge: 18 sc × 20 rounds = 4 in (10.2 cm) in sc worked in the round with a 4.0 mm hook.
Make the cuff first and use it as your gauge piece. It should measure about 4 in (10.2 cm) across when flattened and 2 in (5.1 cm) tall. If it is wider, go down half a hook size. If it is narrower, go up half a size. Check again before you start the mesh.
Measurement checkpoints:
- After the cuff: 4 in (10.2 cm) wide flat, 2 in (5.1 cm) tall
- After mesh round 9: about 7 in (17.8 cm) wide flat
- After the top rim: body 12.6 in (32.0 cm) tall, rim 5.3 in (13.5 cm) wide flat
- Stuffed head: about 4 in (10.2 cm) across
If the mesh is more than 0.5 in (1.3 cm) too wide at round 9, take 1 chain off every ch-9 round. If it is too narrow, add 1 chain to each ch-9 round. The stitch counts don’t change either way.
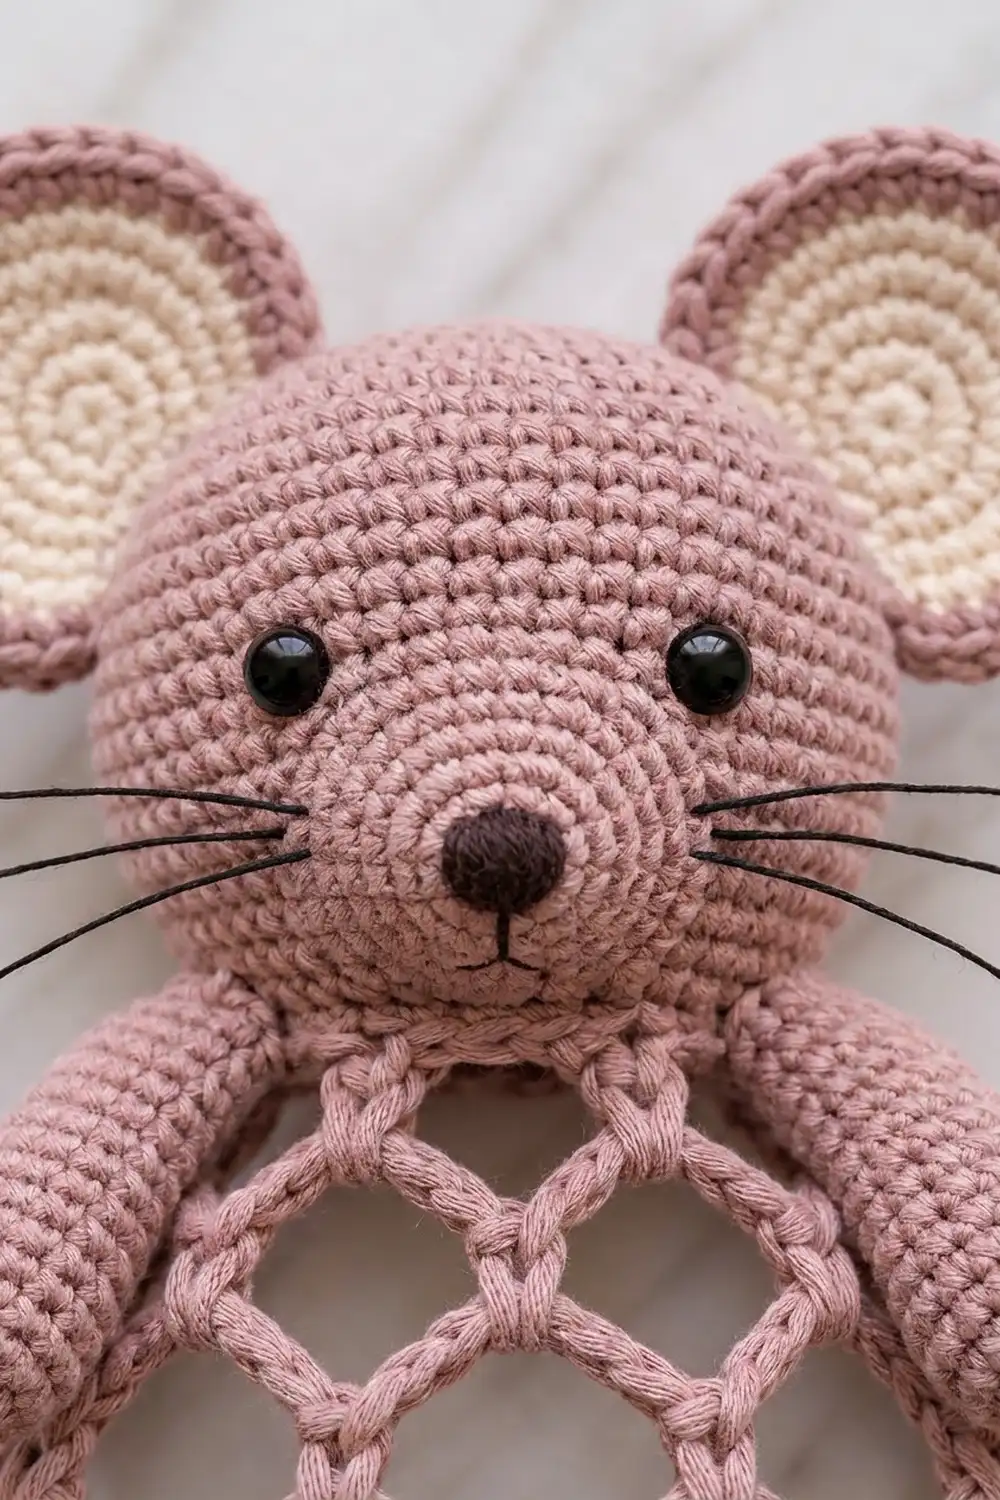
Body
Bottom Cuff
Work in joined rounds so the cuff stays straight.
Foundation: With Color A, ch 36. Join with a sl st into the first ch, taking care not to twist the chain.
Rnd 1: Ch 1, sc in each ch around, join. (36)
Rnds 2–10: Ch 1, sc in each st around, join. (36)
The cuff now measures 2 in (5.1 cm) tall.
Diamond Mesh
From here on, work in a continuous spiral without joining. Put a marker in the first sc of each round and move it up as you go.
Rnd M1: Ch 1, sc in next st, ch 5, sk 2 sts; repeat from * 12 times. (12 sc + 12 ch-5 sps)
That uses all 36 cuff stitches: 12 × (1 + 2) = 36.
Rnd M2: Ch 6, mesh sc in next ch-5 sp; repeat 12 times. (12 sc + 12 ch-6 sps)
Rnd M3: Ch 7, mesh sc in next sp; repeat 12 times. (12 sc + 12 ch-7 sps)
Rnd M4: Ch 8, mesh sc in next sp; repeat 12 times. (12 sc + 12 ch-8 sps)
Rnds M5–M9: Ch 9, mesh sc in next sp; repeat 12 times. (12 sc + 12 ch-9 sps in each round)
Checkpoint: Flatten the body. At round M9 it should measure about 7 in (17.8 cm) wide.
Rnd M10: Ch 8, mesh sc in next sp; repeat 12 times. (12 sc + 12 ch-8 sps)
Rnd M11: Ch 7, mesh sc in next sp; repeat 12 times. (12 sc + 12 ch-7 sps)
Rnd M12: Ch 6, mesh sc in next sp; repeat 12 times. (12 sc + 12 ch-6 sps)
Every mesh round has exactly 12 loops. The egg shape comes only from changing the chain length, which grows from 5 to 9 and then shrinks back to 6. The mesh section is about 10 in (25.4 cm) tall.
Top Rim
The top rim is described in the Border section below. Work it straight after Rnd M12.
Head
Work in a continuous spiral with Color A.
Rnd 1: 6 sc in MR. (6)
Rnd 2: Inc in each st around. (12)
Rnd 3: (Sc 1, inc) × 6. (18)
Rnd 4: (Sc 2, inc) × 6. (24)
Rnd 5: (Sc 3, inc) × 6. (30)
Rnd 6: (Sc 4, inc) × 6. (36)
Rnd 7: (Sc 5, inc) × 6. (42)
Rnd 8: (Sc 6, inc) × 6. (48)
Rnd 9: (Sc 7, inc) × 6. (54)
Rnds 10–15: Sc in each st around. (54)
Place the face: Put the safety eyes between Rnds 11 and 12 with 8 sts between them. Put the nose between Rnds 14 and 15, centered below the eyes. Snap on the backs.
Rnd 16: (Sc 7, dec) × 6. (48)
Rnd 17: (Sc 6, dec) × 6. (42)
Rnd 18: (Sc 5, dec) × 6. (36)
Rnd 19: (Sc 4, dec) × 6. (30)
Stuff the head firmly, but keep it slightly flat from front to back.
Rnd 20: (Sc 3, dec) × 6. (24)
Rnd 21: (Sc 2, dec) × 6. (18)
Rnd 22: (Sc 1, dec) × 6. (12)
Rnd 23: Dec × 6. (6)
Finish stuffing. Fasten off, thread the tail through the front loops of the last round, pull it closed and weave in the end. Rnd 16 (48 sts) is where the head will be sewn to the rim.
Whiskers: With black floss, sew 3 straight whiskers on each side of the nose, each about 1.5 in (3.8 cm) long and fanned slightly.
Ears (Make 2)
Rnd 1: With Color B, 6 sc in MR. (6)
Rnd 2: Inc in each st around. (12)
Rnd 3: (Sc 1, inc) × 6. (18)
Rnd 4: (Sc 2, inc) × 6. (24)
Join with a sl st and change to Color A.
Rnd 5: (Sc 3, inc) × 6. (30)
Rnd 6: (Sc 4, inc) × 6. (36)
Sl st to finish and fasten off, leaving a 12 in (30.5 cm) tail. Each ear is a flat circle about 2.4 in (6.1 cm) across, with a cream center and a mauve ring. Pinch the lower 6 sts together so the ear cups forward slightly.
Arms (Make 2)
Rnd 1: With Color A, 6 sc in MR. (6)
Rnd 2: Inc in each st around. (12)
Rnds 3–14: Sc in each st around. (12)
Stuff only the rounded end lightly. Flatten the opening and sc through both layers to close it. (6)
Fasten off and leave a long tail for sewing. Each arm is about 3 in (7.6 cm) long.
Tail
With Color A, ch 36.
Starting in the 2nd ch from the hook, work 2 sc in each of the next 9 ch (18 sc). Then sl st in each of the remaining 26 ch.
That works all 35 chains (9 + 26). The 2-sc section twists into a spiral at the tip, and the sl st section stays a thin cord. Fasten off and leave a tail. The tail is about 7 in (17.8 cm) long.
Hanging Cords (Make 2)
With Color A, ch 61. Sl st into the back bump of the 2nd ch from the hook and in each ch across. (60 sl st)
Each cord is about 12 in (30.5 cm) long.
Border: Top Rim and Cuff Edging
Border gauge: 18 sc = 4 in (10.2 cm), so 4.5 sc per inch.
Top Rim (worked onto Rnd M12)
Rnd T1 (conversion round): 3 sc in next ch-6 sp, sc in next mesh sc; repeat 12 times. Total: 12 (1 per mesh sc) + 36 (3 per space) = 48. Flattened, that is 24 sts on the front half and 24 sts on the back half.
Rnd T2: Sc in each st around. (48: 24 front / 24 back)
Rnd T3: Sc in each st around. (48: 24 front / 24 back)
Sl st to finish and fasten off, leaving a 24 in (61.0 cm) tail for sewing on the head.
Cuff Edging
Turn the body upside down. Join Color A at the back of the cuff’s foundation edge.
Rnd B1: Sl st in each foundation ch around. (36: 18 front / 18 back)
Fasten off. This firms up the opening so it doesn’t flare out as bags are pulled through.
Why the Math Works
- The 48 rim stitches at 4.5 sts per inch make a circle of 10.7 in (27.2 cm), or 5.3 in (13.5 cm) when flattened. That matches Rnd 16 of the head, which also has 48 stitches, so the two edges line up stitch for stitch.
- The 36 cuff stitches make a circle of 8 in (20.3 cm), or 4 in (10.2 cm) flat. That matches the 12 starting mesh loops, because each loop sits over exactly 3 cuff stitches.
Assembly
- Head to rim: Line up the head’s Rnd 16 with Rnd T3 of the rim, eyes facing front. Whipstitch the back 24 rim sts to the back 24 head sts. Leave the front 24 sts open so the head lifts back and you can load bags from the top.
- Ears: Sew one ear to each side of the head over Rnds 5–9, about 2 in (5.1 cm) apart at their bases, with the cream side facing forward.
- Arms: Sew the closed end of each arm to the front of the rim, one on each side of center, about 3 in (7.6 cm) apart. Let the arms hang down over the top 2 rows of mesh and tack each rounded end to a mesh junction.
- Tail: Sew the straight end to the lower right side of the mesh, about 1 in (2.5 cm) above the cuff. Let the spiral tip hang free.
- Hanging cords: Hold both cords together. Sew all four ends to the crown of the head, around Rnd 2, about 1.5 in (3.8 cm) apart, so the cords form a doubled loop about 6 in (15.2 cm) deep.
Final Blocking
- Lightly spray the mesh body with water. Leave the head and arms dry.
- Slip a rolled towel or a balloon blown up to about 7 in (17.8 cm) wide into the mesh.
- Pull each diamond gently so the junctions sit evenly in their columns.
- Pin the cuff into a straight cylinder 4 in (10.2 cm) wide when flat.
- Shape the tail spiral with your fingers and pin it in place.
- Let everything dry completely, then remove the form.
Final Quality-Control Checklist
- The cuff has 36 sts, is 4 in (10.2 cm) wide flat and 2 in (5.1 cm) tall
- Every mesh round has 12 loops, with none skipped or doubled
- The widest point is about 7 in (17.8 cm)
- The rim has 48 sts and the head is sewn along 24 sts at the back only
- The eyes are level and the whiskers are symmetrical
- The ears are cream side forward and the arms are tacked securely
- The hanging cords hold the full weight without the head tilting
- The body is about 16.5 in (41.9 cm) tall overall
Troubleshooting
- The mesh is twisting into a spiral: That’s normal with spiral rounds. Blocking straightens it. If it bothers you, pull slightly harder on the mesh sc stitches.
- The diamonds are uneven: Your chain tension is varying. Count chains out loud and keep each loop at the same length.
- There are gaps between the head and the rim: The stitch counts don’t match. Recount Rnd T3 and head Rnd 16, which should both have 48 sts.
- Bags slide out on their own: Add a second round of sc in place of the slip-stitch cuff edging.
- The head flops forward: Add a few tacking stitches at the two ends of the back seam.
- The ears curl backward: Steam them lightly and dry them flat under a book.
Care
Hand wash in cool water with mild soap, press out the water in a towel and dry flat, shaping the mesh while it is damp. Don’t tumble dry, because heat can loosen the safety eyes.
Final Notes
Mabel’s measurements build on each other. A 36-stitch cuff measures 4 in (10.2 cm) flat. Twelve mesh loops grow from ch-5 to ch-9 and back to ch-6 to make a 7 in (17.8 cm) egg shape. The rim converts to 48 stitches, 5.3 in (13.5 cm) flat, to match the 48-stitch round of the 4 in (10.2 cm) head. Together that makes a holder about 16.5 in (41.9 cm) tall. If you check your gauge at the cuff and the width at round M9, everything else will fit.
Happy crocheting!