
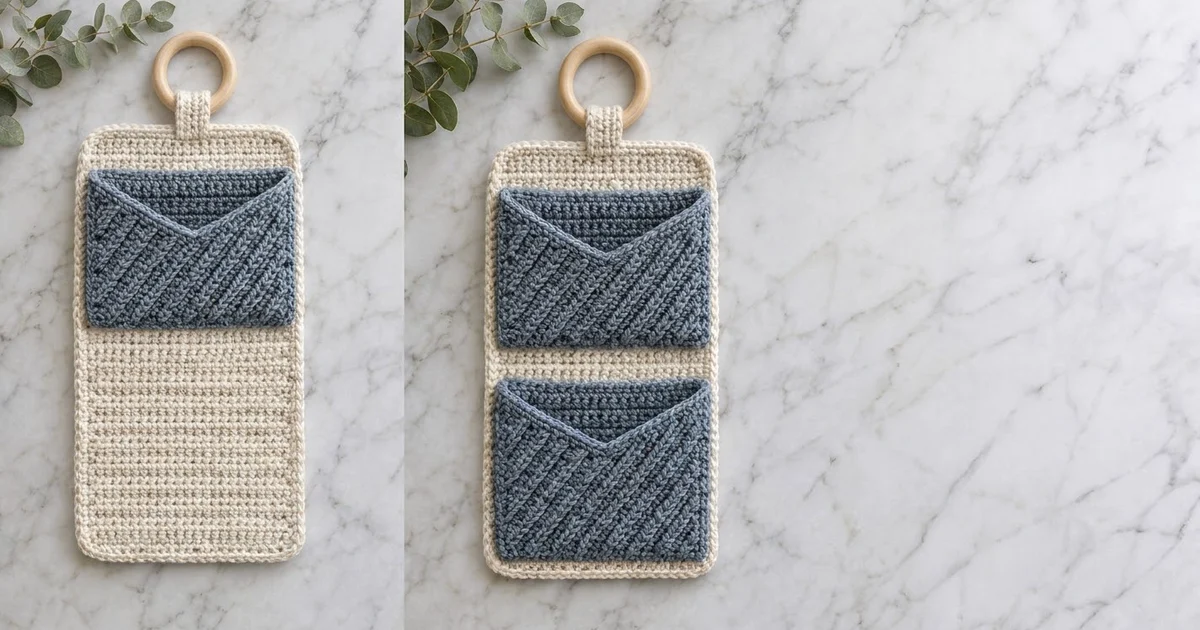
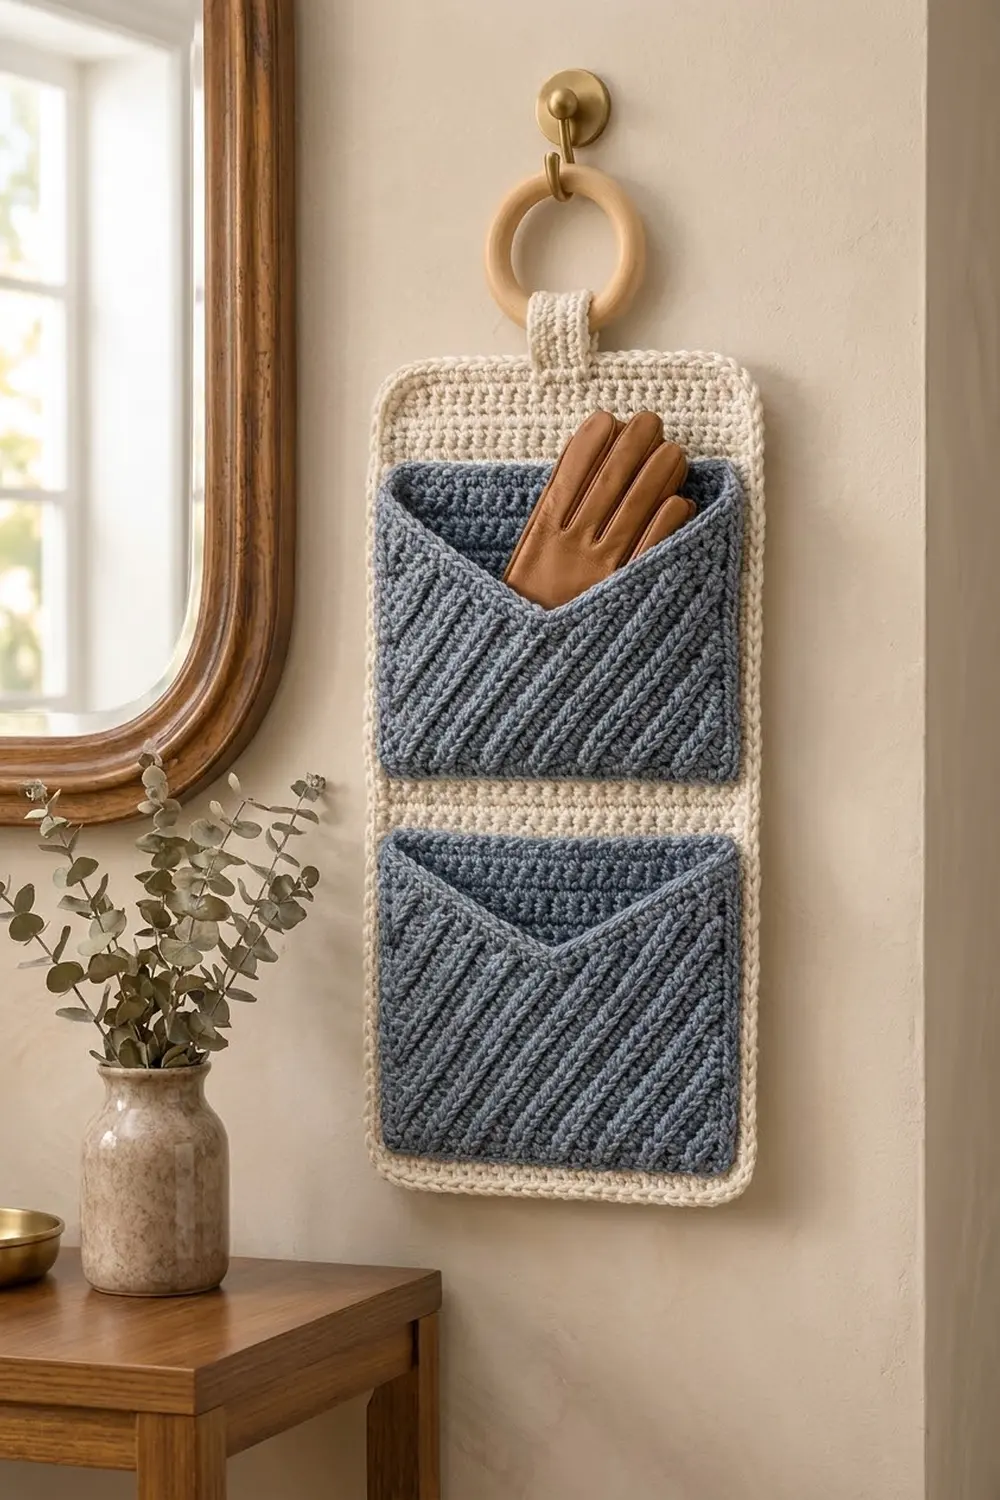
The Harbor Fold Wall Pocket Organizer is a slim hanging catch-all for an entryway, a craft corner, or the back of a door. A tall cream backing panel holds two slate-blue pockets stacked one above the other. The whole piece hangs from a natural wooden ring, so it looks just as good on a hook as it does lying flat.
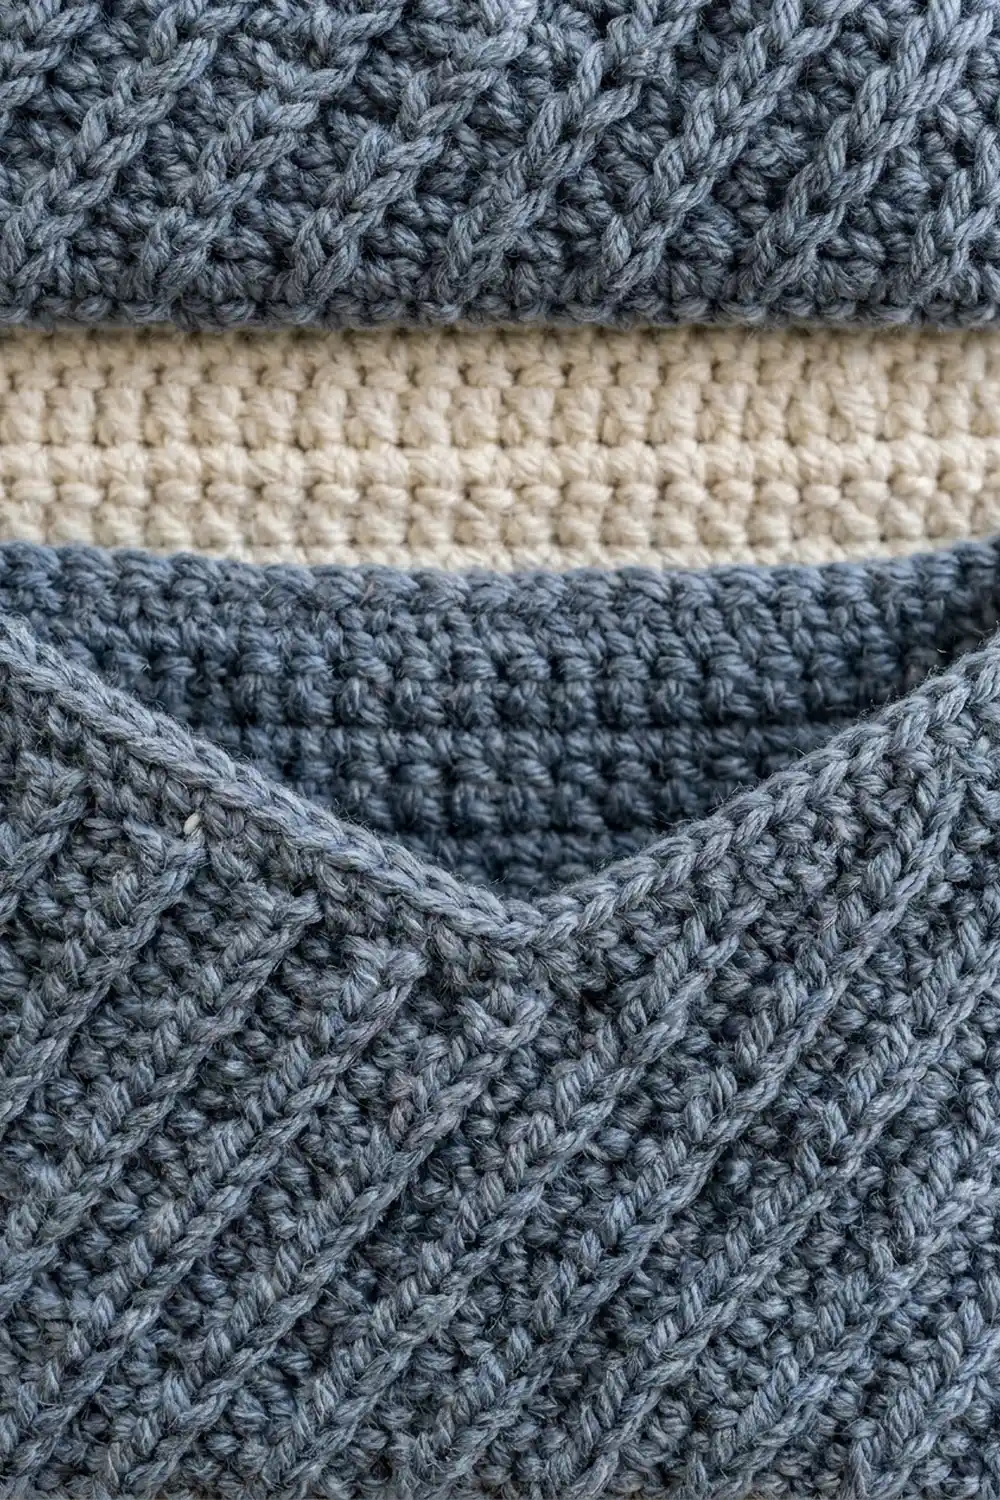
The style is calm and textured. The cream panel is worked in back-loop single crochet, which gives it fine horizontal ridges. Each blue pocket has a raised diagonal twill on the front. A smooth back wall shows through a shallow V-shaped opening at the top, like an envelope flap left open.
This pattern uses US crochet terms. The finished organizer measures 8 in (20.3 cm) wide by 15 in (38.1 cm) tall, not counting the hanging tab and ring. Each pocket measures 7 in (17.8 cm) wide by 6 in (15.2 cm) tall at the sides.
Construction is simple. First you crochet one flat backing panel, then two pockets. Each pocket is a single piece: you work the back wall, fold at the bottom, and work the textured front upward. Then you seam the pocket sides and sew both pockets to the panel. Last, you work a two-round border around the panel and add a tab that wraps the ring.
Finished Size and Construction
- Finished size: 8 in (20.3 cm) wide x 15 in (38.1 cm) tall, plus tab and ring
- Skill level: Easy intermediate
- Terminology: US crochet terms
- Yarn weight: Worsted (#4), cotton or cotton blend preferred
- Hook: 5.0 mm (H-8)
- Number of pieces: 3 crocheted pieces (1 backing panel, 2 pockets) plus 1 wooden ring
- Layout: 1 column of 2 pockets stacked on 1 panel
- Pocket size: 7 in (17.8 cm) wide x 6 in (15.2 cm) tall at the sides, about 5.1 in (13.0 cm) at the center of the V
- Panel size before border: 7 in (17.8 cm) x 14 in (35.6 cm)
- Border depth: 0.5 in (1.3 cm), 2 rounds
Materials
Choose a smooth worsted-weight cotton or cotton blend. Cotton holds its shape when the pockets are full, and it shows the diagonal twill and the back-loop ridges clearly. Acrylic also works, but the panel may need firmer blocking to stay flat.
- Color A, cream: 80 g, about 145 m (159 yd)
- Color B, slate blue: 110 g, about 200 m (219 yd)
These amounts include a margin of about 15% for swatching and seaming.
Tools:
- 5.0 mm (H-8) crochet hook
- 1 wooden ring, 3 in (7.6 cm) outer diameter
- Tapestry needle
- 4 to 6 locking stitch markers or sewing clips
- Measuring tape
- Blocking mat, rust-proof pins, and a spray bottle or steamer
Abbreviations (US Terms)
- ch: chain
- sl st: slip stitch
- sc: single crochet
- hdc: half double crochet
- dc: double crochet
- tr: treble crochet
- BLO: back loop only
- sc2tog: single crochet 2 together
- st(s): stitch(es)
- RS / WS: right side / wrong side
Special stitch, fpdc (front post double crochet): Yarn over, insert the hook from front to back to front around the post of the stitch two rows below the next stitch. Yarn over and pull up a loop, then (yarn over, pull through 2 loops) twice. Always skip the stitch on the current row behind the fpdc so the count stays the same.
Gauge and Checkpoints
Gauge: 16 sts x 18 rows = 4 in (10.2 cm) in sc, and the same in sc BLO.
Make one pocket first. It is the smallest piece, and it uses both stitch patterns you need for the size check.
Checkpoints:
- Pocket, after Row 1: 28 sts measure 7 in (17.8 cm).
- Pocket, after Row 27: the back wall measures 6 in (15.2 cm) tall.
- Pocket, finished and seamed: 7 in (17.8 cm) x 6 in (15.2 cm) at the sides.
- Panel, after Row 18: 4 in (10.2 cm) tall and 7 in (17.8 cm) wide.
- Panel, after Row 63: 14 in (35.6 cm) tall.
- Panel with border: 8 in (20.3 cm) x 15 in (38.1 cm).
If your pocket comes out too big, go down a hook size. If it comes out too small, go up a hook size. Width matters most, because each pocket has to match the panel’s 28 sts exactly.
Backing Panel
With Color A.
Row 1 (RS): Ch 29. Sc in 2nd ch from hook and in each ch across, turn. (28 sts)
Row 2: Ch 1, sc BLO in each st across, turn. (28 sts)
Rows 3–63: Repeat Row 2. (28 sts per row)
You now have 63 rows, and the panel measures 7 in (17.8 cm) wide by 14 in (35.6 cm) tall. Fasten off. Weave in the starting tail. Leave the ending tail for now; the border will hide it.
Place a marker on the RS so you always know which face the pockets go on.
Pockets
With Color B. Each pocket is worked in one piece, starting at the top edge of the back wall.
Back Wall
Row 1: Ch 29. Sc in 2nd ch from hook and in each ch across, turn. (28 sts)
Rows 2–27: Ch 1, sc in each st across, turn. (28 sts per row)
Checkpoint: 6 in (15.2 cm) tall, 7 in (17.8 cm) wide.
Fold Row
Row 28: Ch 1, sc BLO in each st across, turn. (28 sts)
The unworked front loops make a crisp line. This line is the bottom fold of the pocket.
Front
Rows 29–30: Ch 1, sc in each st across, turn. (28 sts per row)
From here on, odd rows are RS rows of the front and even rows are WS rows. Each fpdc goes around the stitch two rows below. On every RS row the pattern starts one stitch later, so the raised lines slant and form the diagonal twill.
Row 31 (RS, offset 0): Ch 1, *fpdc, sc in next 3 sts; repeat from * 6 more times, turn. (7 fpdc + 21 sc = 28 sts)
Row 32 and all even rows through Row 48 (WS): Ch 1, sc in each st across, turn. (28 sts)
Row 33 (RS, offset 1): Ch 1, sc in first st, *fpdc, sc in next 3 sts; repeat from * 5 more times, fpdc, sc in last 2 sts, turn. (28 sts)
Row 35 (RS, offset 2): Ch 1, sc in first 2 sts, *fpdc, sc in next 3 sts; repeat from * 5 more times, fpdc, sc in last st, turn. (28 sts)
Row 37 (RS, offset 3): Ch 1, sc in first 3 sts, *fpdc, sc in next 3 sts; repeat from * 5 more times, fpdc, turn. (28 sts)
Rows 39–49: Keep repeating the 4-offset sequence, with a WS row between each pair:
- Row 39: as Row 31
- Row 41: as Row 33
- Row 43: as Row 35
- Row 45: as Row 37
- Row 47: as Row 31
- Row 49: as Row 33
After Row 49 the front has 22 rows above the fold (Rows 28–49). It measures about 4.9 in (12.4 cm).
V Shaping
Row 50 (WS): Ch 3 (does not count as a st), tr in first 3 sts, dc in next 3 sts, hdc in next 3 sts, sc in next 3 sts, sl st in next 4 sts, sc in next 3 sts, hdc in next 3 sts, dc in next 3 sts, tr in last 3 sts, turn. (28 sts)
The tall stitches at the sides and the slip stitches at the center make a dip of about 0.9 in (2.3 cm).
Row 51 (RS, trim): Ch 1, sc in each of next 13 sts, sc2tog over the 2 center sl sts, sc in each of last 13 sts. (13 + 1 + 13 = 27 sts)
The sc2tog sharpens the point of the V. Fasten off and leave a 24 in (61.0 cm) tail for seaming.
Seam the Pocket
Fold the pocket along Row 28 with WS facing each other and the twill facing out. The top edge of the back wall (the foundation chain) should line up with the tips of the V.
Using the long tail, whip-stitch each side from the fold up to the top of the front. Each side of the back wall has 27 row ends, but each side of the front has only 24 because Row 50 is so tall. Clip the top corners together first. Then ease the rows in evenly, matching by measurement rather than row for row.
Checkpoint: 7 in (17.8 cm) wide, 6 in (15.2 cm) tall at the sides.
Make All Pieces
- Color A: 1 backing panel (28 sts x 63 rows)
- Color B: 2 pockets (28 sts wide each)
Layout on the panel RS, top to bottom (panel rows in brackets):
[Rows 60–63]  cream margin  (4 rows)
[Rows 33–59]  POCKET 1      (27 rows)
[Rows 29–32]  cream gap     (4 rows)
[Rows 2–28]   POCKET 2      (27 rows)
[Row 1]       cream edge    (1 row)
Joining
Lay the panel RS up. Each pocket spans the panel’s full 28-st width.
Bottom pocket: Lay the pocket’s fold (Row 28) along panel Row 2. The fold has 28 sts and the panel row has 28 sts, so sew one fold stitch to one panel stitch, going through the fold edge and the front loops of panel Row 2.
Sides: The pocket back wall has 27 rows, and so does the stretch of panel it covers (Rows 2–28). Both use 18 rows per 4 in (10.2 cm), so match row end to row end. Sew through the outer edge of the seamed pocket and the outermost stitch column of the panel (sts 1 and 28). Work into the stitch posts, not the row-end edge, because the border needs that edge later.
Top pocket: Repeat with the fold on panel Row 33 and the sides along Rows 33–59.
Sew with Color B in whip stitch. Keep your tension snug but not tight, so the panel stays flat without puckering. For strength, tack the two top corners of each back wall to the panel with 2 or 3 extra stitches.
Checkpoint: the panel still measures 7 in (17.8 cm) x 14 in (35.6 cm), and the gap between the pockets is about 0.9 in (2.3 cm).
Border
Border gauge: 4 sc per 1 in (2.5 cm) along every edge. Along row ends, that works out to about 8 sc for every 9 rows.
Rnd 1: With RS facing, join Color A in the first st of Row 63. Work around the panel as follows, then sl st to the first sc. (172 sts)
- Top: 3 sc in first st, sc in next 26 sts, 3 sc in last st.
- First side: Working down the row ends of Rows 62 to 2, work 54 sc evenly. There are 61 row ends, so skip about every 9th one.
- Bottom: Working along the foundation chain, 3 sc in first ch, sc in next 26 ch, 3 sc in last ch.
- Second side: Work 54 sc evenly up the row ends of Rows 2 to 62.
The center sc of each 3-sc group is a corner stitch. Counted with its 2 corner stitches, each side has: top 30, bottom 30, and 58 on each long side. Check: 30 + 30 + 58 + 58 − 4 shared corners = 172.
Rnd 2: Ch 1, sc in each st around, working 3 sc in each corner st. Sl st to first sc. (180 sts)
Counted with its 2 corners, each side now has: top 32, bottom 32, and 60 on each long side. Check: 32 + 32 + 60 + 60 − 4 = 180.
Why the math works: At 4 sts per inch, the 32 top sts measure 8 in (20.3 cm). That is the 7 in (17.8 cm) panel plus 0.5 in (1.3 cm) of border on each side. Each long side has 60 sts, or 15 in (38.1 cm): the 14 in (35.6 cm) panel plus 0.5 in (1.3 cm) at the top and bottom. Each round adds 2 sts per side as the corners grow outward, so the corners stay flat.
Hanging Tab
After Rnd 2, the top edge has 30 non-corner sts. With RS facing, skip the corner st and the next 12 sts, then join Color A in the 13th st.
Row 1: Ch 1, sc in same st and in next 5 sts, turn. (6 sts; 12 sts and the corner stay free on the other side)
Rows 2–16: Ch 1, sc in each st across, turn. (6 sts per row)
The tab is 1.5 in (3.8 cm) wide and about 3.6 in (9.1 cm) long. Fasten off and leave a 12 in (30.5 cm) tail. Pass the tab through the ring from front to back. Fold it down behind the panel and sew Row 16 to the WS of the border, directly behind the tab base. About 1 in (2.5 cm) of tab shows above the panel.
Final Blocking
- Weave in all ends on the WS of the panel or inside the pockets.
- Lay the organizer RS up on the blocking mat, with the ring hanging off the edge.
- Pin the panel to 8 in (20.3 cm) x 15 in (38.1 cm). Use 2 or 3 pins at each corner to ease it into a soft curve.
- Pin the pocket sides straight and open each V slightly. Put a folded towel inside each pocket so the front stands out a little.
- Mist or steam lightly. Do not press an iron onto the fpdc texture.
- Let the piece dry completely, at least 12 hours, before unpinning.
Final Quality-Control Checklist
- Panel is 8 in (20.3 cm) x 15 in (38.1 cm) with straight sides and soft corners.
- Border counts are 172 sts in Rnd 1 and 180 sts in Rnd 2.
- Both pockets are 7 in (17.8 cm) wide and line up with the panel edges.
- The diagonal twill runs the same direction on both pockets.
- The V tips line up with the top corners of each back wall.
- Seams lie flat, with no puckers or gaps.
- Tab is centered, with 12 sts on each side.
- Ring is secure, and the tab seam can’t be seen from the front.
Troubleshooting
- Twill lines zigzag instead of slanting: You skipped or repeated an offset. The RS rows must cycle 0, 1, 2, 3.
- Pocket narrows across the front: You worked into the stitch behind an fpdc. Skip that stitch every time.
- V is too shallow: Work Row 50 more loosely and pull the tr loops up to full height.
- Border ruffles: There are too many sc on the row ends. Use 54 sc per side.
- Border cups: There are too few sc on the row ends, or your tension is tight. Go up a hook size for the border only.
- Pocket puckers the panel: Your sewing is too tight. Unpick it and re-sew row to row.
Care
Remove the wooden ring before washing. Hand wash in cool water, reshape to 8 in (20.3 cm) x 15 in (38.1 cm), and lay flat to dry.
Final Notes
The measurement chain is short. A gauge of 16 sts x 18 rows = 4 in (10.2 cm) gives a 28-st pocket that is 7 in (17.8 cm) wide and 6 in (15.2 cm) tall. Two pockets fit onto a 28-st, 63-row panel measuring 7 in (17.8 cm) x 14 in (35.6 cm). Two border rounds add 0.5 in (1.3 cm) all around, for a finished organizer of 8 in (20.3 cm) x 15 in (38.1 cm). If your first pocket matches its checkpoints, the rest of the pieces will fit.
Happy crocheting!