

Garlic keeps best where air can move around it, and this two-pouch hanging keeper puts it right where you cook. Two plump mustard pouches hang one above the other from a wooden ring. Each has a wide teardrop opening, so you can reach in and grab a bulb with one hand.
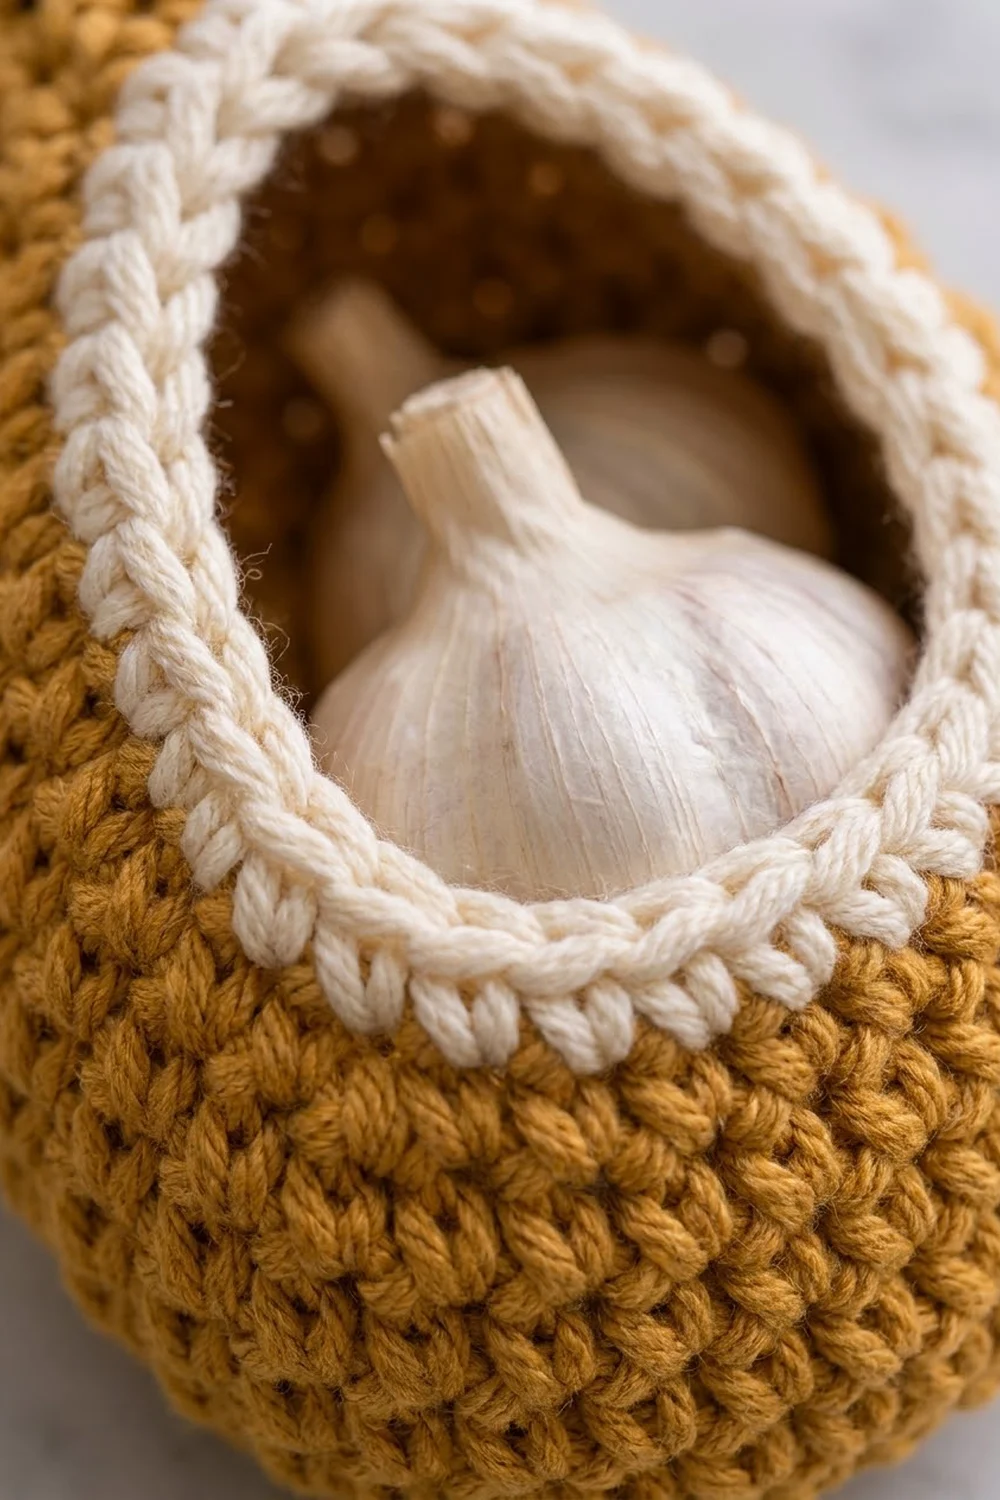
The colors are warm and simple: a golden mustard body with a crisp cream band around each opening. Dense single crochet makes a firm, slightly pebbled fabric that holds its shape when full.
The pattern uses US crochet terms. The finished keeper is about 18 in (45.7 cm) long from the top of the ring to the bottom of the lower pouch. Each pouch is about 4 in (10.2 cm) wide, 2 in (5.1 cm) deep and 6.25 in (15.9 cm) tall.
Each pouch starts with an oval base and is worked up in rounds. It then switches to rows across the back half to form the opening, closes with a chain and decreases into a narrow neck. A cream trim is worked directly around each opening. The strap and connector are flat strips that you sew in place.
Finished Size and Construction
- Finished size: about 18 in (45.7 cm) long, including the ring
- Skill level: Easy-intermediate
- Terminology: US crochet terms
- Yarn weight: Worsted (CYC 4), cotton or cotton blend
- Hook: 4.5 mm (US 7)
- Number of pieces: 4 crocheted pieces (2 pouches, 1 strap, 1 connector) plus 1 wooden ring
- Layout: 1 column x 2 pouches, stacked vertically
- Pouch size: 4 in (10.2 cm) wide x 2 in (5.1 cm) deep x 6.25 in (15.9 cm) tall
- Opening before trim: about 3.75 in (9.5 cm) wide x 3 in (7.6 cm) tall
- Trim (border) depth: 2 rounds, 0.5 in (1.3 cm)
Materials
Choose a smooth worsted-weight cotton. Cotton holds its shape under the weight of garlic, barely stretches when hung and lets air through. Acrylic also works, but the pouches will be softer and may sag a little.
- Mustard (main color): 80 g, about 140 m (153 yd)
- Cream (trim): 15 g, about 25 m (27 yd)
These amounts include a margin for swatching, sewing tails and small differences in tension.
Tools:
- 4.5 mm (US 7) crochet hook
- Wooden ring, 2.75 in (7.0 cm) outer diameter
- 4 locking stitch markers
- Tapestry needle
- Scissors
- Measuring tape
- Rust-proof pins
Abbreviations (US Terms)
- ch – chain
- sc – single crochet
- sl st – slip stitch
- sc2tog – single crochet 2 together
- BLO – back loop only
- st(s) – stitch(es)
- rnd(s) – round(s)
- [ ] – repeat the steps in brackets as directed
Special stitch – sc2tog: Insert hook in next st, yarn over, pull up a loop. Insert hook in following st, yarn over, pull up a loop. Yarn over and pull through all 3 loops on hook.
Gauge and Checkpoints
Gauge: 16 sc and 16 rnds = 4 in (10.2 cm) in single crochet worked in the round.
This gauge is square: one stitch and one row both measure 0.25 in (0.6 cm). That matters later, because the trim puts one sc in each stitch and one sc in each row end.
Finish one complete pouch before you start the second, and check these points as you go:
- After Rnd 4 (base): the oval measures 4 in (10.2 cm) long x 2 in (5.1 cm) wide.
- After Rnd 11 (walls): the walls stand 1.75 in (4.4 cm) above the base edge.
- After Row 12 (opening): the opening is 3 in (7.6 cm) tall.
- After the neck: the pouch body is 6.25 in (15.9 cm) tall, and the neck adds 0.5 in (1.3 cm).
If your pieces are too big, go down to a 4 mm (US G-6) hook. If they are too small, go up to a 5 mm (US H-8) hook. The fabric should be dense enough that a garlic clove can’t poke through.
Pouch (Make 2)
Work in continuous spiral rounds unless told otherwise. Do not join or turn. Mark the first st of each round.
Base
With mustard, ch 11.
Rnd 1: Sc in 2nd ch from hook, sc in next 8 ch, 3 sc in last ch. Working along the opposite side of the chain, sc in next 8 ch, 2 sc in last ch (the same ch as the first sc). (22 sts)
Rnd 2: 2 sc in first st, sc in next 8 sts, 2 sc in each of next 3 sts, sc in next 8 sts, 2 sc in each of last 2 sts. (28 sts)
Rnd 3: Sc in first st, 2 sc in next st, sc in next 8 sts, [sc in next st, 2 sc in next st] 3 times, sc in next 8 sts, [sc in next st, 2 sc in next st] 2 times. (34 sts)
Rnd 4: Sc in next 2 sts, 2 sc in next st, sc in next 8 sts, [sc in next 2 sts, 2 sc in next st] 3 times, sc in next 8 sts, [sc in next 2 sts, 2 sc in next st] 2 times. (40 sts)
Checkpoint: 4 in (10.2 cm) x 2 in (5.1 cm).
Lower Walls
Rnd 5: Working in BLO, sc in each st around. (40 sts) This makes the crisp ridge at the base edge.
Rnds 6–11: Sc in each st around. (40 sts each)
At the end of Rnd 11, sl st in the next st and fasten off with an invisible join for a smooth rim.
Checkpoint: walls 1.75 in (4.4 cm) tall.
Opening (Rows Across the Back)
Flatten the pouch so the long straight sides face front and back. Place a marker at the center of each short end, so there are exactly 20 sts across the back and 20 across the front. Leave the 20 front sts unworked; they form the bottom rim of the opening.
Work back and forth in rows over the 20 back sts. The ch 1 at the start of each row does not count as a st.
Row 1: Join mustard with a standing sc in the first back st at one marker, sc in next 19 sts. (20 sts)
Rows 2–4: Ch 1, turn, sc in each st. (20 sts each)
Row 5: Ch 1, turn, 2 sc in first st, sc in next 18 sts, 2 sc in last st. (22 sts)
Row 6: Ch 1, turn, sc in each st. (22 sts)
Row 7: Ch 1, turn, 2 sc in first st, sc in next 20 sts, 2 sc in last st. (24 sts)
Row 8: Ch 1, turn, 2 sc in first st, sc in next 22 sts, 2 sc in last st. (26 sts)
Row 9: Ch 1, turn, 2 sc in first st, sc in next 24 sts, 2 sc in last st. (28 sts)
Row 10: Ch 1, turn, 2 sc in first st, sc in next 26 sts, 2 sc in last st. (30 sts)
Row 11: Ch 1, turn, 2 sc in first st, sc in next 28 sts, 2 sc in last st. (32 sts)
Row 12: Ch 1, turn, 2 sc in first st, sc in next 30 sts, 2 sc in last st. (34 sts)
The straight Rows 1–4 make the wide, rounded bottom of the teardrop. The increases in Rows 5–12 make the back panel wider so it fills in the gap and the opening narrows toward the top. Of the original 40-st round, the panel now covers 34 sts and 6 remain open.
Checkpoint: opening 3 in (7.6 cm) tall.
Closing the Top and Neck
Closing chain: At the end of Row 12, ch 6 and join with sl st to the first st of Row 12. This closes the point of the teardrop.
Go back to continuous spiral rounds.
Rnd A: Sc in each of the 34 panel sts and in each of the 6 ch. (34 + 6 = 40 sts)
Rnd B: [Sc in next 3 sts, sc2tog] 8 times. (32 sts)
Rnd C: Sc in each st around. (32 sts)
Rnd D: [Sc in next 2 sts, sc2tog] 8 times. (24 sts)
Rnd E: [Sc in next st, sc2tog] 8 times. (16 sts)
Rnd F: [Sc2tog] 8 times. (8 sts)
Neck Rnds G–H: Sc in each st around. (8 sts each)
Fasten off, leaving a 12 in (30.5 cm) tail. Flattened, the 8-st neck is 4 sts, or 1 in (2.5 cm), wide.
Opening Trim (Border)
Work this trim on each pouch before joining. Hold the pouch with the opening facing you.
Border gauge: same as the body, 16 sc = 4 in (10.2 cm); 2 rnds = 0.5 in (1.3 cm).
Rnd 1: Join cream with a standing sc in the first unworked front st at one bottom corner. Sc in each of the other 19 front sts (20 sts along the bottom rim). Work 1 sc in each row end up the first panel edge (12 sts), 1 sc in the remaining loop of each closing ch (6 sts) and 1 sc in each row end down the second panel edge (12 sts). Join with sl st to first sc. (20 + 12 + 6 + 12 = 50 sts)
Rnd 2: Ch 1, skip the first st, sc in next 18 sts, sc2tog over the last rim st and first edge st, sc in next 10 sts, sc2tog over the last edge st and first top st, sc in next 4 sts, sc2tog over the last top st and first edge st, sc in next 10 sts, sc2tog over the last edge st and the skipped first st. Join with sl st to first sc. (18 + 1 + 10 + 1 + 4 + 1 + 10 + 1 = 46 sts)
Fasten off and weave in the ends.
Why the math works: The bottom rim has 20 sts, so it takes 20 sc. Each side has 12 row ends. Because the gauge is square, one row end equals one stitch width, so 12 sc lie flat. The closing chain has 6 loops for 6 sc. Rnd 2 sits on the inside edge of the band, which is shorter. One sc2tog at each of the 4 corners removes 4 sts and keeps the band flat instead of ruffled.
The opening inside the trim is about 2.75 in (7.0 cm) wide x 2 in (5.1 cm) tall.
Strap and Connector
Strap (make 1): With mustard, ch 5.
Row 1: Sc in 2nd ch from hook and in next 3 ch. (4 sts)
Rows 2–24: Ch 1, turn, sc in each st. (4 sts each)
The strap measures 1 in (2.5 cm) x 6 in (15.2 cm). Fasten off, leaving a 12 in (30.5 cm) tail.
Connector (make 1): Work as for the strap through Row 8. (4 sts) The connector measures 1 in (2.5 cm) x 2 in (5.1 cm). Fasten off, leaving a 12 in (30.5 cm) tail.
Make All Pieces
- Mustard: 2 pouches, 1 strap, 1 connector
- Cream: 2 opening trims (worked onto the pouches)
- Wood: 1 ring
Layout, top to bottom:
      ( ring )
      [ strap ]
    [ Pouch 1  ]
    [connector ]
    [ Pouch 2  ]
Joining
Use mustard yarn and a whipstitch for every seam. Sew through both layers, one stitch to one stitch.
Strap to ring and upper pouch: Slide the strap through the ring and fold it in half so the two 4-st ends meet. Flatten Pouch 1’s neck (4 sts front, 4 sts back) and sandwich it between the strap ends, overlapping 2 rows (0.5 in / 1.3 cm). Sew the 4 sts of one strap end to the 4 front neck sts and the other end to the 4 back neck sts. Then sew down both side edges.
Connector to upper pouch: Center the top 2 rows of the connector on the underside of Pouch 1’s base, lined up with the back edge of the base. Whipstitch the connector’s 4 top sts to the 4 center sts of the Rnd 5 ridge, then tack down the side edges.
Connector to lower pouch: Flatten Pouch 2’s neck. Lay the bottom 2 rows of the connector over the front of the neck, 4 sts to 4 sts, and sew around all edges.
Tension: Pull each stitch snug but not tight. Seams that are too tight pucker and tilt the pouches. Hang the piece after each join to check that it hangs straight.
Size checkpoint: About 2 in (5.1 cm) of strap shows below the ring, and about 1 in (2.5 cm) of connector shows between the pouches. The total length is about 18 in (45.7 cm).
Final Blocking
- Mist both pouches lightly with water until damp but not soaked.
- Stuff each pouch firmly with a plastic bag or small towel so the base sits flat and the sides round out.
- Pin the cream trims flat, easing each opening into a smooth teardrop.
- Pull the strap and connector straight and pin them at 1 in (2.5 cm) wide.
- Let everything dry completely, usually 12–24 hours.
- Remove the stuffing and hang the keeper to check the shape.
Final Quality-Control Checklist
- Both pouches measure 4 in (10.2 cm) wide and 6.25 in (15.9 cm) tall.
- Both bases measure 4 in (10.2 cm) x 2 in (5.1 cm) and sit flat.
- The openings are centered on the front and match in size.
- Each trim has 46 sts in Rnd 2 and lies flat.
- The strap and connector are 1 in (2.5 cm) wide and sewn on straight.
- The keeper hangs vertically without twisting.
- All tails are woven in securely.
Troubleshooting
The base curls up like a bowl: Your increases are too tight. Go up a hook size for Rnds 1–4 only.
The opening is off-center: Count the 20 back sts between the markers again before Row 1.
The trim ruffles: Your rows are shorter than your stitches are wide. In Rnd 1, skip 1 row end on each side, then lower the Rnd 2 counts by the same amount.
The trim cups inward: Your rows are taller than your stitches are wide. Loosen your tension on Rnd 1 or go up a hook size for the trim.
The pouches tilt forward: The connector is sewn too far forward. Move it back to line up with the back edge of the base.
Care
Shake out garlic skins regularly. Hand wash in cool water, press out the extra water, reshape and dry flat with the pouches stuffed.

Final Notes
Here is how the measurements add up. A 4 in (10.2 cm) x 2 in (5.1 cm) base, 1.75 in (4.4 cm) of walls, a 3 in (7.6 cm) opening and a 1.5 in (3.8 cm) closing top make a 6.25 in (15.9 cm) pouch. Two rounds of cream trim add a 0.5 in (1.3 cm) frame. A 6 in (15.2 cm) strap, a 2 in (5.1 cm) connector and a 2.75 in (7.0 cm) ring bring the whole keeper to about 18 in (45.7 cm). Check your gauge once and measure at each checkpoint, and the second pouch will match the first.
Happy crocheting!