
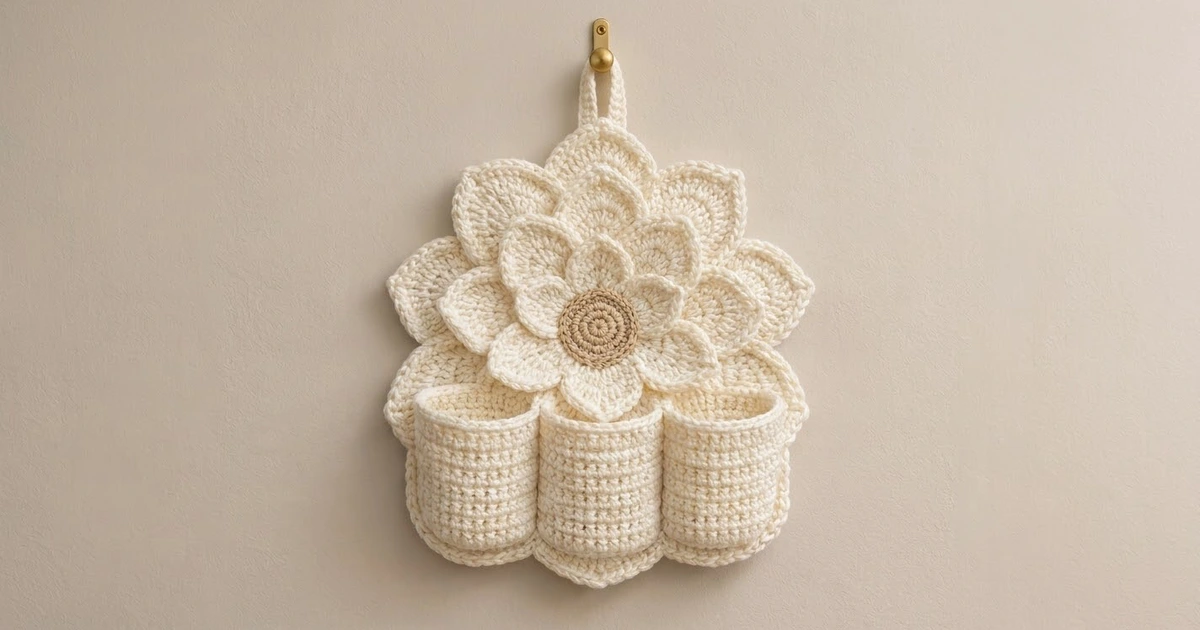
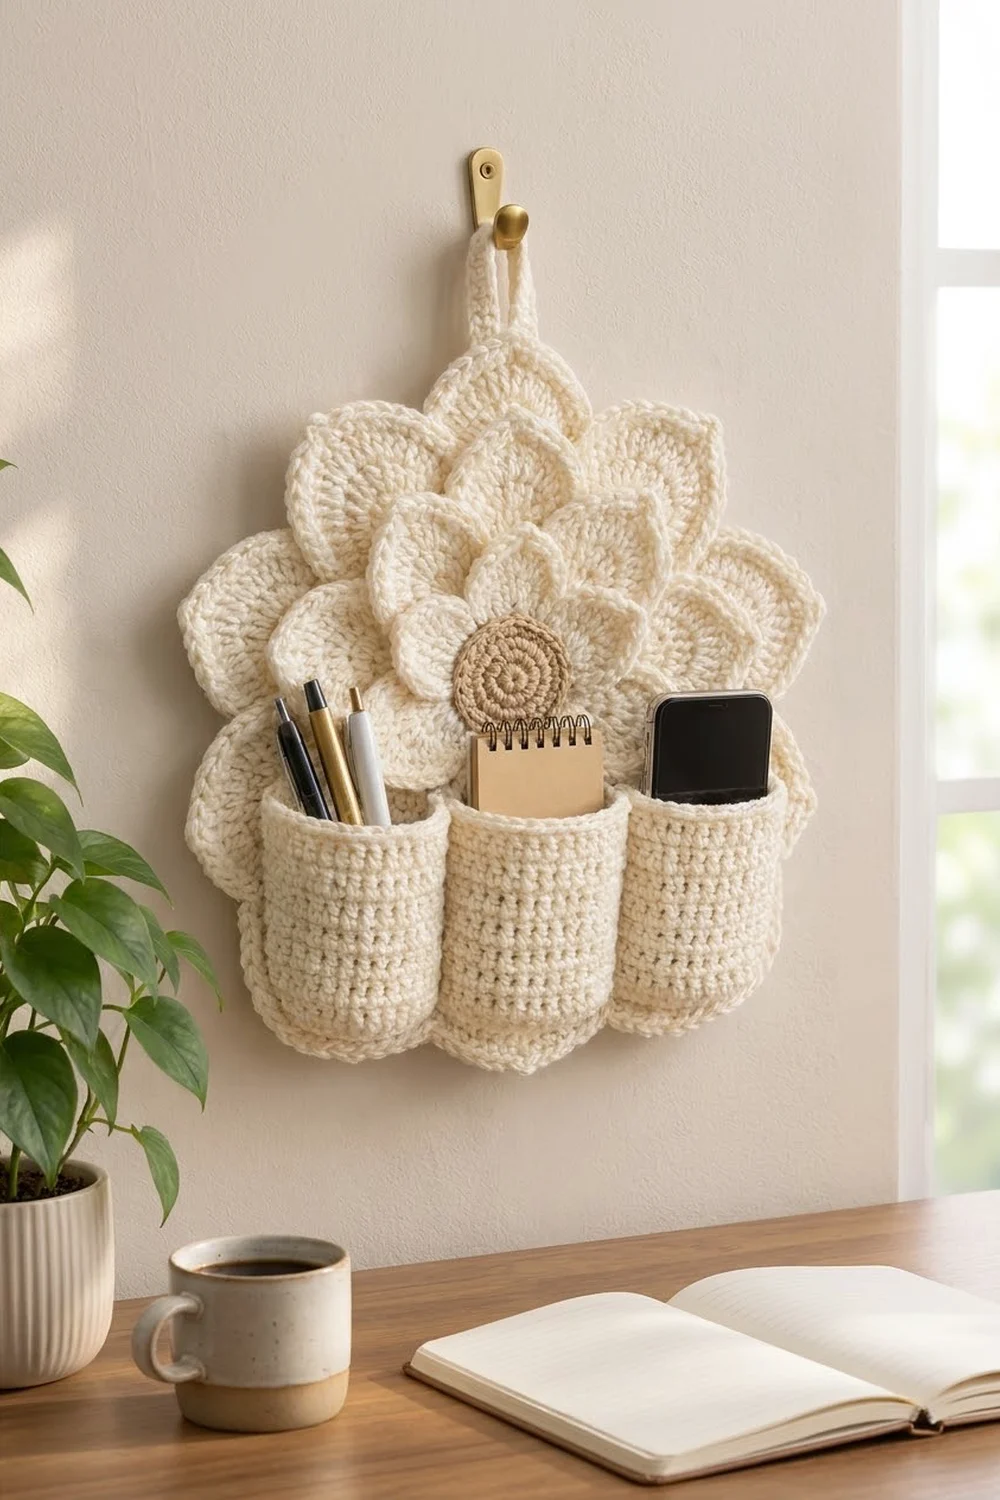
The Ivory Lotus Wall Organizer is a layered crochet flower that hangs on the wall and holds your everyday desk clutter. Three cream petal layers stack into a full, sculpted bloom with a tan spiral disc in the middle. Three round cups across the lower half hold pens, a small notepad and a phone.
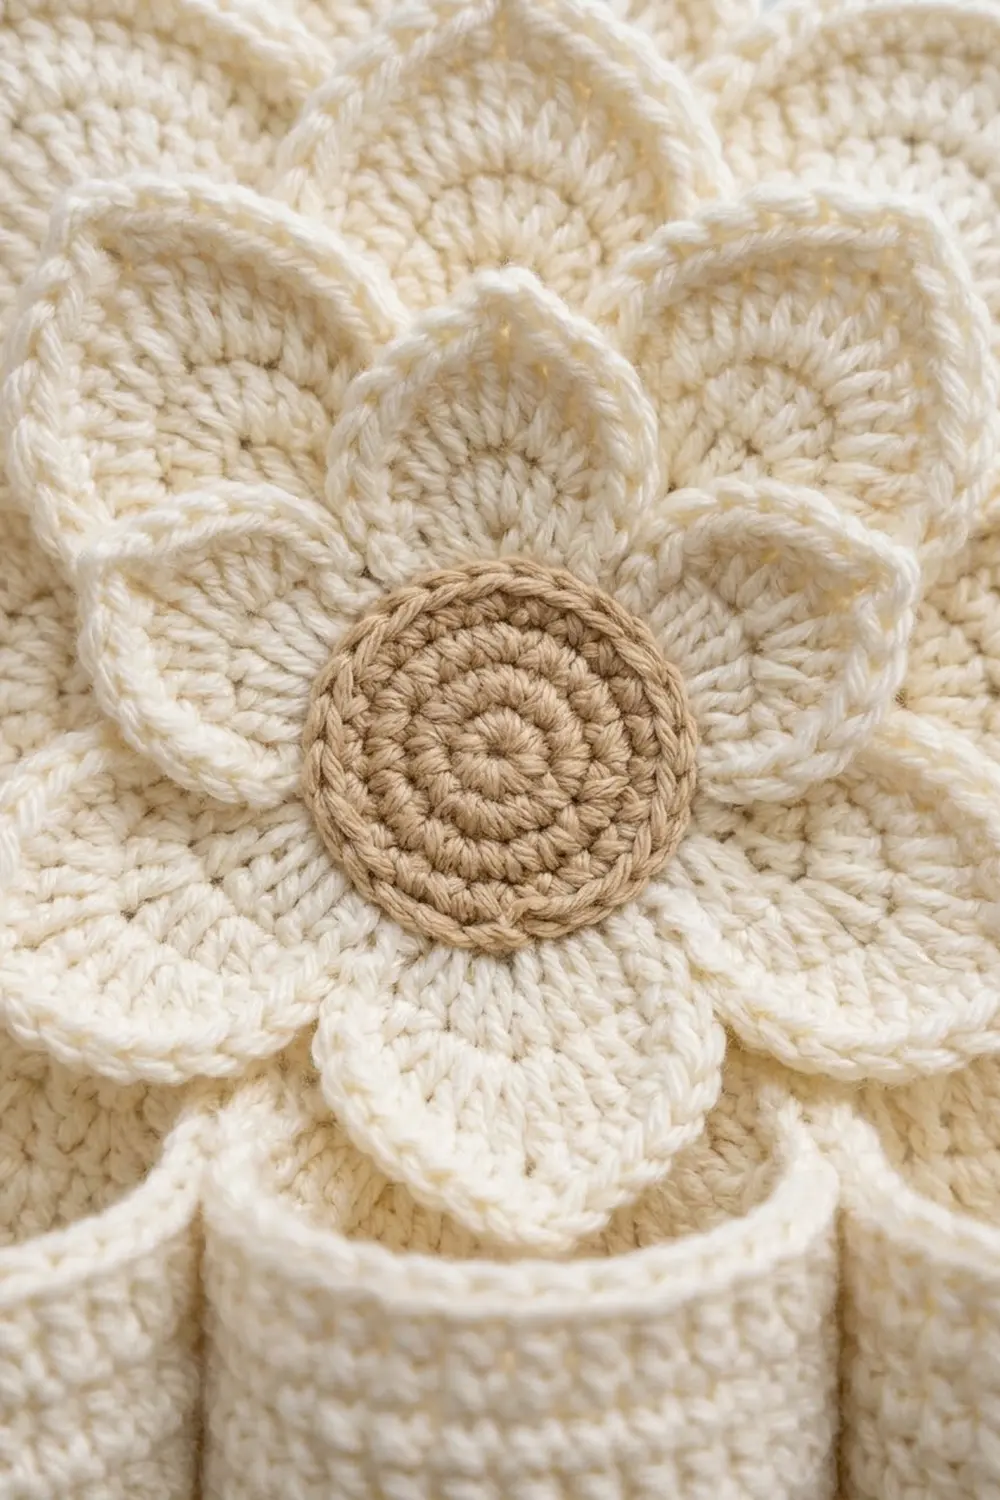
The colors are simple. Soft cream is used for the petals, cups and hanging loop, and warm tan is used only for the center. Every petal has a raised single crochet outline, which gives the bloom crisp, defined edges. The calm, textured look suits a modern neutral room.
This pattern uses US crochet terms. The finished organizer is about 10.5 in (26.7 cm) wide and 12.5 in (31.8 cm) tall including the loop. The cups stand out about 2.9 in (7.4 cm) from the wall.
You will make eight pieces:
– three petal layers, each worked in the round with petals built in short rows
– one tan center disc
– three cups
– one strap
You stack and sew the layers, then sew on the center. Next you stitch the cups across the lower half, and last you fold the strap into a loop at the back.
Finished Size and Construction
- Finished size: 10.5 in (26.7 cm) wide x 12.5 in (31.8 cm) tall with loop
- Skill level: Intermediate
- Terminology: US terms
- Yarn weight: Worsted (#4), cotton or cotton blend
- Hook: 4.5 mm (US 7)
- Number of pieces: 8 (3 petal layers, 1 center disc, 3 cups, 1 strap)
- Layout: Layers stacked from largest to smallest, with the cups in one row of 3 across the lower half
- Piece sizes:
- Outer layer: 10.5 in (26.7 cm)
- Middle layer: 8.5 in (21.6 cm)
- Inner layer: 6.8 in (17.3 cm)
- Center: 2.5 in (6.4 cm)
- Each cup: 2.9 in (7.4 cm) across x 3.5 in (8.9 cm) tall
- Size before border: The outer layer measures 10 in (25.4 cm) before the petal edging
- Border depth: One round of sc edging, adding about 0.25 in (0.6 cm) to every petal
Materials
Choose a smooth worsted-weight cotton. Cotton holds the petal points and keeps the cups upright when they’re full. Acrylic tends to sag. Pick a soft cream and a warm light tan.
- Cream: about 200 g / 310 m (layers, cups, strap, sewing)
- Tan: about 15 g / 25 m (center disc)
These amounts include a margin of roughly 25% for swatching and sewing.
Tools:
- 4.5 mm (US 7) crochet hook
- Yarn needle
- Locking stitch markers (at least 12)
- Scissors
- Rust-proof pins and a blocking mat
- Spray bottle
- Measuring tape
Abbreviations (US Terms)
- ch – chain
- sl st – slip stitch
- sc – single crochet
- hdc – half double crochet
- dc – double crochet
- st(s) – stitch(es)
- sp – space
- MR – magic ring
- BLO – back loop only
- rep – repeat
- RS – right side
Special stitches:
- sc2tog: Insert hook in next st and pull up a loop. Insert hook in following st and pull up a loop. Yarn over and pull through all 3 loops.
- hdc2tog: (Yarn over, insert hook in next st, pull up a loop) twice. Yarn over and pull through all 5 loops.
- dc2tog: (Yarn over, insert hook in next st, pull up a loop, yarn over and pull through 2 loops) twice. Yarn over and pull through all 3 loops.
In this pattern, a beginning ch 2 or ch 1 never counts as a stitch.
Gauge and Checkpoints
Gauge:
– 16 dc and 8 rows = 4 in (10.2 cm)
– 16 sc and 16 rows = 4 in (10.2 cm)
– 16 hdc and 13 rows = 4 in (10.2 cm)
Test one piece first. Make the outer layer disc (Rounds 1–6) before anything else, because it works as your gauge swatch.
Checkpoints:
- Outer disc after Round 6: 6 in (15.2 cm)
- Middle disc after Round 5: 5 in (12.7 cm)
- Inner disc after Round 4: 4 in (10.2 cm)
- Center disc after Round 5: 2.5 in (6.4 cm)
- Cup base after Round 6: 2.9 in (7.4 cm)
- One large petal with edging: 2.25 in (5.7 cm) tall
If your disc is too big, go down one hook size. If it’s too small, go up one size. Get the disc right before you start the petals, because every later size depends on it.
Outer Petal Layer (Make 1, Cream)
Disc
Round 1: MR, ch 2, 12 dc in ring, sl st to first dc. (12 sts)
Round 2: Ch 2, 2 dc in each st around, sl st to first dc. (24 sts)
Round 3: Ch 2, (2 dc in next st, dc in next st) 12 times, sl st to first dc. (36 sts)
Round 4: Ch 2, (2 dc in next st, dc in next 2 sts) 12 times, sl st to first dc. (48 sts)
Round 5: Ch 2, (2 dc in next st, dc in next 3 sts) 12 times, sl st to first dc. (60 sts)
Round 6: Ch 2, (2 dc in next st, dc in next 4 sts) 12 times, sl st to first dc. (72 sts)
Checkpoint: 6 in (15.2 cm). Place a marker in every 6th st to divide the round into 12 groups of 6.
Large Petals (12)
Work each petal in rows over one group of 6 sts.
Row 1 (RS): Ch 2, dc in same st and next 5 sts, turn. (6 sts)
Row 2: Ch 2, dc in each st, turn. (6 sts)
Row 3: Ch 2, dc2tog, dc in next 2 sts, dc2tog, turn. (4 sts)
Row 4: Ch 1, sc2tog twice, turn. (2 sts)
Row 5: Ch 1, sc2tog. (1 st) This is the petal tip.
Don’t fasten off. Sl st loosely into each row-end down the side that faces the next unworked group (5 sl sts). Sl st into the first st of the next group and repeat Rows 1–5.
After the 12th petal, sl st down to its base. Don’t fasten off. Go straight on to the edging (see Border).
Middle Petal Layer (Make 1, Cream)
Work Rounds 1–5 of the outer disc. (60 sts) Checkpoint: 5 in (12.7 cm). Mark every 6th st to make 10 groups.
Medium Petals (10)
Row 1 (RS): Ch 2, dc in same st and next 5 sts, turn. (6 sts)
Row 2: Ch 2, dc2tog, dc in next 2 sts, dc2tog, turn. (4 sts)
Row 3: Ch 1, sc2tog twice, turn. (2 sts)
Row 4: Ch 1, sc2tog. (1 st)
Sl st down the side toward the next group (4 sl sts). Sl st into the first st of that group and repeat. After the 10th petal, sl st down to its base and go on to the edging.
Inner Petal Layer (Make 1, Cream)
Work Rounds 1–4 of the outer disc. (48 sts) Checkpoint: 4 in (10.2 cm). Mark every 6th st to make 8 groups.
Small Petals (8)
Row 1 (RS): Ch 2, hdc in same st and next 5 sts, turn. (6 sts)
Row 2: Ch 2, hdc2tog, hdc in next 2 sts, hdc2tog, turn. (4 sts)
Row 3: Ch 1, sc2tog twice, turn. (2 sts)
Row 4: Ch 1, sc2tog. (1 st)
Sl st down the side (4 sl sts), move to the next group and repeat. After the 8th petal, sl st down to its base and go on to the edging.
Center Disc (Make 1, Tan)
Work in a continuous spiral and keep a marker in the first st of each round. Working without joins creates the visible swirl.
Round 1: MR, 6 sc in ring. (6 sts)
Round 2: 2 sc in each st. (12 sts)
Round 3: (2 sc in next st, sc in next st) 6 times. (18 sts)
Round 4: (2 sc in next st, sc in next 2 sts) 6 times. (24 sts)
Round 5: (2 sc in next st, sc in next 3 sts) 6 times. (30 sts)
Round 6 (trim): Sl st loosely in each st around. (30 worked 1-per-st + 0 added = 30 sts)
Checkpoint: 2.5 in (6.4 cm). Fasten off, leaving a 16 in (40.6 cm) tail.
Cups (Make 3, Cream)
Rounds 1–5: Work as Center Disc Rounds 1–5, but join each round with a sl st and start the next round with ch 1. (30 sts)
Round 6: Ch 1, (2 sc in next st, sc in next 4 sts) 6 times, sl st to first sc. (36 sts)
Checkpoint: 2.9 in (7.4 cm).
Round 7 (conversion): Ch 1, sc in BLO of each st around, sl st to first sc. (36 worked 1-per-st + 0 added = 36 sts) This round turns the flat base up into the wall.
Rounds 8–17: Ch 1, hdc in each st around, sl st to first hdc. (36 sts each round)
Round 18 (trim): Ch 1, sc in each st around, sl st to first sc. (36 worked 1-per-st + 0 added = 36 sts)
Checkpoint: 2.9 in (7.4 cm) across x 3.5 in (8.9 cm) tall. Fasten off, leaving a 24 in (61.0 cm) tail.
Hanging Strap (Make 1, Cream)
Row 1: Ch 29, sc in 2nd ch from hook and each ch across, turn. (28 sts)
Rows 2–3: Ch 1, sc in each st, turn. (28 sts)
Checkpoint: 7 in (17.8 cm) long x 0.75 in (1.9 cm) wide. Fasten off, leaving a long tail.
Make All Pieces
- Cream: 1 outer layer, 1 middle layer, 1 inner layer, 3 cups, 1 strap (7 pieces)
- Tan: 1 center disc (1 piece)
Layout, front view:
            [ strap loop ]
   [   outer layer 10.5 in / 26.7 cm   ]
     [  middle layer 8.5 in / 21.6 cm ]
       [ inner layer 6.8 in / 17.3 cm ]
             ( tan center )
      [ cup ] [ cup ] [ cup ]
Joining
Layers: Lay the outer layer RS up. Center the middle layer on top and turn it so its petals fall between the outer petals as evenly as possible. Whipstitch the middle layer’s Round 5 edge to the outer disc with one stitch per st (60 stitches). Repeat with the inner layer: offset its petals, then sew its Round 4 edge to the middle layer (48 stitches).
Center: Pin the tan disc over the middle. Whipstitch through each Round 6 sl st into the inner layer (30 stitches).
Cups:
1. Place the three cups side by side, touching. Their bottoms should sit 0.5 in (1.3 cm) above the lowest outer petal tip, and their tops should sit just under the tan center. The row of cups spans about 8.6 in (21.8 cm), centered on the flower.
2. On each cup, mark the 9 back sts of Round 7 and the 9 back sts of Round 18.
3. Whipstitch those 9 + 9 sts through all the layers. Then tack a vertical line up the center back of each cup.
4. Where cups touch, sew them together for 2 in (5.1 cm), one stitch per hdc round.
Strap: Fold the strap in half. Sew both ends to the back of the outer disc at the top, overlapping them by 1 in (2.5 cm). The loop should rise about 2 in (5.1 cm) above the top petal.
Tension: Sew firmly, but never pull the yarn tight. The layers should lie flat without puckering, and the cups should stay round.
Size checkpoint: 10.5 in (26.7 cm) wide and 12.5 in (31.8 cm) tall including the loop.
Border
The border is the sc edging you work around every petal of a layer, right after its last petal. Border gauge: 4 sc per 1 in (2.5 cm) along the petal sides.
Each “side” is one edge of a petal:
– Work 2 sc into each dc row-end.
– Work 1 sc into each sc row-end.
– Work 3 sc evenly across 2 hdc row-ends.
– On the sides you slip-stitched down, work through the sl sts.
Outer layer edging: Sl st into the first st of petal 1’s group. *8 sc up the first side, (sc, ch 1, sc) in the tip, 8 sc down the second side, sl st between petals; rep from * 11 more times.
– Per petal: 8 + 2 + 8 = 18 sc
– Total: 216 sc, 12 ch-1 sps, 12 sl sts
Middle layer edging: Same method with 6 sc per side.
– Per petal: 6 + 2 + 6 = 14 sc
– Total: 140 sc, 10 ch-1 sps, 10 sl sts
Inner layer edging: Same method with 5 sc per side.
– Per petal: 5 + 2 + 5 = 12 sc
– Total: 96 sc, 8 ch-1 sps, 8 sl sts
Why the math works:
– A large petal side is 2 in (5.1 cm) long, and 2 in x 4 sc = 8 sc.
– A medium side is 1.5 in (3.8 cm) long, which gives 6 sc.
– A small side is about 1.25 in (3.2 cm) long, which gives 5 sc.
The (sc, ch 1, sc) tip keeps each point sharp. The edging adds 0.25 in (0.6 cm) to each petal, which brings the outer layer from 10 in (25.4 cm) to 10.5 in (26.7 cm).
Final Blocking
- Weave in every end.
- Lay the joined flower face up on a blocking mat.
- Pin each outer petal tip so the bloom measures 10.5 in (26.7 cm) across.
- Pin the middle and inner petal tips, shaping each point.
- Mist evenly until damp but not soaked.
- Fill each cup with a rolled towel or a small jar 2.9 in (7.4 cm) across to set the shape.
- Let everything dry completely, at least 24 hours, before hanging.
Final Quality-Control Checklist
- Outer layer has 12 petals, middle has 10, inner has 8
- Every petal has a full sc outline and a sharp tip
- Layers lie flat with no puckering
- Tan center is round and centered
- Three cups are level, touching and centered
- Cups stand upright and hold their shape
- Strap is secure and centered at the top
- All ends are woven in
- Organizer measures 10.5 in (26.7 cm) x 12.5 in (31.8 cm)
Troubleshooting
Disc ruffles: Your dc is too loose. Go down a hook size.
Disc curls upward: Your gauge is too tight. Go up a hook size.
Petals curl: The edging is too tight. Redo it more loosely, or block the tips flat.
Wavy petal edges: There are too many sc on each side. Stick to the counts given.
Cups lean forward: Add a second tack line, or sew the back sts of Round 18 more firmly.
Cups lose shape: Use cotton rather than acrylic, and block the cups with filler inside.
Organizer tilts: The strap is off-center. Sew it again directly above the tan center.
Care
Spot clean with a damp cloth and mild soap. If needed, hand wash in cool water, press the water out in a towel, and dry flat, reshaping the petals and cups.
Final Notes
Everything starts with the outer disc. Get Round 6 to 6 in (15.2 cm), and the large petals bring that layer to 10.5 in (26.7 cm). The middle and inner layers follow at 8.5 in (21.6 cm) and 6.8 in (17.3 cm), and the center measures 2.5 in (6.4 cm). The three 2.9 in (7.4 cm) cups span 8.6 in (21.8 cm) across the lower half. Check each number as you go, and the finished organizer will hang straight and hold your tools neatly.
Happy crocheting!