
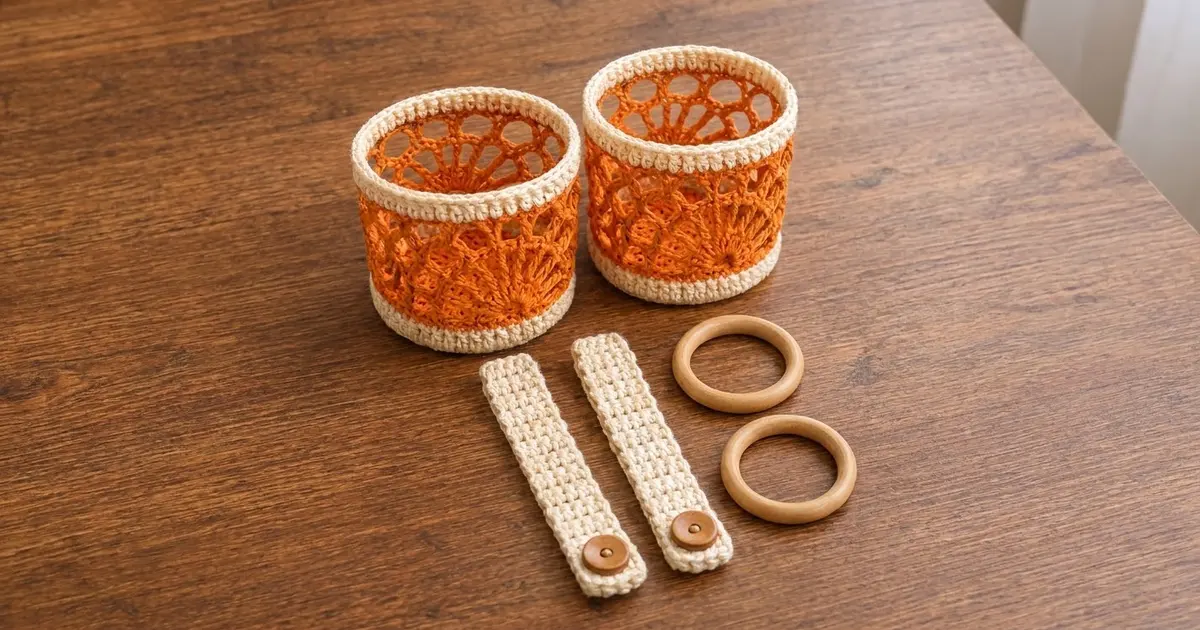
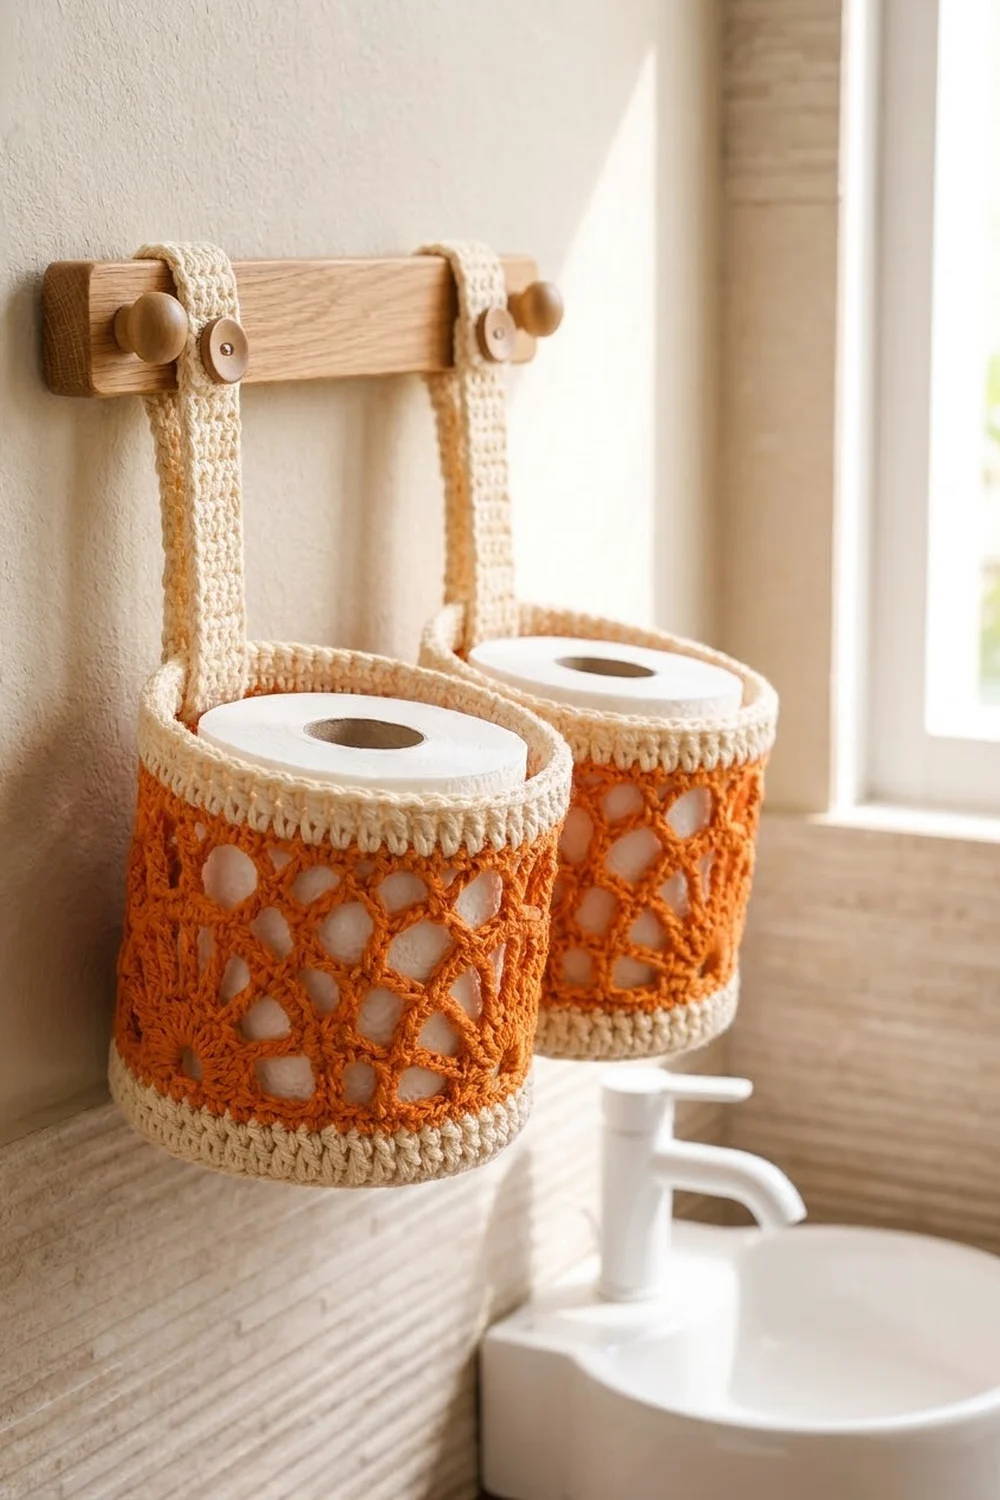
This set has two round hanging baskets in bright orange and cream cotton, each with its own buttoned strap. Each basket has a solid round base, a cream band at the bottom, a round of sunburst fans, two rounds of open lace loops and a firm cream band at the top. They hang side by side from a wooden rail and each one holds a standard toilet roll.
The colors are a warm pumpkin orange for the base and the lace, and a soft natural cream for the bands and straps. Each strap ends in a buttonhole and closes with a wooden button. The style is simple and practical, with a little vintage charm from the fans.
The pattern uses US crochet terms. Each finished basket is about 5 3/4 in (14.6 cm) across and 4 1/4 in (10.8 cm) tall. Each strap is 1 1/4 in (3.2 cm) wide and 10 in (25.4 cm) long.
For each basket, you work the base in rounds and then turn the wall up with a back-loop round. Next come the cream bottom band, the orange lace wall and the cream top band. You make the straps separately in rows, sew them inside the back of each basket and button them around the rail.
Finished Size and Construction
- Finished basket size: 5 3/4 in (14.6 cm) diameter x 4 1/4 in (10.8 cm) tall
- Skill level: Easy-Intermediate
- Terminology: US crochet terms
- Yarn weight: Worsted (medium #4) cotton
- Hook: 4.0 mm (G-6)
- Number of pieces: 4 (2 baskets, 2 straps)
- Layout: Two baskets hung side by side, centers 7 in (17.8 cm) apart
- Piece size: Basket 5 3/4 in (14.6 cm) x 4 1/4 in (10.8 cm); strap 1 1/4 in x 10 in (3.2 cm x 25.4 cm)
- Size before border: Wall height 3 1/4 in (8.3 cm) after Round 20
- Border depth: Cream top band, 7/8 in (2.2 cm)
Materials
Use 100% cotton or a cotton blend in worsted weight. Cotton holds its shape, stands up well to bathroom humidity and keeps the lace crisp. Acrylic will work, but the walls will be softer.
- Color A, Orange: 70 g (about 112 m)
- Color B, Cream: 50 g (about 80 m)
Quantities are for the full set of two baskets and two straps. They include a margin of about 25% for your gauge swatch and any ripping back.
Tools:
– 4.0 mm (G-6) crochet hook
– 2 wooden buttons, 3/4 in (1.9 cm)
– Tapestry needle
– Stitch markers
– Scissors
– Measuring tape
– Rustproof pins
– Towel bar or wooden rail with space behind it
– Optional: 2 wooden rings, 2 1/2 in (6.4 cm), for hanging from hooks instead of a rail
Abbreviations (US Terms)
- ch – chain
- sl st – slip stitch
- sc – single crochet
- tr – treble crochet
- inc – 2 sc in the same stitch
- BLO – back loop only
- sp(s) – space(s)
- st(s) – stitch(es)
- rep – repeat
- RS – right side
Special stitch – Sunburst fan: 9 tr in the same stitch. Each fan spreads into a half-circle that radiates from one point.
Gauge and Checkpoints
Gauge: 16 sc and 18 rounds = 4 in (10.2 cm) in sc with a 4.0 mm hook.
Make one complete basket before you start the second one. The base is your gauge swatch, so measure it as you go.
- After Round 6 (36 sts): base measures about 2 3/4 in (7.0 cm) across.
- After Round 12 (72 sts): base measures about 5 3/4 in (14.6 cm) across.
- After Round 16: cream bottom band is about 7/8 in (2.2 cm) tall.
- After Round 18: wall is about 2 in (5.1 cm) tall.
- After Round 20: wall is about 3 1/4 in (8.3 cm) tall.
- After Round 24: wall is about 4 1/4 in (10.8 cm) tall.
If the base after Round 12 is over 6 in (15.2 cm), go down half a hook size. If it is under 5 1/2 in (14.0 cm), go up half a hook size. Make sure a standard roll, about 4 1/2 in (11.4 cm) wide, fits with a little room around it. A roll up to 5 in (12.7 cm) wide will fit.
Basket (Make 2)
Base (Color A, Orange)
Work in continuous rounds, joining each round with a sl st to the first sc. Ch 1 at the start of every round does not count as a stitch.
Round 1: Magic ring, ch 1, 6 sc in ring, sl st to first sc. (6 sts)
Round 2: Ch 1, inc in each st around. (12 sts)
Round 3: Ch 1, *sc 1, inc; rep from * 6 times. (18 sts)
Round 4: Ch 1, *sc 2, inc; rep from * 6 times. (24 sts)
Round 5: Ch 1, *sc 3, inc; rep from * 6 times. (30 sts)
Round 6: Ch 1, *sc 4, inc; rep from * 6 times. (36 sts)
Round 7: Ch 1, *sc 5, inc; rep from * 6 times. (42 sts)
Round 8: Ch 1, *sc 6, inc; rep from * 6 times. (48 sts)
Round 9: Ch 1, *sc 7, inc; rep from * 6 times. (54 sts)
Round 10: Ch 1, *sc 8, inc; rep from * 6 times. (60 sts)
Round 11: Ch 1, *sc 9, inc; rep from * 6 times. (66 sts)
Round 12: Ch 1, *sc 10, inc; rep from * 6 times. (72 sts)
To keep the base round instead of hexagonal, move the increases in each round by a stitch or two. Fasten off Color A.
Bottom Band (Color B, Cream)
Round 13: Join B in any st. Ch 1, sc in BLO of each st around. (72 sts) This round turns the wall up and leaves a clean ridge at the base edge.
Rounds 14–16: Ch 1, sc in each st around. (72 sts)
Fasten off B.
Lace Wall (Color A, Orange)
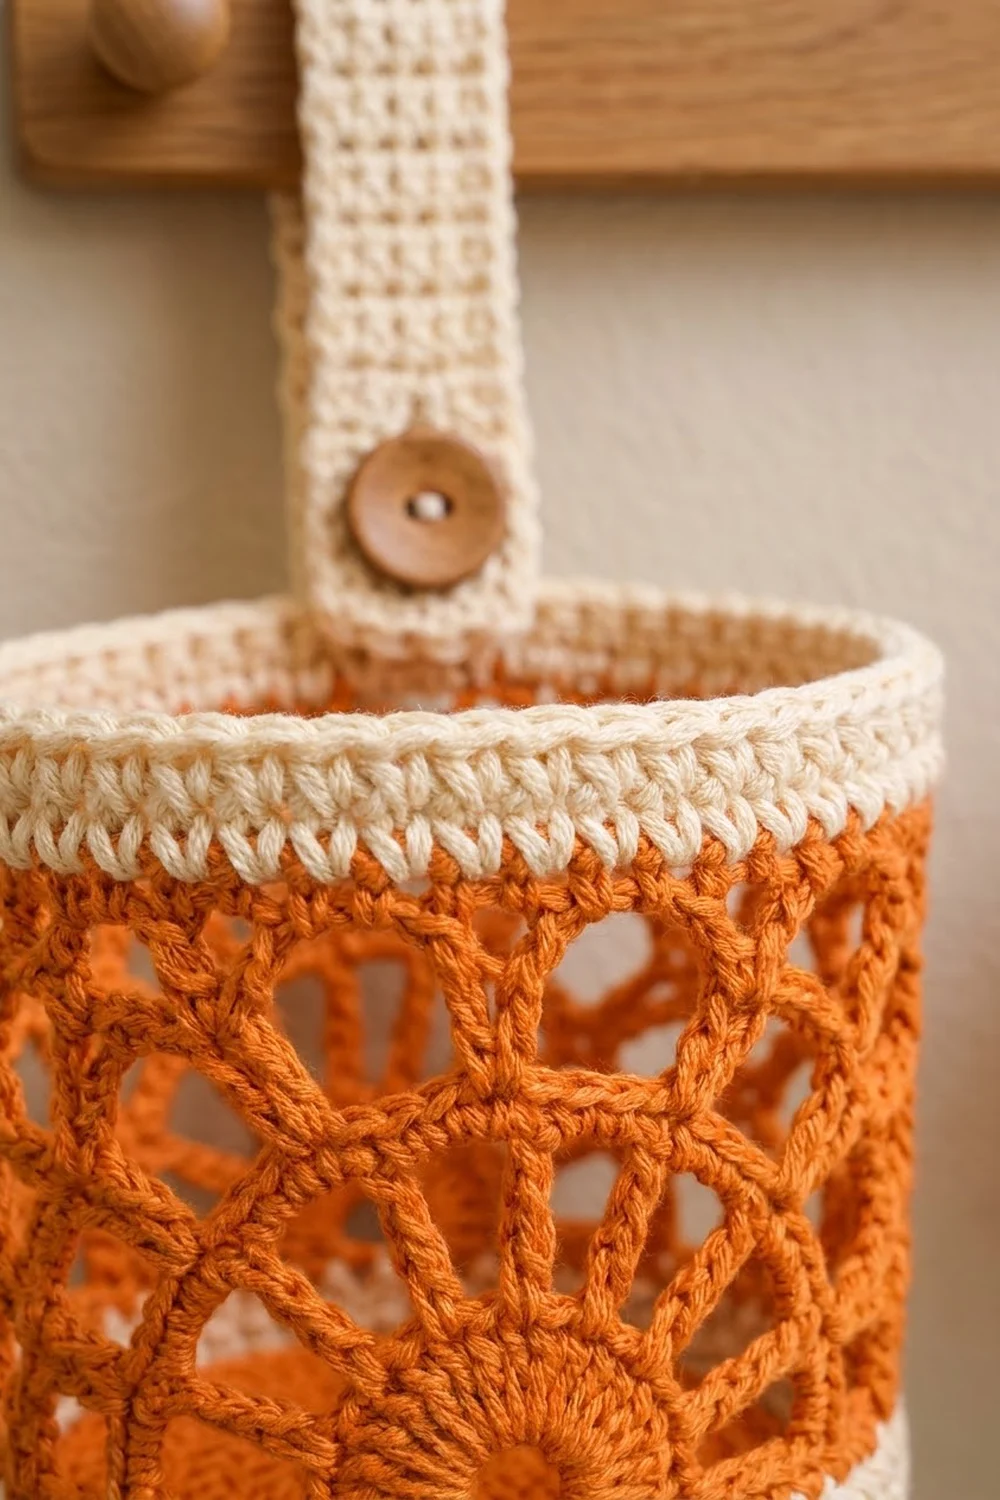
Round 17 (fan round): Join A in any st. Ch 1, sc in the same st, *skip 5 sts, 9 tr in the next st, skip 5 sts, sc in the next st; rep from * 5 more times, leaving out the last sc on the final repeat. Sl st to the first sc. (6 fans of 9 tr + 6 sc = 60 sts)
Each 12-stitch section from Round 16 now holds 1 sc and 1 fan. The fans sit as half-sunbursts on top of the cream band.
Round 18 (fan edge): Sl st in the first tr of the first fan. Ch 1, sc in the same tr, *ch 3, skip 3 tr, sc in the next tr (center tr), ch 3, skip 3 tr, sc in the next tr (9th tr), tr in the next sc between fans, sc in the first tr of the next fan; rep from * 5 more times. On the last repeat, work the tr in the first sc of Round 17, then sl st to the first sc. (18 sc + 6 tr = 24 sts and 12 ch-3 sps)
The tr between fans fills the V-shaped gap, so the top edge is level.
Round 19 (first loop round): Sl st in the first ch-3 sp. Ch 1, sc in the same sp, *ch 5, sc in the next ch-3 sp, ch 5, sc in the next tr, ch 5, sc in the next ch-3 sp; rep from * 5 more times. On the last repeat, leave out the final sc and sl st to the first sc instead. (18 sc and 18 ch-5 loops)
Round 20 (second loop round): Sl st in each of the first 3 ch of the first loop. Ch 1, sc in the same loop, *ch 5, sc in the next ch-5 loop; rep from * around, ending with ch 5, sl st to the first sc. (18 sc and 18 ch-5 loops)
These loops sit offset from Round 19, which gives the two rows of round openings. Fasten off A. The wall should be about 3 1/4 in (8.3 cm) tall.
Make All Pieces
Make 2 baskets and 2 straps.
- Color A: 2 bases and 2 lace walls, about 30 g each
- Color B: 2 bottom bands, 2 top bands and 2 straps, about 20 g per basket and strap set
Hanging layout:
=========== RAIL ===========
     [Strap 1]    [Strap 2]
        |             |
   ( Basket 1 )  ( Basket 2 )
   |<-- 7 in (17.8 cm) -->|
With centers 7 in (17.8 cm) apart, there is a gap of about 1 1/4 in (3.2 cm) between the baskets.
Strap (Make 2, Color B, Cream)
Foundation: Ch 6.
Row 1: Sc in the 2nd ch from hook and in each ch across, turn. (5 sts)
Rows 2–42: Ch 1, sc in each st across, turn. (5 sts)
Row 43 (buttonhole): Ch 1, sc 1, ch 3, skip 3 sts, sc 1, turn. (2 sc + 1 ch-3 sp)
Row 44: Ch 1, sc 1, 3 sc in the ch-3 sp, sc 1, turn. (5 sts)
Row 45: Ch 1, sc in each st across. (5 sts)
Fasten off and leave a 12 in (30.5 cm) tail on the Row 1 end for sewing. The strap measures 1 1/4 in x 10 in (3.2 cm x 25.4 cm).
Joining: Attaching the Straps
Do this step after the top band (see Border below) is finished.
Method: Whipstitch with the Row 1 tail.
Stitch-to-stitch logic: Choose the back center of the basket. Place the RS of the strap against the inside of the top band, with Row 1 lined up along the bottom edge of the band (Round 21). The strap’s 5 sts sit over 5 sts of the band. Rows 1–4 overlap the band, which is about 7/8 in (2.2 cm) of strap. Whipstitch all four edges of that overlap, with one stitch into each strap stitch or row end and the band stitch behind it.
Tension: Pull each stitch snug but do not pucker the band. Seen from outside, the cream band should look smooth.
Button: Take the strap up behind the rail, over the top and down the front. Pin the buttonhole end so it overlaps the strap by about 1 in (2.5 cm) just below the rail. Mark the spot through the buttonhole, then sew the button to the RS of the strap there.
Size checkpoint: With both baskets buttoned on, the rims should hang level. They should also sit about 2 1/2 in (6.4 cm) below the rail. If one hangs lower, move its button.
Border: Cream Top Band
Border gauge: 16 sc = 4 in (10.2 cm), the same as the base. That means the 72-stitch top band is 18 in (45.7 cm) around, which matches the base and keeps the wall straight.
Round 21: Join B in any ch-5 loop. Ch 1, work 4 sc in each ch-5 loop around, sl st to the first sc. (0 sts worked into the 18 sc + 72 sc worked into the 18 loops = 72 sts)
Rounds 22–24: Ch 1, sc in each st around. (72 sts)
Fasten off and weave in all ends.
Count per fan section: Each of the 6 fan sections has 3 loops x 4 sc = 12 sc, and 6 x 12 = 72.
Why the math works: The base ends with 72 sts. The bottom band keeps all 72. Round 17 splits them into 6 sections of 12. Round 19 turns each section into 3 loops, so there are 18 loops in total. Round 21 puts 4 sc back into each loop, which gives 72 again. The top and bottom bands match exactly, so the basket stays straight instead of flaring or narrowing.
Final Blocking
- Soak each basket and strap in cool water for 10 minutes.
- Press out the water by rolling each piece in a towel. Do not wring.
- Slide each basket over a jar or can about 5 1/2 in (14.0 cm) across, or over a toilet roll wrapped in a towel.
- Shape the fans so they fan out evenly, and pull each ch-5 loop into a round opening.
- Check that the wall is 4 1/4 in (10.8 cm) tall and the top band is level.
- Pin the straps flat to 1 1/4 in x 10 in (3.2 cm x 25.4 cm).
- Let everything dry completely before you attach the straps or sew on the buttons.
Final Quality-Control Checklist
- Base is flat, round and 5 3/4 in (14.6 cm) across
- Round 13 ridge is even all around the base
- 6 fans, each with 9 tr, spaced evenly
- 18 open loops in each of Rounds 19 and 20
- Top and bottom bands each have 72 sts and are about 7/8 in (2.2 cm) tall
- Both baskets are 4 1/4 in (10.8 cm) tall
- Straps are 45 rows, with buttonholes that fit the buttons
- Buttons are sewn on firmly, and the baskets hang level
Troubleshooting
Base cups or ruffles: If it cups, go up a hook size. If it ruffles, go down a hook size. Check that each round adds exactly 6 sts.
Wall flares out: You may have worked Round 13 in both loops. Redo it in BLO.
Fans curl: Work the tr looser, or block them firmly over the jar.
Top band is tight or wavy: Count 4 sc per loop. Use 3 or 5 only if your gauge is off, and then match the bottom band count.
Basket tilts forward: Sew the strap lower inside the band, or check that it sits exactly at back center.
Buttonhole is too loose: Add a round of sl sts around the opening.
Care
Hand wash in cool water and lay flat to dry, reshaping over a jar. Do not tumble dry or the cotton may shrink.
Final Notes
Everything in this set comes from one measurement chain. The 16-sc gauge gives a 72-stitch base that is 5 3/4 in (14.6 cm) across. The 72 sts stay through the bottom band and divide into 6 fan sections of 12. These become 18 loops, and 4 sc in each loop brings the top band back to 72. That gives a straight 4 1/4 in (10.8 cm) basket. Check the base after Rounds 6 and 12, and the rest of the basket will follow.
Happy crocheting!