
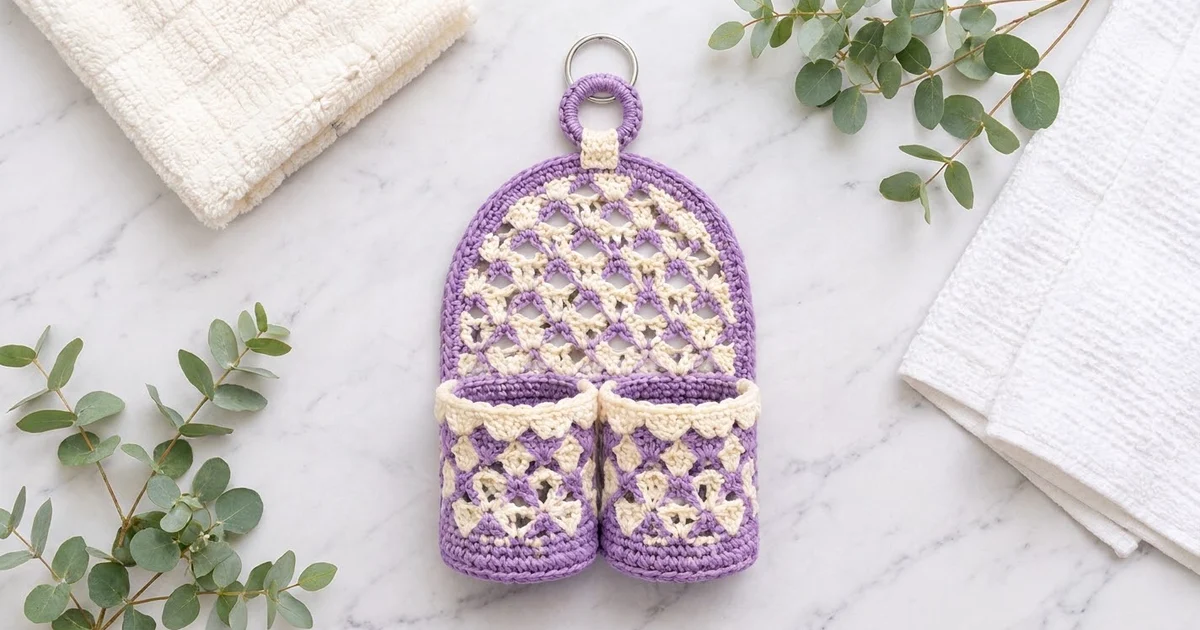
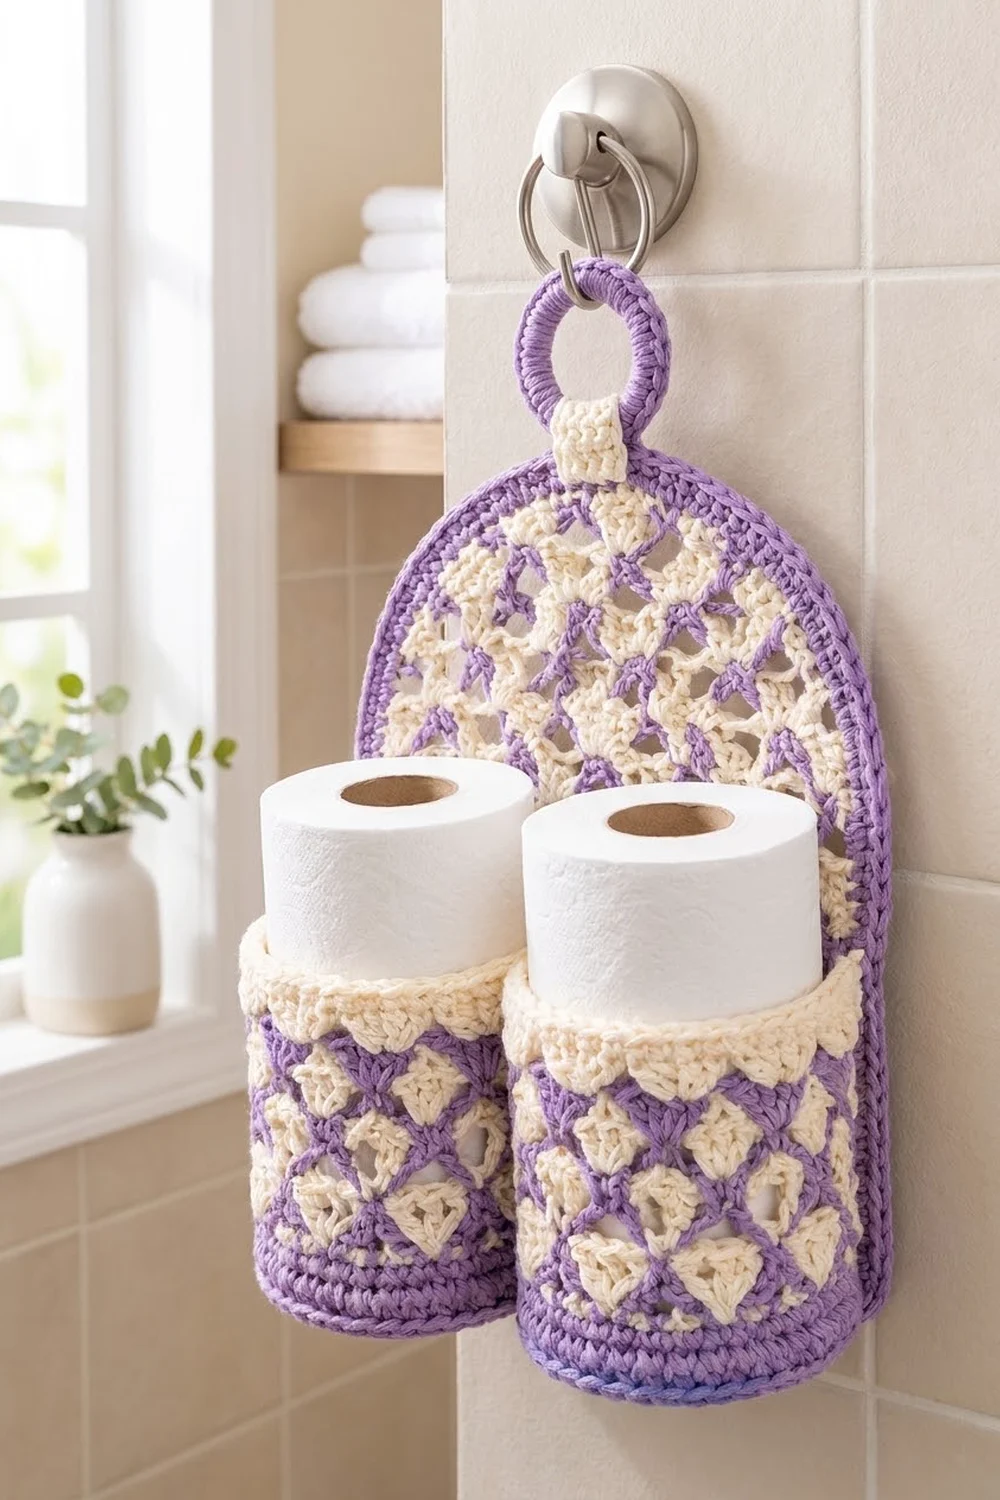
This hanging holder stores two spare rolls in a pair of open cups set against an arched back panel. It hangs from a wall hook, a towel ring, or the back of a door, which makes it handy in small bathrooms.
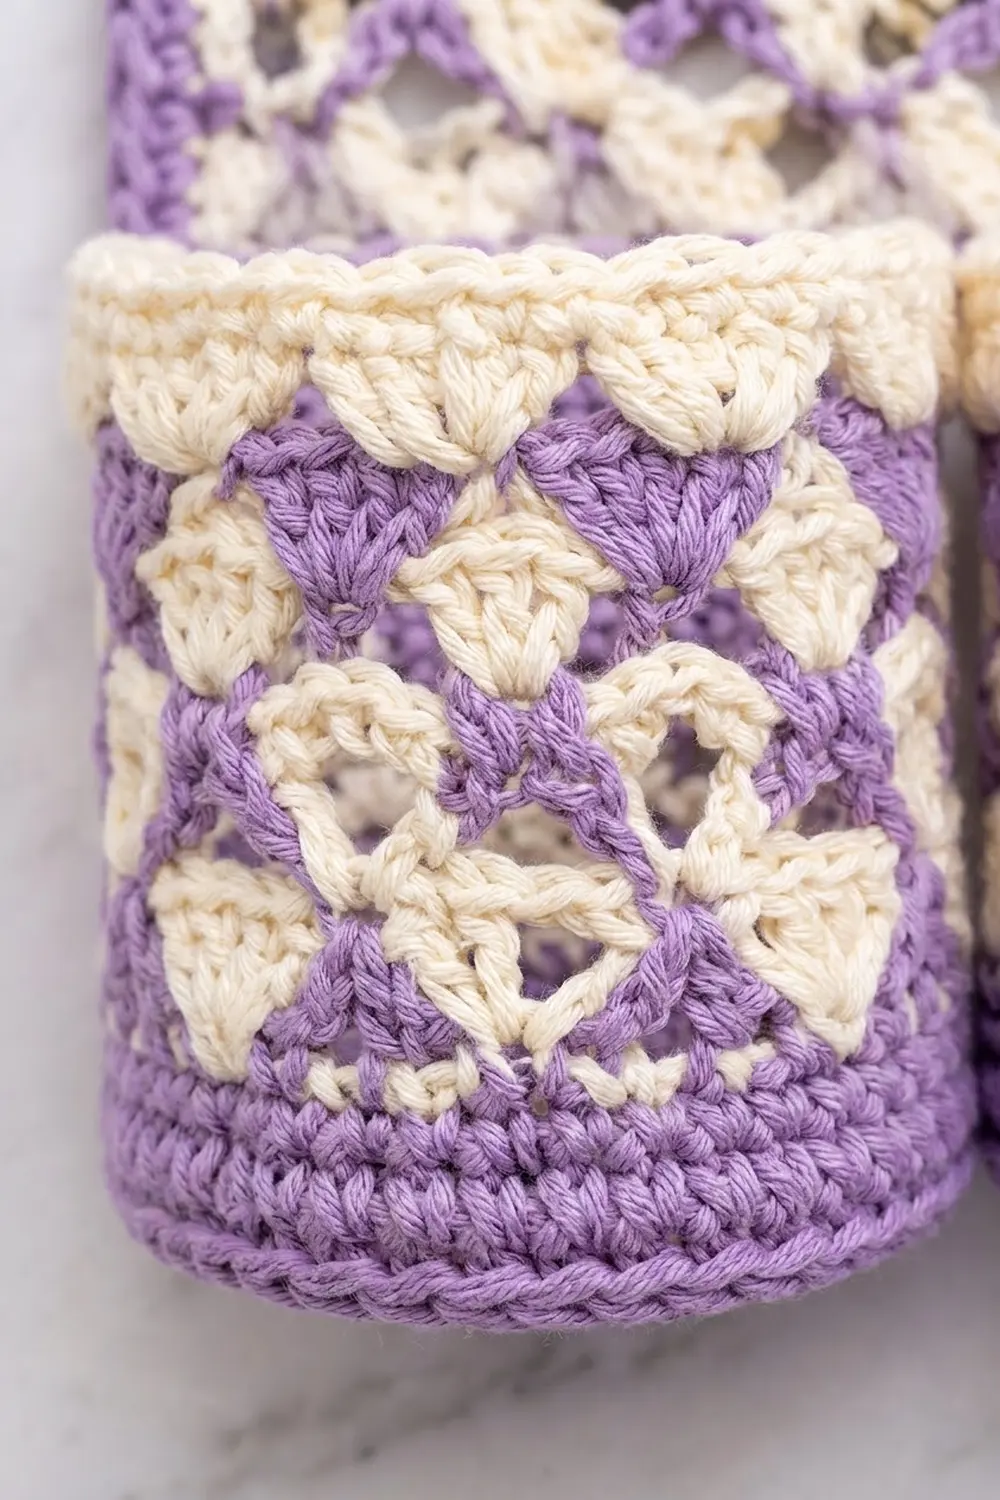
The colors are soft lavender and cream. Cream shells form a diamond trellis and thin lavender lines run between them, so the piece looks light but stays sturdy. Solid lavender bands at the bottom keep the cups firm. Cream scalloped rims and a twisted lavender edge finish it neatly.
The pattern uses US crochet terms. The finished holder is 10 in (25.4 cm) wide and 15 in (38.1 cm) tall without the hanging ring. The tab and covered ring add about 2.5 in (6.4 cm) more.
Construction is simple. You work the back panel flat from the bottom up and shape the arch by dropping half a pattern repeat at each edge. Each cup starts as a flat circle that turns upward into a lattice wall. You then cover a ring, make a tab, edge the panel, and sew everything together.
Finished Size and Construction
- Finished size: 10 in × 15 in (25.4 × 38.1 cm), plus about 2.5 in (6.4 cm) for the hanger
- Skill level: Intermediate
- Terminology: US
- Yarn weight: Worsted (#4) cotton
- Hook: 4.5 mm (US 7)
- Number of pieces: 5 (1 back panel, 2 cups, 1 covered ring, 1 tab)
- Layout: Two cups side by side on the lower panel, with the hanger at the top center
- Cup size: 4.75 in (12.1 cm) across, 4.25 in (10.8 cm) tall
- Panel size before border: 9.25 in × 14.25 in (23.5 × 36.2 cm)
- Border depth: 0.375 in (1.0 cm) per edge
Materials
Use 100% cotton or a cotton blend. Cotton holds its shape, doesn’t stretch much under the weight of the rolls, and stands up to bathroom humidity.
- Lavender: 160 g, about 255 m (279 yd)
- Cream: 90 g, about 145 m (159 yd)
Tools:
- 4.5 mm (US 7) crochet hook
- One 1.5 in (3.8 cm) plastic or wooden ring for covering
- One 1.25 in (3.2 cm) metal O-ring for hanging
- Tapestry needle
- Stitch markers
- Rust-proof pins
- Measuring tape
The quantities include a margin of about 15% for swatching and the many color-change tails.
Abbreviations (US Terms)
- ch – chain
- sl st – slip stitch
- sc – single crochet
- hdc – half double crochet
- dc – double crochet
- sc2tog – single crochet 2 together
- BLO – back loop only
- MR – magic ring
- sp – space
- st(s) – stitch(es)
- RS – right side
Special stitches
- Shell: 5 dc in the same stitch.
- Standing sc: With a slip knot on the hook, insert the hook in the stitch and work an sc as usual. This joins the new color without a chain.
- Reverse sc (crab stitch): Work sc from left to right (right-handed) into the next stitch to the right, which makes a twisted, cord-like edge.
Gauge and Checkpoints
- Single crochet gauge: 16 sc and 18 rows = 4 in (10.2 cm).
- Lattice gauge: One 6-stitch repeat = 1.5 in (3.8 cm) wide. Two pattern rows = 1 in (2.5 cm) tall.
Make one cup first. It works as a large gauge swatch and shows whether the cup will fit a roll.
Checkpoints:
- Cup base after Rnd 5: about 2.4 in (6.1 cm) across
- Cup base after Rnd 10: 4.75 in (12.1 cm) across
- Finished cup: 4.25 in (10.8 cm) tall
- Panel after Row 8: 9.25 in (23.5 cm) wide and 1.75 in (4.4 cm) tall
- Panel after Row 26: 10.75 in (27.3 cm) tall
- Panel after Row 34: 14.25 in (36.2 cm) tall
If your work comes out too big, go down half a millimeter in hook size. If it comes out too small, go up half a millimeter. The base diameter matters most: if it’s under 4.5 in (11.4 cm), a standard roll won’t slide in easily.
Cups (Make 2)
Base
Use lavender. Join each round with a sl st to the first sc, and start each round with ch 1, which doesn’t count as a stitch.
- Rnd 1: 6 sc in MR. (6 sts)
- Rnd 2: 2 sc in each st. (12 sts)
- Rnd 3: Sc in next st, 2 sc in next st; repeat around. (18 sts)
- Rnd 4: Sc in next 2 sts, 2 sc in next st; repeat around. (24 sts)
- Rnd 5: Sc in next 3 sts, 2 sc in next st; repeat around. (30 sts)
- Rnds 6–10: Keep adding one more sc between increases each round. Stagger the increases so the circle stays round rather than hexagonal. Rnd 6 has 36 sts, Rnd 7 has 42 sts, Rnd 8 has 48 sts, Rnd 9 has 54 sts, and Rnd 10 has 60 sts.
Wall
- Rnd 11: Sc in BLO of each st. (60 sts) This leaves a ridge that turns the wall upward.
- Rnds 12–13: Sc in each st. (60 sts) Fasten off lavender.
From here, fasten off at the end of every lattice round. Join the next color as stated.
- Rnd 14 (cream): Standing sc in any st, skip 2 sts, shell in next st, skip 2 sts, sc in next st; repeat around. Leave out the final sc and join to the first sc. (10 shells + 10 sc = 60 sts)
- Rnd 15 (lavender): Standing sc in the center dc of any shell, ch 2, dc in next sc, ch 2, sc in center dc of next shell; repeat around. Leave out the final sc and join. (10 sc + 10 dc + 40 ch = 60 sts)
- Rnd 16 (cream): Standing sc in any sc, shell in next dc, sc in next sc; repeat around, skipping all ch-2 sps. Leave out the final sc and join. (60 sts) These shells sit between the shells of Rnd 14, which creates the staggered diamonds.
- Rnd 17 (lavender): Repeat Rnd 15. (60 sts)
- Rnd 18 (cream): Repeat Rnd 16. (60 sts)
- Rnd 19 (lavender): Repeat Rnd 15. (60 sts)
- Rnd 20 (cream): Standing sc in any sc, 2 sc in next ch-2 sp, sc in next dc, 2 sc in next ch-2 sp, sc in next sc; repeat around. Leave out the final sc and join. (60 sts: 1 per st plus 2 per ch-2 sp)
- Rnd 21 (cream): Ch 1, sc in next st, skip 1 st, (hdc, dc, hdc) in next st, skip 1 st; repeat around and join. (15 scallops, 60 sts)
Fasten off and weave in the ends through the solid rounds.
Back Panel
Use lavender. Turn at the end of every row. Ch 1 at the start of an sc row doesn’t count as a stitch.
- Row 1 (RS): Ch 38, sc in 2nd ch from hook and in each ch across. (37 sts)
- Rows 2–8: Ch 1, sc in each st. (37 sts) Fasten off.
Lattice
From here, fasten off at the end of each row and join the new color at the start of the next one. The border will cover the tails.
- Row 9 (cream, Row A): Standing sc in first st, skip 2 sts, shell in next st, skip 2 sts, sc in next st; repeat 6 times. (6 shells + 7 sc = 37 sts)
- Row 10 (lavender, Row B): Join in first sc, ch 5 (counts as dc and ch 2), sc in center dc of next shell, ch 2, dc in next sc, ch 2; repeat across, ending with dc in last sc. Leave out the final ch 2. (37 sts)
- Row 11 (cream, Row C): Join in first dc, ch 3 (counts as dc), 2 dc in same st, sc in next sc, shell in next dc; repeat 5 times, sc in next sc, 3 dc in 3rd ch of turning ch. Skip all ch-2 sps. (3 + 30 + 1 + 3 = 37 sts)
- Row 12 (lavender, Row D): Join in first dc, ch 1, sc in same st, ch 2, dc in next sc, ch 2, sc in center dc of next shell, ch 2, dc in next sc, ch 2; repeat 5 times, sc in last dc. (37 sts)
- Row 13 (cream, Row A): Standing sc in first sc, shell in next dc, sc in next sc; repeat 6 times. (37 sts)
- Rows 14–26: Continue the sequence B, C, D, A, ending with Row 26 as a Row B. (37 sts)
Arch
Each pair of arch rows drops half a repeat (3 sts) from each edge. That’s 6 sts per pair.
- Row 27 (cream): Standing sc in first sc, skipping the edge dc and ch-2 sp, shell in next dc, sc in next sc; repeat 5 times. Leave the last ch-2 sp and dc unworked. (31 sts)
- Row 28 (lavender): Join in first sc, ch 3 (counts as dc), ch 2, sc in center dc of next shell, ch 2, dc in next sc; repeat 5 times. (31 sts)
- Row 29 (cream): Work as for Row 27, but repeat 4 times. (25 sts)
- Row 30 (lavender): Work as for Row 28, but repeat 4 times. (25 sts)
- Row 31 (cream): Work as for Row 27, but repeat 3 times. (19 sts)
- Row 32 (lavender): Work as for Row 28, but repeat 3 times. (19 sts) Don’t fasten off.
- Row 33: Ch 1, sc in each dc, sc, and ch. (19 sts)
- Row 34: Ch 1, sc2tog, sc in next 15 sts, sc2tog. (17 sts) Fasten off.
The panel should now measure 9.25 in × 14.25 in (23.5 × 36.2 cm), with a top that’s 4.25 in (10.8 cm) wide.
Hanger
Covered ring: Join lavender to the 1.5 in (3.8 cm) ring and work 30 sc tightly around it. Join, fasten off, and turn the sc edge so it faces outward. Slip the 1.25 in (3.2 cm) metal O-ring through the top of the covered ring.
Tab: With cream, ch 6. Sc in 2nd ch from hook and across. (5 sts) Ch 1 and turn, then work 9 more rows of sc, for 10 rows total. The tab measures 1.25 in × 2.25 in (3.2 × 5.7 cm). Fasten off and leave a 12 in (30.5 cm) tail.
Make All Pieces
| Piece | Qty | Colors |
|---|---|---|
| Back panel | 1 | Lavender + cream |
| Cup | 2 | Lavender + cream |
| Covered ring | 1 | Lavender |
| Tab | 1 | Cream |
Layout, front view:
        [O-ring]
      [covered ring]
          [tab]
   /‾‾‾‾‾‾‾‾‾‾‾‾‾‾‾‾‾‾‾‾\
  |    lattice panel     |
  |                      |
  |  [Cup 1]    [Cup 2]  |
  |__solid band__________|
Border
Border gauge: 4 sc per 1 in (2.5 cm). The 2-round border adds 0.375 in (1.0 cm) to each edge.
Rnd 1 (lavender): With the RS facing, join at the bottom-right corner and work sc evenly around:
- Bottom: 3 sc in first foundation st, sc in next 35 sts, 3 sc in last st. (41 sts, corners included)
- Left side, Rows 1–26: 1 sc per sc row-end (8) and 2 sc per lattice row-end (36). (44 sts)
- Left arch, Rows 27–34: 2 sc per lattice row-end (12), 1 sc on each 3-st ledge (3), and 1 sc per sc row-end (2). (17 sts)
- Top: Sc in each st. (17 sts)
- Right arch: Work as for the left arch. (17 sts)
- Right side: Work as for the left side. (44 sts)
Join. (180 sts)
Rnd 2: Ch 1, reverse sc in each st around and join. (180 sts) Fasten off.
Why the math works: The straight sides are 10.75 in (27.3 cm) tall, and 44 sc at 4 per inch is 11 in (27.9 cm). The extra quarter inch gives slight ease, so the edge lies flat. The bottom has 37 sts at 4 per inch, which is 9.25 in (23.5 cm), plus 2 extra sts at each corner so the corners turn cleanly. Each arch edge is about 4.25 in (10.8 cm) on the diagonal, which matches 17 sc. The panel ends up 9.25 + 0.75 = 10 in (25.4 cm) wide and 14.25 + 0.75 = 15 in (38.1 cm) tall.
Joining
Sew everything with lavender, using whipstitch through both layers. Keep the tension firm but not puckered. The seam should be as long as the stitches it joins.
- Tab: Fold the tab around the bottom of the covered ring. Place one end on the front of the panel’s top center and the other on the back. Sew through all layers.
- Cup positions: Count across Row 2 of the panel. Mark st 9 as the center of Cup 1 and st 29 as the center of Cup 2.
- Cup bottoms: Mark 15 sts at the back of each cup’s Rnd 11 ridge. Line each cup’s bottom up with the panel’s bottom border. Sew the 15 cup sts to 15 panel sts, one to one: sts 2–16 for Cup 1 and sts 22–36 for Cup 2.
- Cup rims: Sew the same 15 back sts of each cup’s Rnd 20 to the panel row they lie against, which is about Row 13. Work stitch for stitch here too.
- Center tack: Tack the two cups together with 3–4 stitches where their rims nearly touch.
Size checkpoint: The cups should sit just inside the panel’s side edges. The holder should measure 10 in (25.4 cm) wide, and the cups should stand out 4.75 in (12.1 cm) from the panel.
Final Blocking
- Wet the holder thoroughly and gently press out the water. Don’t wring it.
- Lay it flat and pin the panel to 10 in × 15 in (25.4 × 38.1 cm).
- Open each lattice diamond with your fingers.
- Stuff each cup with a toilet roll wrapped in a plastic bag so it dries round.
- Let it dry completely, which takes 24–48 hours.
Final Quality-Control Checklist
- Each cup base is 60 sts and 4.75 in (12.1 cm) across.
- Each cup has 15 even scallops.
- All panel lattice rows have 37 sts.
- The arch steps go 37, 31, 25, 19, then 17.
- The border has 180 sts.
- All ends are woven in.
- The cups are level, and the hanger is centered.
Troubleshooting
- The base ruffles: Go down a hook size, or check that each round adds exactly 6 sts.
- The base cups upward: You’ve missed increases. Recount against the 6-per-round sequence.
- The shells lean: Make sure you skip exactly 2 sts on each side of every shell.
- The panel edges wave: Work fewer border sc along the lattice row-ends.
- The cup is too tight for a roll: Rework the cup with a 5.0 mm (US 8) hook.
Care
Hand wash in cool water and dry flat. Reshape the cups around a roll while damp.
Final Notes
The measurements build on each other. The 60-stitch base gives a 4.75 in (12.1 cm) cup. The 37-stitch panel measures 9.25 in × 14.25 in (23.5 × 36.2 cm), and the 180-stitch border brings it to 10 in × 15 in (25.4 × 38.1 cm). Two cups fit side by side across that width. Check each step as you go, and the finished holder will hang straight.
Happy crocheting!