

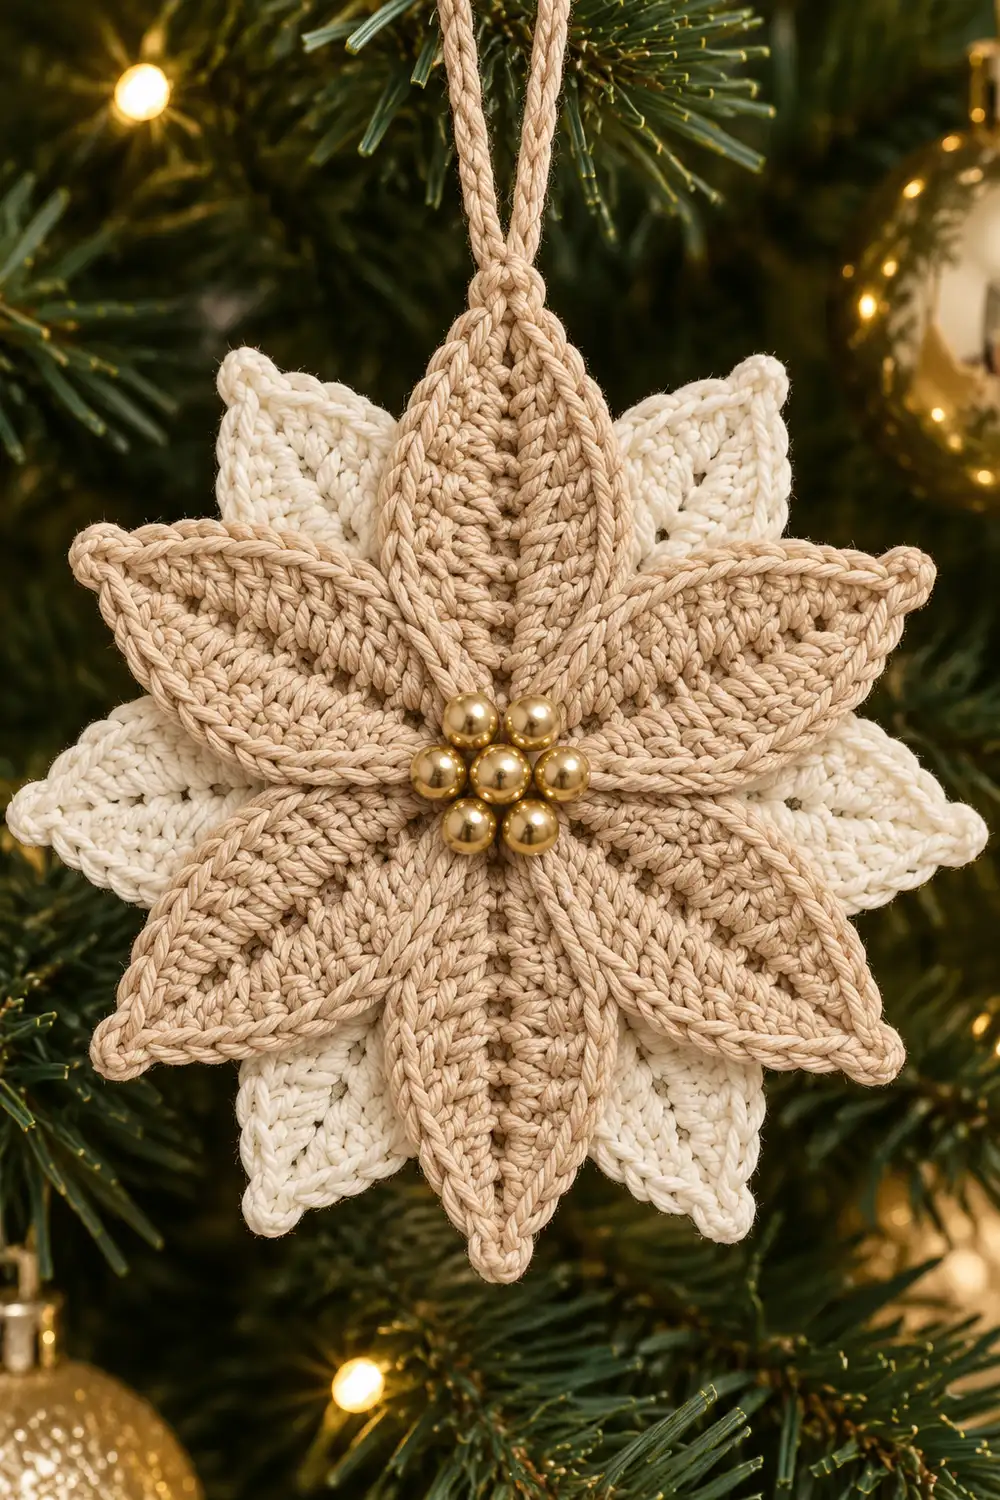
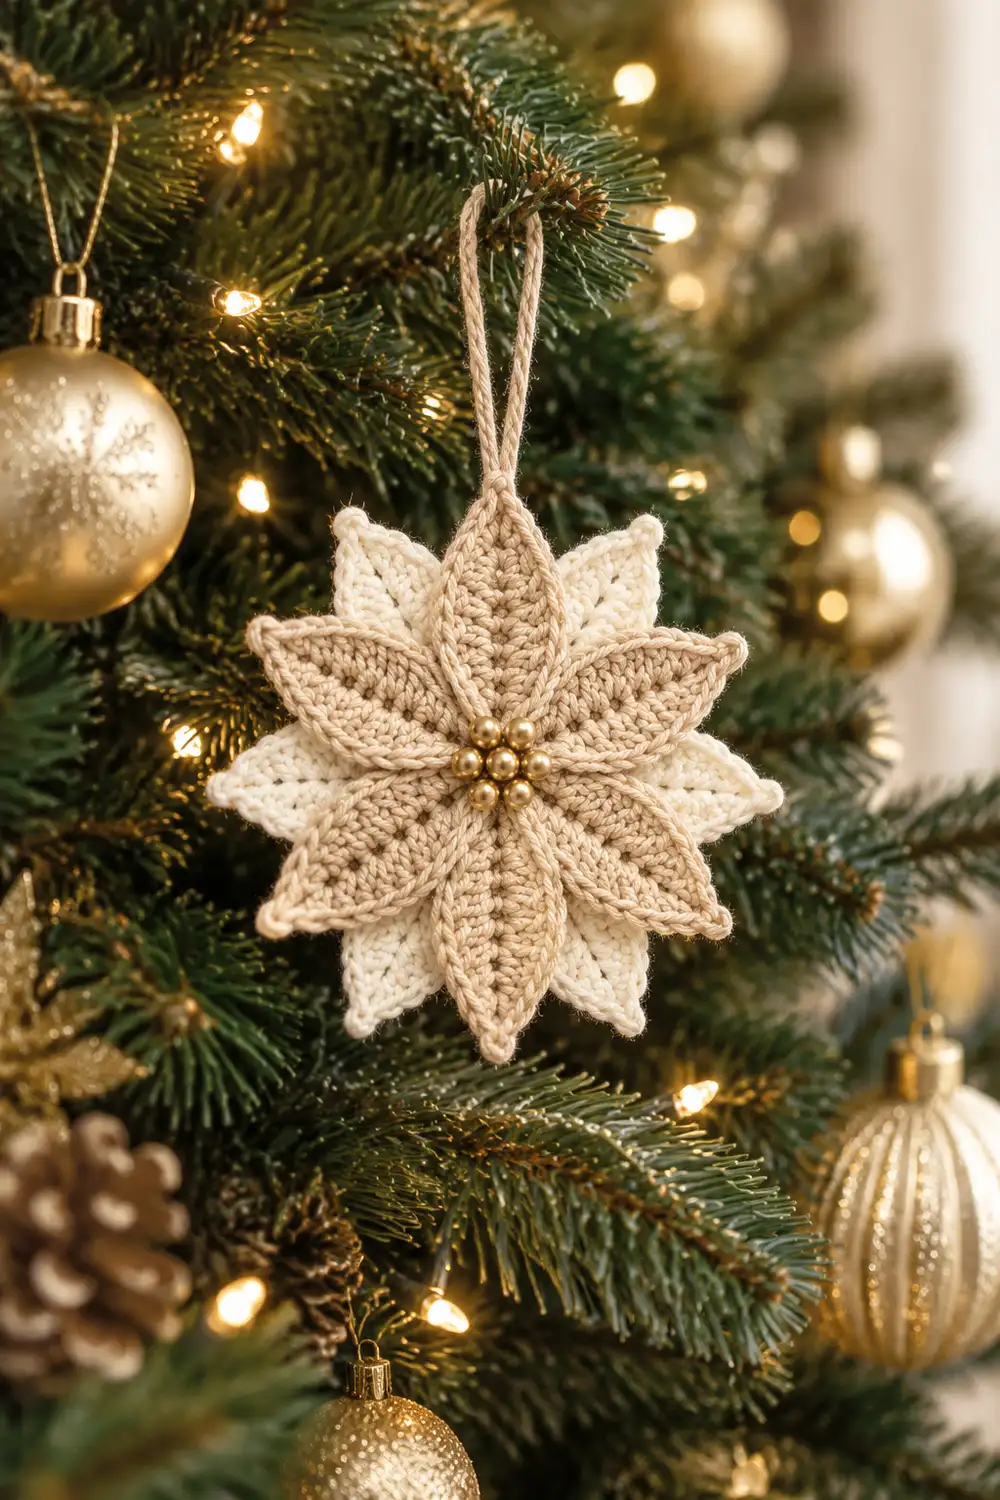
This six-pointed poinsettia star is a small, elegant ornament for a warm-toned Christmas tree. It has six long, pointed petals in cream or off-white yarn around a cluster of small gold beads. The look is soft and classic, and it sits well beside gold and cream baubles and warm white lights.
Each petal is worked in back-loop single crochet, which creates raised horizontal ridges. Those ridges give the flat face of the star its texture, depth, and slight shadowing. A plain single crochet border with a sharp chain point at each tip keeps the outline crisp.
The pattern uses US crochet terms. The finished ornament measures 4.5 in (11.4 cm) from petal tip to opposite petal tip, within the 4-5 in (10.2-12.7 cm) range of the original.
The star is made in one piece. You work a small round center, then build six petals in rows straight off the center. A border round goes around the whole outline. Finally you add a cream or tan yarn hanging loop and sew the gold beads to the center.
Finished Size and Construction
- Finished size: 4.5 in (11.4 cm) tip to opposite tip
- Skill level: Easy+ (rounds, rows, back-loop work, simple decreases)
- Terminology: US crochet terms
- Yarn weight: DK / light (3), cotton or cotton blend
- Hook: 3.5 mm (E-4)
- Number of pieces: 1
- Layout: six petals arranged radially around a round center
- Center size (after Rnd 2): 1.25 in (3.2 cm) diameter
- Petal size: 1.5 in (3.8 cm) long, 1.2 in (3.0 cm) at the widest point
- Size before border: 4.25 in (10.8 cm) tip to tip
- Border depth: 0.125 in (0.3 cm) added at each tip
Materials
Yarn advice: Choose a smooth, tightly plied DK cotton or cotton blend. Cotton shows the back-loop ridges clearly and holds a sharp point after blocking. Fuzzy or very soft acrylic will blur the texture.
- Cream or off-white (main star): 12 g, about 28 m
- Cream or tan (hanging loop, optional contrast): 2 g, about 5 m. Use the main cream if you prefer one color.
These quantities include a margin of about 30% beyond what one star actually uses.
Tools:
- 3.5 mm (E-4) crochet hook
- Tapestry needle
- 7 gold beads, 6 mm, or one 0.5 in (1.3 cm) gold metallic button
- Beading needle and gold or cream sewing thread
- 1 stitch marker
- Scissors
- Blocking mat, rust-proof pins, and a spray bottle
- Optional: fabric stiffener or starch
Abbreviations (US Terms)
- ch – chain
- sl st – slip stitch
- sc – single crochet
- dc – double crochet
- BLO – back loop only
- sc2tog – single crochet 2 together (decrease)
- st(s) – stitch(es)
- sp – space
- RS / WS – right side / wrong side
- Rnd – round
Special stitch – Border valley sc2tog: Insert the hook into the row-1 end of the current petal and pull up a loop. Insert the hook into the row-1 end of the next petal and pull up a loop. Yarn over and pull through all 3 loops. This pulls the gap between two petals into a neat V.
Gauge and Checkpoints
Gauge: 5 sc and 6 rows = 1 in (2.5 cm) in BLO sc, worked flat.
Gauge swatch: 10 sc × 12 rows = 2 in (5.1 cm) square.
Because this is a single ornament, the star itself works as your test piece. Make the center and one petal, then measure before you continue.
Checkpoints:
- After Rnd 1: about 0.75 in (1.9 cm) diameter
- After Rnd 2: 1.25 in (3.2 cm) diameter
- After Petal 1: 1.5 in (3.8 cm) from the base to the tip
- After all six petals: 4.25 in (10.8 cm) tip to opposite tip
- After the border: 4.5 in (11.4 cm) tip to opposite tip
If your piece is too big: switch to a 3.25 mm hook. If it is still large, try a 3.0 mm hook.
If your piece is too small: switch to a 3.75 mm hook.
If the center cups: go up 0.25 mm for Rnd 1 only.
If the center ruffles: pull the magic ring tighter and work Rnd 2 more snugly.
Center
Rnd 1 (RS): Make a magic ring. Ch 3 (counts as dc), work 11 dc into the ring. Sl st to the top of the beginning ch-3. Pull the ring fully closed. (12 dc)
Rnd 2: Ch 1. Work 2 sc in each st around. Sl st to the first sc. (24 sc)
Rnd 2 is a growth round. Each of the 12 dc receives 2 sc, so the round’s own total is 24 sc.
Checkpoint: the center should be 1.25 in (3.2 cm) across and lie flat.
The 24 sc divide evenly into 6 petal bases of 4 sts each:
- Petal 1: sts 1-4
- Petal 2: sts 5-8
- Petal 3: sts 9-12
- Petal 4: sts 13-16
- Petal 5: sts 17-20
- Petal 6: sts 21-24
Place a marker in st 1.
Petals
The petals are worked in rows directly off Rnd 2, without fastening off between them. Turn at the end of every row. The ch 1 at the start of each row does not count as a stitch.
From Row 2 onward, work all stitches in BLO. This forms ridges on both faces of the petal.
Petal 1:
Row 1 (RS): Ch 1, sc in each of the next 4 sts of Rnd 2, turn. (4)
Row 2: Ch 1, BLO: 2 sc in the first st, sc in the next 2 sts, 2 sc in the last st, turn. (6)
Rows 3-5: Ch 1, BLO sc in each st across, turn. (6 each row)
Row 6: Ch 1, BLO: sc2tog, sc in the next 2 sts, sc2tog, turn. (4)
Row 7: Ch 1, BLO sc in each st across, turn. (4)
Row 8: Ch 1, BLO: sc2tog twice, turn. (2)
Row 9: Ch 1, BLO sc2tog. (1) This single stitch is the petal tip.
Checkpoint: Petal 1 should measure 1.5 in (3.8 cm) from base to tip and 1.2 in (3.0 cm) at Rows 2-5. Nine rows at 6 rows per inch gives 1.5 in, which is why the row count matters.
Travel to the next petal: Do not fasten off. Work down the petal edge that faces the unworked stitches of Rnd 2. Sl st once into each row end of Rows 8 through 1. That is 8 sl st, and they bring you back to the base. Keep these sl sts loose so the edge does not pucker.
Petals 2-6: Repeat Rows 1-9, beginning Row 1 in the next 4 unworked sts of Rnd 2. After Petal 6, travel down its edge with 8 sl st. You will end in the valley between Petal 6 and Petal 1.
Checkpoint: the star should measure 4.25 in (10.8 cm) from tip to opposite tip. That is the 1.25 in (3.2 cm) center plus two 1.5 in (3.8 cm) petals.
Border
Border gauge: 1 sc per row end along the petal edges. This matches the petal gauge of 6 rows per inch, so the edge stays flat without stretching or rippling.
Where an edge has travel sl sts, insert the hook under both the sl st and the row end together.
Border Rnd: Ch 1. Work a valley sc2tog across the row-1 end of Petal 6 and the row-1 end of Petal 1. Then, for each petal:
- 7 sc up the first edge, one in each row end of Rows 2-8
- (sc, ch 2, sc) into the single Row 9 tip st
- 7 sc down the second edge, one in each row end of Rows 8-2
- Valley sc2tog across the row-1 end of this petal and the row-1 end of the next petal
Work this sequence around all six petals. After the second edge of Petal 6, skip the last valley sc2tog, because you already made it at the start. Sl st to the first sc2tog.
Per petal: 7 + 2 + 7 = 16 sc, plus 1 ch-2 tip sp, plus 1 valley sc2tog = 17 sts and 1 ch-2 sp.
Total: 6 × 17 = 102 sts and 6 ch-2 sps.
Why the math works:
- Each petal has 9 rows. Rows 2-8 provide 7 row ends per side.
- Row 9 is the single tip stitch that takes the (sc, ch 2, sc) point.
- Row 1 on each side is shared with the neighboring petal through the valley sc2tog. Every row end is used exactly once, and nothing is counted twice.
- The ch-2 adds about 0.125 in (0.3 cm) at each tip. That brings 4.25 in (10.8 cm) to 4.5 in (11.4 cm).
Fasten off and weave in the tail.
Hanging loop: Join the cream or tan yarn in the ch-2 sp of the top petal. Ch 30, then sl st back into the same ch-2 sp. Fasten off. The loop hangs about 2.5 in (6.4 cm) when folded. Knot the two tails together at the back, then weave them in.
Center beads: Using the beading needle and thread, sew 1 bead in the center of the magic ring. Sew the other 6 beads in a circle around it on Rnd 1. Alternatively, sew on one 0.5 in (1.3 cm) gold button. Knot the thread securely on the back.
Final Blocking
- Mist the star evenly with water until it is damp, not dripping. Use stiffener at this stage if you want a firmer ornament.
- Lay it RS up on the blocking mat.
- Pin the center flat so it measures 1.25 in (3.2 cm).
- Pin each ch-2 tip outward, opposite tips 4.5 in (11.4 cm) apart.
- Check that the petals sit 60 degrees apart. Use a printed six-spoke guide or measure equal gaps between tips.
- Smooth each petal so the BLO ridges run straight across. Pin the valleys into clean V shapes.
- Let it dry completely, about 6-12 hours.
- Unpin and re-measure.
Final Quality-Control Checklist
- [ ] Rnd 1 = 12 dc, Rnd 2 = 24 sc
- [ ] Six petals, each worked over 4 base sts with nothing skipped
- [ ] Each petal follows 4, 6, 6, 6, 6, 4, 4, 2, 1 sts by row
- [ ] Border = 102 sts plus 6 ch-2 sps
- [ ] Finished size is 4.5 in (11.4 cm) tip to tip
- [ ] Ridges are visible on every petal
- [ ] Hanging loop is centered on the top petal tip
- [ ] Beads are tight and centered
- [ ] All tails are woven in invisibly
Troubleshooting
The center cups or domes: Rnd 1 is too tight. Redo it with a slightly larger hook or looser dc.
The petals curl: Your BLO rows are tight. Relax your tension, then block firmly with stiffener.
The petal tips are blunt: Make sure Row 9 is a true sc2tog. Pull the ch-2 tip out hard when blocking.
The edges ripple: You likely worked more than 1 sc per row end. Recount to 7 per edge.
The valleys gape: A valley sc2tog was missed or replaced with a plain sc.
The star is uneven: Check that each petal used exactly 4 base sts. The marker at st 1 helps here.
The loop twists: Chain more loosely, or block the loop flat alongside the star.
Care
Hand wash in cool water with mild soap, press out the water gently, and re-block flat to dry. Store the ornament flat and away from humidity so the points stay crisp.
Final Notes
The measurements build in a clear chain:
- Center: 0.75 in (1.9 cm) after Rnd 1 and 1.25 in (3.2 cm) after Rnd 2
- Petals: 1.5 in (3.8 cm) each
- Before border: 4.25 in (10.8 cm) tip to tip
- After border: 4.5 in (11.4 cm), from a 0.125 in (0.3 cm) border at each tip
If your gauge matches at the first checkpoint, every later number follows.
Optional: you can make several stars and string them as a garland, but the pattern above is for one ornament.
Happy crocheting!