

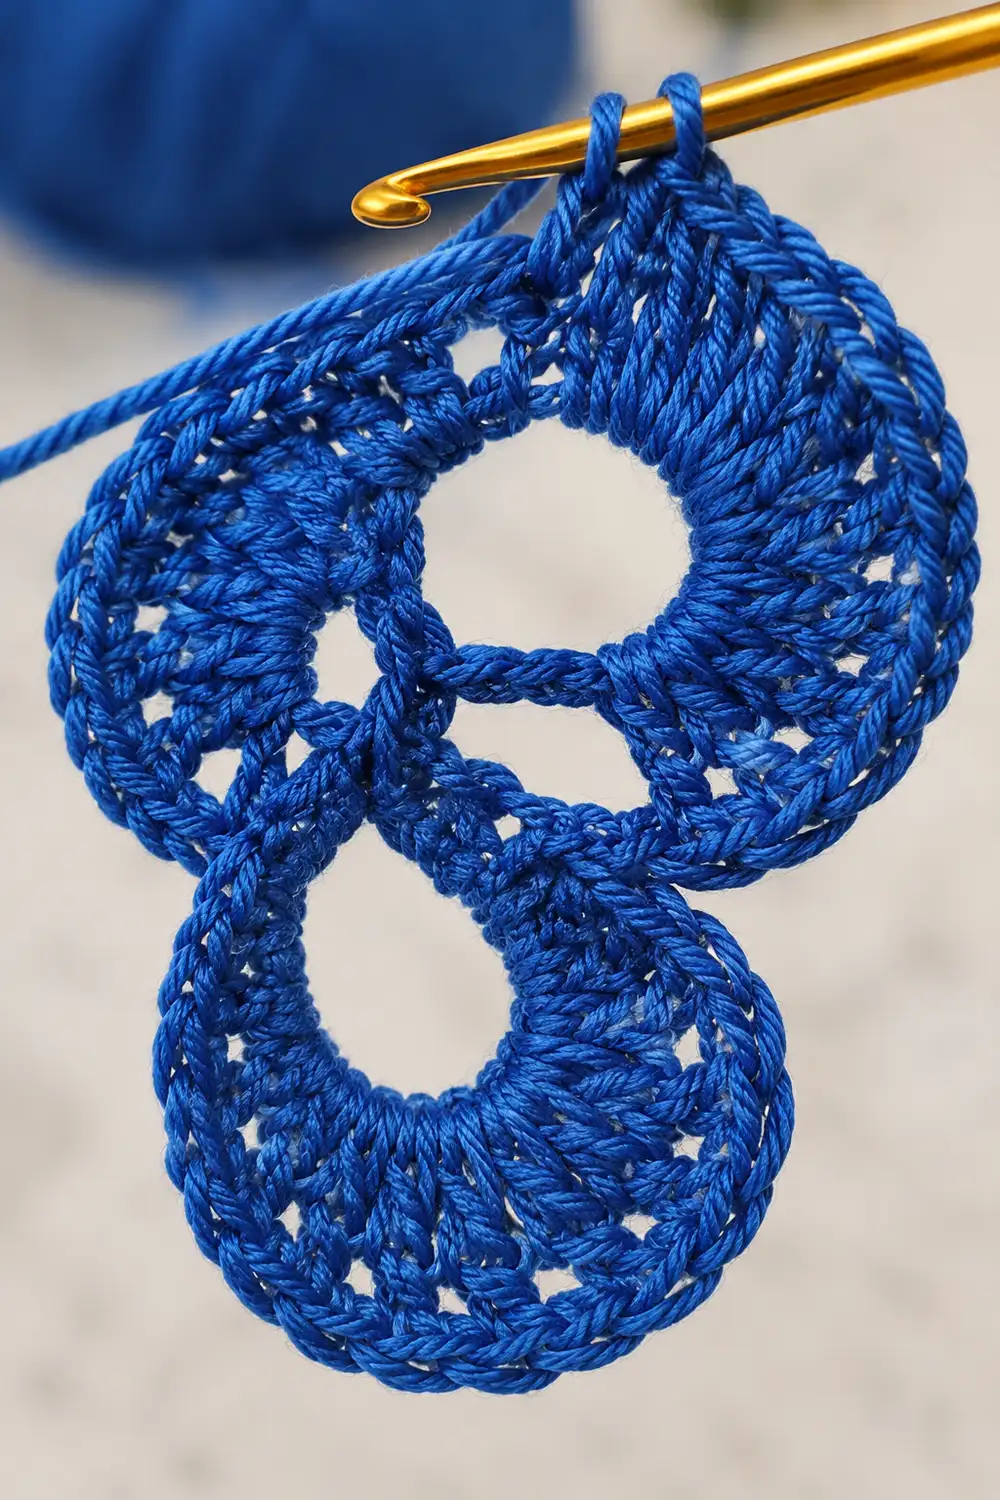
The Royal Twin Loop Motif is a small openwork piece made of two rounded loops joined side by side. Each loop has an open center ring, a round of eyelets, and a softly scalloped edge, so it reads as lace even at this tiny size.
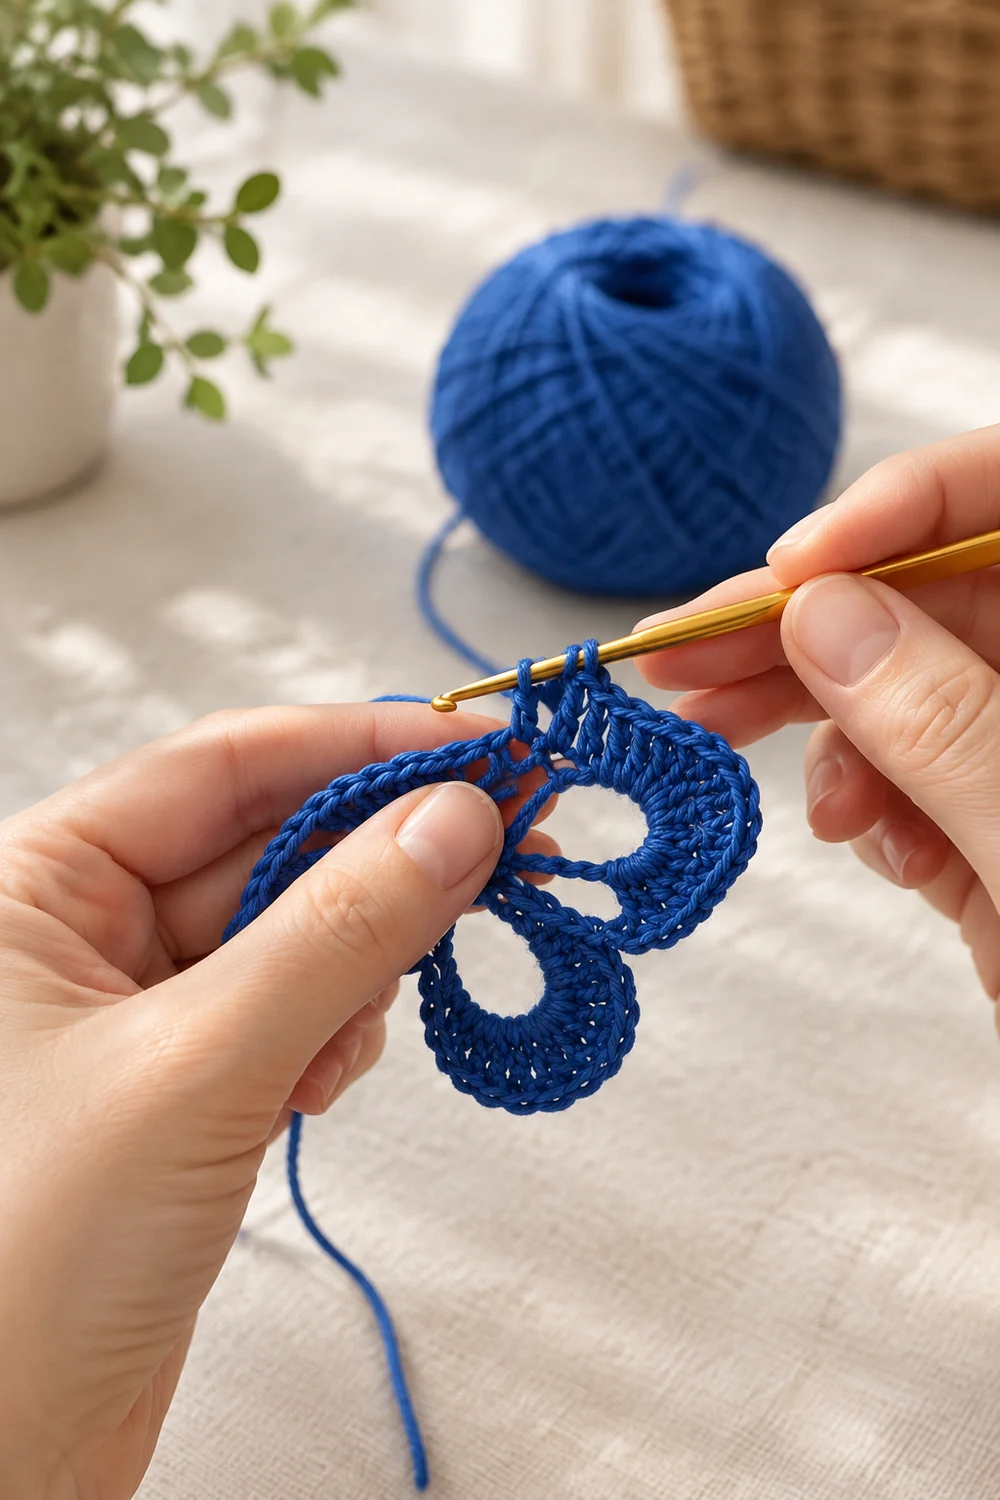
The sample is worked in a single solid royal blue. The style is classic and tidy: defined stitches, crisp negative space, and no color changes. The photo shows the motif in progress on the hook. This pattern takes you from the first chain to the blocked, finished motif.
This pattern uses US crochet terms. The finished motif measures 3 in x 1.75 in (7.6 cm x 4.4 cm).
Construction overview: you make Loop A in two rounds, then chain directly into Loop B and work its two rounds, joining it to Loop A as you go. A scalloped shell edging then travels once around the outside of both loops. The result is one continuous piece with no sewing.
Finished Size and Construction
- Finished size: 3 in x 1.75 in (7.6 cm x 4.4 cm)
- Skill level: Easy+ (comfortable with rings, dc, and slip-stitch joins)
- Terminology: US crochet terms
- Yarn weight: Sport / fine (#2), mercerized cotton
- Hook: 2.75 mm (US C-2)
- Number of pieces: 1 (worked continuously)
- Layout: Two loops side by side, touching at a short center join
- Single loop size before edging: 1.25 in (3.2 cm) diameter
- Size before edging: 2.5 in x 1.25 in (6.4 cm x 3.2 cm)
- Edging depth: 0.25 in (0.6 cm) on every outer side
Materials
Choose a smooth, tightly plied sport-weight cotton. Mercerized cotton gives the clean stitch definition and slight sheen you see in the photo, and it holds the open centers well after blocking. Avoid fuzzy or loosely spun yarns; they blur the eyelets.
Yarn
– Royal blue: 5 g, about 15 m (16 yd)
Tools
– 2.75 mm (US C-2) crochet hook
– Tapestry needle
– Scissors
– Ruler or tape measure
– Rustproof pins and a blocking mat or folded towel
– Spray bottle with clean water
The quantity includes a generous margin for a gauge swatch, tails, and one frog-and-redo. The motif itself uses about 3 g.
Abbreviations (US Terms)
- ch – chain
- sl st – slip stitch
- sc – single crochet
- hdc – half double crochet
- dc – double crochet
- sp – space
- st(s) – stitch(es)
- [ ] – repeat the instructions inside the brackets as directed
Special stitch
– Shell: 3 dc worked into the same ch-1 space.
Gauge and Checkpoints
There is no traditional swatch. Instead, make Loop A first and measure it. It works as your gauge test.
Checkpoints for one loop:
– Starting ring (ch 10, joined): about 1.25 in (3.2 cm) of chain before joining
– After Round 1: 0.8 in (2.0 cm) across, with a center hole of about 0.4 in (1.0 cm)
– After Round 2: 1.25 in (3.2 cm) across
Checkpoints for the whole motif:
– After Loop B is joined: 2.5 in x 1.25 in (6.4 cm x 3.2 cm)
– After the edging and blocking: 3 in x 1.75 in (7.6 cm x 4.4 cm)
If Loop A is too big (over 1.4 in / 3.6 cm after Round 2), switch to a 2.5 mm hook and remake it.
If Loop A is too small (under 1.1 in / 2.8 cm after Round 2), switch to a 3 mm hook and remake it.
Lay the loop flat without stretching it, and measure straight across through the center hole. Measure before blocking. Blocking will relax it only slightly.
Loop A
Foundation: Ch 10, sl st in the first ch made to form a ring. Do not twist the chain.
Round 1: Ch 2 (does not count as a stitch), work 20 hdc into the ring, sl st in the first hdc to join. (20 hdc)
Spread the hdc evenly around the ring as you work. Push stitches back along the chain so the last few don’t bunch. The center hole should stay open, about 0.4 in (1.0 cm).
Checkpoint: 0.8 in (2.0 cm) across.
Round 2 (eyelet round): Ch 4 (counts as first dc and ch 1), [dc in next hdc, ch 1] 19 times, sl st in the 3rd ch of the beginning ch-4 to join. (20 dc, 20 ch-1 sps; 40 sts total)
This round works 1 dc into each hdc, with a ch 1 between each pair. The ch-1 spaces become the eyelets that open the lacework.
Number the spaces mentally: the space formed by the beginning ch-4 is sp 1. Then continue around in working direction to sp 20, which is the last ch-1 before your joining sl st. You need sp 1 and sp 20 for the join.
Checkpoint: 1.25 in (3.2 cm) across. Do not fasten off.
Loop B (Joined As You Go)
Loop B is chained straight off Loop A, so its ring sits right beside Loop A’s join point. That keeps the motif one continuous piece.
Foundation: Ch 10, sl st in the first of these 10 ch to form a ring. Lay the new ring flat beside Loop A so the two loops sit side by side and nothing is twisted.
Round 1: Ch 2 (does not count), work 20 hdc into the ring, sl st in the first hdc to join. (20 hdc)
Checkpoint: 0.8 in (2.0 cm) across, same as Loop A.
Round 2 (eyelet round with join): This round matches Loop A’s Round 2. The only difference is that the first and last ch-1 are replaced by sl sts into Loop A.
- Ch 3 (counts as first dc).
- Sl st into sp 20 of Loop A. This replaces Loop B’s first ch 1 and creates Loop B’s sp 1.
- [Dc in next hdc, ch 1] 18 times. This creates Loop B’s sp 2 through sp 19.
- Dc in the last hdc.
- Sl st into sp 1 of Loop A. This replaces the final ch 1 and creates Loop B’s sp 20.
- Sl st in the top of the beginning ch-3 to join.
(20 dc and 20 sps, of which 18 are open ch-1 sps and 2 are joining sl sts)
Why the pairing works: Loop A’s sp 20 and sp 1 sit on either side of the point where Loop B’s chain leaves Loop A. Loop B’s sp 1 and sp 20 sit on either side of its own ring base. Joining them crosswise (B1 to A20, B20 to A1) locks the two loops together at a short, symmetric waist.
Each loop now has 18 free ch-1 spaces on its outer edge: sp 2 through sp 19.
Checkpoint: 2.5 in x 1.25 in (6.4 cm x 3.2 cm). Both loops should lie flat and touch only at the join, with no pulling or overlap. Do not fasten off.
Edging (Scalloped Shell Border)
The edging is one round of alternating sc and shells, worked only into the free outer spaces. The two joining points become the waists of the figure-eight.
Edging gauge: each shell stands about 0.25 in (0.6 cm) tall from the eyelet round. Each sc + shell repeat covers 2 eyelet spaces.
Set-up: Sl st in the next dc, then sl st into sp 2 of Loop B.
Edging Round:
Around Loop B:
– Ch 1 (does not count), sc in sp 2.
– [Shell in next sp, sc in next sp] 8 times. This works sp 3 through sp 18.
– Shell in sp 19.
Loop B count: 9 sc + 9 shells (27 dc) = 36 sts.
Bottom waist:
– Sl st into the joining sl st between Loop B sp 20 and Loop A sp 1. (1 sl st)
Around Loop A:
– Sc in sp 2 of Loop A.
– [Shell in next sp, sc in next sp] 8 times. This works sp 3 through sp 18.
– Shell in sp 19.
Loop A count: 9 sc + 9 shells (27 dc) = 36 sts.
Top waist and close:
– Sl st into the joining sl st between Loop A sp 20 and Loop B sp 1. (1 sl st)
– Sl st in the first sc of the round to join.
Fasten off, leaving a 6 in (15.2 cm) tail.
Total edging: 36 sts (Loop B) + 36 sts (Loop A) = 72 edging sts, plus 2 waist sl sts.
Why the math works:
– Each loop has 20 spaces. Two spaces per loop are used by the join, which leaves 20 − 2 = 18 free spaces.
– One repeat (sc + shell) uses exactly 2 spaces, so 18 ÷ 2 = 9 repeats per loop. There is no half repeat and no leftover space.
– Every shell lands on an odd-numbered space (3, 5, 7 … 19), and every sc on an even one (2, 4 … 18). That spaces the scallops evenly around each loop.
– The waist sl sts sit in existing joining stitches. They add no new spaces and do not change either loop’s 36-st count. They simply pull the edge inward so the two-loop shape stays defined.
Adding 0.25 in (0.6 cm) of edging on every outer side takes the motif from 2.5 in x 1.25 in (6.4 cm x 3.2 cm) to 3 in x 1.75 in (7.6 cm x 4.4 cm).
Final Blocking
- Weave in both tails along the back of the stitches. Follow the dc posts, not the open eyelets, so the ends stay hidden.
- Mist the motif lightly with clean water until it is damp, not soaked.
- Lay it right side up on a blocking mat or folded towel.
- Shape the overall outline to 3 in x 1.75 in (7.6 cm x 4.4 cm).
- Pin each center hole open at about 0.4 in (1.0 cm). Use 3 or 4 pins around the inside edge of each ring.
- Pin the tip of every shell outward so the scallops are even. There are 9 shells per loop and 18 in total.
- Press the two waists gently inward with your fingertips so the figure-eight shape is clear.
- Let the motif dry completely before unpinning, usually 2 to 4 hours.
Final Quality-Control Checklist
- Motif measures 3 in x 1.75 in (7.6 cm x 4.4 cm).
- Each loop measures 1.75 in (4.4 cm) across, including the edging.
- Both center holes are open, round, and similar in size.
- Each loop has 20 dc in the eyelet round.
- Each loop has 18 open eyelets on the outside, plus 2 joined at the waist.
- Each loop has 9 sc and 9 shells in the edging.
- Shells alternate cleanly with sc, with no doubled shells and no skipped spaces.
- Both waists are firmly joined, with no gaps.
- The motif lies flat, without cupping or ruffling.
- Tails are woven in securely and do not show on the front.
Troubleshooting
Center hole closed up: You likely worked Round 1 into the chain stitches instead of around the ring. Remake it and work all 20 hdc into the ring opening.
Loop cups like a bowl: Your tension is too tight on Round 2, or the ch 1s are too short. Loosen the ch 1s slightly, or go up 0.25 mm.
Loop ruffles: The ch 1s are too loose, or you added an extra dc. Recount to 20 dc and tighten the chains.
Loop B twisted: The 10-ch ring was twisted before joining. Undo back to the ring, lay it flat beside Loop A, and rejoin.
Gap at the waist: One of the joining sl sts went into a dc instead of a ch-1 space. Rework it into the correct space (A20 or A1).
Edging count is off: Count the free spaces. There should be 18 per loop. If you have 19, a joined space was edged by mistake.
Shells flare or curl: Block firmly. If they still curl, try 2 dc per shell instead of 3, and use the same change on both loops.
Motif too large overall: Remake it with a 2.5 mm hook. All stitch counts stay the same.
Care
Hand wash in cool water with mild soap. Press out the water in a towel, then reshape and pin flat to dry as described in Final Blocking.
Final Notes
The measurement chain is short and easy to check at each stage:
| Stage | Measurement |
|---|---|
| Starting ring | 10 ch, about 1.25 in (3.2 cm) before joining |
| After Round 1 (each loop) | 0.8 in (2.0 cm) |
| After Round 2 (each loop) | 1.25 in (3.2 cm) |
| Two loops joined | 2.5 in x 1.25 in (6.4 cm x 3.2 cm) |
| After edging and blocking | 3 in x 1.75 in (7.6 cm x 4.4 cm) |
If Loop A hits its checkpoint, every count after that follows. That means 20 eyelets per loop, 18 free after joining, and 9 even scallops per loop.
Optional: you can repeat the Loop B steps to chain more loops in a line, but the pattern above is written for the two-loop motif only.
Happy crocheting!