

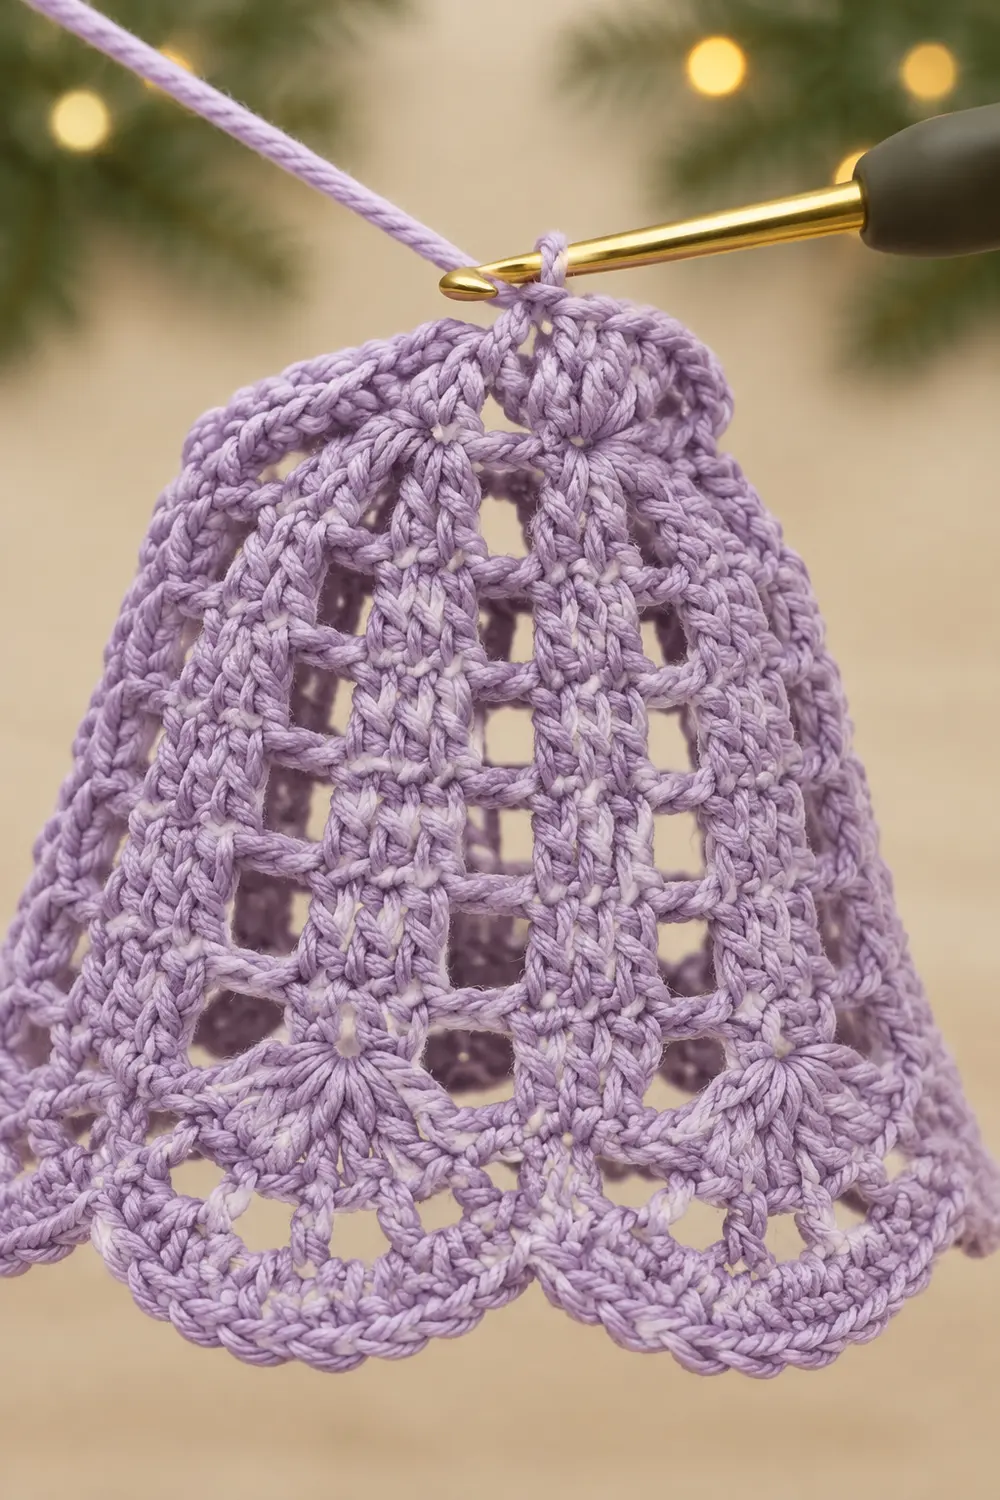
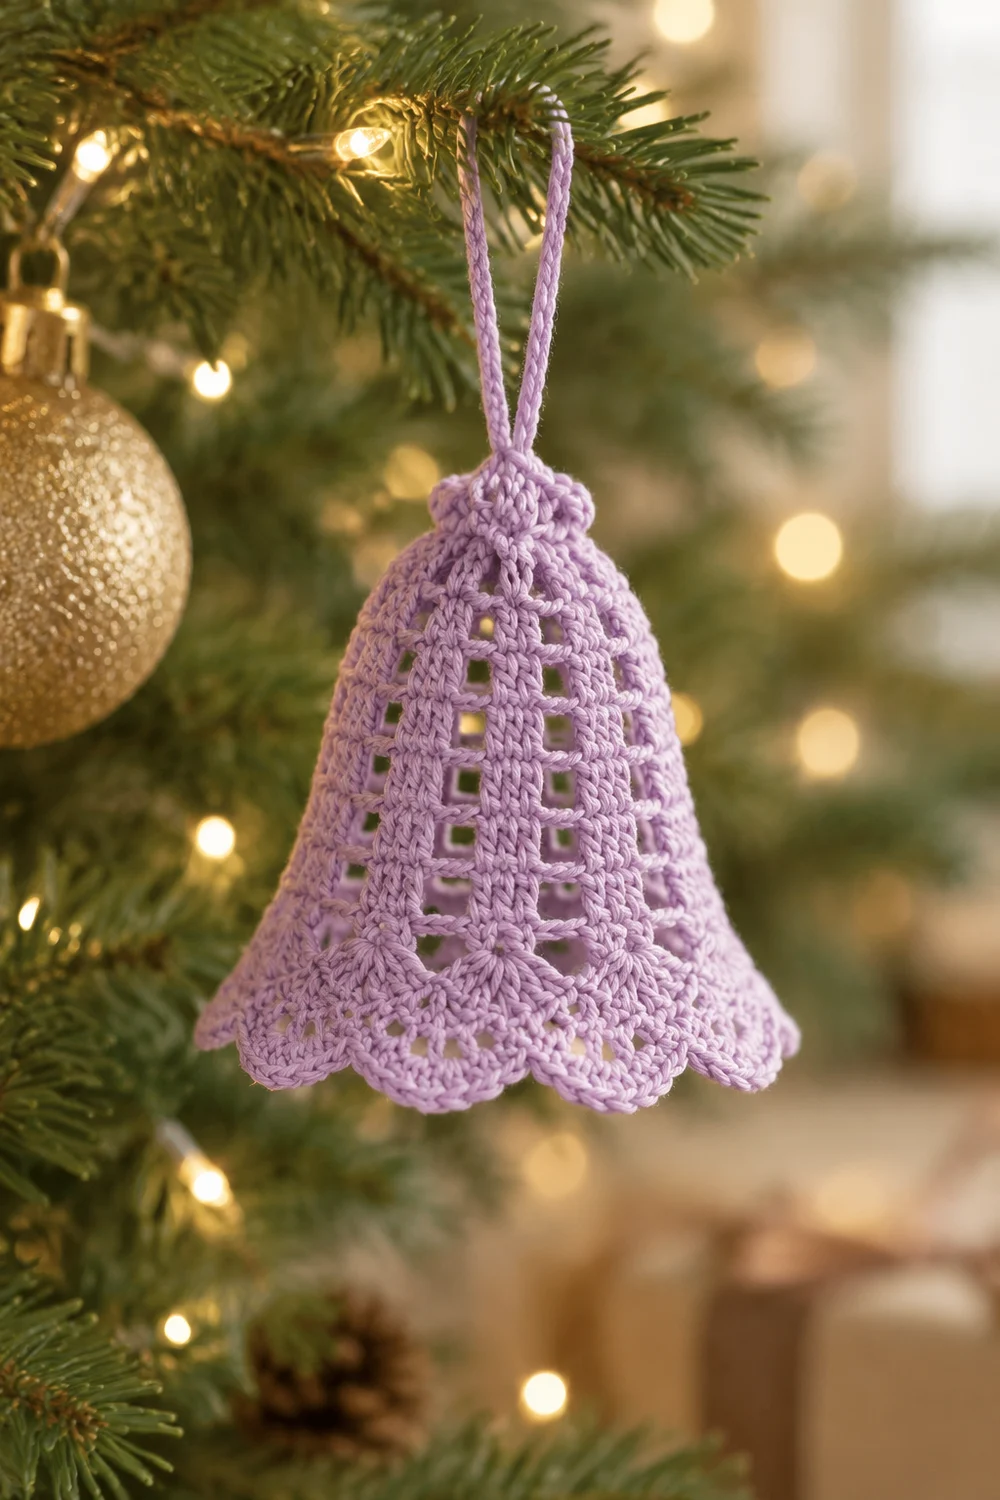
This little bell is a single flat lace motif in soft lavender. Narrow vertical ribs of double crochet alternate with columns of open filet mesh squares, so light shows through the body. The top is cinched into a gathered, textured crown, and the hem finishes in a row of rounded shell scallops.
The style is delicate and vintage. It works as a tree ornament, a gift tag, or an appliqué. The pattern uses US crochet terms throughout.
The finished bell measures 3 in (7.6 cm) wide at the hem and 3.5 in (8.9 cm) tall, including the border and top edging.
Construction is simple. You work the body flat in rows from the top down, adding stitches to the ribs twice so the bell flares. Then you add a two-row scalloped border across the hem. Last, you work a side-and-top edging that gathers the crown, followed by a crab stitch row for texture.
Finished Size and Construction
- Finished size: 3 in (7.6 cm) wide at hem × 3.5 in (8.9 cm) tall
- Skill level: Easy-intermediate
- Terminology: US crochet terms
- Yarn weight: Super fine (#1), fingering-weight cotton
- Hook: 2.25 mm (US B-1)
- Number of pieces: 1
- Layout: One flat bell motif, worked top-down in rows
- Piece size (body): 1.75 in (4.4 cm) wide at top, 3 in (7.6 cm) wide at hem, 3 in (7.6 cm) tall
- Size before border: 3 in (7.6 cm) wide × 3 in (7.6 cm) tall
- Border depth: Hem scallops add 0.4 in (1.0 cm). Top edging adds 0.1 in (0.3 cm) and gathers the top to 1.25 in (3.2 cm) wide.
Materials
Yarn advice: Choose a smooth, mercerized fingering-weight cotton. Mercerized cotton shows the mesh squares crisply and holds its shape after blocking. Avoid fuzzy or brushed yarns, which blur the lace.
- Lavender: 8 g, about 27 m (30 yd)
Tools:
- 2.25 mm (US B-1) crochet hook
- Tapestry needle
- Scissors
- Blocking mat and rust-proof pins
- Spray bottle with water
- Optional: fabric stiffener or starch
- Optional: 8 in (20.3 cm) of ribbon or yarn for hanging
The yarn quantity includes a margin of roughly 30% for your gauge swatch, weaving in ends, and minor tension differences.
Abbreviations (US Terms)
- ch – chain
- sl st – slip stitch
- sc – single crochet
- dc – double crochet
- sc2tog – single crochet 2 together
- rsc – reverse single crochet (crab stitch)
- sk – skip
- sp – space
- st(s) – stitch(es)
- tch – turning chain
- RS / WS – right side / wrong side
Special stitches:
- Shell: 5 dc in the same stitch.
- Mesh square: dc, ch 1, sk 1 st (or ch-1 sp), dc. Each ch-1 counts as 1 stitch in all counts.
- rsc (crab stitch): With RS facing, work from left to right. Insert the hook into the next stitch to the right, yarn over, pull up a loop, then yarn over and pull through both loops.
Gauge and Checkpoints
Gauge: 8 dc and 4 dc rows = 1 in (2.5 cm) in solid dc, before blocking.
Test first. Ch 18. Dc in the 4th ch from the hook and in each ch across, giving 16 sts (the skipped ch counts as 1 dc). Work 3 more rows of dc, starting each row with ch 3 (counts as dc). Your swatch should measure 2 in (5.1 cm) wide × 1 in (2.5 cm) tall.
Checkpoints:
- After Row 1: 1.75 in (4.4 cm) wide
- After Row 5: 1.75 in (4.4 cm) wide × 1.25 in (3.2 cm) tall
- After Row 9: 2.375 in (6.0 cm) wide × 2.25 in (5.7 cm) tall
- After Row 12: 3 in (7.6 cm) wide × 3 in (7.6 cm) tall
- After hem border: 3 in (7.6 cm) wide × 3.4 in (8.6 cm) tall
- After top edging: 3.5 in (8.9 cm) tall, top 1.25 in (3.2 cm) wide
If your swatch is too big: go down to a 2.0 mm hook.
If your swatch is too small: go up to a 2.5 mm hook.
Recheck the swatch after any hook change. Each 0.25 mm hook change shifts the finished width by roughly 0.25 in (0.6 cm). The stitch counts never change; only the hook does.
Bell Body
The body is worked flat in rows. There are 5 dc ribs separated by 4 columns of ch-1 mesh, which gives 4 vertical lines of mesh squares running from top to hem. The row worked first (Row 1) is the RS.
Foundation: Ch 16.
Row 1 (RS): Dc in the 4th ch from the hook. The 3 skipped ch count as the first dc, so you now have a rib of 2 dc. [Ch 1, sk next ch, dc in each of next 2 ch] 4 times. Turn.
Count: 14 sts (10 dc + 4 ch-1 sp), arranged as 5 ribs of 2 dc.
Row 2: Ch 3 (counts as dc throughout). Dc in next dc. [Ch 1, sk ch-1 sp, dc in each of next 2 dc] 4 times, working the last dc into the top of the tch. Turn.
Count: 14 sts.
Rows 3–5: Repeat Row 2.
Count: 14 sts per row.
Each ch-1 sitting over a ch-1 sp forms one open mesh square. Check that the squares stack in straight vertical columns.
Row 6 (increase): Ch 3, dc in the same st as the tch, dc in next dc. This makes the first rib 3 sts wide. [Ch 1, sk ch-1 sp, 2 dc in next dc, dc in next dc] 4 times, working the final dc into the top of the tch. Turn.
Count: 19 sts (15 dc + 4 ch-1 sp), arranged as 5 ribs of 3 dc. This is a growth row: each rib gains 1 dc, for 5 new sts.
Row 7: Ch 3, dc in each of next 2 dc. [Ch 1, sk ch-1 sp, dc in each of next 3 dc] 4 times, working the last dc into the top of the tch. Turn.
Count: 19 sts.
Rows 8–9: Repeat Row 7.
Count: 19 sts per row.
Row 10 (increase): Ch 3, dc in the same st as the tch, dc in each of next 2 dc. This makes the first rib 4 sts wide. [Ch 1, sk ch-1 sp, 2 dc in next dc, dc in each of next 2 dc] 4 times, working the final dc into the top of the tch. Turn.
Count: 24 sts (20 dc + 4 ch-1 sp), arranged as 5 ribs of 4 dc.
Row 11: Ch 3, dc in each of next 3 dc. [Ch 1, sk ch-1 sp, dc in each of next 4 dc] 4 times, working the last dc into the top of the tch. Turn.
Count: 24 sts.
Row 12: Repeat Row 11. Do not fasten off. Turn.
Count: 24 sts. The body measures 3 in (7.6 cm) wide × 3 in (7.6 cm) tall.
Placing the increases in Rows 6 and 10 keeps the upper bell narrow and pushes the flare toward the hem, which gives the classic bell outline.
Border
Border gauge
The hem border is worked at the same 8 sts per 1 in (2.5 cm) as the body. The side edging uses 2 sc per dc row-end. Because the body has 4 rows per 1 in (2.5 cm), that also works out to 8 sc per 1 in (2.5 cm). The edges therefore match the body and lie flat.
Hem Row 1 (conversion row, RS)
Ch 1. Sc in each dc and in each ch-1 sp across, working the last sc into the top of the tch. Work 1 extra sc into that same last st. Turn.
Count: 24 sc worked 1 per existing st (20 dc + 4 ch-1 sp) + 1 extra sc = 25 sc.
Hem Row 2 (scallops)
Ch 1. Sc in first sc. [Sk 2 sc, shell in next sc, sk 2 sc, sc in next sc] 4 times. Fasten off.
Count: 4 shells (20 dc) + 5 sc = 25 sts.
Why the math works: Each scallop repeat uses 6 sts (2 skipped, 1 shell base, 2 skipped, 1 sc). The row needs 1 starting sc plus a whole number of repeats: 1 + (4 × 6) = 25. A plain 24-st row would leave the last scallop one stitch short. The single extra sc in Hem Row 1 makes the row come out exactly.
Each scallop spans 0.75 in (1.9 cm), so 4 scallops fill the 3 in (7.6 cm) hem. The 5 dc fanned over a 6-st span sit flat, with no ruffling.
Side and Top Edging (one row, RS)
With RS facing, join the yarn with a sc at the bottom right corner, in the side of Row 12, just above Hem Row 1.
Right side: Work 1 more sc in the side of Row 12. Then work 2 sc in the side of each remaining row, up to Row 1.
Count: 2 sc × 12 rows = 24 sc.
Top: Rotate the piece and work into the free loops of the foundation chain. There are 14 bases, one under each Row 1 st. [Sc in next, sc2tog over next 2] 4 times, then sc in each of the last 2.
Count: 14 bases worked into → (4 × 2) + 2 = 10 sc.
Left side: Work 2 sc in the side of each row from Row 1 down to Row 12.
Count: 24 sc.
Fasten off.
Total: 24 + 10 + 24 = 58 sts.
The 10 top sc measure 1.25 in (3.2 cm) at 8 sts per inch. The 1.75 in (4.4 cm) foundation is drawn in by 0.5 in (1.3 cm), which creates the gathered crown.
Top Texture Row
With RS facing, join the yarn in the first top sc at the right corner. Ch 1, then rsc in each of the 10 top sc. Fasten off.
Count: 10 rsc.
The crab stitch gives the crown a corded, textured finish.
Optional hanger: Thread the 8 in (20.3 cm) ribbon through the center of the top edge and knot it.
Final Blocking
- Weave in all ends along the dc ribs, never across the mesh squares.
- Soak the bell in cool water for 10 minutes. Press out the water gently in a towel; do not wring.
- Lay the bell RS up on the blocking mat.
- Pin the top edge to 1.25 in (3.2 cm) wide.
- Pin the body hem line, just above the scallops, to 3 in (7.6 cm) wide.
- Pin the overall height to 3.5 in (8.9 cm).
- Pin each of the 4 scallops at its center dc to round the curves.
- Use a pin tip to nudge each mesh square open and square.
- Optional: mist with stiffener or starch for a firm ornament.
- Let the bell dry completely, about 6–12 hours, before unpinning.
Final Quality-Control Checklist
- Rows 1–5 have 14 sts each.
- Rows 6–9 have 19 sts each.
- Rows 10–12 have 24 sts each.
- There are 4 straight columns of 12 mesh squares each.
- Hem Row 1 has 25 sc.
- Hem Row 2 has 4 even shells and 5 sc.
- Each side edge has 24 sc.
- The top is gathered to 10 sts and finished with 10 rsc.
- After blocking, the bell measures 3 in (7.6 cm) wide at the hem, 1.25 in (3.2 cm) at the top, and 3.5 in (8.9 cm) tall.
- No ends show through the mesh.
Troubleshooting
Mesh squares look like rectangles. Your dc are tall compared with the ch-1. Pull the ch-1 slightly snug, or shorten the dc by keeping the first loop low on the hook.
Mesh columns drift sideways. You probably worked a dc into a ch-1 sp, or a ch-1 over a dc. Count each rib before each mesh column.
The bell is straight instead of flared. Check that Rows 6 and 10 each added 5 sts.
The edges look wavy. The side edging is too loose or too full. Keep exactly 2 sc per row and use firm tension.
Scallops are cupping or ruffling. Check that you skipped exactly 2 sc on each side of every shell.
The last scallop doesn’t fit. Hem Row 1 is missing its extra sc. You need 25 sc, not 24.
The top won’t gather. Work the sc2tog firmly, and work the rsc row snug.
Care
Hand wash in cool water with mild soap, then reshape and dry flat. If you used stiffener, re-block after washing to restore the shape.
Final Notes
Here is the full measurement chain:
- Your 8 dc per 1 in (2.5 cm) gauge gives a 14-st top of 1.75 in (4.4 cm).
- Two growth rows take the body to 24 sts, or 3 in (7.6 cm) wide.
- Twelve rows at 4 rows per inch give 3 in (7.6 cm) of height.
- The hem border converts 24 sts into 25 sc for 4 exact scallops and adds 0.4 in (1.0 cm).
- The edging gathers the top to 1.25 in (3.2 cm) and adds 0.1 in (0.3 cm), for a finished height of 3.5 in (8.9 cm).
If your gauge holds at each checkpoint, the bell will block to the stated size.
Optional: make several bells for a tree garland; the pattern itself stays exactly the same.
Happy crocheting!