

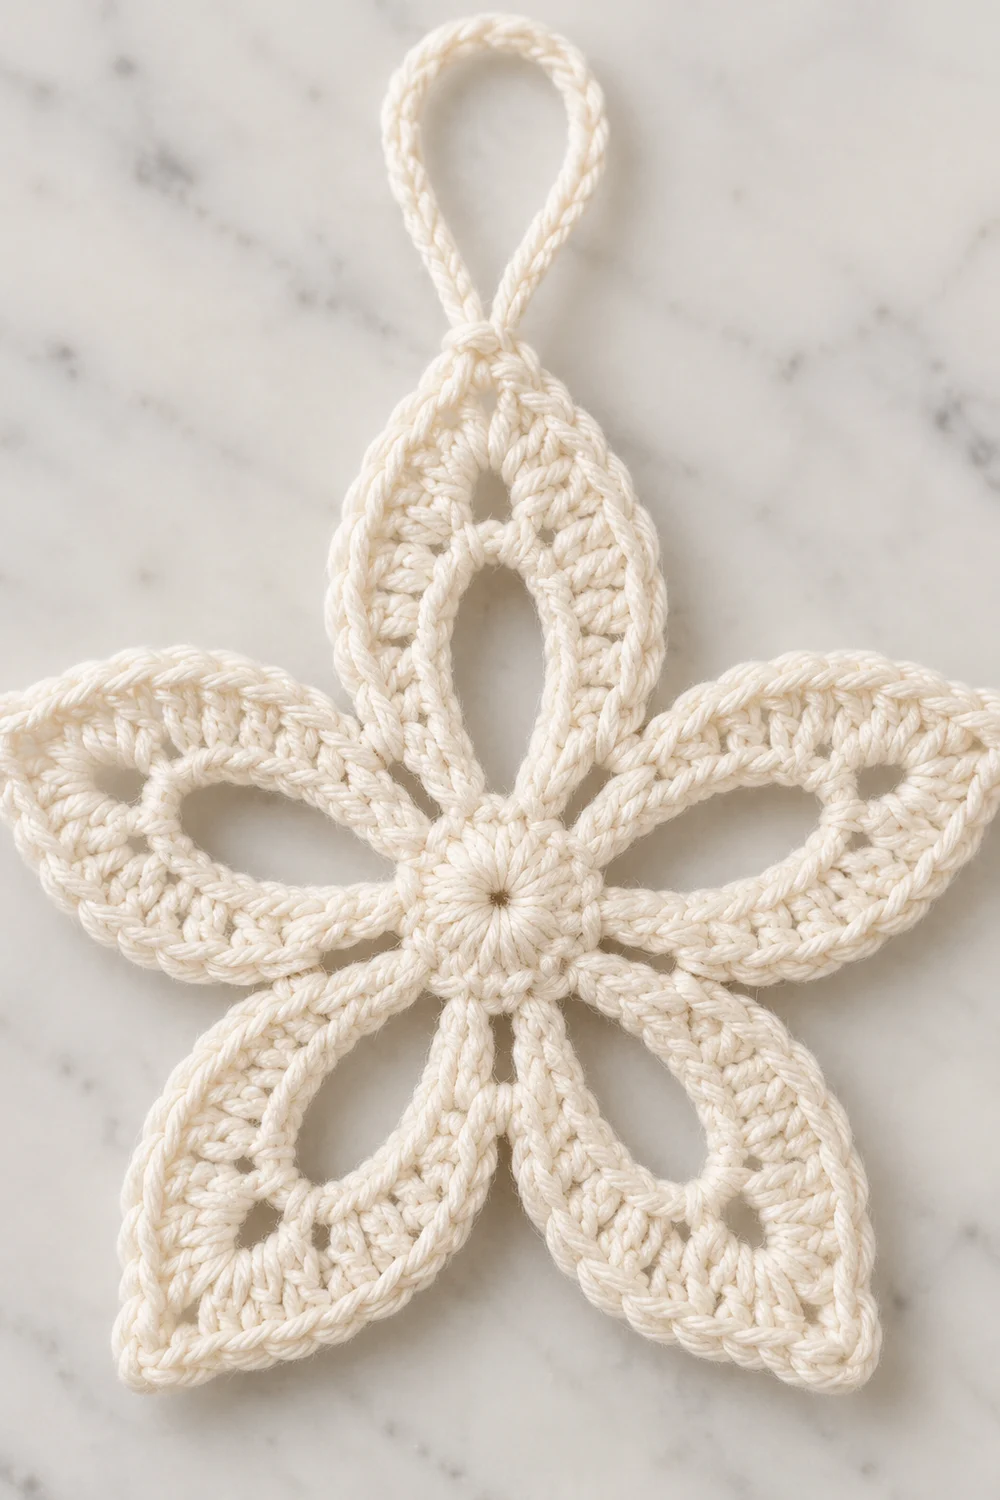
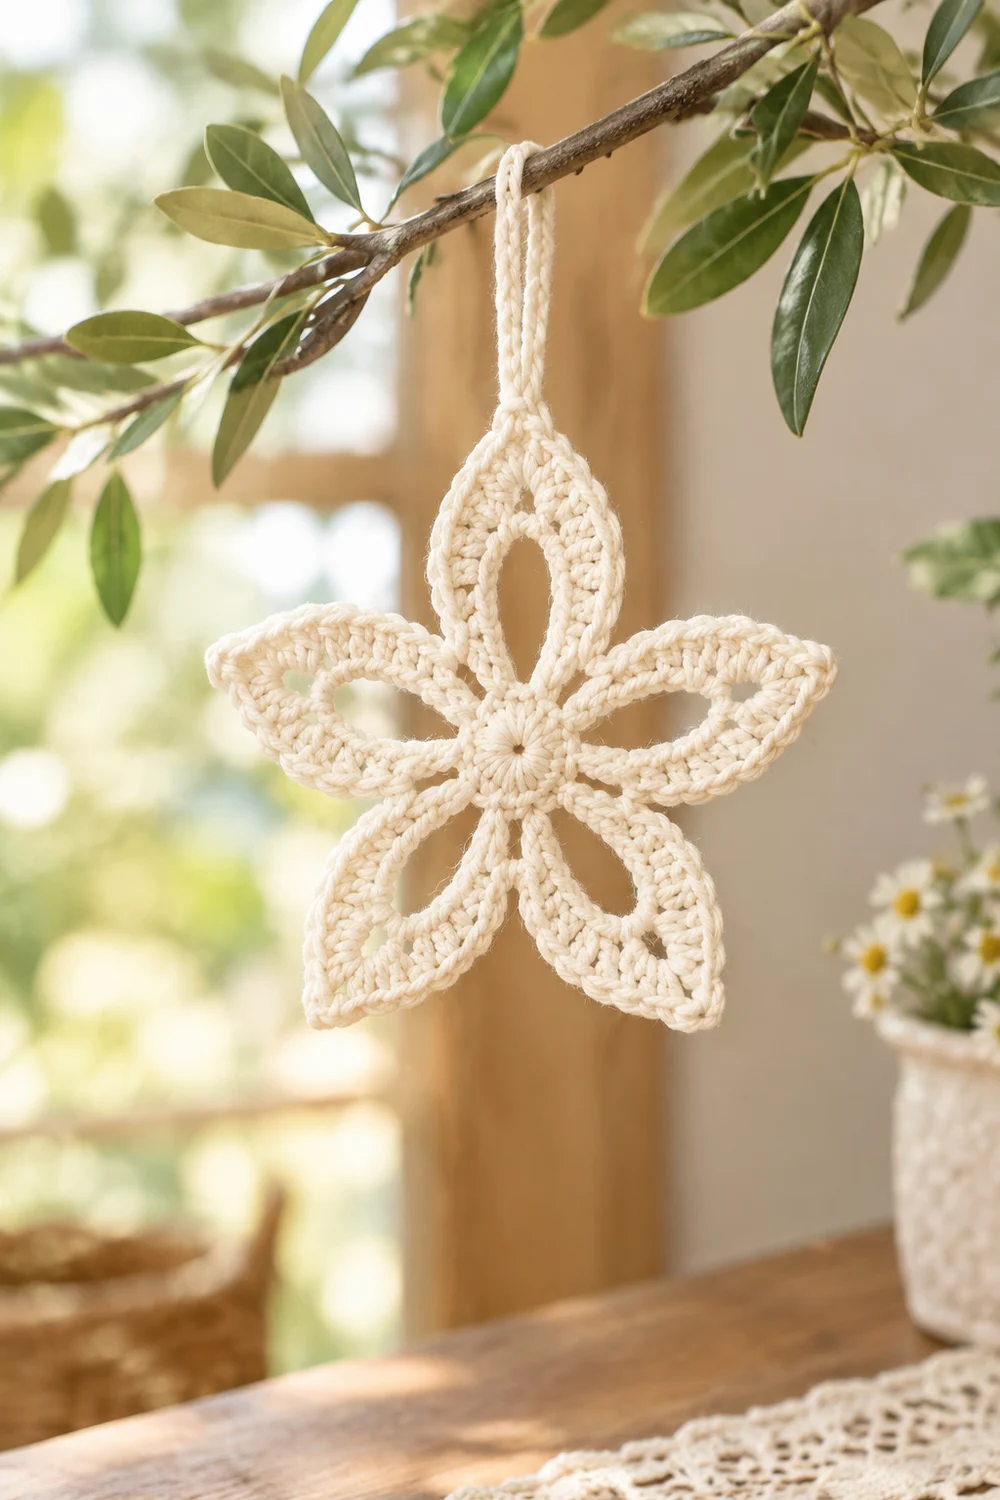
This is a single five-petaled flower motif worked in cream cotton. Five identical almond-shaped petals sit evenly around a small, tightly worked circular center. Each petal has an open oval void in the middle, framed by a dense, textured outline of graduated stitches that rise to a point at the tip. A small chain loop at the top makes it ready to hang.
The look is soft, lacy, and slightly vintage. Off-white or cream yarn shows the stitch definition best, especially the taller double and treble crochet stitches along the petal sides. The motif suits a window ornament, a gift tag, or a tree decoration.
This pattern uses US crochet terms. The finished flower measures about 3.5 in (8.9 cm) tip to tip across its widest point.
Construction is simple. You work a tight center ring, then five long chain loops that become the petal frames. A final outline round covers each loop with graduated stitches, and a separate chain loop is added at one petal tip for hanging.
Finished Size and Construction
- Finished size: about 3.5 in (8.9 cm) tip to tip, widest point
- Skill level: advanced beginner
- Terminology: US crochet terms
- Yarn weight: #3 light (DK) cotton
- Hook: 3.5 mm (US E-4)
- Number of pieces: 1 (single motif)
- Layout: five petals arranged symmetrically around one center
- Center size: about 0.75 in (1.9 cm) across after Round 1
- Size before border (outline round): about 3 in (7.6 cm) tip to tip after Round 2
- Border (outline) depth: about 0.25 in (0.6 cm) added at each tip
- Hanging loop: about 2 in (5.1 cm) tall
Materials
Yarn: Use a smooth, mercerized or combed cotton in DK weight. Cotton holds the petal points crisply and blocks well. Avoid fuzzy or very splitty yarns, since the open oval voids look best with clean stitch edges.
- Cream / off-white: 8 g, about 20 m (one color only)
Tools:
- 3.5 mm (US E-4) crochet hook
- Tapestry needle
- Scissors
- Blocking mat or folded towel
- Rust-proof pins (at least 10)
- Spray bottle with water
- Optional: light spray starch
Yarn quantities include a margin. The motif itself uses about 5 g, so 8 g leaves room for a gauge swatch and weaving in ends.
Abbreviations (US Terms)
- ch – chain
- sl st – slip stitch
- sc – single crochet
- hdc – half double crochet
- dc – double crochet
- tr – treble crochet (yarn over twice, insert hook, pull up a loop, [yarn over, pull through 2 loops] 3 times)
- sp – space
- st(s) – stitch(es)
- Rnd – round
Magic ring: Wrap the yarn around two fingers to form a loop, insert the hook, pull up a loop, and ch 1 to secure. Work the first round into the ring, then pull the tail to close the center tightly.
Working into a chain loop: In Round 3, insert your hook into the open space inside each ch-15 loop, not into the individual chains. Your stitches wrap around the chain, covering it from the outside and leaving the oval void open.
Gauge and Checkpoints
Gauge matters here because the chain loops set the petal length. Work one test flower first, measure at each checkpoint, then adjust.
Base gauge: 10 ch = 2 in (5.1 cm), or 5 ch per inch.
Checkpoint 1 (after Rnd 1): The closed center measures about 0.75 in (1.9 cm) across.
Checkpoint 2 (after Rnd 2): Each ch-15 loop, laid flat as an oval, measures about 1.25 in (3.2 cm) from its base to its fold. The flower measures about 3 in (7.6 cm) tip to tip.
Checkpoint 3 (after Rnd 3): Each petal measures about 1.5 in (3.8 cm) from the center edge to the tip, and about 1 in (2.5 cm) across at its widest. The flower measures about 3.5 in (8.9 cm) tip to tip.
If your flower is too big: Go down to a 3.25 mm (US D-3) hook, or chain more tightly. Do not shorten the chain loops, since that changes the petal proportions and the Round 3 stitch fit.
If your flower is too small: Go up to a 3.75 mm (US F-5) hook. If the petals look cramped or ruffled in Round 3, the chain loops are too tight; loosen your chaining first.
Pattern
Round 1: Center Ring
Make a magic ring.
Rnd 1: Ch 1 (does not count as a st), work 10 sc into the ring. Pull the tail to close the ring tightly. Sl st in the first sc to join.
Stitch count: 10 sc.
Check that the center lies flat and the hole is fully closed. This tight hub is what gives the finished flower its neat, solid middle.
Round 2: Petal Chain Loops
This round creates the five petal frames. Each petal is a ch-15 loop anchored on two neighboring sc.
Rnd 2: Ch 1 (does not count as a st). *Sc in next sc, ch 15, sc in next sc; repeat from * 4 more times. Sl st in the first sc to join.
Stitch count: 10 sc and 5 ch-15 loops.
The math: Round 1 has 10 sc. Each petal uses 2 of them (1 sc at each end of its loop), so 5 petals × 2 sc = 10 sc. Every stitch from Round 1 is used exactly once.
Lay the flower flat and fold each loop into a narrow oval pointing outward. Check Checkpoint 2 before continuing. The loops will look floppy at this stage; that is normal.
Round 3: Petal Outline
This is the outline round that gives each petal its dense, textured edge and pointed tip. It is covered in full detail in the Border section below, since it works as the motif’s border.
Hanging Loop
After Round 3 is complete and fastened off, choose any one petal to be the top.
Join yarn with a sl st in the ch-3 tip sp of that petal. Ch 20. Sl st in the same ch-3 sp. Fasten off.
The ch-20 loop measures about 4 in (10.2 cm) of chain, folded into a loop about 2 in (5.1 cm) tall. For a twisted-cord look like the photo, twist the loop a few times before blocking.
Border (Petal Outline Round)
For a single motif, the “border” is the outline round worked around each chain loop. It sets the final size, the petal shape, and the pointed tips.
Border gauge: The outline stitches pack around the outside of each oval at about 18 stitches plus a ch-3 tip per ch-15 loop. That is denser than one stitch per chain because the outer edge of a curve is longer than the chain itself.
Round 3
Begin from the joining sl st of Round 2. You are sitting on the first sc, at the base of petal 1.
Rnd 3: Sl st into the first ch-15 loop.
Working into the loop: 2 sc, 2 hdc, 3 dc, 2 tr, ch 3, 2 tr, 3 dc, 2 hdc, 2 sc. Sl st in each of the next 2 sc of Round 2; repeat from * 4 more times, ending the last repeat with sl st in the next sc, then sl st in the first sc to join (this covers the final 2 sc).
Fasten off and leave a 4 in (10.2 cm) tail.
Counts Per Petal Side
Each petal has two sides that meet at the tip.
- Rising side (base to tip): 2 sc, 2 hdc, 3 dc, 2 tr = 9 sts
- Tip: ch-3 sp (1 per petal)
- Falling side (tip to base): 2 tr, 3 dc, 2 hdc, 2 sc = 9 sts
Per petal: 9 + 9 = 18 sts, plus 1 ch-3 tip.
Round total: 5 petals × 18 sts = 90 sts, plus 5 ch-3 tips, plus 10 sl sts into the Round 2 sc.
Why the Math Works
The stitch heights climb from sc to tr on the rising side, then drop back from tr to sc on the falling side. Short stitches near the center keep the petal base narrow. Tall stitches in the middle of each side widen the petal into its almond shape. The ch-3 at the tip pulls the point outward by about 0.25 in (0.6 cm).
Both sides use exactly 9 stitches, so every petal is symmetrical. The 10 sl sts land one on each Round 2 sc, so each petal starts and ends at its own anchor and the gaps between petals stay clean.
Two tips sit across from each other at the widest measurement. Each adds about 0.25 in (0.6 cm), so the flower grows from about 3 in (7.6 cm) to about 3.5 in (8.9 cm).
Final Blocking
- Weave in all ends first. Run the tails through the sc of Round 1 or along the back of the outline stitches, never across an oval void.
- Spray the flower until it is evenly damp but not dripping.
- Lay it face up on a blocking mat or folded towel.
- Pin the center flat with one pin through Round 1.
- Pin each ch-3 tip outward, spacing the five tips evenly around the center, like the points of a star.
- Measure tip to tip across the widest point. Adjust the pins until it reads about 3.5 in (8.9 cm).
- Gently open each oval void with a fingertip so it forms a smooth, symmetrical almond.
- Lay the hanging loop straight above its petal, or twist it if you prefer.
- Optional: mist lightly with spray starch for a firmer ornament.
- Let it dry completely before unpinning, usually several hours.
Final Quality-Control Checklist
- Center ring is fully closed with no visible hole.
- Round 1 has 10 sc.
- Round 2 has 5 ch-15 loops, each anchored on 2 sc.
- Each petal has 9 sts on each side plus a ch-3 tip.
- All five petals match in length, about 1.5 in (3.8 cm) from center edge to tip.
- Each petal shows an open oval void with no stitches crossing it.
- Flower measures about 3.5 in (8.9 cm) tip to tip.
- Hanging loop is secure and sits at one petal tip.
- All ends are woven in and trimmed.
Troubleshooting
Petals ruffle or curl: The chain loops are too tight for 18 stitches. Loosen your chaining or go up a hook size for Round 2 only.
Petals look thin or gappy: The chain loops are too loose. Chain more firmly, or use a smaller hook for Round 2.
Petals are different lengths: Recount each ch-15. One extra or missing chain changes the petal length noticeably.
Center hole won’t close: Pull the magic-ring tail firmly before joining Round 1, then secure it while weaving in.
Oval voids closed up: You worked into the individual chains instead of the loop space. Rework Round 3 into the space inside each loop.
Tips look rounded: Check that you made the ch-3 between the two tr pairs, then pin each tip firmly during blocking.
Flower won’t lie flat: Block again with more water and pin all five tips and the center.
Care
Hand wash in cool water with mild soap, press out water in a towel, and reblock flat to dry. Starch again if you want a firm ornament.
Final Notes
The measurement chain is short and predictable. A 0.75 in (1.9 cm) center leads to five ch-15 loops at about 1.25 in (3.2 cm) each, for a flower about 3 in (7.6 cm) tip to tip. The outline round adds 18 stitches and a ch-3 tip per petal, bringing the finished motif to about 3.5 in (8.9 cm).
Check gauge at each stage, keep your chain loops even, and block the tips into a crisp star shape. Optional: if you enjoy this motif, you could make several flowers in the same way, but the pattern above is complete as a single hanging flower.
Happy crocheting!