

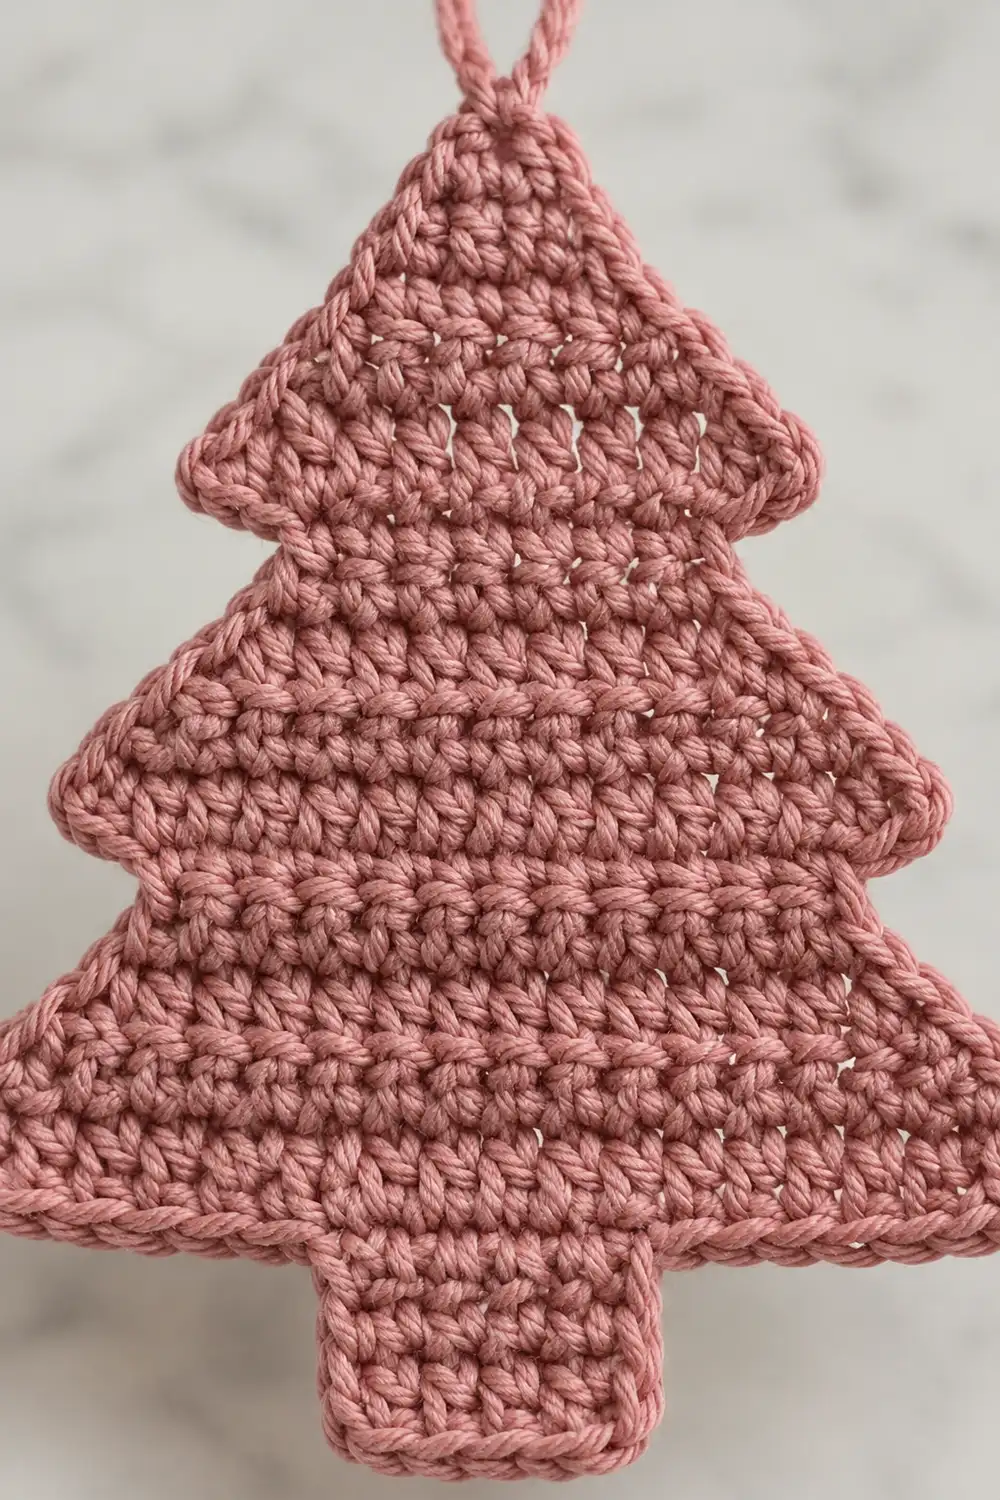
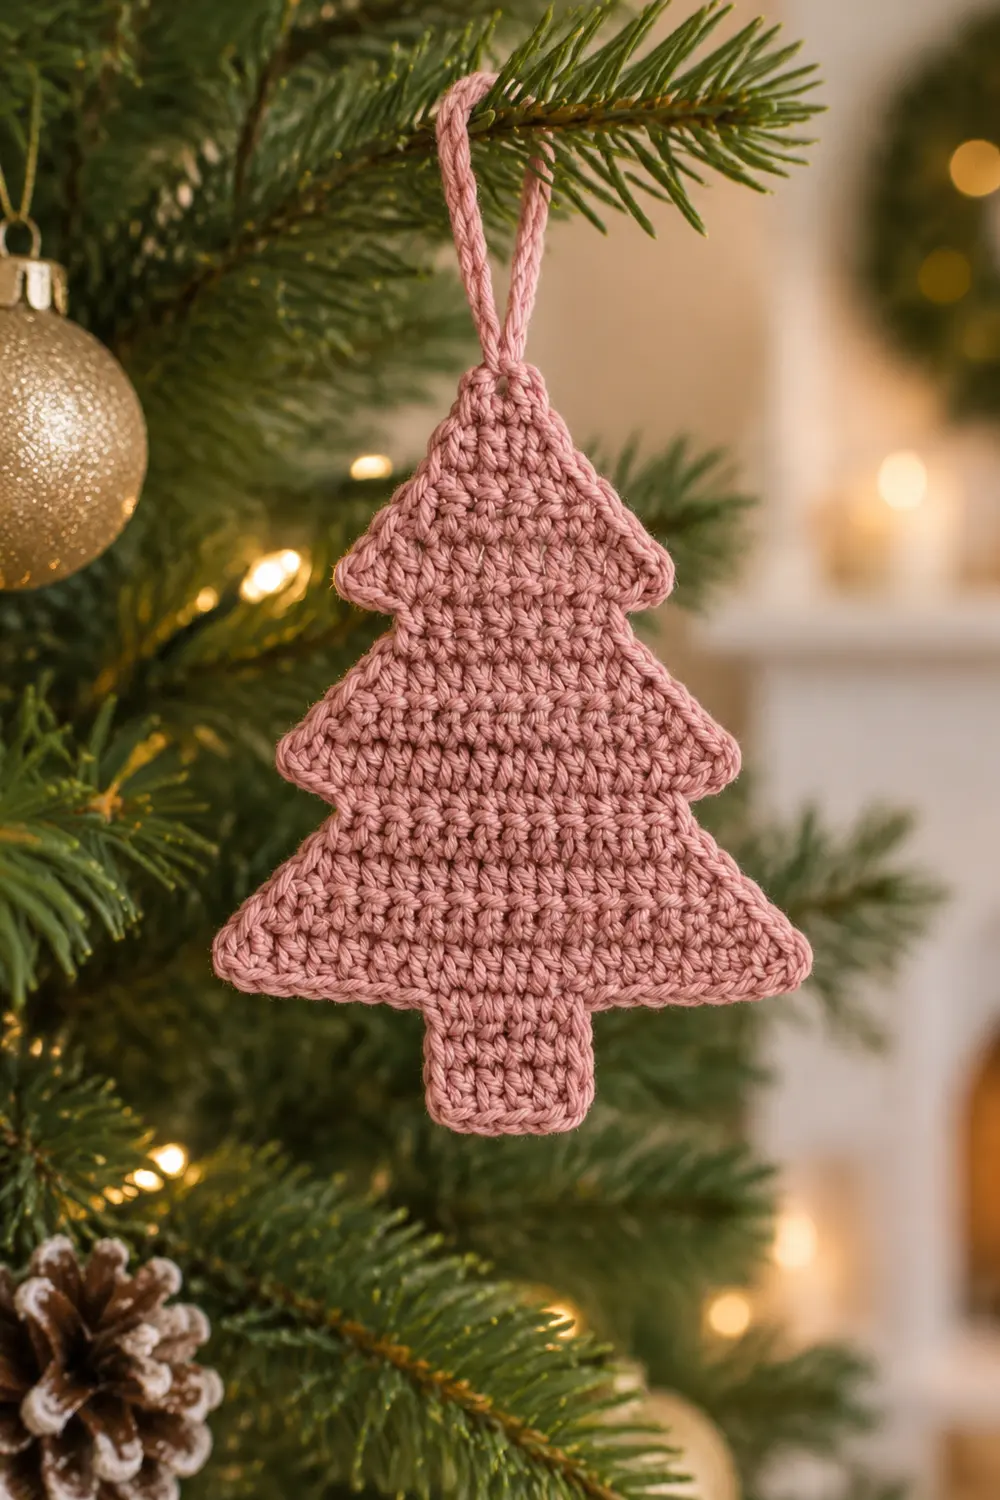
The Rosy Pine is a small, flat Christmas tree made in one soft dusty rose color. It has a classic triangle shape with a gently rounded, domed top. The rows widen gradually toward the base, and a short rectangular trunk sits under the center. A small loop at the peak lets you hang it from a branch, a gift tag, or a window hook.
The texture is dense and even because every row is plain single crochet. One single crochet round outlines the whole tree to smooth the stepped edges. The muted mauve-pink color makes it look modern rather than traditional. It also works well sewn onto a stocking, card, or bag as an appliqué.
This pattern uses US crochet terms. The finished ornament measures about 3 in (7.6 cm) tall and 2.4 in (6.1 cm) wide, not counting the hanging loop.
The tree is worked from the top down in turned rows, starting with a 3-stitch fan at the tip. You then add the trunk in the center of the last row and finish with one border round. The hanging loop is made as part of that round. It is all one piece, with no sewing.
Finished Size and Construction
- Finished size: about 3 in (7.6 cm) tall x 2.4 in (6.1 cm) wide, without the loop
- Skill level: Easy
- Terminology: US crochet terms
- Yarn weight: Sport / fine (#2) cotton or cotton blend
- Hook: 2.75 mm (US C-2)
- Number of pieces: 1
- Layout: a single flat motif, worked top-down in rows
- Piece size (triangle only, before trunk and border): 2.2 in (5.6 cm) wide at the base x 2.1 in (5.3 cm) tall
- Size before border (triangle plus trunk): 2.2 in (5.6 cm) wide x 2.7 in (6.9 cm) tall
- Border depth: 1 round of sc, about 0.125 in (0.3 cm) on every edge
- Trunk: 3 stitches wide x 4 rows, about 0.5 in (1.3 cm) x 0.6 in (1.5 cm) before the border
- Hanging loop: ch 12, about 0.8 in (2.0 cm) tall when folded
Materials
Yarn advice: Use a smooth, matte cotton or cotton blend in sport weight. Cotton shows stitch definition clearly, holds a crisp outline, and blocks flat. Avoid fuzzy or very splitty yarn, because the tree is small and every stitch shows.
Color:
– Dusty rose / mauve pink: 5 g, about 15 m
The quantity includes a margin for your gauge swatch, yarn tails, and one round of frogging. The tree itself uses closer to 2 g.
Tools:
– 2.75 mm (US C-2) crochet hook, or the size needed to reach gauge
– Tapestry needle
– Scissors
– Stitch marker (optional, helpful for marking the right side)
– Rust-proof pins and a foam blocking mat
– Spray bottle or steam iron
Abbreviations (US Terms)
- ch – chain
- sc – single crochet
- sl st – slip stitch
- st(s) – stitch(es)
- inc row – 2 sc in first st, sc in each st across to the last st, 2 sc in last st (adds 2 sts)
- standing sc – start with a slip knot on the hook. Insert the hook into the stitch, yarn over, and pull up a loop. Yarn over and pull through both loops. This joins new yarn without a chain.
The turning ch 1 at the start of each row never counts as a stitch.
Gauge and Checkpoints
Gauge: 6 sc and 7 rows = 1 in (2.5 cm) in sc rows. That is 24 sc and 28 rows over 4 in (10.2 cm).
The tree is small, so you can use it as your test piece. Work through Row 8 and measure. If it matches, keep going. If not, change your hook and restart. You lose very little yarn either way.
Checkpoints:
– After Row 4: 5 sts measure about 0.8 in (2.0 cm) wide, and the piece is about 0.6 in (1.5 cm) tall.
– After Row 8: 9 sts measure about 1.5 in (3.8 cm) wide, and the piece is about 1.1 in (2.8 cm) tall.
– After Row 15: the base is 2.2 in (5.6 cm) wide, and the triangle is 2.1 in (5.3 cm) tall.
– After the trunk: total height is 2.7 in (6.9 cm).
– After the border: about 3 in (7.6 cm) tall x 2.4 in (6.1 cm) wide.
If your piece is too big: go down to a 2.5 mm hook, or crochet more firmly.
If your piece is too small: go up to a 3.0 mm hook.
Width matters more than height here. A base 0.25 in (0.6 cm) too wide makes the tree look squat.
Pattern: The Tree (Triangle)
The triangle is worked top-down. Row 1 is the tip, and each increase row widens the tree by 1 stitch on each side. Increases happen every third row after Row 2, which keeps the slant even.
Row 1: Ch 2. Work 3 sc in the 2nd ch from the hook. (3 sts)
The 3 sc fan around one chain, which creates the rounded top. Place a marker on this side if you want a set right side. Plain sc fabric looks almost the same on both sides.
Row 2 (inc row): Ch 1, turn. Work 2 sc in the first st, sc in the next st, and 2 sc in the last st. (5 sts)
Rows 3–4: Ch 1, turn. Sc in each st across. (5 sts)
Row 5 (inc row): Ch 1, turn. Work 2 sc in the first st, sc in the next 3 sts, and 2 sc in the last st. (7 sts)
Rows 6–7: Ch 1, turn. Sc in each st across. (7 sts)
Row 8 (inc row): Ch 1, turn. Work 2 sc in the first st, sc in the next 5 sts, and 2 sc in the last st. (9 sts)
Checkpoint: 1.5 in (3.8 cm) wide, 1.1 in (2.8 cm) tall.
Rows 9–10: Ch 1, turn. Sc in each st across. (9 sts)
Row 11 (inc row): Ch 1, turn. Work 2 sc in the first st, sc in the next 7 sts, and 2 sc in the last st. (11 sts)
Rows 12–13: Ch 1, turn. Sc in each st across. (11 sts)
Row 14 (inc row): Ch 1, turn. Work 2 sc in the first st, sc in the next 9 sts, and 2 sc in the last st. (13 sts)
Row 15: Ch 1, turn. Sc in each st across. (13 sts)
Fasten off and leave a 6 in (15.2 cm) tail.
Checkpoint: the base is 2.2 in (5.6 cm) wide, and the triangle is 2.1 in (5.3 cm) tall.
Row count summary: 3 → 5 → 5 → 5 → 7 → 7 → 7 → 9 → 9 → 9 → 11 → 11 → 11 → 13 → 13.
Each increase row’s total is its own complete count. It is not a running total.
Pattern: The Trunk
The trunk is worked into the center 3 stitches of Row 15. Since 13 = 5 + 3 + 5, it sits exactly in the middle.
Hold the tree with Row 15 at the top. Count 5 sts in from the edge.
Trunk Row 1: Make a standing sc in the 6th st of Row 15. Sc in the 7th and 8th sts. (3 sts)
This leaves 5 unworked sts on each side of the trunk (sts 1–5 and 9–13).
Trunk Rows 2–4: Ch 1, turn. Sc in each st across. (3 sts)
Do not fasten off. Continue straight into the border.
Checkpoint: the trunk is about 0.5 in (1.3 cm) wide x 0.6 in (1.5 cm) tall. The whole piece is 2.7 in (6.9 cm) tall.
Border
The border is one round of sc worked all around the tree. It hides the small “steps” made by the increase rows. It also rounds the domed top and squares the trunk and base corners. The hanging loop is built into this round at the tip.
Border gauge: The border uses the same 6 sc per inch (2.5 cm) as the body. It is not worked tighter or looser.
Corner rules:
– Outer corners (trunk bottom corners and base outer corners): 3 sc in the corner st. That corner group covers the end of that row, so the side count starts with the next row end up.
– Inner corners (where the trunk meets the base): no extra sts. Move directly from the trunk’s row end into the next base st. This keeps the corner from puckering.
Border Round: Ch 1, turn.
- Trunk bottom: Work 3 sc in the first st, sc in the next st, and 3 sc in the last st. (7 sc)
- First trunk side: Sc in the row ends of Trunk Rows 3, 2, and 1. (3 sc)
- First base section: Sc in each of the next 4 unworked Row 15 sts, then 3 sc in the outer corner st. (7 sc)
- First slant: Sc in the row ends of Rows 14 down through 1. (14 sc)
- Tip and loop: Work (sc, ch 12, sc) into the foundation chain at the tip, under Row 1’s center st. (2 sc + ch-12 loop)
- Second slant: Sc in the row ends of Rows 1 through 14. (14 sc)
- Second base section: Work 3 sc in the outer corner st, then sc in each of the next 4 unworked Row 15 sts. (7 sc)
- Second trunk side: Sc in the row ends of Trunk Rows 1, 2, and 3. (3 sc)
Sl st to the first sc to join. Fasten off and weave in all ends.
Total: 7 + 3 + 7 + 14 + 2 + 14 + 7 + 3 = 57 sc, plus the ch-12 loop.
Why the math works:
– This is a conversion round, not a growth round. It works 1 sc into each existing edge spot: 3 trunk sts + 6 trunk row ends + 10 base sts + 28 slant row ends + 1 foundation ch = 48. Then it adds 9 extra sts: 2 at each of the 4 outer corners (8) and 1 at the tip.
– 48 + 9 = 57.
– The slants fit their edges. Each slant edge measures about 2.2 in (5.6 cm). 14 sc at 6 sc per inch comes to 2.3 in (5.8 cm). That 0.1 in (0.3 cm) of ease lets the stepped edge settle into a straight line without pulling tight.
– The base sections fit too. 7 sc covers 5 sts, plus 2 extra at the corner to turn it without cupping.
– The tip makes the dome. The tip gets 2 sc plus the row ends of Row 1 on each side. That spreads 4 sc around the 3-st fan, which gives a smooth, rounded peak instead of a sharp point.
Final Blocking
- Weave in all ends first. Cut the tails close only after blocking, so they don’t pop out.
- Lightly mist the tree with water until it is damp, not soaked. Cotton can also be steamed. Hold the iron above the piece and never press directly on the stitches.
- Lay the tree on a foam mat with the right side up.
- Pin the tip, the two base outer corners, and the two trunk bottom corners first.
- Check the size: 3 in (7.6 cm) from the top of the border at the tip to the bottom of the trunk, and 2.4 in (6.1 cm) across the base.
- Add pins along each slant so it lies as a straight diagonal. Ease any small bumps flat with your fingertip.
- Lay the hanging loop straight up from the tip so it dries without a twist.
- Let it dry completely, usually 2–4 hours, before unpinning.
Final Quality-Control Checklist
- [ ] The triangle has 15 rows, ending with 13 sts.
- [ ] The increase rows are 2, 5, 8, 11, and 14 only.
- [ ] The trunk has 3 sts and 4 rows, with exactly 5 unworked base sts on each side.
- [ ] The border has 57 sc in total.
- [ ] Each slant has 14 sc, and each base section has 7 sc.
- [ ] The tip is rounded, not pointed or flattened.
- [ ] The hanging loop is centered and not twisted.
- [ ] The finished size is about 3 in (7.6 cm) x 2.4 in (6.1 cm).
- [ ] All ends are woven in securely, and none show on the right side.
- [ ] The tree lies flat with no cupping or ruffling.
Troubleshooting
The tree cups or curls inward. Your stitches are too tight for the increase rate. Go up one hook size, or relax your tension on the increase rows.
The slants ruffle after the border. Your row ends are taller than gauge. Skip the row end of Row 7 on each slant to get 13 sc per slant and 55 sc in total.
The slants pull tight or the tree bows. You may have skipped row ends. Count again: you need 14 sc per slant.
The top is too pointed. Make sure Row 1 has all 3 sc worked into the same chain. At the tip, work both border sc into the foundation chain, not into a row end.
The trunk is off-center. Count 5 unworked sts on each side before you join. Mark the 6th st before starting the trunk.
The base corners look sharp or holey. Work all 3 corner sc into the same st, not spread across two sts.
There are gaps at the inner corners. Insert your hook under two strands of the trunk’s row end, not one.
The loop flops sideways. Make sure the second sc goes into the same foundation ch as the first sc. Block the loop upright.
Care
Hand wash in cool water with mild soap, press out water in a towel, and dry flat. Re-pin to 3 in (7.6 cm) tall if the shape relaxes.
Final Notes
The measurement chain is short and easy to check:
- Row 4: 0.8 in (2.0 cm) wide
- Row 8: 1.5 in (3.8 cm) wide
- Row 15: 2.2 in (5.6 cm) wide x 2.1 in (5.3 cm) tall
- With the trunk: 2.7 in (6.9 cm) tall
- After the 57-stitch border: about 3 in (7.6 cm) x 2.4 in (6.1 cm)
If each checkpoint matches, the finished tree will too.
Optional: Make several trees in other colors to hang as a set or sew onto gift wrap. Each tree is still worked exactly as written.
Happy crocheting!