

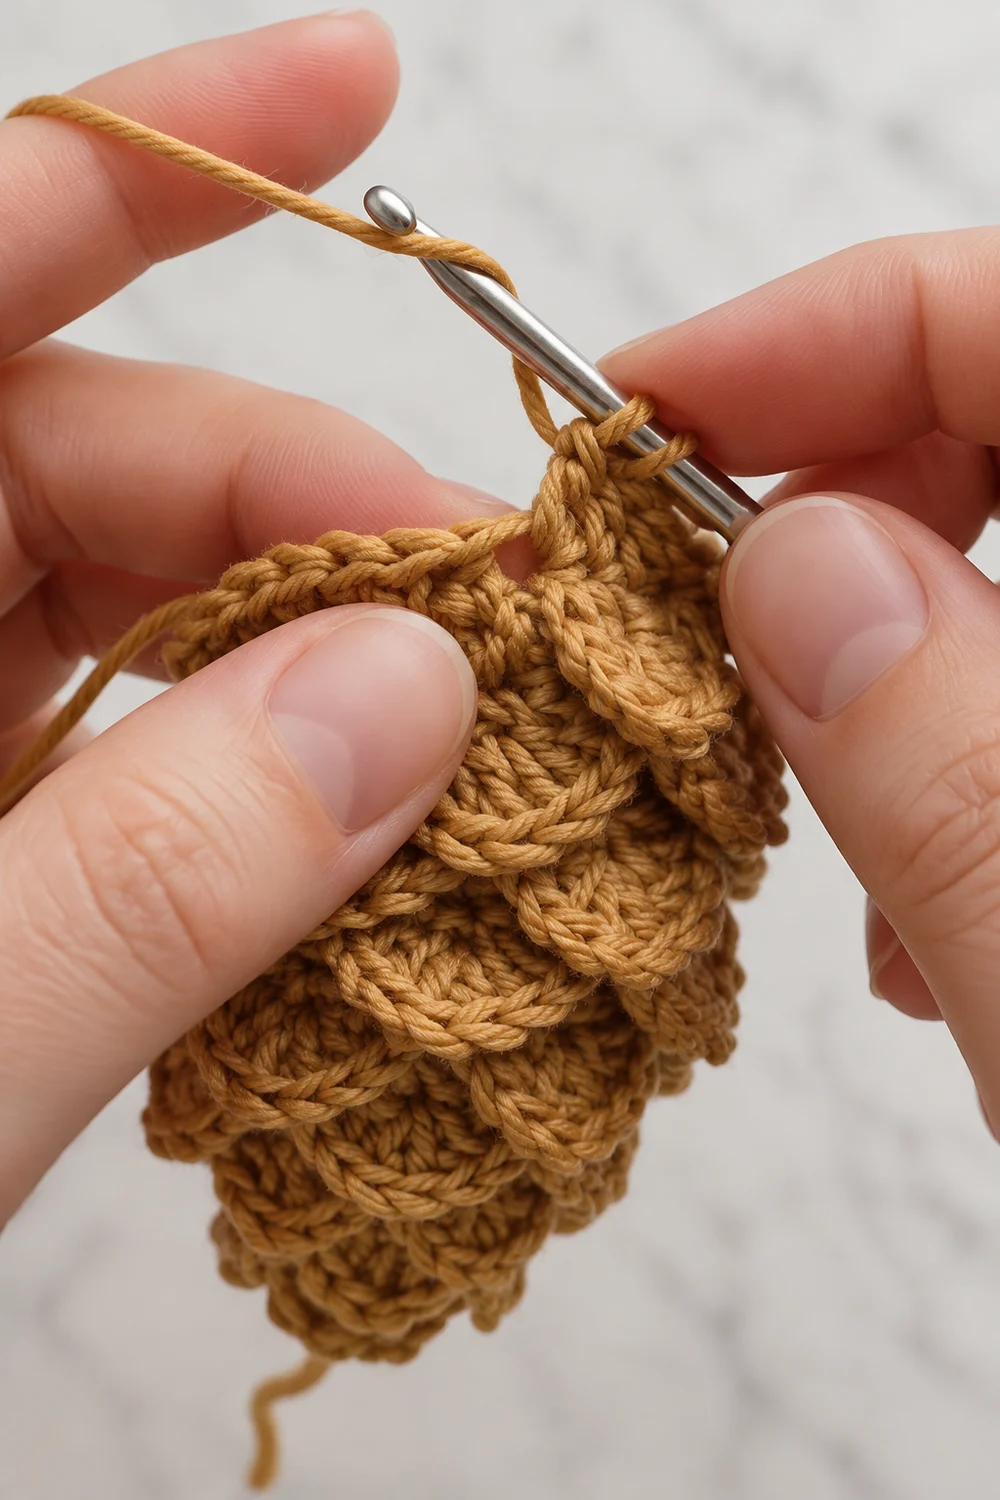
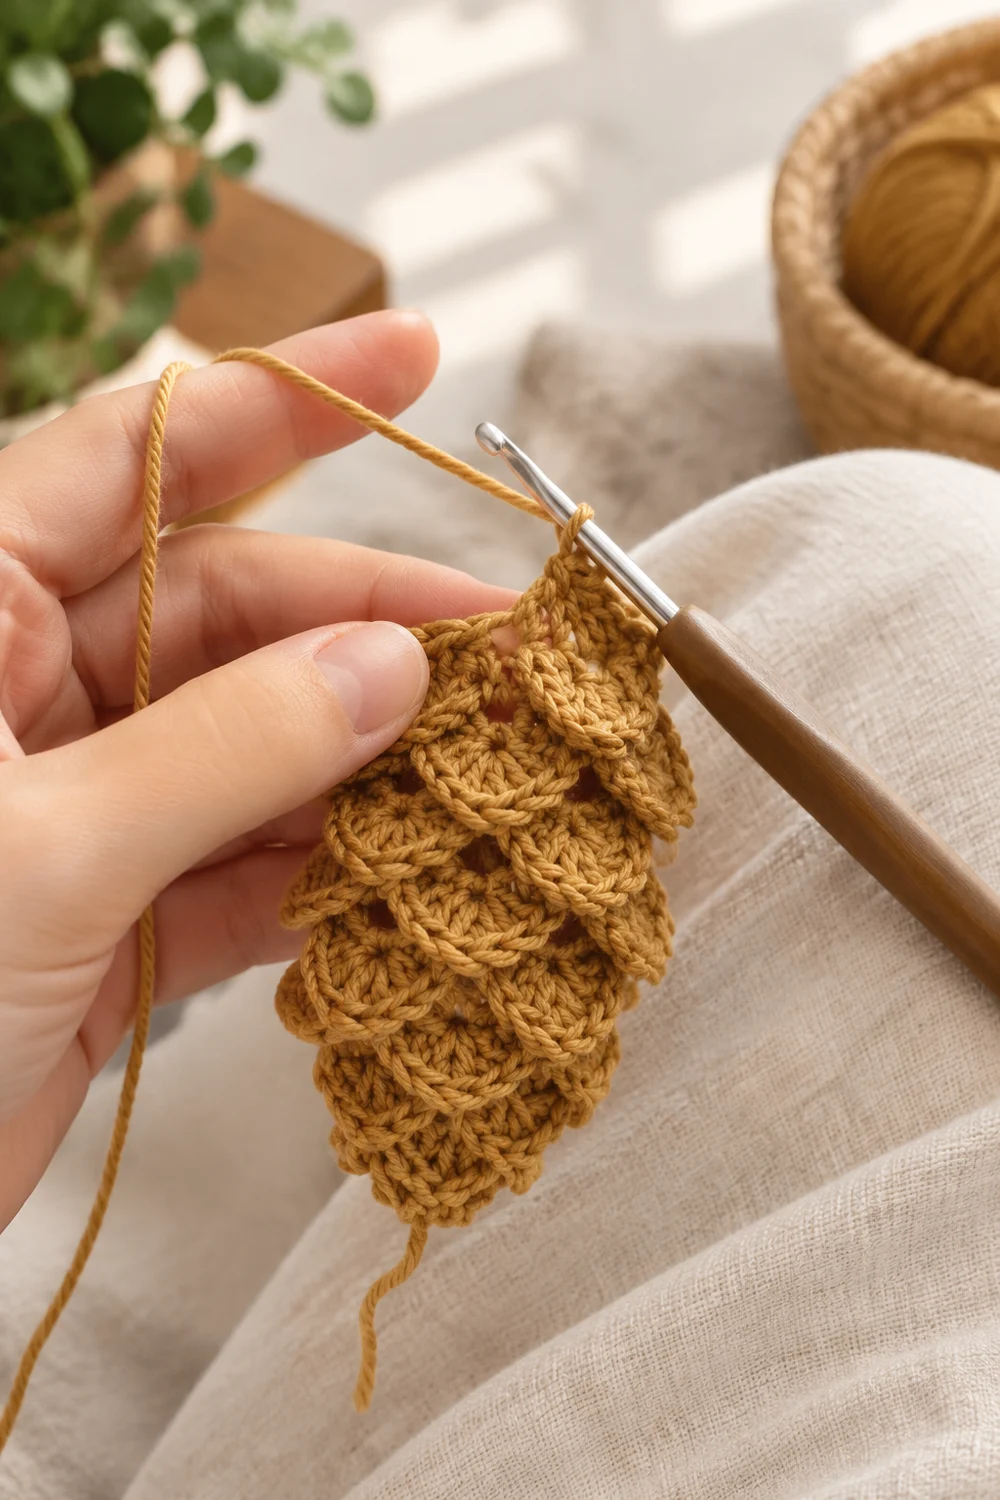
This small motif has a warm golden-mustard color and a textured, openwork surface. Rows of puff stitches separated by chain spaces form a lacy mesh, and they sit between plain single crochet rows that keep the shape tidy. The finished piece has an elongated oval, leaf-like silhouette. It tapers to a neat point at one end and rounds off gently at the other.
The style is simple and organic. It uses one solid color and fine cotton, and it works up in a single sitting. The pattern uses US crochet terms throughout.
The finished motif measures about 2.75 in (7.0 cm) long and 1.75 in (4.4 cm) wide, including the border. Before the border, it measures 2.5 in (6.4 cm) long and 1.5 in (3.8 cm) wide.
Construction is worked flat in rows, starting at the pointed tip and working up toward the rounded top. Single crochet rows alternate with puff-mesh rows. The width increases at the edges in the lower rows, holds steady through the middle, and decreases slightly near the top. One round of single crochet finishes the edge and adds a small chain point at the tip.
Finished Size and Construction
- Finished size: 2.75 in x 1.75 in (7.0 cm x 4.4 cm)
- Skill level: Easy-intermediate
- Terminology: US crochet terms
- Yarn weight: Fine (#2) cotton
- Hook: 2.75 mm (US C-2)
- Number of pieces: 1
- Layout: Single motif, worked flat in rows from tip to top
- Piece size: 2.75 in x 1.75 in (7.0 cm x 4.4 cm)
- Size before border: 2.5 in x 1.5 in (6.4 cm x 3.8 cm)
- Border depth: about 0.125 in (0.3 cm) per edge
Materials
Yarn advice: Choose a smooth, mercerized or combed fine (#2) cotton. Cotton holds the puff texture crisply and blocks into a clean leaf shape. Fuzzy or very soft acrylics will blur the openwork.
- Golden mustard: 3 g (about 10 m / 11 yd)
Tools:
- 2.75 mm (US C-2) crochet hook
- Tapestry needle
- Small scissors
- 2 stitch markers
- Ruler or measuring tape with inch and cm markings
- Blocking mat or folded towel
- Rust-proof pins
- Spray bottle with clean water
The yarn quantity includes a small margin for the gauge check, weaving in ends, and minor tension differences.
Abbreviations (US Terms)
- ch – chain
- sl st – slip stitch
- sc – single crochet
- dc – double crochet
- sc2tog – single crochet 2 together
- sk – skip
- st(s) – stitch(es)
- sp – space
- tch – turning chain
- RS / WS – right side / wrong side
Special stitch – Puff stitch (puff): (Yarn over, insert hook in indicated st, yarn over and pull up a loop to the height of a dc) 3 times. You now have 7 loops on the hook. Yarn over and pull through all 7 loops. The puff counts as 1 st.
Turning chain note: In puff-mesh rows, “ch 4” counts as 1 dc plus 1 ch-1 sp. In the following sc row, the last st is worked into the 3rd ch of that ch-4.
Gauge and Checkpoints
Gauge in pattern: 15 sts = 2 in (5.1 cm) wide. One sc row plus one puff-mesh row = 0.4 in (1.0 cm) tall.
Because this is a single small motif, the motif itself is your gauge test. Work through Row 6, then measure before continuing.
Checkpoints:
- After Row 2: 7 sts, about 0.9 in (2.3 cm) wide
- After Row 3: 9 sc, about 1.2 in (3.0 cm) wide
- After Row 6: 11 sts, about 1.5 in (3.8 cm) wide; total length about 0.9 in (2.3 cm)
- After Row 9: total length about 1.7 in (4.3 cm)
- After Row 13: total length 2.5 in (6.4 cm); widest point 1.5 in (3.8 cm)
- After border: 2.75 in x 1.75 in (7.0 cm x 4.4 cm)
If your piece is too big: Change to a 2.5 mm hook, or check that your puffs are not pulled up too tall. Keep puff loops level with a standard dc.
If your piece is too small: Change to a 3.0 mm hook. Also check that you are not tightening the ch-1 spaces, since these create the mesh.
A difference of 0.125 in (0.3 cm) in either direction can be corrected at blocking. Larger differences need a hook change.
Pattern
The motif is worked flat in rows. Turn at the end of every row. Row 1 is the RS. Place a marker on the RS so you can track it.
Foundation: Ch 4.
Row 1 (RS): Sc in 2nd ch from hook and in each ch across. Turn. (3 sc)
This row forms the narrow tip. It measures about 0.4 in (1.0 cm) wide.
Row 2 (WS, puff-mesh increase row): Ch 4 (counts as dc + ch-1). Dc in first sc, at the base of the ch-4. Ch 1, dc in next sc. Ch 1, dc in last sc. Turn. (7 sts: 4 dc and 3 ch-1 sps)
The extra dc worked into the first sc is the increase. It fans the tip open.
Row 3 (RS, sc increase row): Ch 1. Work 2 sc in first dc. Work 1 sc in each ch-1 sp and each dc across, up to the tch. Work 2 sc in 3rd ch of tch. Turn. (9 sc)
Count check: 7 sts worked 1-per-st, plus 2 extra sc (one at each edge), equals 9 sc.
Row 4 (WS, puff-mesh row): Ch 4 (counts as dc + ch-1). Sk next sc. Work [puff in next sc, ch 1, sk next sc] 3 times. Dc in last sc. Turn. (9 sts: 2 dc, 3 puffs, 4 ch-1 sps)
Row 5 (RS, sc increase row): Ch 1. Work 2 sc in first dc. Work 1 sc in each ch-1 sp and each puff across, up to the tch. Work 2 sc in 3rd ch of tch. Turn. (11 sc)
Count check: 9 sts worked 1-per-st, plus 2 extra sc, equals 11 sc.
Row 6 (WS, puff-mesh row): Ch 4 (counts as dc + ch-1). Sk next sc. Work [puff in next sc, ch 1, sk next sc] 4 times. Dc in last sc. Turn. (11 sts: 2 dc, 4 puffs, 5 ch-1 sps)
Checkpoint: The piece should measure 1.5 in (3.8 cm) across Row 6. Total length should be about 0.9 in (2.3 cm).
Row 7 (RS, sc row): Ch 1. Sc in first dc. Work 1 sc in each ch-1 sp and each puff across. Sc in 3rd ch of tch. Turn. (11 sc)
Row 8 (WS): Repeat Row 6. (11 sts, 4 puffs)
Row 9 (RS): Repeat Row 7. (11 sc)
Checkpoint: Total length should be about 1.7 in (4.3 cm).
Row 10 (WS): Repeat Row 6. (11 sts, 4 puffs)
Rows 6 to 10 form the widest, straight-sided section of the leaf.
Row 11 (RS, sc decrease row): Ch 1. Sc2tog over the first dc and the next ch-1 sp. Work 1 sc in each st and sp across until 2 remain, which are the last ch-1 sp and the tch. Sc2tog over those 2, working the second leg into the 3rd ch of tch. Turn. (9 sc)
Count check: 11 sts, minus 1 st at each edge, equals 9 sc.
Row 12 (WS, puff-mesh row): Repeat Row 4. (9 sts, 3 puffs)
Row 13 (RS, sc decrease row): Ch 1. Sc2tog over first dc and next ch-1 sp. Work 1 sc in each st and sp across until 2 remain. Sc2tog over the last ch-1 sp and the 3rd ch of tch. (7 sc)
Do not fasten off. Continue directly into the border.
Checkpoint: The motif should measure 2.5 in (6.4 cm) long and 1.5 in (3.8 cm) at its widest. The top edge should measure about 0.9 in (2.3 cm).
Row count summary: There are 7 sc rows (Rows 1, 3, 5, 7, 9, 11, 13) and 6 puff-mesh rows (Rows 2, 4, 6, 8, 10, 12). That makes 13 rows total.
Border
Border gauge: The border uses the same density as the body, about 7.5 sc per 1 in (2.5 cm) along each edge. This keeps the edge flat, with no ruffling and no cupping.
The border is a conversion round. Each stitch is worked into an existing stitch, row-end, or chain loop, with a small number of extra stitches added at the shaping points.
Row-end rule for the side edges:
- 1 sc into the end of each sc row
- 2 sc into the end of each puff-mesh row, working around the dc or tch post
Border Round (RS): At the end of Row 13, do not turn. Ch 1 and rotate the piece to work down the side edge.
- Side edge 1: Work 19 sc evenly down the row-ends. That is 7 sc rows x 1 sc, plus 6 puff-mesh rows x 2 sc, for a total of 7 + 12 = 19 sc.
- Tip: Work into the opposite side of the foundation ch. Sc in first ch. Work (sc, ch 2, sc) in center ch. Sc in last ch. (4 sc + ch-2 point)
- Side edge 2: Work 19 sc evenly up the row-ends, following the same row-end rule.
- Top edge: Work 2 sc in first st of Row 13. Sc in next 5 sts. Work 2 sc in last st. (9 sc: 7 worked 1-per-st, plus 2 extra)
Join with a sl st to the first sc of the round. Fasten off.
Border total: 19 + 4 + 19 + 9 = 51 sc plus 1 ch-2 tip point.
Why the math works: Each side edge measures about 2.5 in (6.4 cm). At 7.5 sc per inch, it needs about 19 sc, and the row-end rule gives exactly 19. The shaped lower edges run slightly diagonal, so they are a little longer than straight vertical sides. The 2-sc rule on the taller puff-mesh rows absorbs that extra length.
The tip’s (sc, ch 2, sc) creates a crisp point without crowding the 3 foundation chains. The 2 extra sc on the top edge round off the upper corners.
The border adds about 0.125 in (0.3 cm) to every edge. This brings the motif from 2.5 in x 1.5 in (6.4 cm x 3.8 cm) to 2.75 in x 1.75 in (7.0 cm x 4.4 cm).
Final Blocking
- Weave in both ends along the WS of the sc rows. Do not trim them yet.
- Lay the motif RS up on a blocking mat or folded towel.
- Mist it evenly with water until it is damp but not dripping.
- Pin the tip point first. Then pin the center of the top edge so the motif measures 2.75 in (7.0 cm) long.
- Pin the widest point, at Rows 6 to 10, to 1.75 in (4.4 cm) across.
- Ease the lower edges into smooth, slightly curved lines toward the tip. Round the top corners gently.
- Use a pin tip to nudge each puff upright and open each ch-1 space so the mesh is visible.
- Let the motif dry completely, then remove the pins.
- Trim the woven-in ends close to the fabric.
Final Quality-Control Checklist
- Motif measures 2.75 in x 1.75 in (7.0 cm x 4.4 cm)
- 13 rows total: 7 sc rows and 6 puff-mesh rows
- Rows 6, 8, and 10 each have 4 puffs; Rows 4 and 12 each have 3 puffs
- Row 13 has 7 sc
- Border has 51 sc plus the ch-2 tip
- Each side edge has 19 border sc
- Tip forms a clean point; top edge is gently rounded
- Edges lie flat, with no ruffles or cupping
- Ends are secure and invisible from the RS
Troubleshooting
Edges are wavy after the border. You may have added extra sc on the side edges. Recount to 19 per side and rework if needed.
Edges cup inward. The border tension is too tight, or you worked only 1 sc into the puff-mesh row-ends. Use 2 sc per puff-mesh row-end and keep the border loops relaxed.
Puffs look flat or uneven. Pull up each loop to the height of a dc before the final yarn over. Hold the loops loosely on the hook.
Stitch counts don’t match. The most common cause is missing the 3rd ch of the tch. Mark it with a stitch marker on every puff-mesh row.
The tip is lopsided. Make sure the (sc, ch 2, sc) is in the center foundation ch. Re-pin the tip during blocking.
The motif is too long but the width is correct. Your puffs are too tall. Shorten the pulled-up loops slightly, or block with gentle side-to-side tension.
Care
Hand wash in cool water with mild soap and press out the water in a towel. Reshape and dry flat, re-pinning the tip if needed.
Final Notes
Here is the measurement chain to follow. The tip starts at 0.4 in (1.0 cm) wide and opens to 1.5 in (3.8 cm) by Row 6. The body holds that width through Row 10, then narrows to 0.9 in (2.3 cm) at Row 13. The unbordered piece measures 2.5 in x 1.5 in (6.4 cm x 3.8 cm).
The 51-stitch border adds 0.125 in (0.3 cm) per edge, for a finished size of 2.75 in x 1.75 in (7.0 cm x 4.4 cm). Check your counts at each marked row, block with care, and the leaf will hold its shape and texture.
Optional: once you are comfortable with the motif, you can make several to use as appliqués. That is an extra idea, not part of this pattern.
Happy crocheting!