

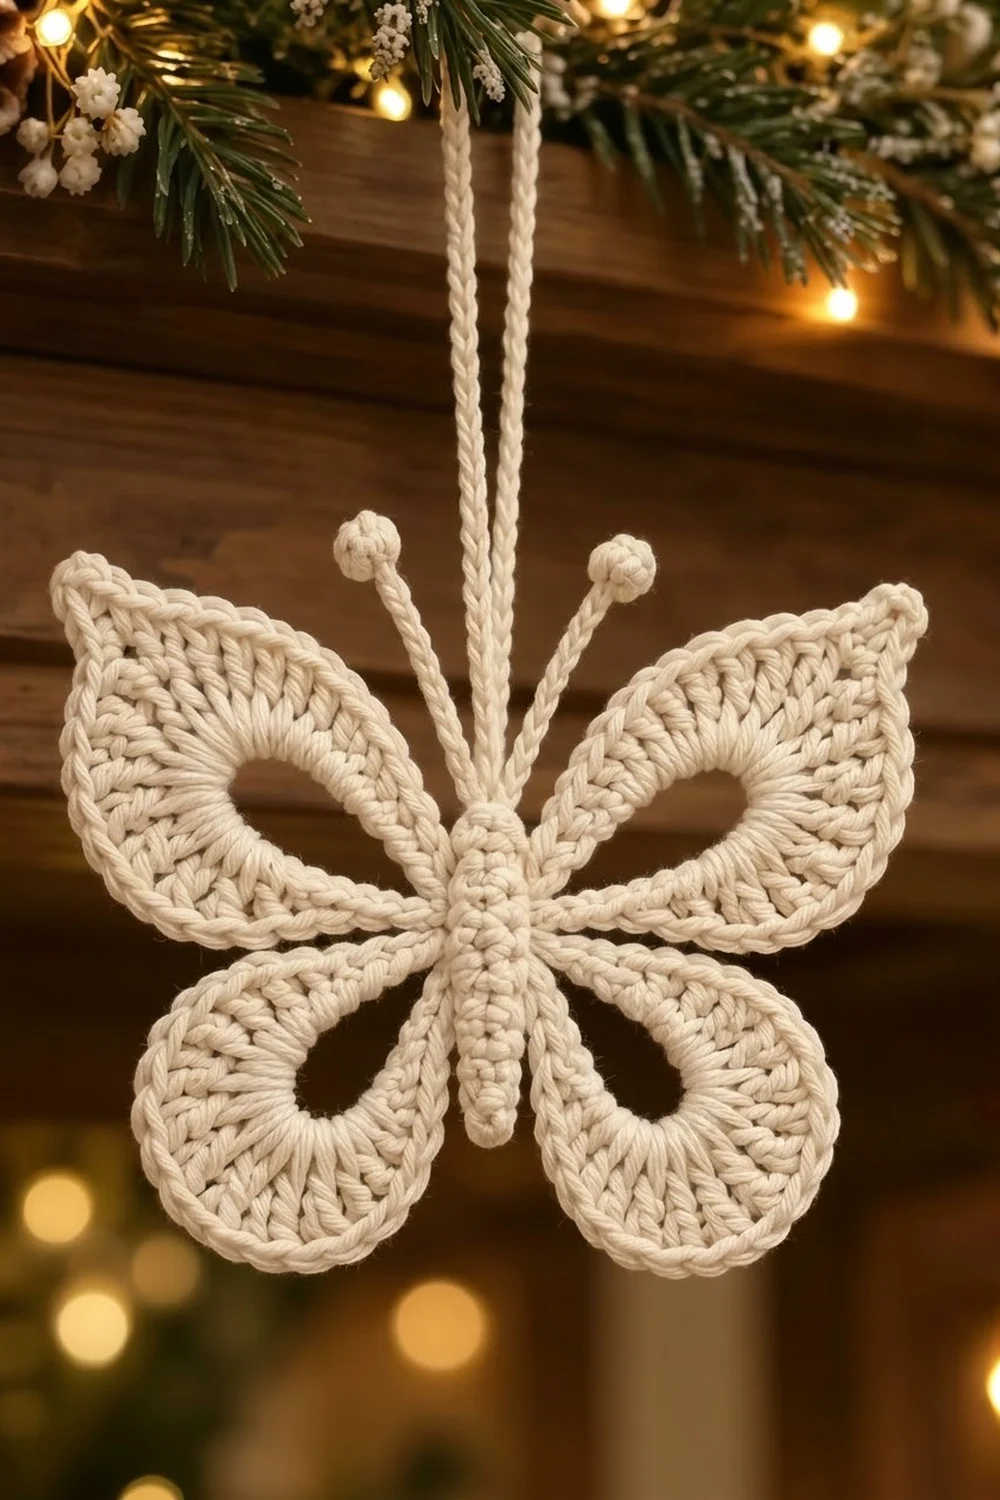
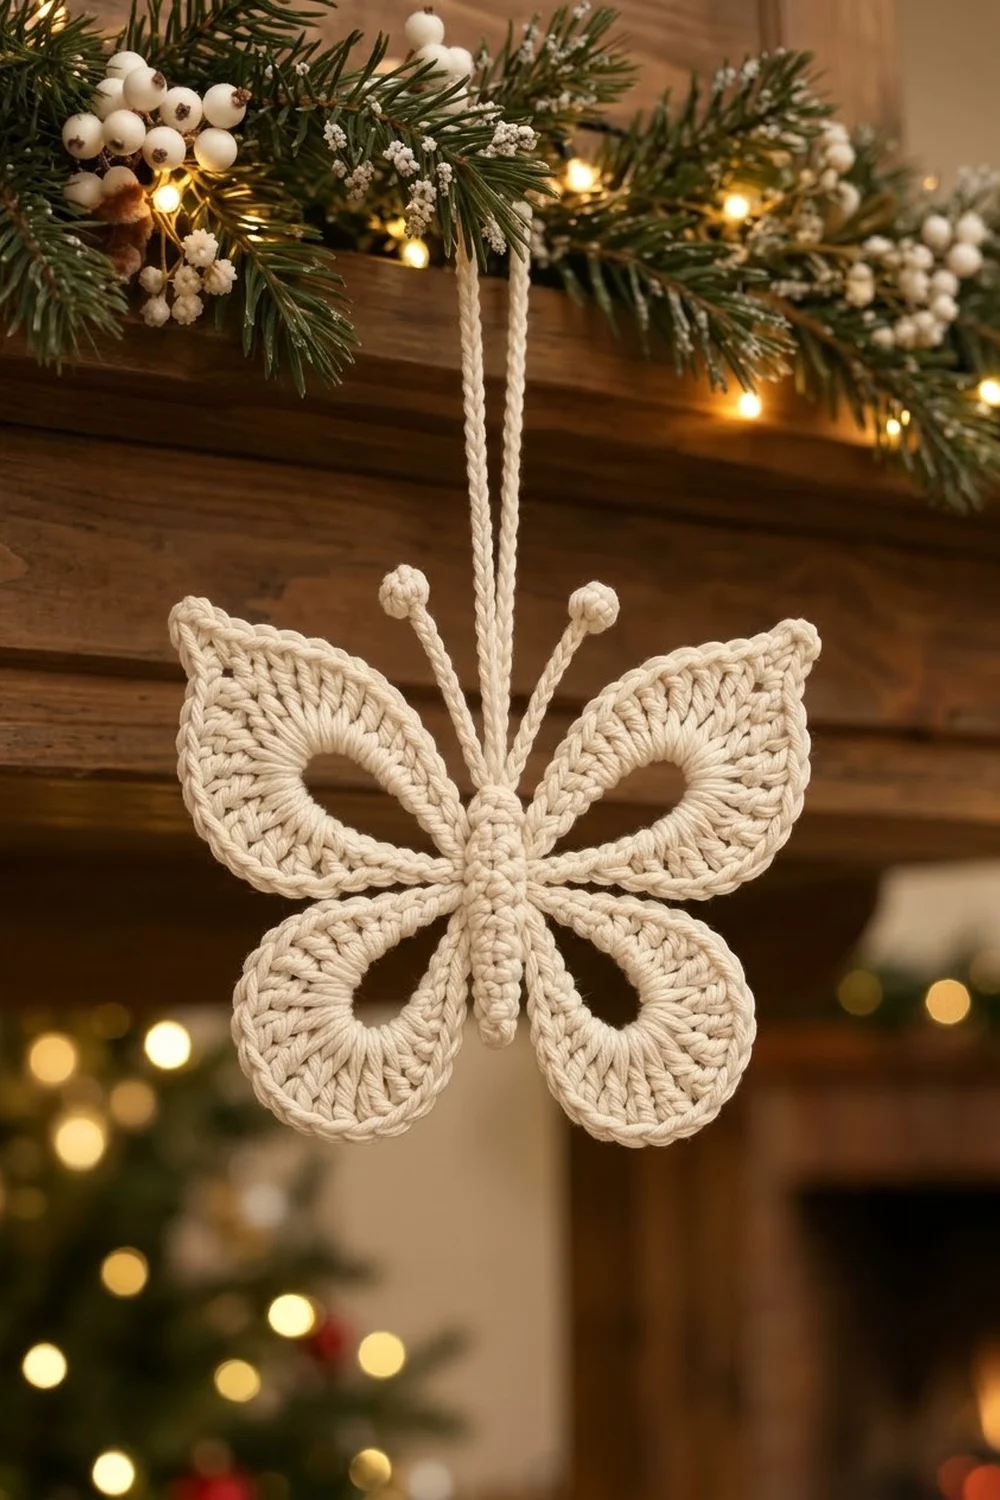
This butterfly ornament is worked in a single cream, off-white yarn. It has four symmetrical wings with an open, leaf-like silhouette. Each wing is a teardrop frame outlined in dense single crochet around a large oval opening, which gives the piece a lacy, openwork look.
At the center sits a textured cylindrical body worked in tight back-loop single crochet. Three small bobble-tipped antennae rise from the top. Two twisted rope cords extend upward from the body so the butterfly hangs freely as a dimensional Christmas tree ornament.
The pattern uses US crochet terms. The finished butterfly measures about 4.5 in (11.4 cm) wide and 4.5 in (11.4 cm) tall from wing tip to wing tip, not counting the antennae and cords.
You will work each wing in three rounds around a chain ring: a base round, a shaping round, and a dense single crochet outline round. You will then make the body, the three antennae, and the two cords. Finally, you will block the wings and assemble everything into one ornament.
Finished Size and Construction
- Finished size: 4.5 in (11.4 cm) wide x 4.5 in (11.4 cm) tall, excluding antennae and cords
- Skill level: Intermediate (shaped rounds, bobbles, light assembly)
- Terminology: US crochet terms
- Yarn weight: DK / light worsted (#3) cotton
- Hook: 3.0 mm (US C/2–D/3)
- Number of pieces: 1 finished ornament, assembled from 4 wings, 1 body, 3 antennae, and 2 twisted cords
- Layout: 2 upper wings (pointed tips) and 2 lower wings (rounded tips), one of each on either side of the body
- Piece size:
- Upper wing: 2.8 in (7.1 cm) long x 2.0 in (5.1 cm) wide
- Lower wing: 2.3 in (5.8 cm) long x 1.8 in (4.6 cm) wide
- Body: 2.5 in (6.4 cm) long x 0.5 in (1.3 cm) across
- Size before border:
- Upper wing: 2.4 in (6.1 cm) x 1.6 in (4.1 cm)
- Lower wing: 1.9 in (4.8 cm) x 1.4 in (3.6 cm)
- Border depth: 0.2 in (0.5 cm) on all edges, from one round of sc
Materials
Yarn: Use a smooth, mercerized DK cotton in cream or off-white. Cotton holds crisp edges, takes starch well, and shows the dense sc outline clearly. Avoid fuzzy or very soft acrylics, because the wing openings will sag.
- Cream: 20 g / approximately 44 m (48 yd)
This quantity includes a margin of about 25 percent for your gauge swatch, the cords, and sewing tails.
Tools:
- 3.0 mm crochet hook
- Tapestry needle
- 2–4 locking stitch markers
- A small pinch of fiberfill
- Rust-proof pins and a blocking board or foam mat
- Spray starch or fabric stiffener
- Scissors and a ruler or tape measure
Abbreviations (US Terms)
- ch – chain
- sl st – slip stitch
- sc – single crochet
- hdc – half double crochet
- dc – double crochet
- sc2tog – single crochet 2 together
- BLO – back loop only
- st(s) – stitch(es)
- sp – space
- MR – magic ring
- rnd(s) – round(s)
Special stitch – 5-dc bobble: Yo, insert hook in the indicated st, yo and pull up a loop, yo and pull through 2 loops. Repeat from * to * 4 more times in the same st (6 loops on hook). Yo and pull through all 6 loops.
Gauge and Checkpoints
Gauge: 22 sc x 24 rnds = 4 in (10.2 cm), worked firmly. That equals 5.5 sc per inch and 6 rnds per inch.
Test one piece first. Make one complete upper wing before anything else and measure it against these checkpoints:
- Upper wing after Rnd 1: the oval ring lies about 1.5 in (3.8 cm) long when flattened.
- Upper wing after Rnd 2: 2.4 in (6.1 cm) x 1.6 in (4.1 cm).
- Upper wing after Rnd 3: 2.8 in (7.1 cm) x 2.0 in (5.1 cm).
- Lower wing after Rnd 1: about 1.2 in (3.0 cm) long.
- Lower wing after Rnd 2: 1.9 in (4.8 cm) x 1.4 in (3.6 cm).
- Lower wing after Rnd 3: 2.3 in (5.8 cm) x 1.8 in (4.6 cm).
- Body after Rnd 2: 0.5 in (1.3 cm) across.
- Body after Rnd 13: 2.2 in (5.6 cm) long.
- Body after Rnd 15: 2.5 in (6.4 cm) long.
If your wing is too big by more than 0.2 in (0.5 cm), change to a 2.75 mm hook. If it is too small, change to a 3.25 mm hook. Don’t add or remove stitches, because the shaping depends on the stated counts.
Upper Wings (Make 2)
Foundation: Ch 24. Sl st in the first ch to form a ring, taking care not to twist the chain.
Rnd 1: Ch 1 (does not count as a st). Sc in each ch around. Sl st in the first sc to join. (24 sc)
Place a marker in the first sc. This is st 1, the base center that will later sit against the body. St 13 sits directly opposite it and becomes the tip.
Rnd 2 (shaping): Ch 1. Work the following in order:
- Sc in st 1 (base center).
- Sc in next 2 sts.
- Hdc in next 3 sts.
- Dc in next st, 2 dc in next st. Repeat from * to * 3 times in total.
- In st 13 work (dc, ch 2, dc). This forms the tip.
- 2 dc in next st, dc in next st. Repeat from * to * 3 times in total.
- Hdc in next 3 sts.
- Sc in last 2 sts.
- Sl st in the first sc to join.
(31 sts: 5 sc, 6 hdc, 20 dc, plus 1 ch-2 sp)
This is a growth round. The 24 existing sts become 31 because the dc sections add 6 sts and the tip adds 1. Counted by section, Rnd 2 has 1 base sc, 15 sts on side A, the ch-2 tip, and 15 sts on side B. Side A is 2 sc, 3 hdc, 9 dc, and 1 tip dc. Side B mirrors it.
The short sc stitches near the base and the tall dc stitches toward the tip pull the ring into a leaf shape. Don’t fasten off yet; continue with the border round in the Border section.
Lower Wings (Make 2)
Foundation: Ch 20. Sl st in the first ch to form a ring.
Rnd 1: Ch 1. Sc in each ch around. Sl st in the first sc to join. (20 sc)
Mark st 1 as the base center. St 11 is the tip.
Rnd 2 (shaping): Ch 1. Work the following in order:
- Sc in st 1.
- Sc in next 2 sts.
- Hdc in next 2 sts.
- Dc in next st, 2 dc in next st. Repeat from * to * 2 times in total.
- 2 dc in next st (st 10).
- 3 dc in next st (st 11, the tip).
- 2 dc in next st (st 12).
- 2 dc in next st, dc in next st. Repeat from * to * 2 times in total.
- Hdc in next 2 sts.
- Sc in last 2 sts.
- Sl st in the first sc to join.
(28 sts: 5 sc, 4 hdc, 19 dc)
The 20 existing sts gain 8 increases in this round, which brings the total to 28. Counted by section, there is 1 base sc, 12 sts on side A, 3 tip dc, and 12 sts on side B. The fan of dc stitches at the tip gives the lower wing its rounded end. Continue with the border round.
Body (Make 1)
The body is worked in a continuous spiral. Move a marker up each round to track the start.
- Rnd 1: 6 sc in MR. (6 sc)
- Rnd 2: Sc in next st, 2 sc in next st. Repeat 3 times. (9 sc)
- Rnds 3–13: Sc BLO in each st around. (9 sc) The back-loop stitches create a fine horizontal ridge texture. Keep your tension tight.
- Rnd 14: Sc in next st, sc2tog. Repeat 3 times. (6 sc) Stuff the body lightly with a small pinch of fiberfill.
- Rnd 15: Sc2tog 3 times. (3 sc)
Fasten off. Close the opening with the tail and weave it inside. Rnd 1 (the MR end) is the top of the body.
Antennae (Make 3)
- Leave a 6 in (15.2 cm) tail. Ch 12.
- Work a 5-dc bobble in the 4th ch from the hook. Ch 1 to close.
- Sl st in each of the remaining 8 ch. (8 sl st)
- Fasten off, leaving a 6 in (15.2 cm) tail.
The 3 skipped chains fold into the bobble and round it into a small sphere. Each stem is about 1.5 in (3.8 cm) long.
Twisted Cords (Make 2)
- Cut a 24 in (61.0 cm) strand of yarn. Anchor one end, for example under a heavy book.
- Twist the free end in one direction until the strand kinks back on itself when slackened.
- Fold the strand in half and let it twist around itself.
- Knot the cut ends together.
Each finished cord is about 9 in (22.9 cm) long, with a folded loop at one end and a knot at the other.
Border
The border is the third round of each wing: one dense round of sc that forms the outline. It is worked at the same gauge as the rest of the piece, 5.5 sc per inch, and adds 0.2 in (0.5 cm) on every edge.
Upper Wing, Rnd 3
Ch 1. Work the following in order:
- Sc in the first 6 sts. These are the base sc and the next 5 sts.
- Sc in next 2 dc, 2 sc in next dc. Repeat from * to * 3 times in total. (12 sc)
- Sc in the next dc.
- 3 sc in the ch-2 sp.
- Sc in the next dc.
- 2 sc in next dc, sc in next 2 dc. Repeat from * to * 3 times in total. (12 sc)
- Sc in the last 5 sts.
- Sl st in the first sc to join. Fasten off, leaving a 12 in (30.5 cm) tail for sewing.
Count by section:
- Base center: 1 sc
- Side A: 18 sc (5 + 12 + 1)
- Tip: 3 sc
- Side B: 18 sc (1 + 12 + 5)
- Total: 40 sc
This is a conversion round. The 31 existing sts get 1 sc each, which gives 31 sc. Add 6 sc from the increases and 3 sc in the ch-2 tip space: 31 + 6 + 3 = 40. The middle sc of the 3 at the tip is the point.
Lower Wing, Rnd 3
Ch 1. Work the following in order:
- Sc in the first 5 sts.
- Sc in next 2 dc, 2 sc in next dc. Repeat from * to * 3 times in total. (12 sc)
- Sc in the center tip dc.
- 2 sc in next dc, sc in next 2 dc. Repeat from * to * 3 times in total. (12 sc)
- Sc in the last 4 sts.
- Sl st in the first sc to join. Fasten off, leaving a 12 in (30.5 cm) tail.
Count by section:
- Base center: 1 sc
- Side A: 16 sc (4 + 12)
- Tip: 1 sc
- Side B: 16 sc (12 + 4)
- Total: 34 sc
This is also a conversion round: 28 sc worked 1 per existing st, plus 6 sc from increases, gives 34.
Why the Math Works
The upper wing’s border line runs around an oval about 2.6 in x 1.8 in (6.6 cm x 4.6 cm). That edge measures about 7.0 in (17.8 cm). At 5.5 sc per inch, it needs about 38–39 sc. The 40 sc include 2 extra stitches packed into the tip so the point stays sharp.
The lower wing’s border line measures about 5.8 in (14.7 cm), which needs about 32 sc. The 2 extra stitches sit on the wide outer curve, where they keep the edge from cupping. Every increase falls on the dc sections, where the edge travels farthest. The sc and hdc sections at the base stay at 1 sc per st, so the base stays narrow.
Final Blocking
- Soak all four wings in cool water for 10 minutes. Press out the water in a towel; don’t wring.
- Pin each upper wing to 2.8 in (7.1 cm) x 2.0 in (5.1 cm). Pin the tip first, then the base, then the sides.
- Pin each lower wing to 2.3 in (5.8 cm) x 1.8 in (4.6 cm).
- Pin around the inside of each opening to stretch it into a smooth oval. Matching wings should have identical openings.
- Spray each wing generously with starch and let it dry for 24 hours.
- Assemble the ornament:
- Sew the 3 base sc of each upper wing (the base center plus one stitch on each side) to the side of the body at Rnds 4–7. Angle each wing upward and outward.
- Sew each lower wing at Rnds 9–12, angled downward and outward.
- Keep the wings in mirror image across the body.
- Attach the antennae. Thread each antenna’s tails through the top of the body at Rnds 1–2, with one in the center and one on each side. Knot the tails inside and bury the ends.
- Attach the cords. Thread the knotted end of each cord into the top of the body between the antennae and secure it inside. Tie the two folded loops together 6 in (15.2 cm) above the body to form the hanger.
- Lightly starch the antennae and shape them upright. Let them dry.
Final Quality-Control Checklist
- Upper wings each have 40 sc in Rnd 3; lower wings each have 34 sc.
- Upper wings measure 2.8 in x 2.0 in (7.1 cm x 5.1 cm). Lower wings measure 2.3 in x 1.8 in (5.8 cm x 4.6 cm).
- All four openings are clean ovals, and matching wings are identical.
- The body is 2.5 in (6.4 cm) long with even BLO ridges.
- All three bobbles are round and firm.
- The total width is about 4.5 in (11.4 cm).
- The ornament hangs level from both cords without tipping.
- All tails are woven in invisibly.
Troubleshooting
- Wing cups or curls: Your Rnd 3 is too tight. Go up 0.25 mm for that round only.
- Wing edge ruffles: You may have added extra increases. Recount against 40 or 34 sc.
- Opening closes up: The foundation chain was too tight. Re-chain loosely, or chain with a hook one size larger.
- Tip isn’t pointed: Make sure all 3 sc go into the ch-2 sp, not the dc beside it.
- Body ridges look uneven: Work only in the back loops and keep consistent tension in every round.
- Bobbles look flat: Pull the closing ch 1 snug, or work 6 dc instead of 5.
- Ornament tilts when hung: Adjust where the two cords are knotted at the top until the body hangs straight.
Care
Spot clean only with cool water and mild soap. Reshape, re-starch if needed, and store flat between tissue paper.
Final Notes
The measurement chain is simple. Gauge sets the wing ring, and the ring sets the shaping round:
- Upper wing: 24, 31, then 40 sts, finishing at 2.8 in (7.1 cm).
- Lower wing: 20, 28, then 34 sts, finishing at 2.3 in (5.8 cm).
- Body: 2.5 in (6.4 cm) long.
Together, these give a butterfly about 4.5 in (11.4 cm) wide. Check each stage and the finished ornament will match.
Happy crocheting!