

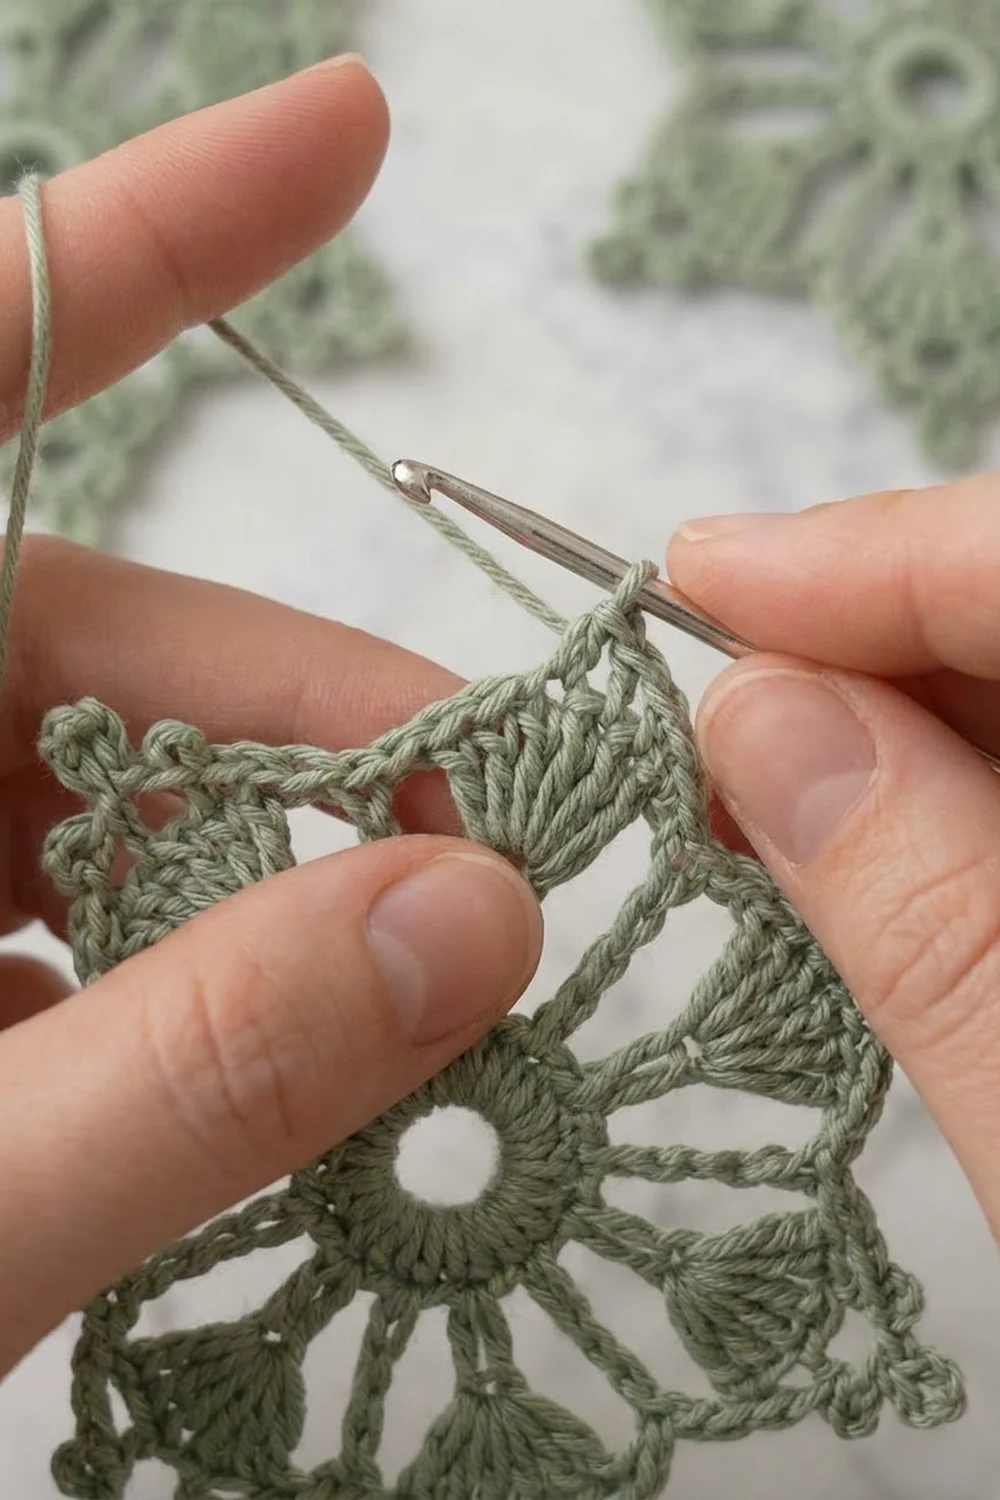
The Sage Frost Four-Point Star is a small, lacy motif worked in soft sage green. Four symmetrical pointed petals radiate from a round central opening. Each petal is built from an open fan of double crochet spaced with chains, so light passes through the whole piece.
The look is airy and delicate, close to a filet snowflake or a lace appliqué. The edges stay open and lacy. There is no added trim. The petal tips come directly from the last round of the motif.
This pattern uses US crochet terms. The finished motif measures 2.75 in (7.0 cm) from petal tip to opposite petal tip after blocking.
Construction is simple. You chain a ring for the center opening, work a round of double crochet, set up spokes with chain spaces, build four open fans, and finish with a round of chain loops that shapes each pointed tip. Everything is one piece, worked in the round, with no joining.
Finished Size and Construction
- Finished size: 2.75 in (7.0 cm) tip to tip, blocked
- Skill level: Easy-intermediate
- Terminology: US crochet terms
- Yarn weight: Super fine (#1), fingering-weight cotton
- Hook: 2.25 mm (US B-1)
- Number of pieces: 1
- Layout: Single motif, four petals set at 90° to each other around a central ring
- Piece size: 2.75 in (7.0 cm) tip to tip
- Size before final round: 2.25 in (5.7 cm) after Round 3
- Edge depth: Round 4 adds about 0.25 in (0.6 cm) at each tip, so 0.5 in (1.3 cm) total across the motif
Materials
Yarn advice: Use a smooth, mercerized fingering-weight cotton. Mercerized cotton gives crisp stitch definition and holds its shape after blocking, which matters for the pointed tips. Avoid fuzzy or very stretchy yarns. They blur the open fans and make the points droop.
Color:
- Sage green: 4 g, about 14 m (15 yd)
Tools:
- 2.25 mm (US B-1) crochet hook
- Tapestry needle
- Small sharp scissors
- Ruler or tape measure
- Blocking mat or folded towel
- Rust-proof pins (at least 8)
- Spray bottle with water
- Optional: fabric stiffener or spray starch
The yarn quantity includes a margin of about 30% for your gauge swatch, a starting tail, and weaving in ends. One motif uses roughly 3 g (10.5 m) of yarn.
Abbreviations (US Terms)
- ch – chain
- sl st – slip stitch
- sc – single crochet
- dc – double crochet
- sk – skip
- sp(s) – space(s)
- st(s) – stitch(es)
- rep – repeat
- [ ] – work the instructions inside brackets the number of times stated
- *** to *** – repeat the instructions between asterisks as directed
Special stitches:
- Open fan: In the same space, work (dc, ch 1) 6 times, then dc once more. This gives 7 dc and 6 ch-1 spaces. The 4th dc is the center dc of the fan.
- Tip point: In the same stitch, work (sc, ch 5, sc). The ch-5 loop forms the point of the petal.
Gauge and Checkpoints
Gauge is not critical for a single motif, but your size depends on it. Work one motif first and measure at each checkpoint below.
Checkpoints (unblocked, measured flat):
- After Round 1: 1.0 in (2.5 cm) outer diameter. The central opening is about 0.4 in (1.0 cm) across.
- After Round 2: 1.5 in (3.8 cm) across, measured over the ch-6 spaces.
- After Round 3: 2.25 in (5.7 cm) from fan top to opposite fan top.
- After Round 4: about 2.5 in (6.4 cm) tip to tip. Blocking opens it to 2.75 in (7.0 cm).
If your motif is too big: Go down to a 2.0 mm hook, or tighten your chains. Loose chains are the most common cause of oversizing in lace.
If your motif is too small: Go up to a 2.5 mm hook. Also check that you are not pulling the ch-1 spaces tight in the fans.
If only Round 1 is off: Adjust the hook and restart. A center that is off by 0.1 in (0.3 cm) becomes a larger error by Round 4.
Pattern
Round 1: Center Ring
Ch 10, sl st to the first ch to form a ring. This ring creates the central opening.
Ch 3 (counts as dc), work 23 dc into the ring. Sl st to the top of the beginning ch-3.
Stitch count: 24 dc.
Keep the dc snug and evenly spaced around the ring. The opening should stay round, about 0.4 in (1.0 cm) across.
Round 2: Spokes and Petal Bases
This round sets up the four petals. Each petal uses 6 stitches of Round 1 (24 ÷ 4 = 6).
Ch 1, sc in the same st as the join. Ch 3, sk 2 dc, sc in next dc. Ch 6, sk 2 dc.
Sc in next dc, ch 3, sk 2 dc, sc in next dc, ch 6, sk 2 dc. Rep from * to * 3 more times.
Sl st to the first sc.
Stitch count: 8 sc, 4 ch-3 sps, 4 ch-6 sps.
The last ch-6 skips the final 2 dc of Round 1 and returns to the first sc, so the repeat closes exactly. The ch-3 spaces become the valleys between petals. The ch-6 spaces become the petal bases.
Round 3: Open Fans
Sl st into the next ch-3 sp. Ch 1, sc in the same ch-3 sp.
Work 1 open fan in the next ch-6 sp: (dc, ch 1) 6 times, dc. Sc in the next ch-3 sp. Rep from * to * 3 more times, but on the last repeat, end after the open fan.
Sl st to the first sc.
Stitch count: 4 sc, 28 dc, 24 ch-1 sps.
Each petal now has 7 dc and 6 ch-1 spaces. Each valley has 1 sc. Spread the fan dc evenly across the ch-6 space. The fans should fan out flat, not stack up.
Checkpoint: 2.25 in (5.7 cm) across from fan top to opposite fan top.
Round 4: Petal Tips (Final Round)
This round shapes the points and forms the open lacy edge.
Ch 1, sc in the same st as the join. This is the first valley sc.
Ch 2, sc in the next ch-1 sp. [Ch 3, sc in the next ch-1 sp] 2 times. Ch 3. Work a tip point in the center (4th) dc of the fan: (sc, ch 5, sc). Ch 3, sc in the next ch-1 sp. [Ch 3, sc in the next ch-1 sp] 2 times. Ch 2, sc in the next valley sc. Rep from * to * 3 more times, but on the last repeat, replace the final “sc in the next valley sc” with a sl st to the first sc.
Fasten off, leaving a 6 in (15.2 cm) tail.
Stitch count per petal: 9 sc (1 valley sc + 6 sc in ch-1 spaces + 2 sc in the tip), 6 ch-3 sps, 2 ch-2 sps, 1 ch-5 tip.
Round total: 36 sc, 24 ch-3 sps, 8 ch-2 sps, 4 ch-5 tips.
The short ch-2 spaces at each valley pull the edge inward. The longer ch-3 loops and the ch-5 tip push outward. That contrast creates the star shape.
Edge (No Separate Border)
This motif has no added border or trim. Round 4 is the finished edge. Work nothing beyond it. An extra round would close the open lace and soften the points.
Edge gauge: Each ch-3 loop spans about 0.2 in (0.5 cm) along the petal edge. Each ch-5 tip extends about 0.25 in (0.6 cm) beyond the fan top. Each ch-2 valley spans about 0.1 in (0.3 cm).
Edge count per petal (one “side” of the star):
- 1 ch-2 sp leading up from the valley
- 3 ch-3 sps on the way up
- 1 ch-5 tip at the center
- 3 ch-3 sps on the way down
- 1 ch-2 sp leading back into the next valley
That is 6 ch-3 loops, 2 ch-2 spaces, and 1 tip per petal. Times 4 petals: 24 ch-3 loops, 8 ch-2 spaces, and 4 tips.
Why the math works:
- Round 1 has 24 dc, which divides evenly by 4 petals: 6 dc per petal.
- Round 2 uses those 6 dc as: sc, skip 2, sc, skip 2. That gives exactly 1 valley space and 1 petal base per petal, with no leftover stitches.
- Each open fan has 7 dc. An odd number gives a true center stitch (the 4th dc), so the tip sits exactly on the petal’s midline.
- The 6 ch-1 spaces split 3 and 3 around that center dc. Round 4 places 3 sc on each side, so both sides of every petal are mirror images.
- The 36 sc in Round 4 break down cleanly as 9 per petal, matching the stated per-petal count.
Final Blocking
Blocking is what turns the motif from slightly ruffled to crisp and flat.
- Weave in both ends along the backs of the stitches, following the dc posts so the tails stay hidden in the lace. Do not trim yet.
- Wet the motif fully in cool water. Press out the excess between two towels. Do not wring.
- Lay it face up on the blocking mat.
- Pin the center ring open into a neat circle about 0.4 in (1.0 cm) across. A pencil or knitting needle tip helps here.
- Pin each ch-5 tip outward along a straight line through the center. Opposite tips should measure 2.75 in (7.0 cm) apart.
- Check that all four tips sit at 90° to each other. Adjust pins until the star is square.
- Gently open each fan so the ch-1 spaces show evenly. Pin the valley ch-2 spaces inward slightly to sharpen the star shape.
- Optional: mist with spray starch or dab on fabric stiffener for a firmer ornament or appliqué.
- Let it dry completely, usually 4 to 6 hours, before unpinning.
- Trim the yarn tails close to the work.
Final Quality-Control Checklist
- Round 1 has 24 dc and the center opening is round.
- Round 2 has 8 sc, 4 ch-3 spaces, and 4 ch-6 spaces.
- Round 3 has 4 open fans of 7 dc each, with 1 sc in each valley.
- Round 4 has 36 sc and 4 ch-5 tips.
- Each tip sits on the center (4th) dc of its fan.
- Each petal has 3 ch-3 loops on each side of the tip.
- All four petals are the same size and shape.
- The motif lies flat with no cupping or ruffling.
- Tip-to-tip size is 2.75 in (7.0 cm) after blocking.
- Ends are woven in securely and invisible from the front.
Troubleshooting
The motif cups like a bowl. Your fans are too tight or your ch-6 spaces are too short. Loosen your chains in Round 2, or go up 0.25 mm in hook size.
The motif ruffles. Your chains are too loose. Tighten your chain tension or go down 0.25 mm in hook size.
The tip is off-center. You worked the tip point in the wrong dc. Count the fan dc again. The tip goes in the 4th of 7.
One petal is bigger than the others. You likely skipped the wrong number of dc in Round 2. Every repeat must skip exactly 2 dc after each sc.
The center hole is too big. Work the Round 1 dc tighter, or start with ch 8 instead of ch 10 and work 23 dc into the smaller ring.
The center hole closes up. Your ring chains are too tight. Loosen the starting chain slightly.
Points look rounded, not sharp. Pin the tips firmly during blocking and use starch. Make sure the ch-2 valley spaces are not too loose.
Care
Hand wash in cool water with mild soap, press dry in a towel, and reblock flat to restore the points. If you used stiffener, re-apply it after washing.
Final Notes
The size of this motif comes from a short, predictable chain of measurements. Round 1 sets a 1.0 in (2.5 cm) center. Round 2 widens it to 1.5 in (3.8 cm). Round 3 builds the fans to 2.25 in (5.7 cm). Round 4 adds the tips and blocking brings the star to its finished 2.75 in (7.0 cm).
If you hit each checkpoint, the final size takes care of itself. If one round is off, fix it there before moving on.
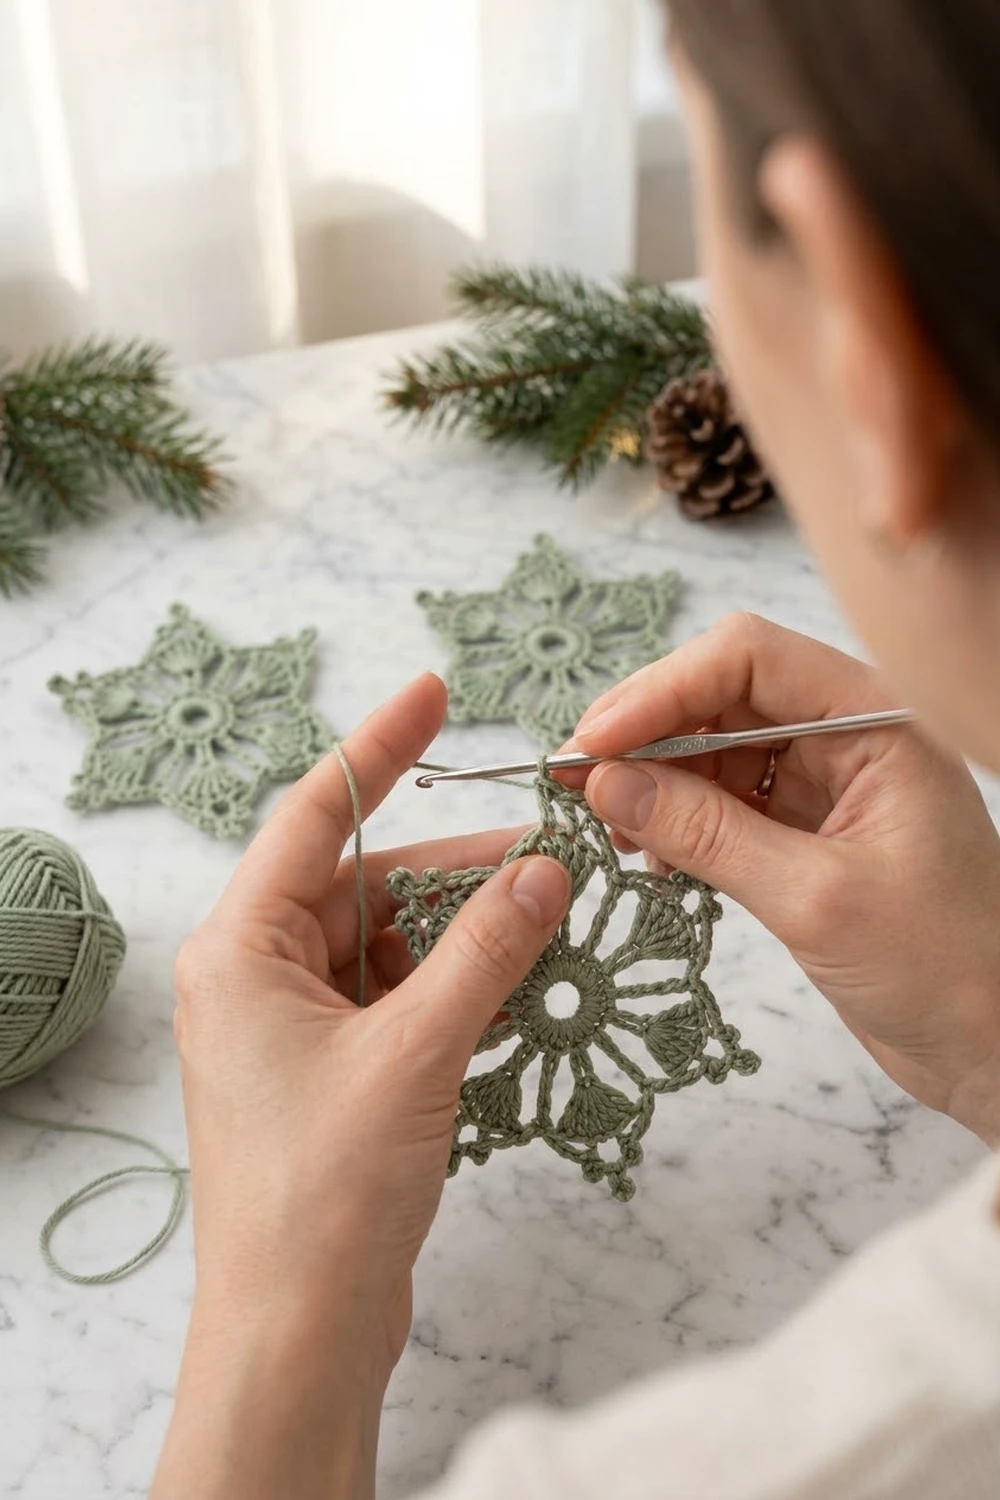
Optional: the motif works up quickly, so you can make several identical stars to use as ornaments, gift tags, or appliqués.
Happy crocheting!