

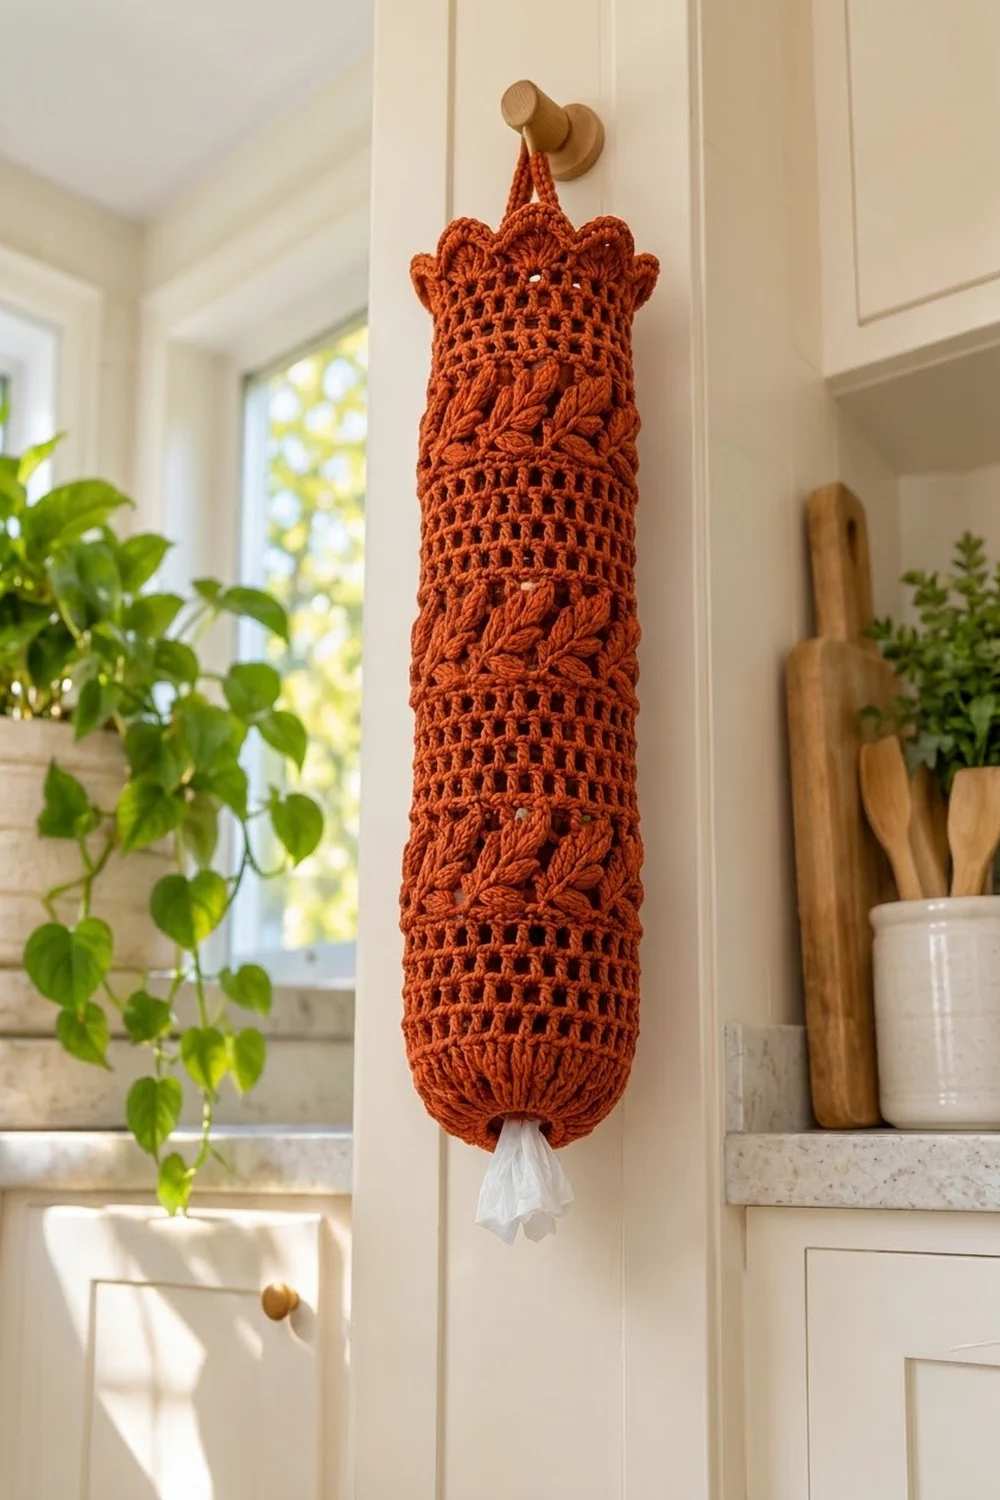
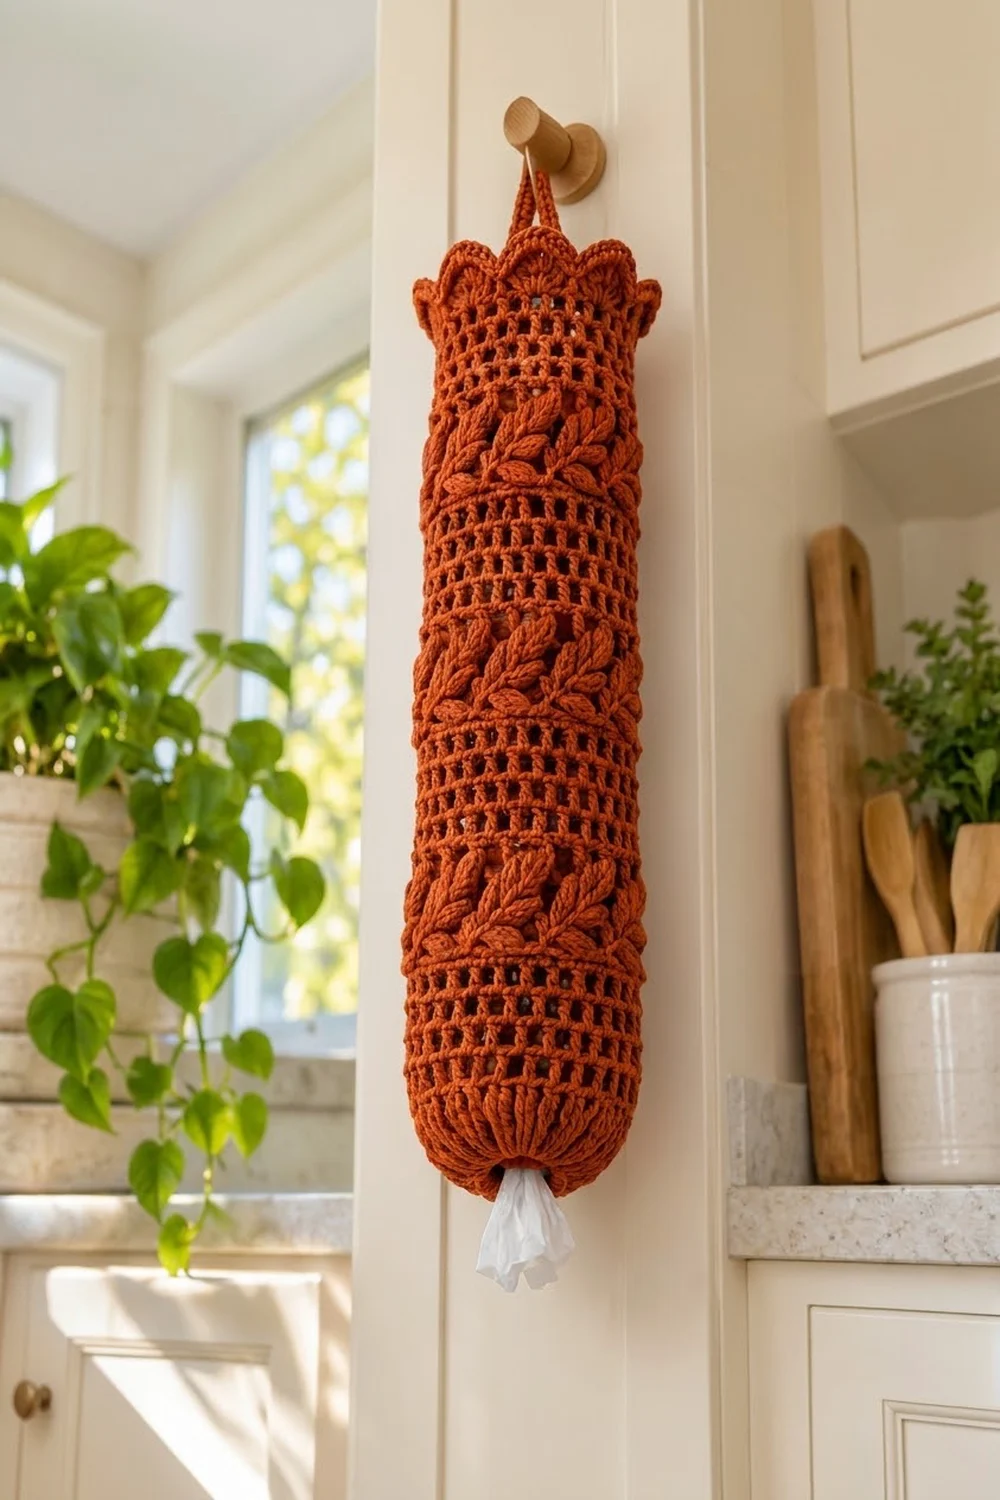
This bag holder is one long crocheted tube in a single warm rust shade. Bands of open filet mesh alternate with bands of raised leaf sprigs. You pull bags out one at a time through a small hole in the rounded base, and you stuff them in through the scalloped top, which flares slightly.
The leaves are puff stitches set in V-pairs on each side of a raised front post stem, so each band looks like a row of small branches. A thin single crochet ridge frames every leaf band. The mesh keeps the holder light and lets you see when it needs refilling.
The pattern uses US crochet terms throughout. The finished holder is 20 in (50.8 cm) long, 14 in (35.6 cm) around, and 7 in (17.8 cm) wide when flat. The hanging loop adds about 3 in (7.6 cm).
Construction is seamless. You start at the dispensing hole, work a domed base outward in joined rounds, and then go straight up the tube. A three-round scalloped edge finishes the top, and you work the hanging loop directly onto it. There is nothing to sew together.
Finished Size and Construction
- Finished size: 20 in (50.8 cm) long, 14 in (35.6 cm) around, 7 in (17.8 cm) wide when flat
- Skill level: Intermediate
- Terminology: US crochet terms
- Yarn weight: Worsted (#4), 100% cotton
- Hook: 4.5 mm (US 7)
- Number of pieces: 1 (the hanging loop is worked on, not sewn)
- Layout: base, then 4 mesh sections alternating with 3 leaf bands, then the scalloped top
- Piece size: one tube, 56 stitches around
- Size before border: 19 in (48.3 cm) long after Round 40
- Border depth: 1 in (2.5 cm) scalloped edge, plus a 3 in (7.6 cm) loop
Materials
Use a smooth mercerized or combed worsted cotton. Cotton holds its shape when the holder is full of bags, and it makes the leaf puffs look crisp. Avoid fuzzy or very stretchy yarns, because they let the tube sag lengthwise.
- Rust / terracotta: 150 g (about 255 m / 279 yd)
Tools:
- 4.5 mm (US 7) crochet hook
- Tapestry needle
- 1 stitch marker
- Scissors
- Tape measure
- A towel rolled to about 14 in (35.6 cm) around, for blocking
- Spray bottle
The 150 g includes a margin of about 25% for your gauge test and small differences in tension. The holder itself uses about 115–120 g.
Abbreviations (US Terms)
- ch – chain
- sl st – slip stitch
- sc – single crochet
- dc – double crochet
- fpdc – front post double crochet
- sk – skip
- sp – space
- st(s) – stitch(es)
- rep – repeat
- lf – leaf stitch (see below)
- V – (lf, ch 3, lf) all in the same stitch or space
Special stitch – Leaf (lf): [Yo, insert hook in the indicated st or sp, yo, pull up a loop to dc height] 3 times (7 loops on hook). Yo and draw through all 7 loops. Ch 1 to lock the leaf. The locking ch does not count as a stitch.
Round notes: Work in joined rounds with the right side facing. Do not turn. At the start of a round, ch 3 counts as 1 dc, and ch 4 counts as 1 dc plus ch 1. Join each round with a sl st to the top of the beginning chain. In the stitch counts, each ch-1 space counts as 1 stitch, and each chain in a ch-3 space counts as 1 stitch.
Gauge and Checkpoints
Gauge: 16 dc and 8 dc rounds = 4 in (10.2 cm). In mesh, 8 squares (dc + ch 1) = 4 in (10.2 cm).
That makes each 56-stitch round 14 in (35.6 cm) around. One dc round adds 0.5 in (1.3 cm) of length, and one sc round adds 0.25 in (0.6 cm).
Test the base first. Work Rounds 1–5, then check:
- After Round 1, the outer edge measures 8 in (20.3 cm) around and the hole is about 1.25 in (3.2 cm) across.
- After Round 4, the edge measures 14 in (35.6 cm) around and the base cups into a shallow dome.
Length checkpoints, measured from the edge of the hole up the side of the tube:
- Round 10: 4.75 in (12.1 cm)
- Round 15: 7 in (17.8 cm)
- Round 20: 9.5 in (24.1 cm)
- Round 25: 11.75 in (29.8 cm)
- Round 30: 14.25 in (36.2 cm)
- Round 35: 16.5 in (41.9 cm)
- Round 40: 19 in (48.3 cm)
If Round 4 measures more than 14.5 in (36.8 cm) around, switch to a 4 mm (US G-6) hook. If it measures less than 13.5 in (34.3 cm), switch to a 5 mm (US H-8) hook. Get the circumference right before anything else, because the stitch count can’t change from 56. If only the length is off, add or remove one mesh round in each mesh section.
Base
Ch 16, sl st in first ch to form a ring.
Round 1: Ch 3, work 31 dc into the ring, working over the chain rather than into it. Join. (32 dc)
Round 2: Ch 3, dc in next 2 sts, 2 dc in next st, dc in next 3 sts, 2 dc in next st; rep from * 6 more times, join. (40 dc)
Round 3: Ch 3, dc in next 3 sts, 2 dc in next st, dc in next 4 sts, 2 dc in next st; rep from * 6 more times, join. (48 dc)
Round 4: Ch 3, dc in next 4 sts, 2 dc in next st, dc in next 5 sts, 2 dc in next st; rep from * 6 more times, join. (56 dc)
Round 5: Ch 1, sc in each st around, join to first sc. (56 sc)
A flat circle this size would need about 66 stitches. With only 56, the base curves upward into a rounded cap.
Body
Mesh Section A (Rounds 6–10)
Round 6: Ch 4, sk next st, dc in next st, ch 1, sk next st; rep from * 26 more times, join to 3rd ch of beginning ch-4. (28 dc + 28 ch-1 sps = 56 sts)
Rounds 7–10: Ch 4, sk next ch-1 sp, dc in next dc, ch 1, sk next ch-1 sp; rep from * 26 more times, join. (56 sts in each round)
Each dc sits on top of the dc below, so the mesh forms straight columns of square holes.
Leaf Band 1 (Rounds 11–15)
Round 11 (solid base): Ch 3, dc in next ch-1 sp, dc in next dc, dc in next ch-1 sp; rep from * 26 more times, join. (56 dc)
Round 12 (first leaves): Ch 3, fpdc around next dc, dc in next dc, sk next 2 dc, V in next dc, sk next 2 dc, dc in next dc, fpdc around next dc, dc in next dc, sk next 2 dc, V in next dc, sk next 2 dc; rep from * 5 more times, join. (7 repeats)
Each repeat uses 8 sts of Round 11 and makes 8 sts: dc, fpdc, dc, lf, 3 ch, lf. The round has 14 dc, 7 fpdc, 14 lf, and 7 ch-3 sps, for 56 sts.
Rounds 13–14 (stacked leaves): Ch 3, fpdc around next fpdc, dc in next dc, sk next lf, V in next ch-3 sp, sk next lf, dc in next dc, fpdc around next fpdc, dc in next dc, sk next lf, V in next ch-3 sp, sk next lf; rep from * 5 more times, join. (56 sts in each round)
The fpdc stems stack into raised vertical ribs, and each V sits inside the one below it. Each sprig ends up with three leaf pairs angled outward, like a small branch.
Round 15 (ridge): Ch 1, sc in same st as join, sc in next fpdc, sc in next dc, sc in next lf, 3 sc in next ch-3 sp, sc in next lf, sc in next dc, sc in next fpdc, sc in next dc, sc in next lf, 3 sc in next ch-3 sp, sc in next lf; rep from * 5 more times, join. (8 sc per repeat x 7 = 56 sc)
Remaining Sections (Rounds 16–40)
- Rounds 16–20 (Mesh Section B): Work Round 6 into the sc ridge, then work Rounds 7–10.
- Rounds 21–25 (Leaf Band 2): Work as for Rounds 11–15.
- Rounds 26–30 (Mesh Section C): Work as for Rounds 6–10.
- Rounds 31–35 (Leaf Band 3): Work as for Rounds 11–15.
- Rounds 36–40 (Mesh Section D): Work as for Rounds 6–10.
Every round of the body has 56 sts, so the tube stays straight. The lengths add up like this:
- Base: 2.25 in (5.7 cm)
- 4 mesh sections at 2.5 in (6.4 cm) each: 10 in (25.4 cm)
- 3 leaf bands at 2.25 in (5.7 cm) each: 6.75 in (17.1 cm)
- Total: 19 in (48.3 cm)
Border: Scalloped Top and Hanging Loop
Border gauge: The border uses the same gauge as the body. Each dc round adds 0.5 in (1.3 cm) and each sc round adds 0.25 in (0.6 cm). The border has two sc rounds and one shell round, so it is 1 in (2.5 cm) deep.
Round 41: Ch 1, sc in each dc and each ch-1 sp around, join. (56 sc)
Round 42 (shells): Ch 1, sc in same st as join, sk next 3 sc, 7 dc in next sc, sk next 3 sc, sc in next sc; rep from * 6 more times. On the last repeat, leave out the final sc and join to the first sc instead. (7 shells: 49 dc + 7 sc = 56 sts)
Round 43 (edging): Sc in next 3 dc, 3 sc in next dc (the center of the shell), sc in next 3 dc, sl st in next sc; rep from * 6 more times. Fasten off. (63 sc + 7 sl sts = 70 sts)
Why the math works: 56 divides evenly by 8, so 7 shells fit with no leftover stitches. The 7 shells line up above the 7 leaf sprigs. In Round 43, the 2 extra sc at each shell tip (14 in total) let the scallops fan out, so the top flares to about 8 in (20.3 cm) wide when flat.
Hanging Loop
With the right side facing, join yarn with a sl st in any sl st between two scallops. Ch 24, sk next 4 sts, sl st in next sc. Work 30 sc over the ch-24 loop, then sl st into the stitch where the loop started. Fasten off.
Packing 30 sc over 24 ch makes a firm loop about 3 in (7.6 cm) tall. The two ends of the loop are 4 sts apart, which keeps it from twisting on a hook.
Final Blocking
- Weave in all ends along the sc ridges, where they hide best.
- Roll a towel until it is about 14 in (35.6 cm) around, and slide the holder over it.
- Mist the holder until it is evenly damp but not soaked.
- Pinch each leaf so it points outward, and straighten the fpdc stems so they run vertically.
- Shape the base into a smooth dome, and gently open the hole to 1.25 in (3.2 cm).
- Pull each scallop outward, then pin the 3 sc at each tip flat on a board to set the flare.
- Let the holder dry completely, about 12–24 hours, then remove the towel.
Final Quality-Control Checklist
- The holder is 20 in (50.8 cm) long and 14 in (35.6 cm) around.
- The hole is about 1.25 in (3.2 cm) across, and the base curves evenly.
- Each mesh round has 28 open squares stacked in straight columns.
- Each leaf band has 7 sprigs with 3 leaf pairs each.
- The fpdc stems line up from band to band.
- There are exactly 7 scallops, and each one sits above a leaf sprig.
- The loop is firm, sits centered between scallops, and doesn’t twist.
- All ends are woven in, and none show on the right side.
Troubleshooting
The base ruffles instead of cupping. Your tension is loose, or you added extra increases. Recount Round 4 (56 dc) and go down a hook size.
The base stays flat. Check that you worked the 31 dc over the ring, not into the chains. Working into the chains spreads the stitches out.
The tube spirals. The rounds are drifting at the join. Always join to the top of the beginning chain, and start the next round in that same stitch.
The leaves look thin. Pull each puff loop all the way up to dc height before you make the next one. Don’t skip the ch 1 that locks the leaf.
The last shell is crowded or uneven. You added an extra sc at the end of Round 42. The round needs exactly 7 sc.
The holder sags when full. The yarn is too stretchy or the mesh is loose. Use cotton, block the holder on the towel, and don’t overfill it.
Care
Hand wash in cold water. Reshape the holder over the rolled towel and let it dry. Don’t tumble dry, because heat can shrink cotton and flatten the leaves.
Final Notes
The measurements build on each other. At 16 dc = 4 in (10.2 cm), 56 sts make 14 in (35.6 cm) around. The domed base is 2.25 in (5.7 cm) long. The four mesh sections add 10 in (25.4 cm) and the three leaf bands add 6.75 in (17.1 cm), so the body is 19 in (48.3 cm) long. The 1 in (2.5 cm) scalloped border brings the holder to 20 in (50.8 cm), and the loop adds 3 in (7.6 cm) above it.
If you check the base at Round 4 and the length after each section, the holder will hang straight and hold plenty of bags.
Happy crocheting!