

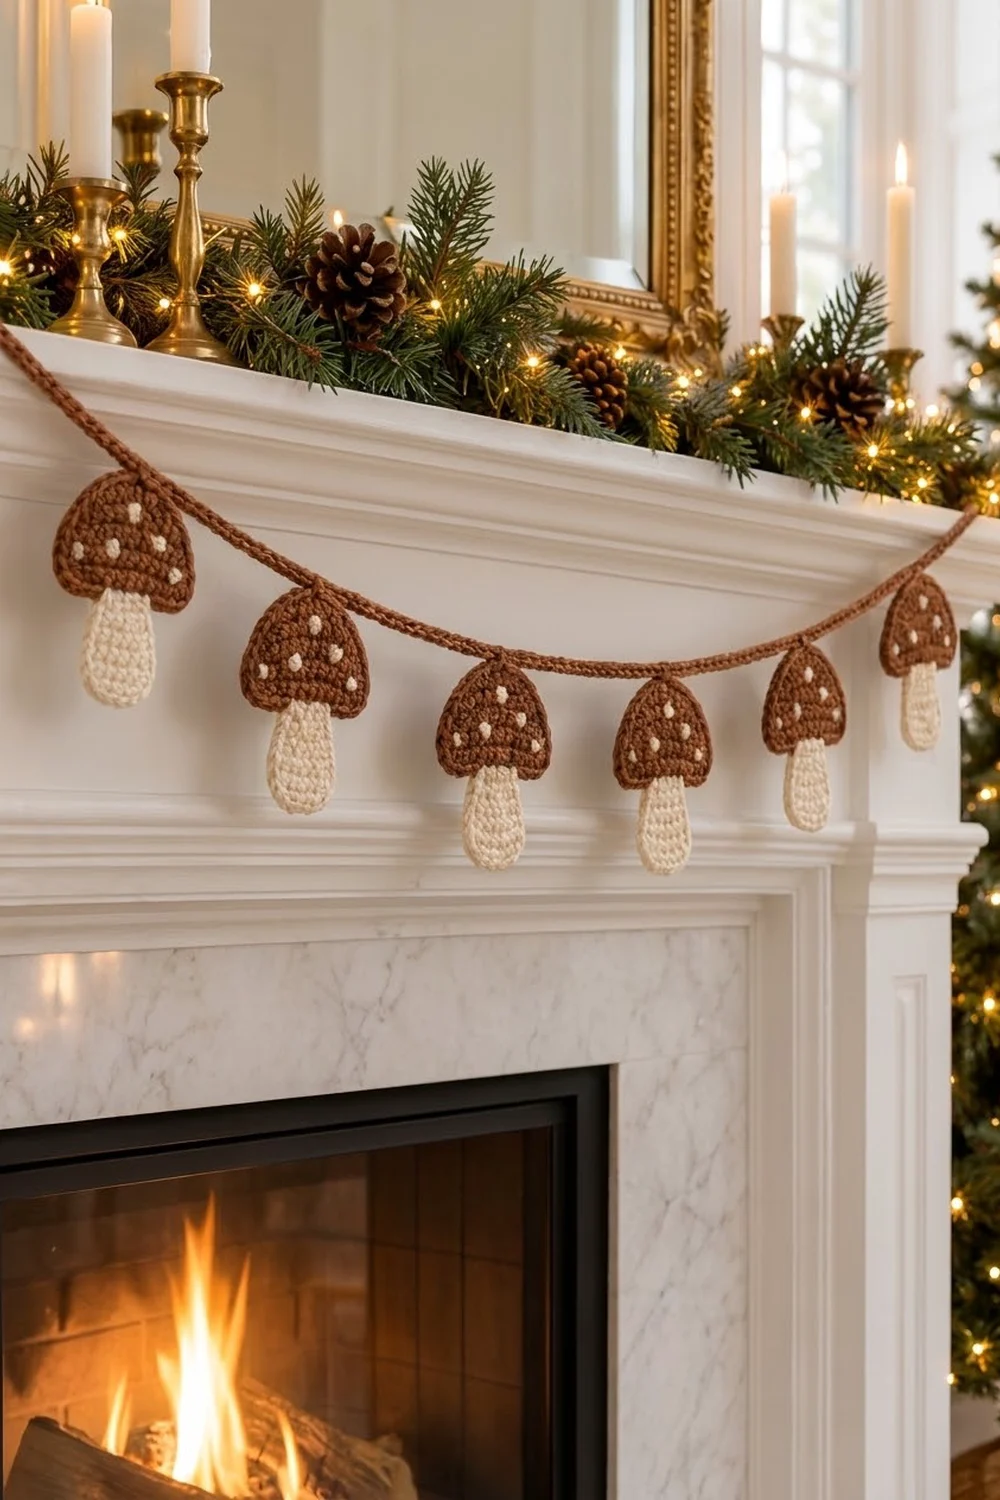
This garland strings seven little mushrooms along a thick brown cord that looks like twisted rope. Each mushroom has a cocoa-brown dome cap with five cream spots and a soft cream stem tucked behind it. It looks warm and a little rustic, and it works for autumn and Christmas mantels alike.
The palette is just two colors: medium cocoa brown for the caps and cord, and cream for the stems and spots. The caps are worked in tight single crochet, so the shapes stay crisp and lie flat. A single outline round around each piece gives the clean, finished edge you see on the mantel.
This pattern uses US crochet terms. Each mushroom is 3.6 in (9.1 cm) wide and 3.7 in (9.4 cm) tall. The cord is 58.8 in (149.4 cm) long, not counting the loops, and the seven mushrooms take up about 42 in (106.7 cm) in the middle.
Here’s the order of work: crochet each cap in rows from the bottom edge up, then work an outline round. Crochet each stem in rows from the bottom up, then outline it. Embroider the spots, sew each stem behind its cap, and finally work the cord, joining the mushrooms as you go.
Finished Size and Construction
- Finished size: cord 58.8 in (149.4 cm) plus two hanging loops; mushroom section about 42 in (106.7 cm)
- Skill level: Easy / advanced beginner
- Terminology: US crochet terms
- Yarn weight: DK (#3)
- Hook: 3.5 mm (E-4)
- Number of pieces: 7 caps, 7 stems, 1 cord
- Layout: 7 mushrooms in a single line, 6.4 in (16.3 cm) apart, center to center
- Piece size (one mushroom): 3.6 in (9.1 cm) wide × 3.7 in (9.4 cm) tall
- Size before outline round: cap 3.2 in × 1.6 in (8.1 cm × 4.1 cm); stem 1.4 in × 1.8 in (3.6 cm × 4.6 cm)
- Outline (border) depth: 0.2 in (0.5 cm) on every edge
Materials
Pick a smooth DK cotton or cotton blend so the stitches look crisp. Stay away from fuzzy or loosely plied yarn, because it blurs both the spots and the rope texture of the cord.
- Cocoa brown: 35 g, about 80 m (caps, cap outlines, cord)
- Cream: 20 g, about 46 m (stems, stem outlines, spots)
These amounts include a safety margin of roughly 30%.
Tools:
- 3.5 mm (E-4) crochet hook
- Tapestry needle
- Sharp embroidery needle (for the spots)
- 2 stitch markers
- Scissors
- Tape measure
- Blocking mat and rust-proof pins
- Spray bottle
Abbreviations (US Terms)
- ch – chain
- sl st – slip stitch
- sc – single crochet
- sc2tog – single crochet 2 together (decrease)
- st(s) – stitch(es)
- RS / WS – right side / wrong side
Special stitch: joining sl st. Insert the hook into the back bump of the next chain, then through both loops of the marked cap stitch. Yarn over and pull through everything on the hook. This attaches the mushroom and completes one slip stitch of the cord in the same move.
Gauge and Checkpoints
Gauge: 20 sc × 22 rows = 4 in (10.2 cm) in sc worked in rows. That works out to 5 sts and 5.5 rows per inch.
Test one mushroom first. Make one complete cap and one stem before you start the full set.
- Checkpoint 1: After Row 3, the cap measures 3.2 in (8.1 cm) wide.
- Checkpoint 2: After Row 9, the cap measures 1.6 in (4.1 cm) tall.
- Checkpoint 3: After the outline round, the cap is 3.6 in × 2 in (9.1 cm × 5.1 cm).
- Checkpoint 4: The outlined stem is 1.8 in × 2.2 in (4.6 cm × 5.6 cm).
- Checkpoint 5: On the cord, 50 ch measure 10 in (25.4 cm) after the slip stitch row.
If your pieces come out too big, go down a hook size, to 3.25 mm. If they come out too small, go up to 3.75 mm. Don’t change the stitch counts. The shapes depend on them.
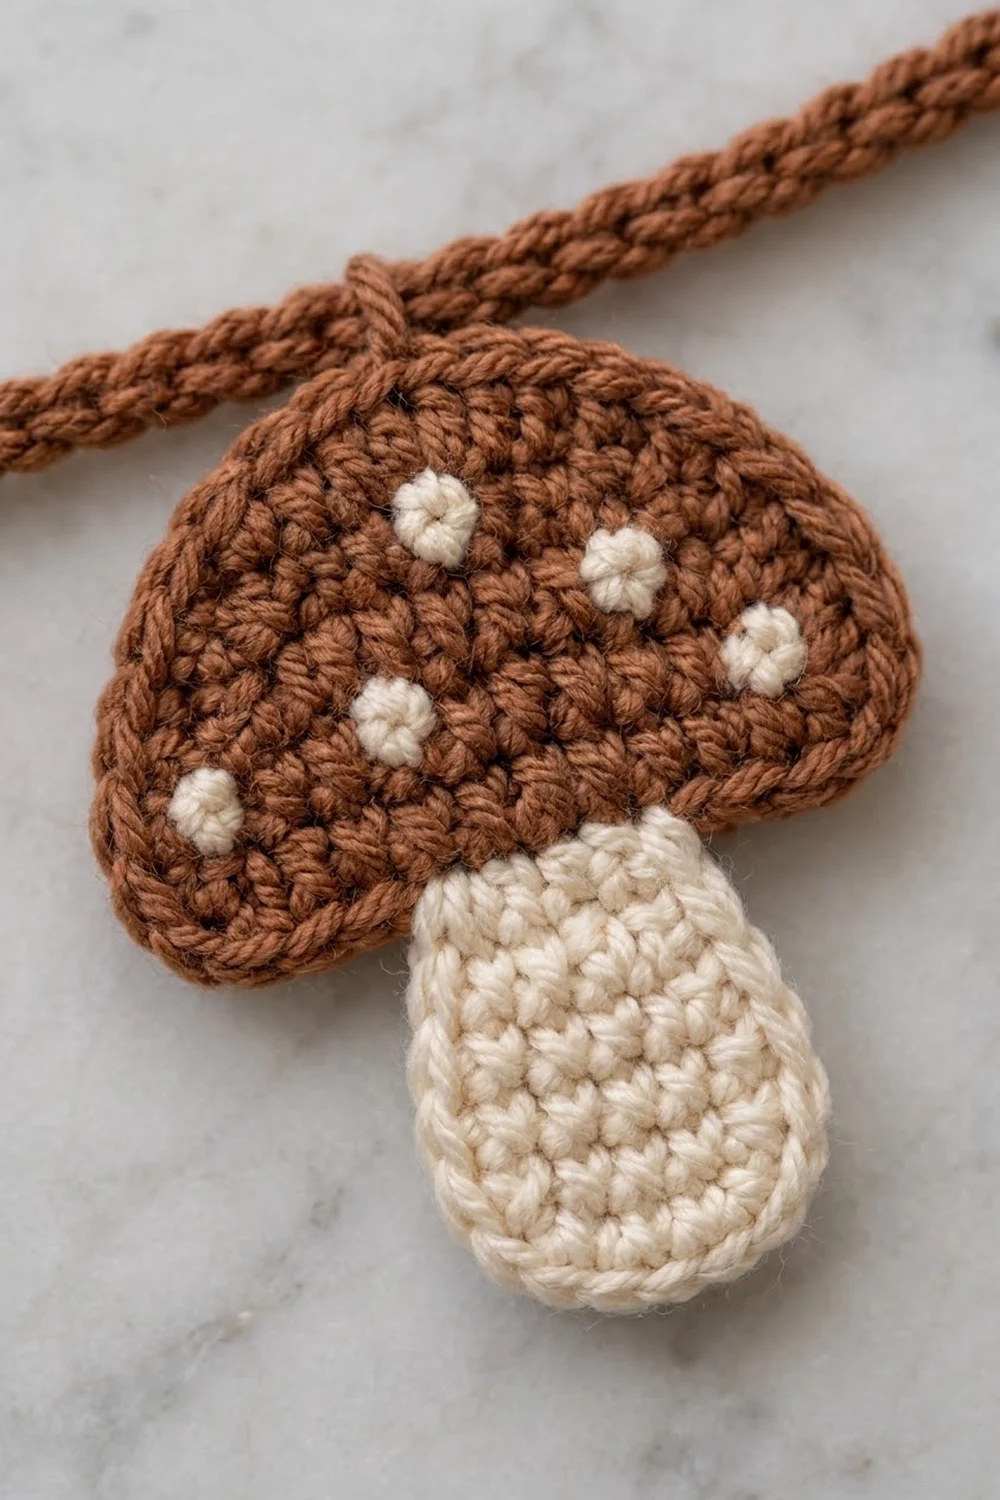
Cap (make 7, cocoa brown)
The cap is worked flat in turned rows, starting at the straight bottom edge. Decreases at both ends shape the dome. Begin each row with ch 1, which doesn’t count as a stitch.
Row 1 (RS): Ch 17. Sc in 2nd ch from hook and in each ch across. Turn. (16 sc)
Rows 2–3: Ch 1, sc in each st across. Turn. (16 sc)
Row 4: Ch 1, sc2tog, sc in next 12 sts, sc2tog. Turn. (14 sc)
Row 5: Ch 1, sc in each st across. Turn. (14 sc)
Row 6: Ch 1, sc2tog, sc in next 10 sts, sc2tog. Turn. (12 sc)
Row 7: Ch 1, sc2tog, sc in next 8 sts, sc2tog. Turn. (10 sc)
Row 8: Ch 1, sc2tog, sc in next 6 sts, sc2tog. Turn. (8 sc)
Row 9: Ch 1, sc2tog, sc in next 4 sts, sc2tog. Do not fasten off. (6 sc)
The width stays the same for three rows, then steps in. The slower decreases at first and faster ones at the top give a round dome with a slightly flat crown.
Cap Outline Round
This is a trim round. It works one sc into every existing stitch or row end, plus 4 extra stitches at the corners.
Outline Rnd: Ch 1, turn.
- Top: 2 sc in first st, sc in next 4 sts, 2 sc in last st (8 sc).
- First side: Work 1 sc in each row end down the side (9 sc).
- Bottom: Working into the free loops of the foundation chain, 2 sc in first ch, sc in next 14 ch, 2 sc in last ch (18 sc).
- Second side: Work 1 sc in each row end up the other side (9 sc).
- Sl st to the first sc. Fasten off, leaving a 12 in (30.5 cm) tail for sewing.
Count: 40 sts worked one per stitch or row end (6 + 9 + 16 + 9) + 4 corner increases = 44 sc.
Count 4 sts in from the start of the round and place a marker in the 4th st (T4). Place a second marker in the 5th st (T5). These two center top stitches are where the cap joins the cord.
Stem (make 7, cream)
The stem is also worked in rows, starting at the rounded bottom.
Row 1 (RS): Ch 4. Sc in 2nd ch from hook and in next 2 ch. Turn. (3 sc)
Row 2: Ch 1, 2 sc in first st, sc in next st, 2 sc in last st. Turn. (5 sc)
Row 3: Ch 1, 2 sc in first st, sc in next 3 sts, 2 sc in last st. Turn. (7 sc)
Rows 4–7: Ch 1, sc in each st across. Turn. (7 sc)
Row 8: Ch 1, sc2tog, sc in next 3 sts, sc2tog. Turn. (5 sc)
Rows 9–10: Ch 1, sc in each st across. Turn after Row 9 only. (5 sc)
Stem Outline Round
Outline Rnd: Ch 1, turn.
- Top: Sc in each of the 5 sts (5 sc).
- First side: 1 sc in each row end (10 sc).
- Bottom: Into the foundation chain, 2 sc in first ch, sc in next ch, 2 sc in last ch (5 sc).
- Second side: 1 sc in each row end (10 sc).
- Sl st to the first sc and fasten off.
Count: 28 sts worked one per stitch or row end (5 + 10 + 3 + 10) + 2 corner increases = 30 sc.
The stem is narrowest at the bottom tip, widest through Rows 3–7, and slightly narrower again at the top, where it tucks behind the cap.
Spots (on each cap)
Thread the embroidery needle with an 18 in (45.7 cm) length of cream yarn. Make a French knot with 2 wraps at each of these 5 places, RS facing:
- Row 8, in the center
- Row 6, 3 sts in from the left edge
- Row 6, 3 sts in from the right edge
- Row 3, 3 sts in from the left edge
- Row 3, 3 sts in from the right edge
Bring the needle up and back down through two neighboring holes in the fabric so the knot sits on top and doesn’t pull through. Weave the ends in on the WS. Each knot should be about 0.2 in (0.5 cm) across.
Make All Pieces
Totals:
- Cocoa brown: 7 caps (each 44 sts after the outline round) + 1 cord
- Cream: 7 stems (each 30 sts after the outline round) + 35 French knots (5 per cap)
Layout grid (left to right along the cord):
CORD: LOOP – LEAD – M1 – M2 – M3 – M4 – M5 – M6 – M7 – LEAD – LOOP
EACH M: BROWN CAP (5 CREAM SPOTS) OVER CREAM STEM
All seven mushrooms are the same. Make every cap and stem before you sew anything.
Joining
Here, joining means attaching each stem to its cap. The caps go onto the cord in the next section.
Method: Whipstitch with the brown cap tail.
- Lay the cap RS up. Slide the stem underneath so the stem’s top 0.5 in (1.3 cm) sits behind the cap. That’s the top outline round plus about Rows 9–10.
- Center the stem under the cap. The cap’s bottom edge has 18 outline stitches. Count 5 sts in from each end. The center 8 sts (sts 6–13) sit over the stem.
- Stitch-to-stitch: Whipstitch through the back loop of each of those 8 cap stitches and through the stem stitch directly behind it. That’s 8 stitches, one pass per stitch.
- Turn the piece over. Tack the stem’s top outline (5 sts) to the WS of the cap with cream yarn, one small stitch per stitch, so the stem stays put.
Tension: Pull each stitch just snug. If you pull too hard, the cap’s bottom edge puckers inward. If you sew too loosely, the stem swings.
Size checkpoint: The finished mushroom measures 3.6 in (9.1 cm) wide and 3.7 in (9.4 cm) tall. That’s the 2 in (5.1 cm) cap plus 1.7 in (4.3 cm) of visible stem.
Border: Hanging Cord
On this garland, the cord serves as the border: it finishes the top edge and holds every piece. It’s made in two passes. First you make a foundation chain, then you work a slip stitch row back along it, which turns the chain into the rope texture. The mushrooms are joined during the slip stitch row.
Border gauge: 5 sts = 1 in (2.5 cm) after the slip stitch row.
Row 1 (chain), cocoa brown:
- Start loop: Ch 12, sl st in the first ch to form a loop.
- Cord chain: Ch 294.
- End loop: Ch 12, sl st in the last of the 294 ch to form the second loop.
Don’t turn yet.
Row 2 (slip stitch row): Work back along the 294 cord chains only, into the back bump of each ch. Leave the loops unworked.
- Lead: Sl st in next 50 ch (50 sts).
- Mushroom 1: Joining sl st through the next ch and the cap’s T4, then joining sl st through the next ch and T5 (2 sts).
- Repeat 6 times: *Sl st in next 30 ch (30 sts), then 2 joining sl sts into the next cap’s T4 and T5 (2 sts).*
- Lead: Sl st in next 50 ch (50 sts).
- Fasten off and weave in the ends.
Before you join each mushroom, check that its RS faces the same way as the others and that its stem hangs straight down.
Row 2 count: 50 + 2 + (6 × 32) + 50 = 294 sts. That matches the Row 1 chain count exactly, with one stitch in every chain.
Why the math works:
- From one cap’s join to the next is 30 + 2 = 32 sts. At 5 sts per inch, that’s 6.4 in (16.3 cm) center to center.
- Subtract one 3.6 in (9.1 cm) cap and you get an even 2.8 in (7.1 cm) gap between mushrooms.
- The first and last caps’ centers are 6 × 32 = 192 sts apart, which is 38.4 in (97.5 cm). Add half a cap at each end and the mushroom section comes to 42 in (106.7 cm).
- Each lead is 50 sts, or 10 in (25.4 cm), so there’s enough cord left at each end to tie the garland on.
- Total: 294 sts ÷ 5 = 58.8 in (149.4 cm).
Final Blocking
- Mist each mushroom lightly with water until it’s damp but not soaked.
- Lay the garland flat on the blocking mat, RS up.
- Pin each cap to 3.6 in (9.1 cm) wide. Keep the bottom edge straight and the dome evenly rounded.
- Pin the stem straight down so the mushroom is 3.7 in (9.4 cm) tall.
- Straighten the cord and check that every gap measures 2.8 in (7.1 cm).
- Lift each French knot gently with the tip of a needle so it stands up.
- Let everything dry completely, about 6–8 hours, before you unpin.
Final Quality-Control Checklist
- Every cap has 44 outline sts and every stem has 30.
- Every cap has 5 spots in matching positions.
- Each stem is centered behind its cap, with 8 stitches sewn on each.
- All 7 mushrooms face RS forward.
- Center-to-center spacing is 6.4 in (16.3 cm) all along.
- Both leads are 10 in (25.4 cm) and both loops are secure.
- All ends are woven in on the WS.
Troubleshooting
- Cap cups or ripples at the corners: Check that you made both 2-sc increases at the bottom and at the top corners. Block firmly.
- Cap edges wave along the sides: Your row ends are looser than your stitches. Rework the outline with a 3.25 mm hook.
- Stem looks lopsided: Re-count Rows 2–3. Each one should add exactly 2 sts.
- Mushrooms twist on the cord: Make sure both joining sl sts went into T4 and T5. A single join lets the mushroom spin.
- Cord is shorter than 58.8 in (149.4 cm): Your slip stitches are too tight. Work them with a 4.0 mm hook.
- French knots pull through: Add a third wrap, or come up and go down a little farther apart.
Care
Hand wash in cool water with a mild soap and press out the water in a towel. Dry flat, and reshape the mushrooms while they’re still damp.
Final Notes
The measurements build on each other:
- Gauge of 5 sts per inch
- A 16-st cap, 3.2 in (8.1 cm) wide
- The 44-st outline round, bringing it to 3.6 in (9.1 cm)
- A 30-st outlined stem, 1.8 in (4.6 cm) wide
- A finished mushroom 3.7 in (9.4 cm) tall
- 32-st spacing, 6.4 in (16.3 cm) center to center
- A 294-st cord, 58.8 in (149.4 cm) long
If your first test mushroom matches its checkpoints, the whole garland will come out right. Hang it on a mantel, a shelf edge or a window, and enjoy your little woodland row.
Happy crocheting!