

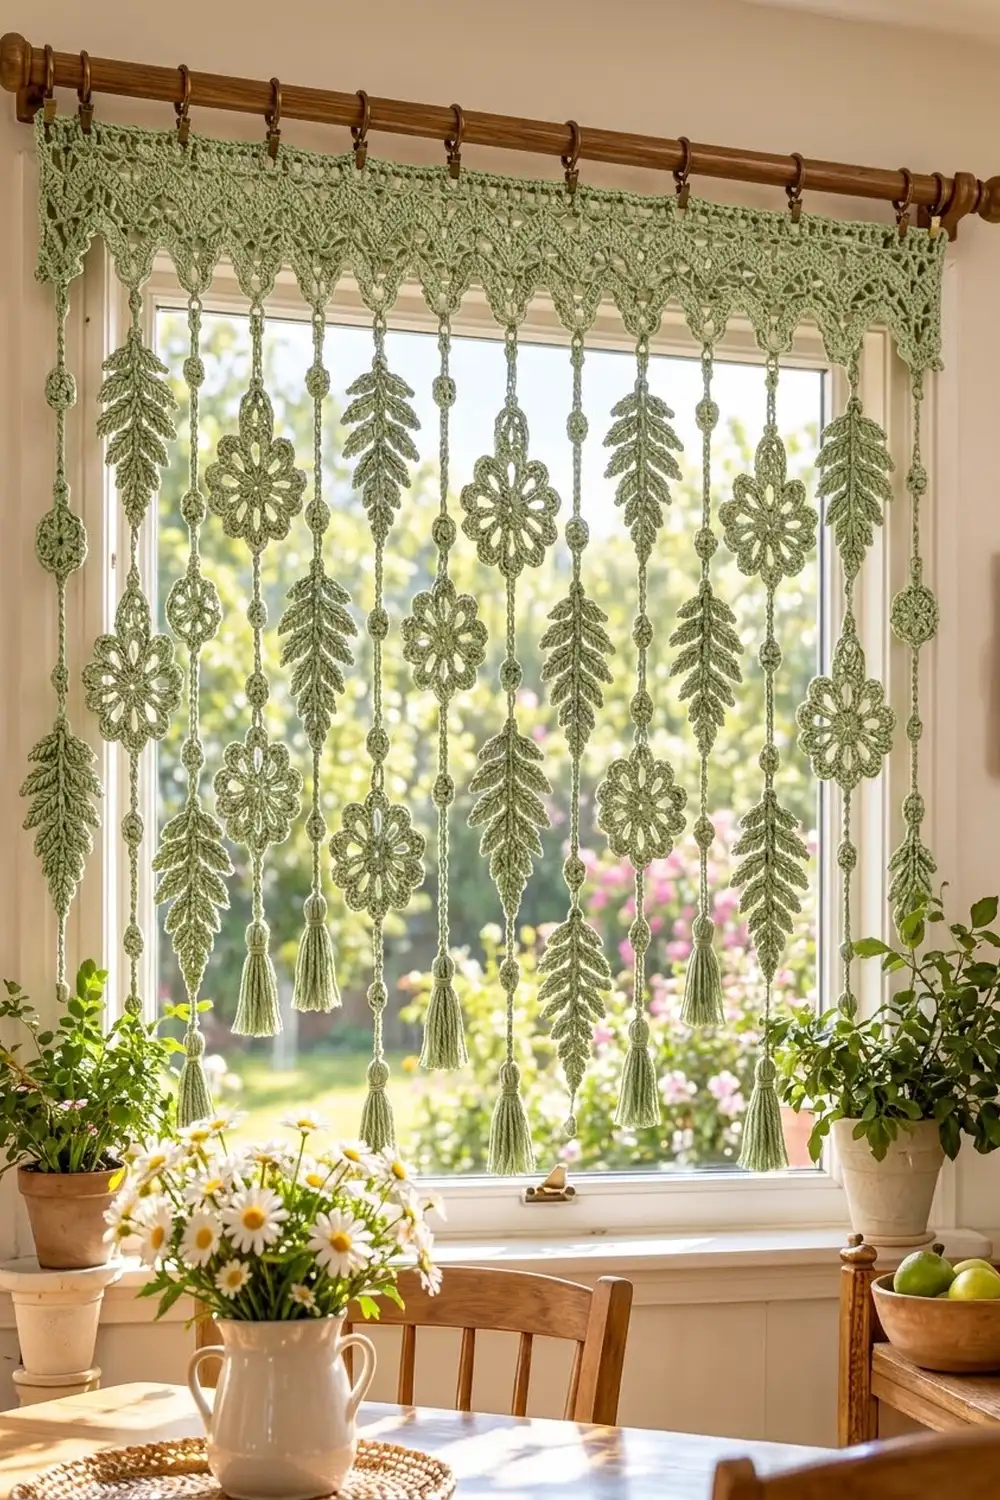
This curtain brings a garden into the window. A lacy valance runs across the top, and its lower edge ends in a row of soft, pointed scallops. One strand hangs from each point, and the strands alternate between fern leaves and open-petal flowers. Small crochet beads add rhythm along each strand, and a tassel finishes every one.
The whole piece is one color: a calm sage green. Light shining through the lace and petal windows does the decorating. The style is cottage and botanical, light enough for a kitchen window and pretty enough for a bedroom.
The pattern uses US crochet terms. The finished curtain is 41.8 in (106.2 cm) wide and 35.9 in (91.2 cm) long, measured from the top edge to the tassel tips.
You’ll make 12 lace panels, join them into one strip and work a three-round border that creates the scallops. Then you’ll make 12 cords and sew the ferns, flowers, beads and tassels to them in a fixed order. The cords attach to the loops at the scallop tips.
Finished Size and Construction
- Finished size: 41.8 in (106.2 cm) wide × 35.9 in (91.2 cm) long
- Skill level: Intermediate
- Terminology: US crochet terms
- Yarn weight: DK (#3) cotton
- Hook: 3.5 mm (E-4)
- Number of pieces: 12 header panels plus 12 strands, made from 12 cords, 12 ferns, 18 flowers, 42 beads and 12 tassels
- Layout: 12 panels in 1 row; strands alternate Fern / Flower
- Panel size: 3.4 in (8.6 cm) wide × 4.4 in (11.2 cm) tall
- Header size before border: 40.8 in (103.6 cm) × 4.4 in (11.2 cm)
- Border depth: 0.5 in (1.3 cm) on the top and sides; the scallop tips reach 1.0 in (2.5 cm) below the panels
- Strand drop: 30 in (76.2 cm) below each scallop tip
Materials
Yarn: Use a smooth mercerized or combed DK cotton. Cotton holds the lace open, hangs straight and won’t fuzz in sunlight. Avoid fuzzy blends, because they blur the petal windows and fern leaflets.
- Sage green: 450 g / about 1,035 m (9 balls of 50 g / 115 m)
The quantity includes a margin of about 20% for gauge swatches, tassel trimming and sewing tails.
Tools:
- 3.5 mm (E-4) crochet hook
- Tapestry needle
- About 1 oz (28 g) polyester fiberfill for the beads
- 3 in (7.6 cm) cardboard strip for the tassels
- Stitch markers
- Blocking mats and rustproof pins
- Spray bottle
- Measuring tape
- 13 curtain clip rings and a rod
Abbreviations (US Terms)
- ch – chain
- sl st – slip stitch
- sc – single crochet
- hdc – half double crochet
- dc – double crochet
- tr – treble crochet
- sc2tog – single crochet 2 together
- sk – skip
- sp – space
- tch – turning chain
- MR – magic ring
- RS – right side
- st(s) – stitch(es)
Special stitches:
- V-st (V-stitch): (dc, ch 1, dc) in the same stitch. It counts as 3 sts.
- Lf-n (fern leaflet of size n): Ch n+1. Sc in the 2nd ch from the hook, hdc in the next ch, then dc in each remaining ch, so n sts are made. Sl st in the same spine ch at the base of the leaflet.
Gauge and Checkpoints
Gauge: 20 sts and 10 dc rows = 4 in (10.2 cm). In sc, 20 sts = 4 in (10.2 cm). For the cord, 5 sl sts = 1 in (2.5 cm).
Make one complete panel before anything else. It is your gauge swatch.
Checkpoints:
- After Row 1: the panel is 3.4 in (8.6 cm) wide.
- After Row 5: it is 2.0 in (5.1 cm) tall.
- After Row 11: it is 3.4 in × 4.4 in (8.6 × 11.2 cm).
- Flower: 3.0 in (7.6 cm) across.
- Fern: 6.0 in (15.2 cm) long × 2.75 in (7.0 cm) wide.
- Bead: 1.0 in (2.5 cm) across.
- First cord: 27 in (68.6 cm).
If your panel is too big, go down 0.5 mm in hook size. If it is too small, go up 0.5 mm. Don’t change the stitch counts. All the border and strand math depends on them.
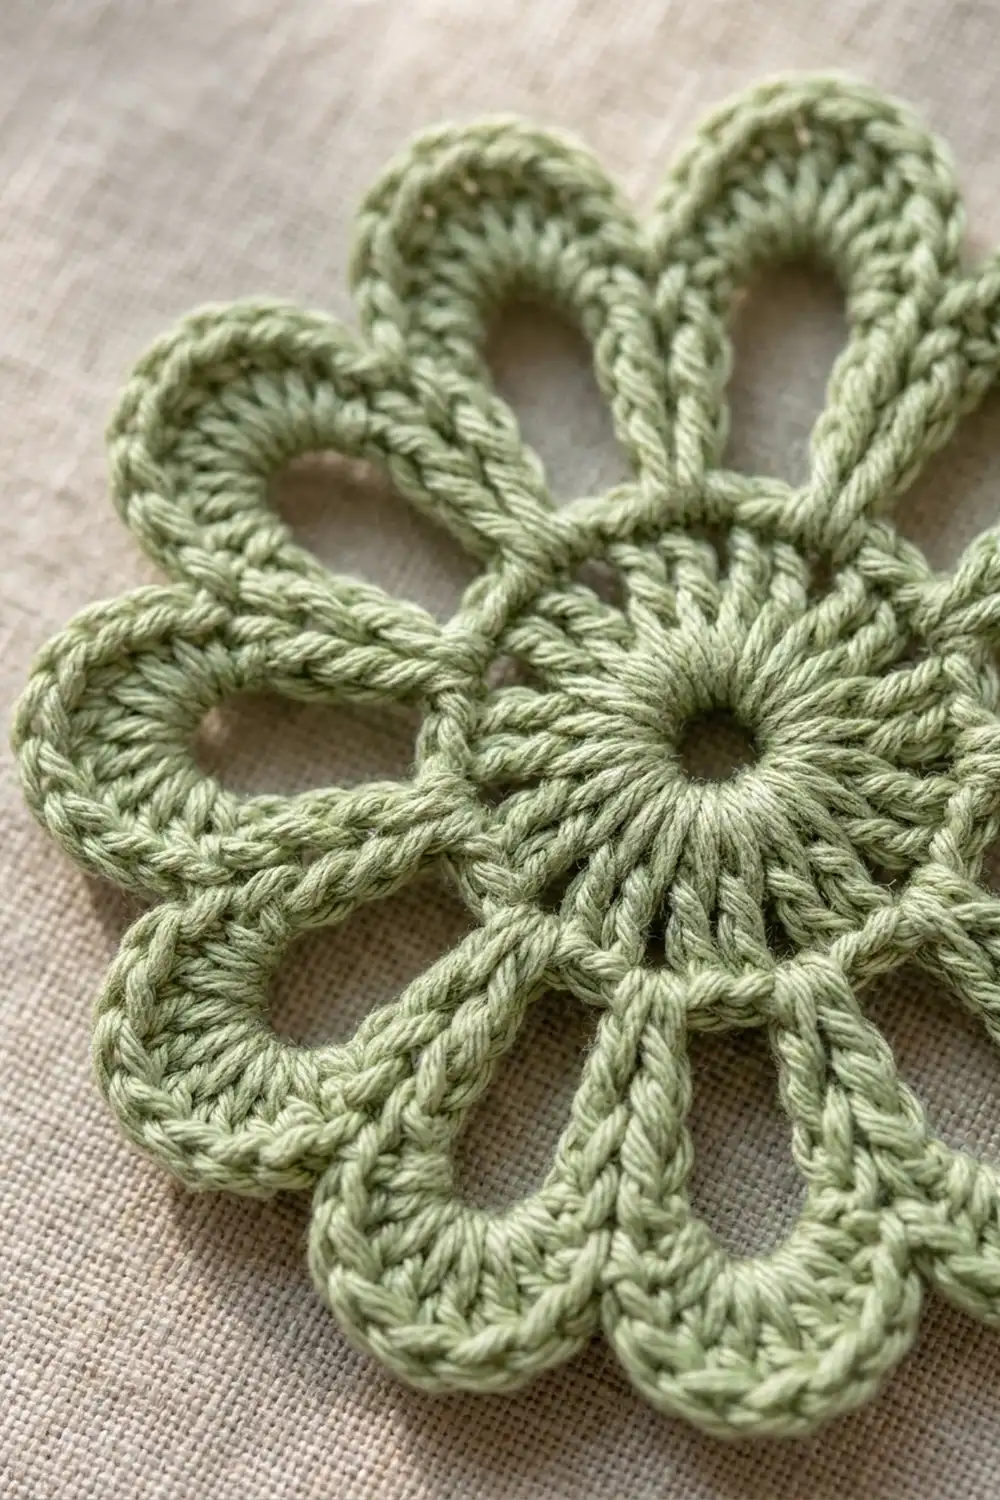
Header Panel (Make 12)
Row 1 is the bottom edge of the panel. The scallops are worked into its foundation chain later.
Row 1 (RS): Ch 19. Dc in the 4th ch from the hook and in each ch across. Turn. (17 sts; the skipped 3 ch count as 1 dc)
Row 2 (mesh): Ch 4 (counts as dc + ch 1). Sk the next st, dc in the next st. Ch 1, sk the next st, dc in the next st. Repeat from * 7 times. Turn. (9 dc + 8 ch-1 sps = 17 sts)
Row 3 (solid): Ch 3 (counts as dc). Dc in each ch-1 sp and each dc across, working the last 2 dc into the tch sp and the 3rd ch of the tch. Turn. (17 dc)
Row 4 (V-row): Ch 3 (counts as dc). Sk the next st, V-st in the next st, sk the next st. Repeat from * 5 times. Dc in the top of the tch. Turn. (1 + 15 + 1 = 17 sts)
Row 5 (solid): Ch 3. Dc in the next dc, dc in the ch-1 sp, dc in the next dc. Repeat from * 5 times. Dc in the top of the tch. Turn. (17 dc)
- Row 6: Repeat Row 2.
- Row 7: Repeat Row 3.
- Row 8: Repeat Row 4.
- Row 9: Repeat Row 5.
- Row 10: Repeat Row 2.
- Row 11: Repeat Row 3. Fasten off. (17 dc)
Panel per-side counts: 17 sts on the top, 17 foundation loops on the bottom, and 11 dc row-ends on each side. There are no corner stitches.
Flower (Make 18)
Rnd 1: MR. Ch 3 (counts as dc), then work 19 dc in the ring. Sl st to the top of the ch-3. (20 dc)
Rnd 2: Ch 1, sc in the same st, ch 7, sk the next dc. Sc in the next dc, ch 7, sk the next dc. Repeat from * 9 times. Sl st to the first sc. (10 sc + 10 ch-7 loops)
Rnd 3: (2 sc, 2 hdc, 3 dc, 2 hdc, 2 sc) in the next ch-7 loop, sl st in the next sc. Repeat from * 10 times. Fasten off, leaving a 12 in (30.5 cm) tail. (10 petals of 11 sts = 110 sts + 10 sl sts)
Each ch-7 loop is anchored only 2 dc apart, so an open window stays inside every petal. The petal tip is the center dc of each petal’s 3 dc.
Fern Leaf (Make 12)
Foundation: Ch 30. This chain is the spine: 26 ch for the leaf plus a 4-ch stalk.
Side A: Sl st in the 2nd ch from the hook (the skipped ch is the leaf tip). Then work leaflets toward the stalk:
- Lf-4, sl st in the next 3 ch.
- Lf-4, sl st in the next 3 ch.
- Lf-5, sl st in the next 3 ch.
- Lf-5, sl st in the next 3 ch.
- Lf-6, sl st in the next 3 ch.
- Lf-6, sl st in the next 3 ch.
- Lf-7, sl st in the next 3 ch.
- Lf-7, sl st in the next 3 ch.
Finish Side A with a sl st in each of the last 4 ch (the stalk). (8 leaflets, 44 leaflet sts; 1 + 24 + 4 = 29 spine ch used)
Side B: Ch 1 and rotate. Working in the free loops of the foundation chain, sl st in the 4 stalk loops. Then work toward the tip:
- Lf-7, sl st in the next 3 loops.
- Lf-7, sl st in the next 3 loops.
- Lf-6, sl st in the next 3 loops.
- Lf-6, sl st in the next 3 loops.
- Lf-5, sl st in the next 3 loops.
- Lf-5, sl st in the next 3 loops.
- Lf-4, sl st in the next 3 loops.
- Lf-4, sl st in the next 3 loops.
Tip: (sl st, ch 3, sl st) in the tip ch. Fasten off with a 12 in (30.5 cm) tail.
Side B starts 3 ch further from the tip than Side A, so the leaflets alternate along the spine like a real fern frond. The largest leaflets sit at the stalk end, and the leaf tapers to the tip.
Bead (Make 42)
- Rnd 1: 6 sc in a MR. (6)
- Rnd 2: 2 sc in each st. (12)
- Rnds 3–4: Sc in each st. (12)
- Rnd 5: Sc2tog 6 times. (6)
Stuff the bead firmly. Close the opening and leave an 8 in (20.3 cm) tail.
Cord (Make 12)
Ch 136. Sl st in the 2nd ch from the hook and in each ch across. (135 sl sts = 27 in / 68.6 cm)
Leave a 10 in (25.4 cm) tail at each end.
Tassel (Make 12)
- Wrap yarn 30 times around the 3 in (7.6 cm) card.
- Thread an 8 in (20.3 cm) strand under the wraps at the top and tie it tightly.
- Cut the wraps at the bottom.
- Wrap a second strand 6 times around the tassel, 0.5 in (1.3 cm) below the top, and knot it.
- Trim the ends evenly to 3 in (7.6 cm).
Make All Pieces
All pieces are sage green:
| Piece | Quantity |
|---|---|
| Panels | 12 |
| Cords | 12 |
| Ferns | 12 (6 fern strands × 2) |
| Flowers | 18 (6 flower strands × 3) |
| Beads | 42 (6 × 3 for fern strands + 6 × 4 for flower strands) |
| Tassels | 12 |
Header layout (left to right):
PANEL 1 2 3 4 5 6 7 8 9 10 11 12
Strand layout (one strand under each panel tip):
FERN FLOWER FERN FLOWER FERN FLOWER FERN FLOWER FERN FLOWER FERN FLOWER
Joining
Panels: Hold two panels RS together with the row-ends lined up and Row 1 at the bottom. Sl st through both edges, working 2 sl sts in each dc row-end, for 22 sl sts per seam. Join all 12 panels into one strip with 11 seams.
Keep the seam tension as relaxed as your dc tension. The strip should lie flat and not pucker.
The seam sl sts are not worked into in the border, so they add nothing to the border counts.
Checkpoint: The joined strip measures 40.8 in × 4.4 in (103.6 × 11.2 cm).
Strands: Sew the motifs to each cord, centered over these sl st positions, counting from the top.
Fern strand:
| Cord stitches | Piece |
|---|---|
| 1–25 | Bare |
| 26–30 | Bead |
| 31–35 | Bare |
| 36–65 | Fern, stalk up |
| 66–75 | Bare |
| 76–80 | Bead |
| 81–85 | Bare |
| 86–115 | Fern |
| 116–125 | Bare |
| 126–130 | Bead |
| 131–135 | Bare |
| 135 | Tassel |
Flower strand:
| Cord stitches | Piece |
|---|---|
| 1–20 | Bare |
| 21–25 | Bead |
| 26–30 | Bare |
| 31–45 | Flower |
| 46–55 | Bare |
| 56–60 | Bead |
| 61–65 | Bare |
| 66–80 | Flower |
| 81–90 | Bare |
| 91–95 | Bead |
| 96–100 | Bare |
| 101–115 | Flower |
| 116–125 | Bare |
| 126–130 | Bead |
| 131–135 | Bare |
| 135 | Tassel |
How to attach each piece:
- Ferns: Whipstitch the spine along the cord. Each spine is 30 ch, so it covers exactly 30 cord sts.
- Flowers: Tack two opposite petal tips (petals 1 and 6) to the cord. A flower spans 15 sts, or 3.0 in (7.6 cm).
- Beads: Sew each bead on at its top and bottom.
- Tassels: Tie each tassel to the bottom end of its cord.
Each strand is 30 in (76.2 cm) long: 27 in (68.6 cm) of cord plus the 3 in (7.6 cm) tassel. Sew the strands on after the border is finished.
Border
Border gauge: 20 sc = 4 in (10.2 cm). Corner groups are listed separately and are not part of any side count.
Rnd 1: With the RS facing, join the yarn at the top right corner.
- Top: Sc in each st across. (12 × 17 = 204 sc)
- Ch 2 at the corner.
- Side: 2 sc in each row-end down the side. (11 × 2 = 22 sc)
- Ch 2 at the corner.
- Bottom: Sc in each foundation loop. (12 × 17 = 204 sc)
- Ch 2 at the corner.
- Side: 22 sc up the other side.
- Ch 2 and sl st to the first sc. (452 sc + 4 ch-2 sps)
Rnd 2:
- Top: Sc in each st. (204)
- Each corner: (sc, ch 2, sc) in the ch-2 sp.
- Sides: Sc in each st. (22 each)
- Bottom: Work this sequence over each panel’s 17 sts:
- Sc in the next st.
- Hdc in each of the next 2 sts.
- Dc in each of the next 3 sts.
- Tr in each of the next 2 sts.
- (Tr, ch 3, tr) in the next st (the tip).
- Tr in each of the next 2 sts.
- Dc in each of the next 3 sts.
- Hdc in each of the next 2 sts.
- Sc in the next st.
Bottom count: 204 sts worked 1 per st + 12 extra tr = 216 sts, plus 12 ch-3 tips. Round total: 204 + 22 + 22 + 216 + 8 corner sc = 472 sts.
Rnd 3:
- Top: Sc in each st. (204)
- Each corner: Sc in the corner sc, (sc, ch 2, sc) in the ch-2 sp, sc in the next corner sc. (4 sc)
- Sides: Sc in each st. (22 each)
- Bottom: Sc in each st. In each ch-3 tip, work (2 sc, ch 5, 2 sc). (216 + 48 = 264 sc, plus 12 ch-5 hanging loops)
- Join to the first sc and fasten off. (Round total: 204 + 44 + 264 + 16 = 528 sc)
Why the math works:
- Each panel is 17 sts wide, an odd number. Stitch 9 is the exact center, so each scallop has 8 matching stitches on either side of its tip.
- 12 panels × 17 = 204 sts, and 204 ÷ 5 = 40.8 in (103.6 cm).
- 11 dc rows × 2 = 22 sc on each side, and 22 ÷ 5 = 4.4 in (11.2 cm).
- Sc ends sit next to each other at every seam, which forms the valley between two scallops.
Hanging: Sew a 10 in (25.4 cm) cord tail through each ch-5 loop. Clip 13 rings to the top edge: one at each seam and one at each end, about 3.4 in (8.6 cm) apart.
Checkpoint: 41.8 in (106.2 cm) wide; 5.4 in (13.7 cm) tall at the sides; 5.9 in (15.0 cm) tall at the scallop tips.
Final Blocking
- Soak the whole curtain in cool water, then press it in a towel. Don’t wring it.
- Pin the header to 41.8 in × 5.4 in (106.2 × 13.7 cm). Pin each scallop tip 5.9 in (15.0 cm) down from the top edge.
- Pin each flower to 3.0 in (7.6 cm) across, opening every petal window.
- Pin each fern to 6.0 in × 2.75 in (15.2 × 7.0 cm), spreading the leaflets evenly.
- Lay the strands straight to 30 in (76.2 cm).
- Let everything dry completely. Steam the tassels and comb them straight.
Final Quality-Control Checklist
- 12 panels, each 17 sts by 11 rows
- Border counts: 452 / 472 / 528
- 12 matching scallop tips, each with a ch-5 loop
- Strands alternate fern and flower, starting with a fern on the left
- 2 ferns and 3 beads on every fern strand
- 3 flowers and 4 beads on every flower strand
- All strands 30 in (76.2 cm) long
- All tails woven in
Troubleshooting
- Header ripples: The seams are too loose or the border sc are too many. Recount to 204 sc across.
- Header curves: The seams are too tight. Redo them with a larger hook.
- Scallop points lean to one side: The tip isn’t on stitch 9. Recount the sts on each side of the tip.
- Petal windows close up: Rnd 3 is too tight. Keep the ch-7 loops relaxed.
- Fern twists: Block it flat and stitch the spine along its full length.
- Strands are uneven: Recount each cord to 135 sl sts.
- Beads look lumpy: Add or remove fiberfill until the bead is evenly round.
Care
Hand wash in cool water with mild soap and dry flat, re-pinning if needed. Keep the curtain out of harsh direct sun for long periods to protect the color.
Final Notes
The measurement chain:
- Your panel is 3.4 in × 4.4 in (8.6 × 11.2 cm).
- Twelve panels join to 40.8 in × 4.4 in (103.6 × 11.2 cm).
- The border brings the header to 41.8 in × 5.4 in (106.2 × 13.7 cm), with tips at 5.9 in (15.0 cm).
- Each 30 in (76.2 cm) strand brings the curtain to 35.9 in (91.2 cm) long.
If you hit gauge on the first panel, every number after it falls into place.
Happy crocheting!