

This garland is one long green stem with 18 white daisies and pairs of small leaves. Hang it in a window and the daisies sit flat against the light. The stem keeps them evenly spaced from top to bottom.
The colors are classic: crisp white petals, a solid sunny-yellow center, and a soft leaf green for the stem and leaves. Each daisy is a simple single-layer flower with 10 rounded petals. The stem is a slip-stitch rope, so it looks textured and holds its shape when it hangs.
This pattern uses US crochet terms. The finished garland measures 114 in (289.6 cm) along the stem. With the hanging loop it hangs 115.5 in (293.4 cm). Each daisy is 3 in (7.6 cm) across.
Construction is straightforward. You make 18 daisies and 34 leaves. Then you make one long rope stem, sew the daisies and leaves to marked stitches, and finish the top with a covered hanging loop.
Finished Size and Construction
- Finished size: 114 in (289.6 cm) stem; 115.5 in (293.4 cm) total hanging length with loop
- Skill level: Easy
- Terminology: US crochet terms
- Yarn weight: DK (light worsted, category 3), cotton recommended
- Hook: 3.5 mm (US E-4)
- Number of pieces: 53 (18 daisies, 34 leaves, 1 stem)
- Layout: Single vertical strand, daisy centers every 6 in (15.2 cm), one leaf pair between each two daisies
- Piece size: Daisy 3 in (7.6 cm) across; leaf 1.25 in (3.2 cm) long × 0.6 in (1.5 cm) wide
- Size before border: 114 in (289.6 cm) stem
- Border depth: Hanging loop adds 1.5 in (3.8 cm) at the top
Materials
Yarn advice: Use a smooth mercerized or matte DK cotton. Cotton gives crisp petal points and does not stretch much when the garland hangs. Avoid fuzzy yarns, which blur the petal shapes. The quantities below assume about 2.3 m per gram, typical for DK cotton.
- White: 65 g (about 150 m), petals
- Yellow: 35 g (about 80 m), centers
- Green: 65 g (about 150 m), stem and leaves
All quantities include a margin of about 20% for gauge swatches, sewing tails, and small differences in tension.
Tools:
- 3.5 mm (US E-4) crochet hook
- Tapestry needle
- Stitch markers in two colors (at least 18 of one color and 17 of the other)
- Scissors
- Measuring tape
- Blocking mat and rust-proof pins
- Spray bottle or steamer
Abbreviations (US Terms)
- ch – chain
- sl st – slip stitch
- sc – single crochet
- hdc – half double crochet
- dc – double crochet
- st(s) – stitch(es)
- sk – skip
- MR – magic ring
- rep – repeat
- BB – back bump of the chain
Special stitch – Back-bump slip stitch (BB sl st): Turn the chain over and find the small ridge on the back of each chain. Insert the hook under that ridge only, yarn over, and pull through the ridge and the loop on the hook. Worked along a whole chain, this makes a firm, twisted, rope-like strand.
Gauge and Checkpoints
Make one daisy, one leaf, and a 30-chain stem test piece before starting the full garland.
Daisy checkpoints:
- After Round 2, the yellow center measures 1.25 in (3.2 cm) across.
- After Round 3, the finished daisy measures 3 in (7.6 cm) from petal tip to opposite petal tip.
- Each petal is about 0.875 in (2.2 cm) long from the center edge to the tip.
Leaf checkpoint: 1.25 in (3.2 cm) long and 0.6 in (1.5 cm) wide.
Stem checkpoint: Ch 31 and work 30 BB sl sts. The finished rope should measure 6 in (15.2 cm). That is 5 sts per inch (5 sts per 2.5 cm).
If your pieces are too big: Go down to a 3.25 mm (US D-3) hook. Try a 3.0 mm hook if they are still too big.
If your pieces are too small: Go up to a 3.75 mm (US F-5) hook.
You can adjust the stem separately from the daisies. Stem gauge controls daisy spacing, and daisy gauge controls flower size. Both matter, so match both.
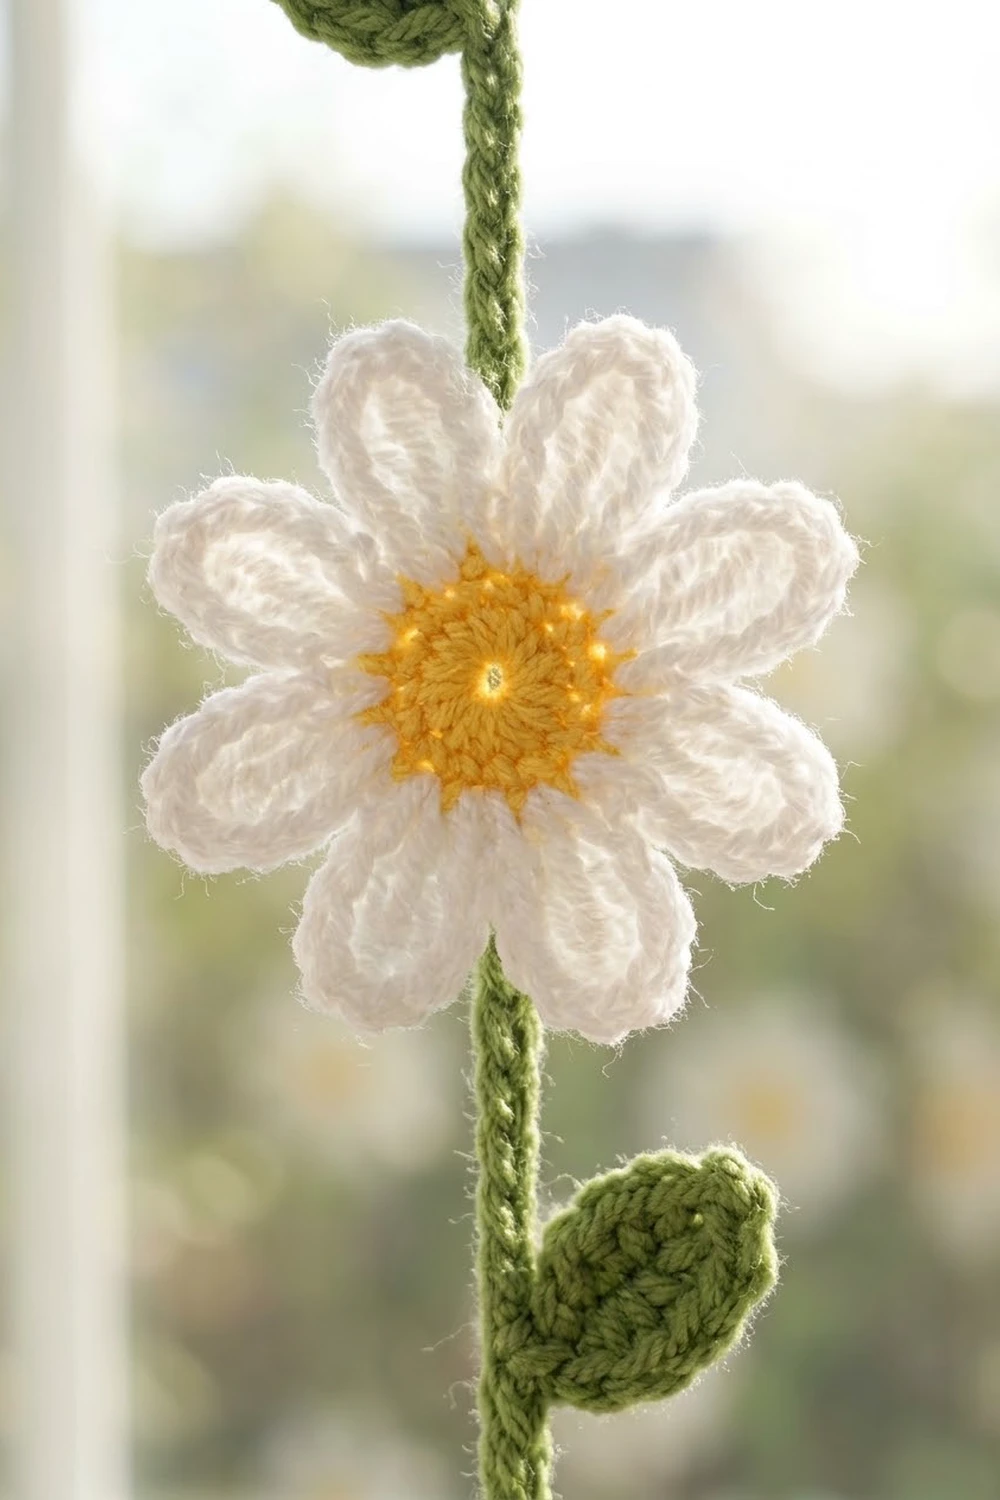
Daisy (Make 18)
Round 1 (yellow): Make an MR. Ch 1 (does not count as a st). Work 10 sc into the ring. Pull the ring closed. Sl st to the first sc to join. (10 sts)
Round 2 (yellow): Ch 1. Work 2 sc in each st around. Sl st to the first sc to join. (20 sts)
Fasten off yellow and weave in the tail on the wrong side. The center should lie flat and measure 1.25 in (3.2 cm).
Round 3 (white, petals): Join white with a sl st in any st of Round 2. This is st 1.
Ch 6. Sc in 2nd ch from hook. Hdc in next ch. Dc in next 2 ch. Hdc in last ch. Sk next st of Round 2. Sl st in following st. Rep from * to * 9 more times.
Each petal uses 2 sts of Round 2: the st it starts from and the skipped st. Ten petals × 2 sts = 20 sts, so the 10th sl st lands in st 1, where you joined.
Petal count: 10 petals, 5 sts each = 50 petal sts, plus 10 sl sts.
Fasten off. Leave a 10 in (25.4 cm) white tail for sewing the daisy to the stem.
The finished daisy is a flat single-layer flower with a solid yellow center and 10 rounded petals. It measures 3 in (7.6 cm) across.
Leaf (Make 34)
Use green.
Foundation: Ch 7.
Side 1: Sc in 2nd ch from hook. Hdc in next ch. Dc in next 2 ch. Hdc in next ch. Work (sc, ch 2, sc) in the last ch. This forms the tip.
Side 2: Work along the opposite side of the foundation chain. Hdc in next ch. Dc in next 2 ch. Hdc in next ch. Sc in last ch. Sl st into the skipped turning ch at the base.
Leaf count: 12 sts plus a ch-2 tip. The 6 sts on each side are sc, hdc, dc, dc, hdc, sc.
Fasten off. Leave an 8 in (20.3 cm) tail at the base for sewing.
Stem (Make 1)
Use green. The first chain you make becomes the top of the garland.
Row 1 (foundation): Ch 571.
While chaining, count and mark from the first chain:
- Place a flower marker in ch 30, 60, 90, and so on through ch 540. That is every 30th chain, 18 markers in total.
- Place a leaf marker, in the second color, in ch 45, 75, 105, and so on through ch 525. That is 17 markers in total.
Row 2 (rope pass): Sk the last ch made (the turning ch). Work 1 BB sl st in the back bump of each remaining ch, from ch 570 back to ch 1. When you reach a marked chain, move the marker up into the new sl st. (570 sts)
Do not fasten off. You are now at the top of the stem, ready for the border.
Checkpoint: At 5 sts per inch, 570 sts = 114 in (289.6 cm). Flower markers fall every 6 in (15.2 cm). The first flower marker sits 6 in (15.2 cm) below the top.
Measure with the stem lying flat and relaxed, not pulled.
Make All Pieces
Quantities per color:
- Yellow: 18 daisy centers (Rounds 1–2)
- White: 18 petal rounds (Round 3)
- Green: 34 leaves and 1 stem
Layout grid (top to bottom, by stem stitch):
TOP:        GREEN HANGING LOOP
ST 1-29:    GREEN STEM
ST 30:      DAISY 1
ST 45:      LEAF LEFT + LEAF RIGHT
ST 60:      DAISY 2
ST 75:      LEAF LEFT + LEAF RIGHT
ST 90:      DAISY 3
...         (pattern continues: daisy every 30 sts, leaf pair 15 sts later)
ST 510:     DAISY 17
ST 525:     LEAF LEFT + LEAF RIGHT
ST 540:     DAISY 18
ST 541-570: GREEN STEM TAIL
Daisies sit at st 30 × n, for n = 1 to 18. Leaf pairs sit at st 30 × n + 15, for n = 1 to 17.
Joining
Method: Sew each piece to the back of the stem with its own tail and a tapestry needle. Use small whipstitches that are hidden from the front.
Daisies: Lay the stem flat, right side up. Center a daisy over each flower marker, with the stem running behind the flower.
Using the white tail, stitch through the back loops of Round 1 into three stem sts: the marked st, the st above it, and the st below it. Three stem sts measure 0.6 in (1.5 cm). That matches the center area, so the anchor stays hidden behind the yellow.
Add one tacking stitch at the base of the top petal and one at the base of the bottom petal. These keep the daisy from rotating.
Leaves: At each leaf marker, sew one leaf base to the left side of the marked st and one to the right side. Angle each tip upward at about 45°.
The gap between daisy edges is 15 sts, or 3 in (7.6 cm). The leaves sit at its midpoint, 1.5 in (3.8 cm) from each daisy edge. An angled 1.25 in (3.2 cm) leaf rises about 0.9 in (2.3 cm), so it clears the daisy above.
Tension advice: Sew firmly but do not pull the stem into puckers. After each daisy, lay that section flat. The stem should still measure 6 in (15.2 cm) between flower centers.
Size checkpoint: After all joining, the stem is still 114 in (289.6 cm). There are 18 daisies 6 in (15.2 cm) apart. There is 4.5 in (11.4 cm) of plain stem above Daisy 1’s top edge and 4.5 in (11.4 cm) below Daisy 18’s bottom edge.
Border (Hanging Loop)
The border is a covered loop at the top of the stem.
Border gauge: 6 sc per inch, worked around a chain. These sc are denser than the stem’s 5 sts per inch because sc worked around a chain pack tighter than the chain itself.
Round 1: With the working loop still at the top of the stem, ch 15. Sl st in the top st of the stem (st 1) to form a loop.
The loop’s 15 ch measure 3 in (7.6 cm) around at 5 ch per inch. It hangs 1.5 in (3.8 cm).
Round 2: Work 18 sc around the ch-15 loop, not into the individual chains. Sl st in st 1 of the stem. Fasten off and weave in the tail down the stem. (18 sc)
Bottom end: No border stitches. Weave the starting tail up through 2 in (5.1 cm) of the stem’s back bumps.
Why the math works: The loop is 3 in (7.6 cm) long. At the 6 sc per inch border gauge, 3 × 6 = 18 sc. This fully covers the chain without ruffling or squeezing the loop shut.
Final Blocking
- Weave in all remaining tails on the back of each piece.
- Lightly mist the daisies until they are damp, not soaked.
- Pin each daisy on the blocking mat to 3 in (7.6 cm) across. Put a pin at each petal tip so the 10 petals are evenly spaced.
- Pin each leaf flat and point the tip.
- Lay the stem straight beside the pins. Do not stretch it.
- Let everything dry completely.
- Hang the garland and let it settle for a few hours. Check the 6 in (15.2 cm) spacing once more.
Final Quality-Control Checklist
- 18 daisies, each 3 in (7.6 cm) across with 10 petals
- Yellow centers lie flat at 1.25 in (3.2 cm)
- 34 leaves, each 1.25 in (3.2 cm) long, tips pointing upward
- Stem has 570 sts and measures 114 in (289.6 cm)
- Daisy centers fall every 6 in (15.2 cm)
- No sewing stitches show on the front
- Hanging loop is covered with 18 sc and is firmly anchored
- All tails are woven in and trimmed
Troubleshooting
Center cups or ruffles: Your Round 2 tension is too tight or too loose. Redo the center with a smaller or larger hook.
Petals curl: Your chain is tighter than your stitches. Make the ch 6 more loosely, or block firmly with a pin at every tip.
Last petal doesn’t land on st 1: You missed a skip or worked an extra sl st. Count 2 sts per petal and rework.
Stem too long or short: Your stem gauge is off. Rework the 30-st test piece and change hook size until it measures 6 in (15.2 cm).
Stem twists heavily: Work the BB sl sts a little looser. Light steam blocking also relaxes the twist.
Daisies flop forward: Add the top and bottom petal tacking stitches.
Hanging loop gapes: Add 1–2 sc so the loop is fully covered.
Care
Hand wash cool and lay flat to dry, reshaping each daisy to 3 in (7.6 cm). Hang it away from strong direct sun to slow fading.
Optional: For a fuller window, make several strands and hang them side by side.
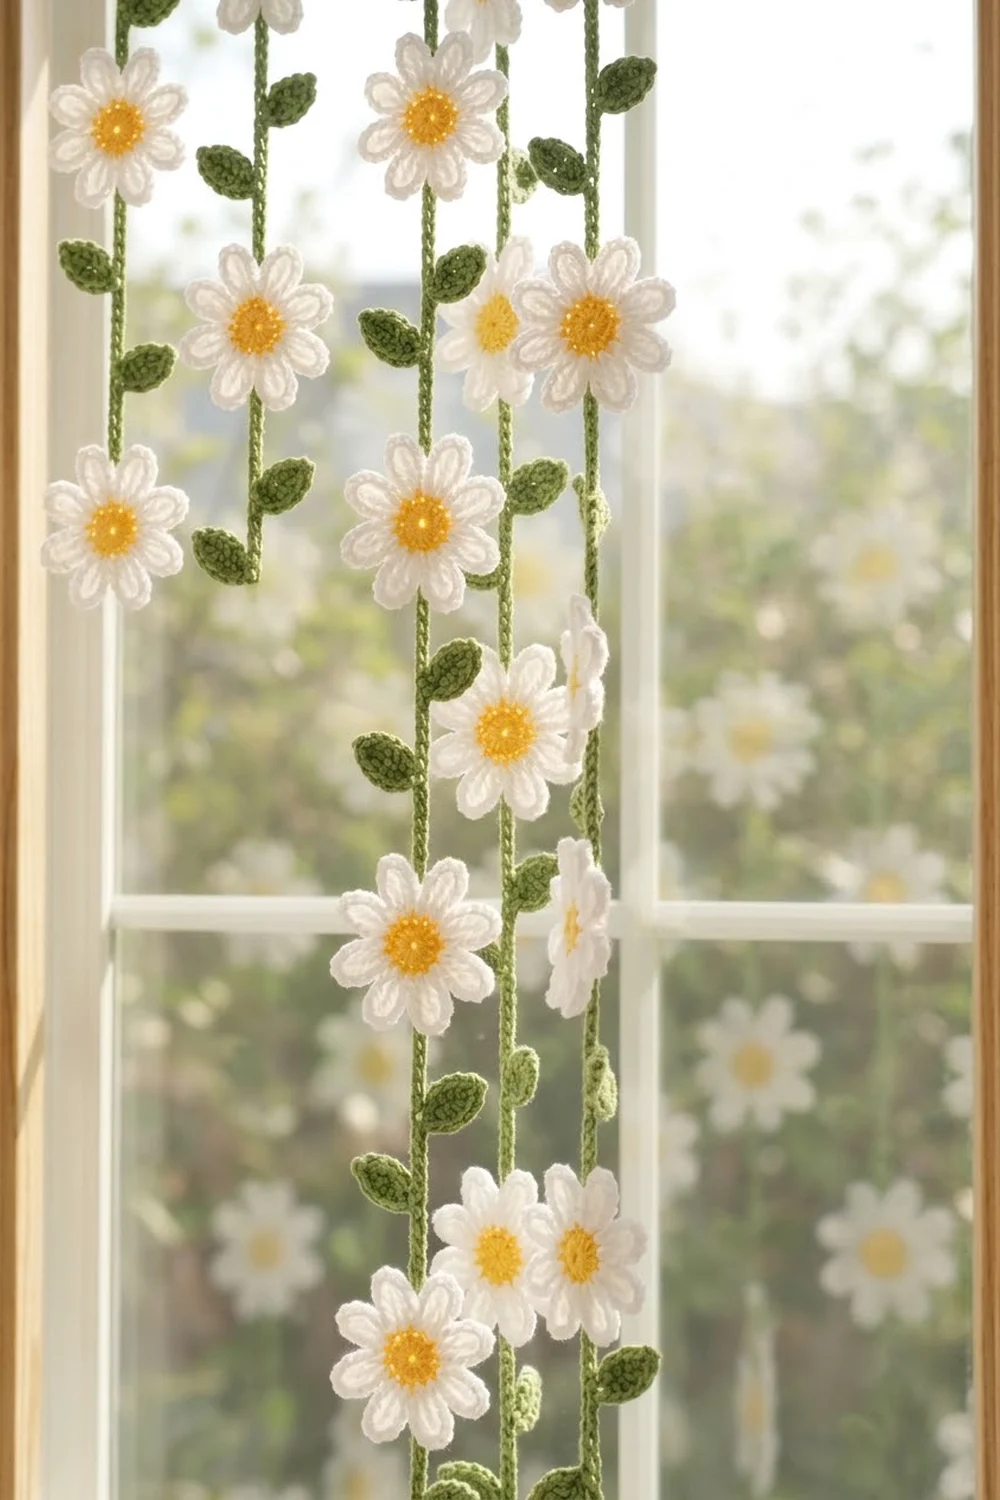
Final Notes
Everything in this garland follows from a short measurement chain. The daisy center is 1.25 in (3.2 cm). Add 0.875 in (2.2 cm) petals on each side and you get a 3 in (7.6 cm) daisy.
The stem runs at 5 sts per inch, so 30 sts give the 6 in (15.2 cm) daisy spacing. Then 570 sts give the 114 in (289.6 cm) stem. The 18-sc loop adds 1.5 in (3.8 cm), for 115.5 in (293.4 cm) total.
Check each stage against these numbers and the garland will hang straight and evenly spaced.
Happy crocheting!