

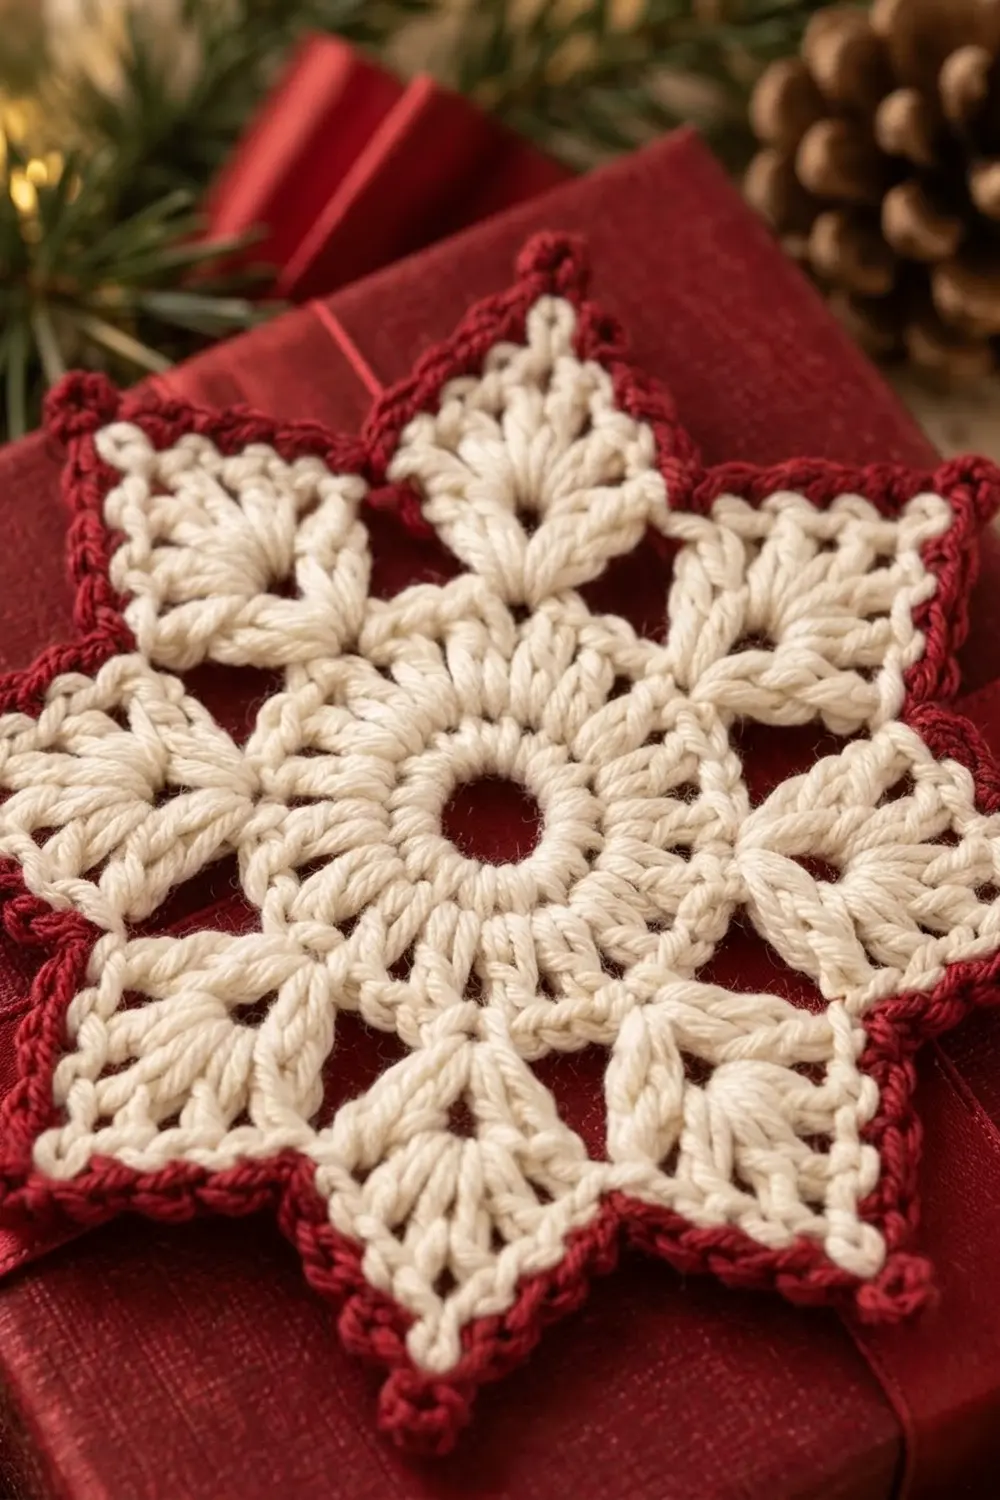
The Crimson Frost Snowflake is a single lace motif with a classic six-pointed star outline. The interior is open and airy, built from three-double-crochet clusters and chain spaces around a small circular hole at the center. Each of the six points tapers to a neat tip.
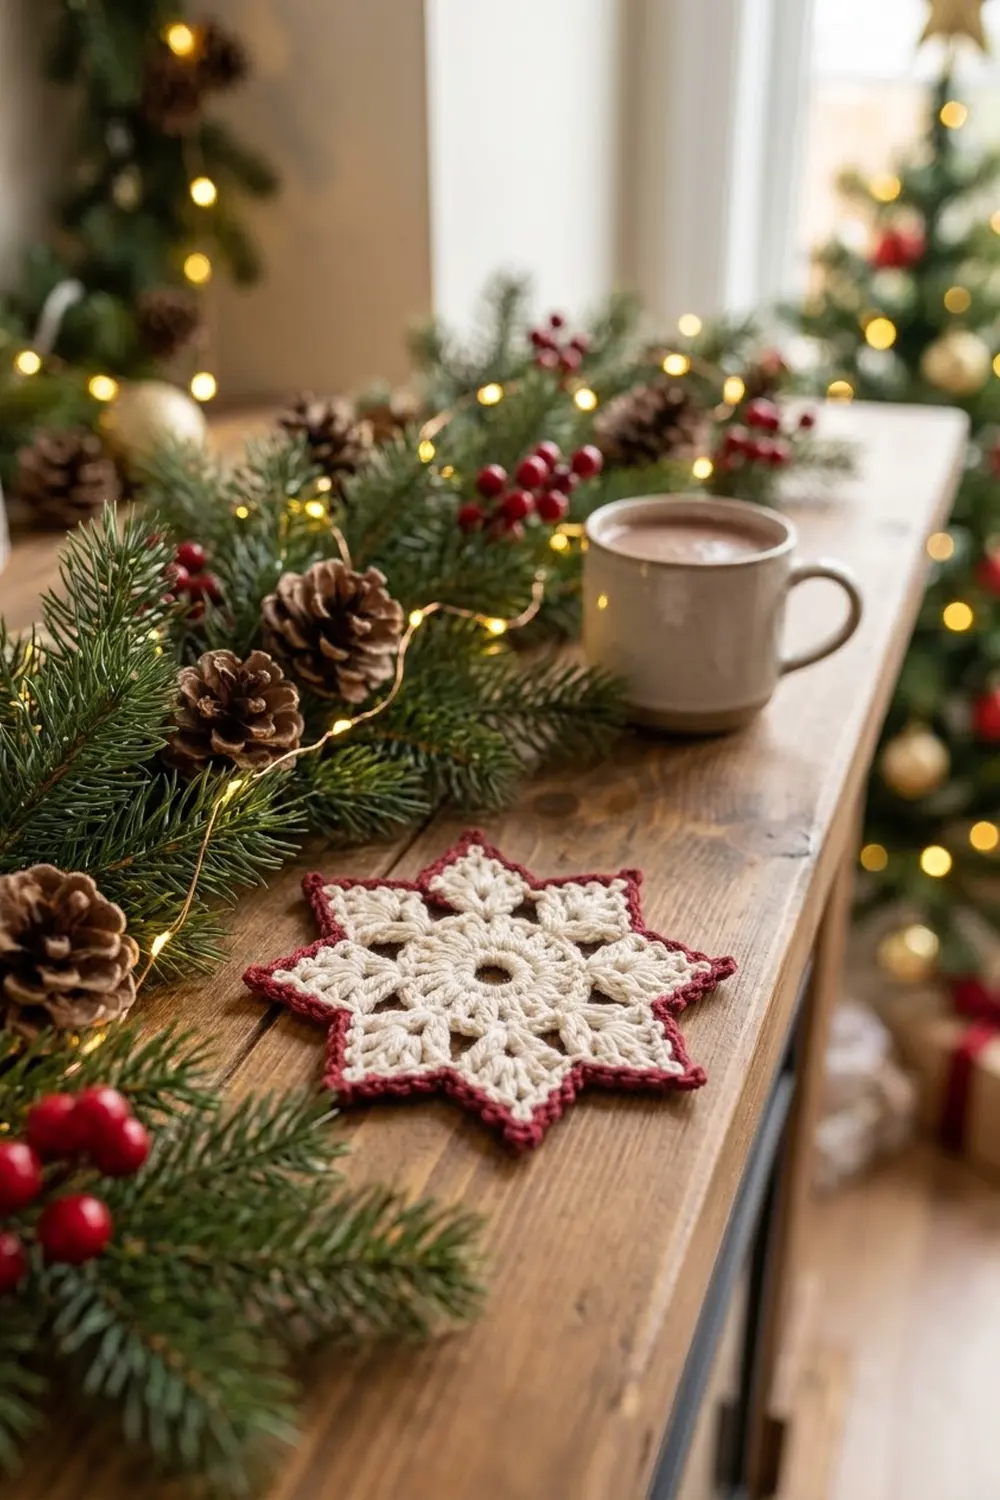
The snowflake is worked in cream yarn. A deep burgundy border runs around the whole perimeter, outlining every point and valley. A small picot finishes each tip. The cream and wine-red pairing looks traditional and festive, and it stands out on a wrapped gift, a tree branch, or a card.
This pattern uses US crochet terms. The finished snowflake measures 4.5 in (11.4 cm) from point to opposite point.
The snowflake is worked in the round as one piece. Rounds 1 to 4 are cream and build the ring, the spokes, and the six cluster points. Rounds 5 and 6 are burgundy. They form a two-round single crochet border that sharpens the valleys and adds a picot at each tip. Nothing is sewn together.
Finished Size and Construction
- Finished size: 4.5 in (11.4 cm) point to opposite point
- Skill level: Easy-intermediate (clusters, chain spaces, sc2tog, picots)
- Terminology: US crochet terms
- Yarn weight: DK / light worsted (#3), cotton or cotton blend
- Hook: 3.5 mm (E-4)
- Number of pieces: 1
- Layout: Single motif, worked in joined rounds
- Piece size (cream lace, Rounds 1–4): 4 in (10.2 cm) point to point
- Size before border: 4 in (10.2 cm)
- Border depth: 0.25 in (0.6 cm) on each side, 2 rounds
- Math check: 4 in + 0.25 in + 0.25 in = 4.5 in (10.2 cm + 0.6 cm + 0.6 cm ≈ 11.4 cm)
Materials
Yarn advice: Choose a smooth, mercerized or combed cotton in DK weight. Cotton shows stitch definition clearly, holds the points crisp after blocking, and keeps its shape well. Fuzzy or very stretchy acrylics blur the lace and let the points curl.
- Cream (Color A): 8 g / about 19 m
- Burgundy (Color B): 4 g / about 10 m
These quantities include a margin of roughly 30% for your gauge swatch, the tails you weave in, and a possible restart. The snowflake itself uses about 6 g of cream and 3 g of burgundy.
Tools:
– 3.5 mm (E-4) crochet hook
– Tapestry needle
– Scissors
– Stitch marker
– Rustproof pins
– Blocking mat or folded towel
– Spray bottle with water
– Optional: fabric stiffener or spray starch
Abbreviations (US Terms)
- ch – chain
- sl st – slip stitch
- sc – single crochet
- dc – double crochet
- sc2tog – single crochet 2 together
- sp – space
- st(s) – stitch(es)
- rep – repeat
- beg – beginning
Special stitches:
- 3-dc cluster (cl): Yarn over, insert hook in the stitch or space, and pull up a loop. Yarn over and pull through 2 loops. Repeat these steps 2 more times in the same place, leaving 4 loops on the hook. Yarn over and pull through all 4 loops.
- Beginning cluster (beg cl): Ch 2. Then work a 2-dc cluster in the same place: yarn over, insert, pull up a loop, yarn over, pull through 2 loops, done twice, then yarn over and pull through all 3 loops. The ch-2 plus the 2-dc cluster counts as 1 cl.
- Picot: Ch 3, then sl st in the 3rd ch from the hook.
Gauge and Checkpoints
This is one small motif, so the snowflake itself works as your gauge test. Work Rounds 1 and 2, then measure before you continue.
Gauge: Rounds 1–2 = 2 in (5.1 cm) in diameter.
Measurement checkpoints (measure flat, unstretched):
| After | Measurement |
|---|---|
| Round 1 | 1.25 in (3.2 cm) diameter |
| Round 2 | 2 in (5.1 cm) diameter |
| Round 3 | 3 in (7.6 cm) point to point |
| Round 4 | 4 in (10.2 cm) point to point |
| Round 5 | 4.25 in (10.8 cm) point to point |
| Round 6 | 4.5 in (11.4 cm) point to point |
A tolerance of ±0.125 in (0.3 cm) at each checkpoint is fine.
If your piece is too big: Change to a 3 mm hook, or tighten your dc by pulling the first loop up shorter.
If your piece is too small: Change to a 4 mm hook.
Re-check after Round 2 every time you change hooks. Checking early saves you from finishing a snowflake that is the wrong size.
Pattern: Cream Lace (Rounds 1–4)
Use Color A (cream) for these rounds.
Round 1 – Center Ring
Ch 6 and sl st in the first ch to form a ring. This ring becomes the small circular hole at the center.
Ch 3 (counts as dc). Work 17 dc in the ring. Sl st in the top of the beg ch-3 to join.
Count: 18 dc.
Pull the starting tail gently to keep the hole small and round, but do not close it.
Round 2 – Six Sections
Ch 3 (counts as dc). Dc in the next 2 dc, then ch 3.
Dc in the next 3 dc, ch 3. Rep from * 4 more times.
Sl st in the top of the beg ch-3 to join.
Count: 18 dc (6 groups of 3) and 6 ch-3 sps.
This round divides the circle into the 6 sections that become the 6 points.
Round 3 – V-Clusters and Spokes
Sl st in the next 2 dc, then sl st into the next ch-3 sp.
(Beg cl, ch 3, cl) in the same ch-3 sp. Ch 2, skip the next dc, sc in the next dc (the center dc of the group), ch 2.
(Cl, ch 3, cl) in the next ch-3 sp, ch 2, skip the next dc, sc in the next dc, ch 2. Rep from * 4 more times.
Sl st in the top of the beg cl to join.
Count: 12 cl, 6 sc, 6 ch-3 sps (future tips), and 12 ch-2 sps.
The sc spokes anchor the valleys between the points. The V-clusters push outward to start each point.
Round 4 – Cluster Points
Sl st into the next ch-3 sp.
Work the first point in that sp: (beg cl, ch 2, cl, ch 3, cl, ch 2, cl). Then ch 2, sc in the next sc, ch 2.
In the next ch-3 sp work (cl, ch 2, cl, ch 3, cl, ch 2, cl). Ch 2, sc in the next sc, ch 2. Rep from * 4 more times.
Sl st in the top of the beg cl to join. Fasten off the cream yarn.
Count: 24 cl, 6 sc, 6 ch-3 tip sps, 12 ch-2 sps inside the points, and 12 ch-2 valley sps.
Each point reads, from valley to valley: sc, ch 2, cl, ch 2, cl, ch 3 (tip), cl, ch 2, cl, ch 2, sc.
The fan of 4 clusters spreads into a pointed shape. The single sc between the fans holds each valley down close to the center, which creates the star silhouette.
Checkpoint: The piece should measure 4 in (10.2 cm) point to point. Each side of a point, from tip to valley, should be about 1 in (2.5 cm) long.
Border (Rounds 5–6)
Use Color B (burgundy) for the border.
Border gauge: 6 sc = 1 in (2.5 cm) along the edge.
This is intentionally a little firmer than a relaxed DK sc, which is about 5.5 sc per inch. The firmer border holds the lace taut and keeps the points sharp.
Round 5 – Outline Round
Join Color B with a sl st in any ch-3 tip sp. Ch 1 (does not count as a stitch). Work (sc, ch 2, sc) in the same sp.
Work the following in order:
– sc in the next cl
– 2 sc in the next ch-2 sp
– sc in the next cl
– sc in the next ch-2 valley sp
– skip the valley sc
– sc in the next ch-2 valley sp
– sc in the next cl
– 2 sc in the next ch-2 sp
– sc in the next cl
– (sc, ch 2, sc) in the next ch-3 tip sp
Rep from * around. On the last repeat, stop before the final tip, because that tip was worked at the start. Sl st in the first sc to join.
Count per side (tip to valley): 1 sc in the tip sp + 1 + 2 + 1 + 1 sc in the valley sp = 6 sc.
Count per point: 2 sides × 6 sc = 12 sc, plus 1 ch-2 tip sp.
Total: 6 points × 12 sc = 72 sc and 6 ch-2 tip sps.
The tip is a ch-2 sp, not a stitch. It is not counted in either side, so there is no double counting.
Why the math works: Each side measures about 1 in (2.5 cm). At the border gauge of 6 sc per inch, a 1 in side needs exactly 6 sc. With this count, the border lies flat without ruffling or cupping.
Skipping the valley sc pulls the burgundy line inward, so each valley stays crisp.
Round 6 – Sharpening and Picot Round
This is a conversion and trim round, not a growth round. It works into the existing sc of Round 5, with extra stitches added only at the tips.
Sl st into the next ch-2 tip sp. Ch 1. Work (sc, picot, sc) in the same sp.
Sc in the next 5 sc. Sc2tog over the next 2 sc (the last sc of this side and the first sc of the next point’s side). Sc in the next 5 sc. Work (sc, picot, sc) in the next ch-2 tip sp. Rep from * around.
On the last repeat, stop before the final tip, because that tip was worked at the start. Sl st in the first sc to join. Fasten off and weave in all ends.
Count:
– 60 sc worked 1-per-existing-stitch (10 per point)
– 6 sc2tog, made from the remaining 12 existing sc (1 per valley)
– 12 extra sc added at the tips (2 per point)
– Total: 60 + 6 + 12 = 78 stitches, plus 6 picots
Per point: 5 + 1 + 5 + 2 = 13 stitches.
Checkpoint: The snowflake should measure 4.5 in (11.4 cm) point to point, with a border depth of 0.25 in (0.6 cm).
Why it works: The sc2tog at each valley prevents extra fabric from bunching where the edge turns inward. The 2 extra sc and the picot at each tip give the point room to turn its sharp corner. These changes balance each other, so the outline stays flat.
Optional hanging loop: Join burgundy at one picot. Ch 15 and sl st back into the same picot. Fasten off.
Final Blocking
- Weave in all ends along stitches of matching color. Trim the tails close.
- Lightly mist the snowflake with water until it is damp but not dripping. If you want a stiff ornament, use diluted fabric stiffener instead.
- Lay the snowflake right side up on your blocking mat.
- Pin the center ring open with a pin placed in the hole.
- Pin the 6 picot tips so that each tip sits 2.25 in (5.7 cm) from the center. This gives 4.5 in (11.4 cm) point to point.
- Check that the tips are evenly spaced at 60° intervals. Opposite tips should line up through the center.
- Pin each valley 1.5 in (3.8 cm) from the center to define the star shape.
- Gently open the chain spaces with your fingertips so the lace looks airy.
- Leave the snowflake to dry completely, usually 4–8 hours, before removing the pins.
Final Quality-Control Checklist
- [ ] The center hole is small, round, and open
- [ ] There are 6 points, all the same size
- [ ] Each point has 4 clusters with a ch-3 tip
- [ ] Round 5 has 72 sc and 6 ch-2 tips
- [ ] Round 6 has 78 stitches and 6 picots
- [ ] Each valley is sharp and dips inward
- [ ] The border lies flat with no ruffling or cupping
- [ ] The snowflake measures 4.5 in (11.4 cm) point to point
- [ ] All ends are woven in securely and are invisible from the front
- [ ] There is no cream showing through the burgundy edge
Troubleshooting
The center hole is too large.
Pull the starting tail snugly after Round 1 and secure it as you weave it in. Next time, start with ch 5 instead of ch 6.
The snowflake cups into a bowl shape.
Your clusters are too tight. Go up a hook size for Rounds 3–4, or make your chain spaces a little looser.
The border ruffles.
Your border gauge is looser than 6 sc per inch. Work Rounds 5–6 with a 3 mm hook.
The border pulls the points inward.
Your border is too tight. Use a 4 mm hook for Round 5 only.
The points look rounded.
Check that you worked (sc, ch 2, sc) at each tip in Round 5. Then pin the tips firmly when blocking.
The valleys are shallow.
Make sure you skipped the valley sc in Round 5 and worked the sc2tog in Round 6.
Your stitch count is off.
Count one point at a time. Each point should have 12 sc in Round 5 and 13 stitches in Round 6.
Care
Hand wash in cool water with mild soap. Reshape, pin, and lay flat to dry, then re-stiffen if needed.
Final Notes
The measurement chain is short and easy to verify:
- Round 2: 2 in (5.1 cm)
- Round 3: 3 in (7.6 cm)
- Round 4: 4 in (10.2 cm), with each side about 1 in (2.5 cm)
- Round 5: 6 sc per side at 6 sc per inch, 72 sc total
- Round 6: 78 stitches, 4.5 in (11.4 cm) finished
If every checkpoint matches, the finished snowflake will lie flat with crisp points and a clean burgundy outline.
Optional: Make a few extra snowflakes to use as gift toppers or tree ornaments.
Happy crocheting!