

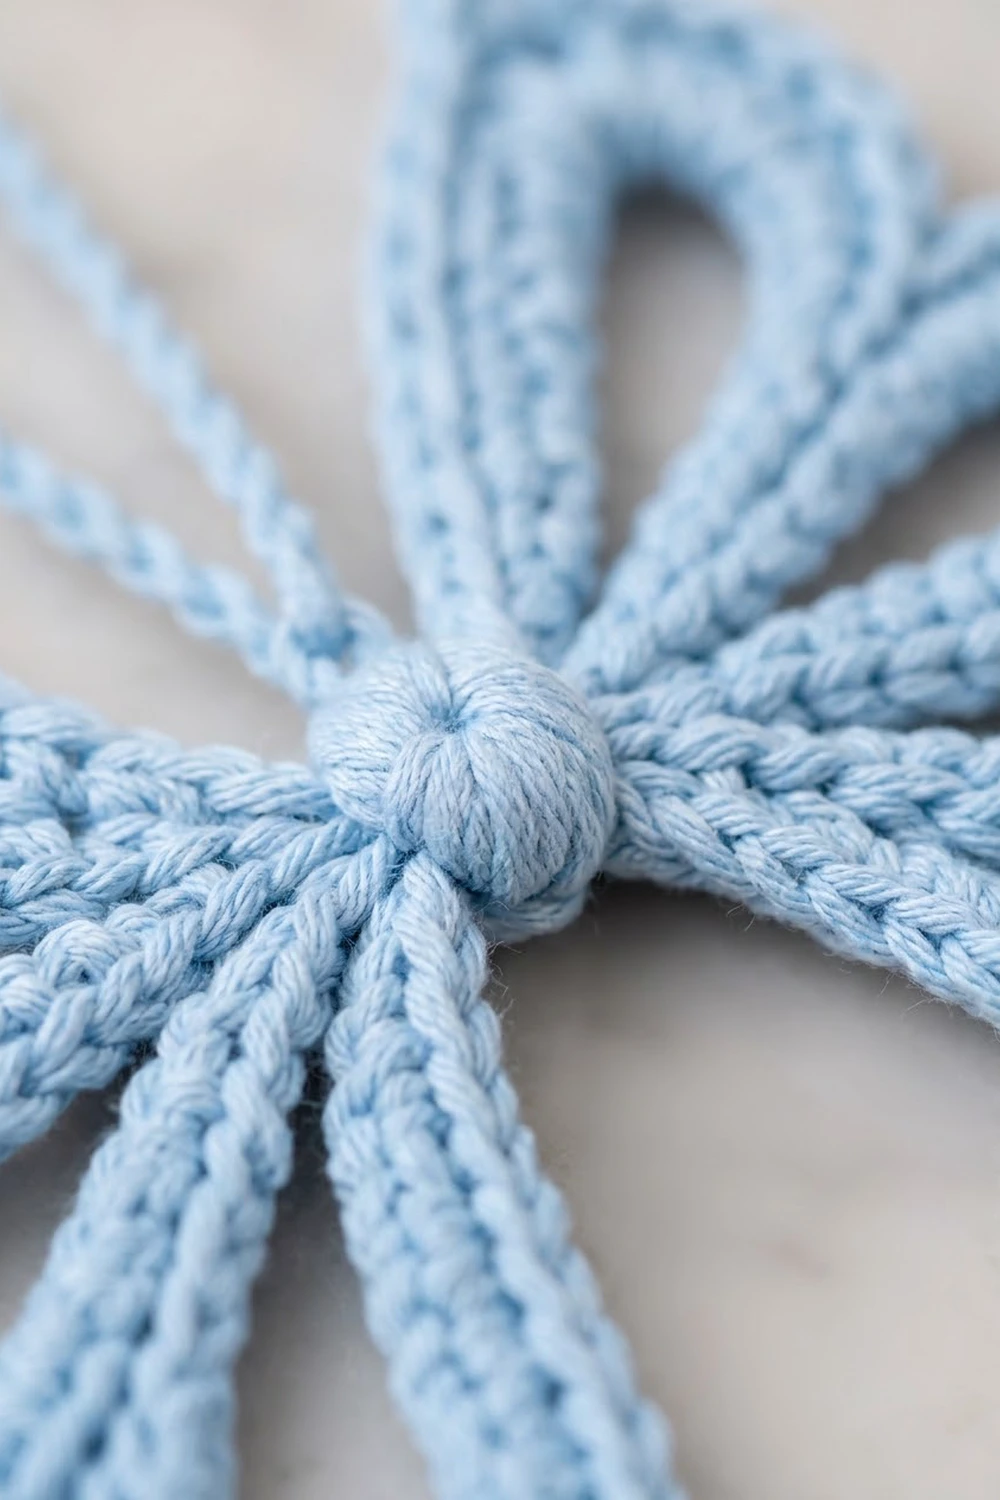
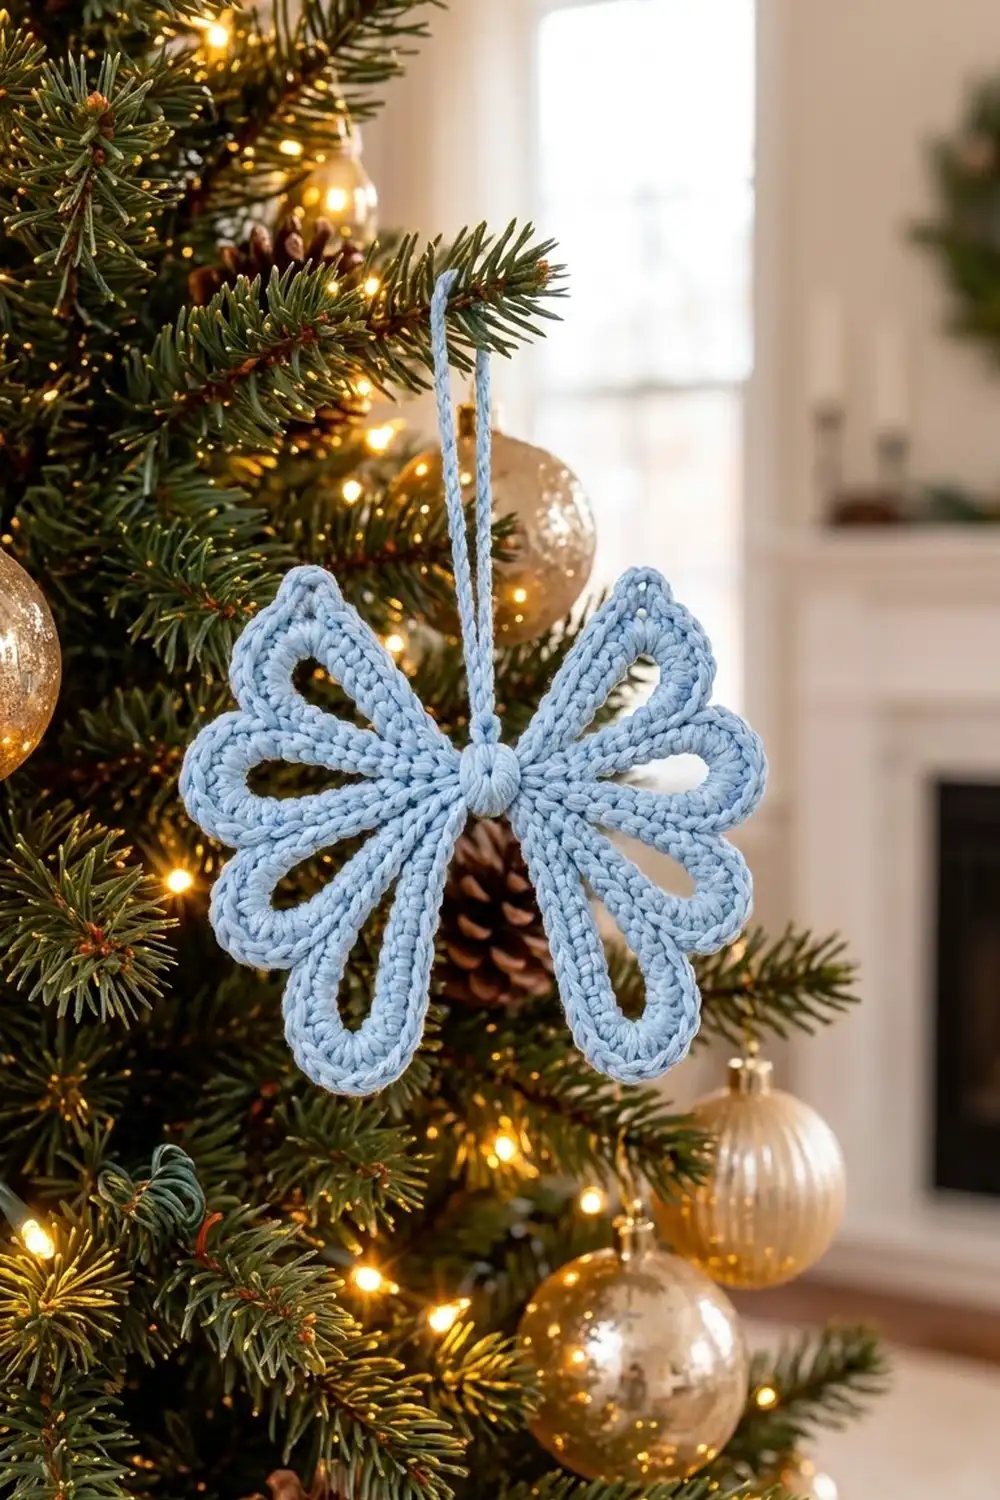
The Frost Ribbon Bow is a light, airy ornament shaped like a bow tied at the center. Six open teardrop loops fan out from a small rounded center, three on each side. Every loop is framed by a thick, rope-like edge, so the bow looks like a frosted ribbon caught mid-flutter.
It uses one soft powder blue, which keeps the focus on the outline and the open spaces. The style is clean and modern, and it stands out against dark branches, warm lights, and gold baubles. The pattern uses US crochet terms throughout.
The finished bow is about 5 in (12.7 cm) wide and 4 in (10.2 cm) tall, not counting the hanging loop. The hanging loop adds about 3 in (7.6 cm) above the top.
The whole ornament is made in one piece. You start the center with a magic ring, chain six loops in three lengths, and cover each chain with single crochet. Then you add a two-round border that locks the loops together and ends with reverse single crochet. A slip-stitched hanging loop finishes it.
Finished Size and Construction
- Finished size: 5 in (12.7 cm) wide x 4 in (10.2 cm) tall, plus a 3 in (7.6 cm) hanging loop
- Skill level: Easy (advanced beginner)
- Terminology: US crochet terms
- Yarn weight: DK (light, #3)
- Hook: 4.0 mm (G-6)
- Number of pieces: 1 (a single motif, with no sewing or joining)
- Layout: 6 teardrop loops around one center: an upper, middle, and lower loop on each wing, mirrored
- Piece size: same as the finished size, because this is one piece
- Size before border (after Rnd 3): 4 in (10.2 cm) wide x 3 in (7.6 cm) tall
- Border depth: about 0.5 in (1.3 cm) on every outer edge (Rnds 4–5)
Materials
Choose a smooth, tightly plied DK yarn. Cotton or a cotton-acrylic blend gives the crisp, rope-like edge and holds its shape well after blocking. Avoid fuzzy or brushed yarns, because they blur the open loops.
- Powder blue (light sky blue), DK: 10 g / 25 m per ornament
That amount includes a margin of about 25% for a test piece, tails, and the hanging loop. For several ornaments, multiply by how many you plan to make. A 50 g ball usually covers about 5 bows.
Tools:
- 4.0 mm (G-6) crochet hook
- Tapestry needle
- Scissors
- Stitch markers (at least 2)
- Rust-proof pins and a foam blocking mat
- Spray bottle with cool water, or a light fabric stiffener (optional)
- Ruler or tape measure
Abbreviations (US Terms)
- ch: chain
- sl st: slip stitch
- sc: single crochet
- sc2tog: single crochet 2 together
- rev sc: reverse single crochet (crab stitch)
- MR: magic ring
- st(s): stitch(es)
- Rnd: round
Special stitches:
- Valley sc2tog: Insert hook in the last sc of the current loop, yarn over, and pull up a loop. Skip the 2 sl sts at the base between loops. Insert hook in the first sc of the next loop, yarn over, and pull up a loop. Yarn over and draw through all 3 loops. This one stitch locks two neighboring loops together.
- Reverse sc (rev sc): Work from left to right (if you crochet right-handed). Insert hook in the next st to the right, pull up a loop, yarn over, and draw through both loops. This makes a twisted, rope-like edge.
Gauge and Checkpoints
Gauge: 5 sc and 5 sc rows = 1 in (2.5 cm) with a 4.0 mm hook. Exact gauge isn’t critical for an ornament, but it sets the final size and how firm the loops feel.
Make one test bow first, and check these measurements as you go:
- After Rnd 1: the center is about 0.75 in (1.9 cm) across.
- After Rnd 3: about 4 in (10.2 cm) wide x 3 in (7.6 cm) tall, measured flat with the loops gently spread.
- After Rnd 5: about 5 in (12.7 cm) wide x 4 in (10.2 cm) tall.
If your bow is too big: switch to a 3.5 mm (E-4) hook, or work your chains more tightly. Loose chains are the most common cause of oversized loops.
If your bow is too small: switch to a 4.5 mm (7) hook. Don’t add chains to the loops, because that changes the stitch counts in every later round.
If the loops ruffle: your sc are tighter than your chains. Go up half a hook size for Rnd 3 only.
Pattern
Work in your usual round direction. The first three loops form Wing 1 and the last three form Wing 2. The bow is mirror-symmetrical, so it doesn’t matter which wing ends up on the left. The gap between the two upper loops is the top of the bow, and the hanging loop goes there.
Rnd 1: Center
Make a MR. Ch 1 and work 12 sc into the ring. Pull the tail tight to close the center completely. Sl st to the first sc to join. (12 sc)
The tight ring makes the center dome slightly, which gives it the small rounded “knot” look. Place a marker in the first sc to mark the top center.
Rnd 2: Chain Loops
This round builds the six loop frames. Each loop starts in one sc and ends in the very next sc, so every teardrop has a narrow base.
Ch 1, then:
- Wing 1, upper loop: sc in next st, ch 20, sc in next st.
- Wing 1, middle loop: sc in next st, ch 16, sc in next st.
- Wing 1, lower loop: sc in next st, ch 24, sc in next st.
- Wing 2, lower loop: sc in next st, ch 24, sc in next st.
- Wing 2, middle loop: sc in next st, ch 16, sc in next st.
- Wing 2, upper loop: sc in next st, ch 20, sc in next st.
Sl st to the first sc to join. (12 anchor sc + 6 chain loops: 20 + 16 + 24 + 24 + 16 + 20 = 120 ch)
Don’t let the chains twist. Each loop should lie flat as a long, open teardrop.
Rnd 3: Covering the Loops
This is a conversion round. You work 1 sc into each chain, plus 4 extra sc at each loop tip to round the curve. Each anchor sc from Rnd 2 gets a sl st.
Don’t ch 1. For each loop, sl st in the starting anchor sc, work the loop stitches below, then sl st in the ending anchor sc.
- Upper loops (ch 20): sc in each of the first 8 ch, 2 sc in each of the next 4 ch, sc in each of the last 8 ch. (20 + 4 = 24 sc)
- Middle loops (ch 16): sc in each of the first 6 ch, 2 sc in each of the next 4 ch, sc in each of the last 6 ch. (16 + 4 = 20 sc)
- Lower loops (ch 24): sc in each of the first 10 ch, 2 sc in each of the next 4 ch, sc in each of the last 10 ch. (24 + 4 = 28 sc)
Work the loops in the same order as Rnd 2. Sl st to the first sl st to join.
Rnd 3 total: 144 sc (120 worked 1 per chain + 24 extra) + 12 sl st. Each wing has 24 + 20 + 28 = 72 sc.
Checkpoint: 4 in (10.2 cm) wide x 3 in (7.6 cm) tall. The openings should be clear and teardrop-shaped. This is the size before the border.
Border
The border adds two rounds around every loop. Rnd 4 widens the outline and links the loops, and Rnd 5 adds the rope edge.
Border gauge: Rnd 4 adds about 0.2 in (0.5 cm) of depth and the rope edge of Rnd 5 adds about 0.3 in (0.8 cm). That’s 0.5 in (1.3 cm) in total on every outer edge, which takes the bow from 4 x 3 in (10.2 x 7.6 cm) to 5 x 4 in (12.7 x 10.2 cm).
On a single bow, the six loops act as the “sides” of the border, so the counts below are given per loop.
Rnd 4: Outline and Link
You should be at the top center, between the two upper loops. Ch 1.
Work a valley sc2tog using the last sc of the Wing 2 upper loop and the first sc of the Wing 1 upper loop, skipping the 2 sl sts between them. Place a marker in this stitch to mark the top valley.
Now work around each loop, and finish each one with a valley sc2tog into the next loop:
- Wing 1 upper (24 sc in Rnd 3): sc in next 9 sc, 2 sc in each of next 4 sc, sc in next 9 sc. (22 + 4 = 26 sc) Valley sc2tog.
- Wing 1 middle (20 sc in Rnd 3): sc in next 7 sc, 2 sc in each of next 4 sc, sc in next 7 sc. (18 + 4 = 22 sc) Valley sc2tog.
- Wing 1 lower (28 sc in Rnd 3): sc in next 11 sc, 2 sc in each of next 4 sc, sc in next 11 sc. (26 + 4 = 30 sc) Valley sc2tog (this is the bottom valley).
- Wing 2 lower: work as Wing 1 lower. (30 sc) Valley sc2tog.
- Wing 2 middle: work as Wing 1 middle. (22 sc) Valley sc2tog.
- Wing 2 upper: work as Wing 1 upper. (26 sc)
Sl st to the first valley sc2tog (the top valley) to join.
Each loop works 2 fewer plain sc than it had in Rnd 3, because its first and last sc go into the valley sc2tog stitches.
Rnd 4 total: 156 sc + 6 valley sc2tog = 162 sts. Each wing has 26 + 22 + 30 sc + 3 valleys = 81 sts.
Rnd 5: Rope Edge
Ch 1. Working from left to right, rev sc in each st around, including each valley sc2tog. Sl st to the first rev sc to join. (162 rev sc)
That’s 26 + 1 valley on each upper loop, 22 + 1 valley on each middle loop, and 30 + 1 valley on each lower loop. Don’t skip the valley stitches, because they keep the outline continuous.
Checkpoint: 5 in (12.7 cm) wide x 4 in (10.2 cm) tall.
Hanging Loop
Don’t fasten off. Sl st into the top valley stitch and ch 30. Sl st into the same top valley stitch to close the loop. Sl st into the back bump of each of the 30 ch around the loop, then sl st into the top valley once more. (30 ch + 30 sl st)
The slip-stitch pass firms up the chain so it looks like a twisted cord, and the loop hangs about 3 in (7.6 cm) tall. Fasten off and weave in all ends through the center back.
Why the Math Works
- Rnd 2 places 6 loops on 12 sc, using exactly 2 sc per loop, with nothing left over.
- Rnd 3 adds 4 sc to each of the 6 loops: 120 + 24 = 144 sc.
- Rnd 4 adds 4 sc per loop (+24) and merges 2 sc into 1 at each of the 6 valleys (−6): 144 + 24 − 6 = 162 sts.
- Rnd 5 works 1 rev sc per stitch, for 162 rev sc. It needs no increases because Rnd 4 already rounded the tips.
- Every increase sits at a loop tip, so the two wings mirror each other exactly at 81 sts each.
Final Blocking
- Weave in all ends before blocking. Hide them in the center back so they don’t show through the open loops.
- Mist the bow lightly with cool water until it’s damp but not dripping. For a stiffer ornament, use a light fabric stiffener instead.
- Lay the bow right side up on a blocking mat.
- Pin the center first, then pin the tip of each loop. Angle the upper loops up and out, set the middle loops straight out to the sides, and angle the lower loops down and out.
- Measure it: 5 in (12.7 cm) wide and 4 in (10.2 cm) tall. Move the pins until both wings match.
- Gently open the center of each teardrop with a finger so the openings are even.
- Let it dry completely, for at least 6 to 8 hours, before unpinning.
Final Quality-Control Checklist
- The center ring is fully closed, with no hole.
- There are six loops (two upper, two middle, two lower), mirrored across the center.
- Rnd 3 has 24 / 20 / 28 sc on each upper / middle / lower loop.
- Rnd 4 has 26 / 22 / 30 sc on each upper / middle / lower loop, plus 6 valley sc2tog.
- Rnd 5 has 162 rev sc, with an even rope edge all around.
- The finished bow measures 5 in (12.7 cm) x 4 in (10.2 cm).
- The hanging loop is centered at the top and about 3 in (7.6 cm) tall.
- All ends are woven in and can’t be seen from the front.
Troubleshooting
Loops twist or flip over. A chain twisted in Rnd 2. Undo that loop and chain it again, keeping the front of the chain facing you.
Loop tips are pointed instead of rounded. The 4 tip increases are off-center. Count from both ends of the loop to place them in the middle.
Loop edges ruffle. Your increases are too loose, or your border stitches are larger than your chains. Go down half a hook size for Rnds 4–5.
Loops splay apart at the valleys. A valley sc2tog was skipped or worked as two separate sc. Each valley needs exactly one sc2tog.
The rope edge looks flat. You worked regular sc instead of rev sc. Check that you’re moving left to right (if you’re right-handed).
The bow is lopsided. Your counts differ between the wings. Each wing should have 72 sc in Rnd 3 and 81 sts in Rnd 4.
The hanging loop is off-center. It has to start and end in the top valley sc2tog, not in a neighboring stitch.
Care
Hand wash in cool water with mild soap, press the water out in a towel, and dry flat, reshaping and pinning if needed. Store it flat or hang it by its loop so the loops don’t crease.
Final Notes
The Frost Ribbon Bow follows a clear measurement chain. The center starts at 0.75 in (1.9 cm). After you cover the loops in Rnd 3, the bow measures 4 in (10.2 cm) x 3 in (7.6 cm). The two border rounds add 0.5 in (1.3 cm) on every edge, bringing it to 5 in (12.7 cm) x 4 in (10.2 cm), with a 3 in (7.6 cm) hanging loop on top.
Check your counts at each stage: 12 sc, 120 ch, 144 sc, 162 sts, and 162 rev sc. If those numbers match, your bow will match too.
Once you know the rhythm, one bow takes about an hour. Make a few to hang on a tree, tie onto a gift, or hang in a window.
Happy crocheting!