

The Blush Bloom Butterfly Bow is a small, lacy motif shaped like a bow with four rounded lobes: two larger upper wings and two slightly smaller lower wings. A ridged band wraps the center, and a sturdy hanging loop sits on top, so the bow hangs neatly from a hook, a window latch, or a tree branch.
The sample is worked in one soft blush pink. Every lobe has the same airy rhythm: a solid fan near the center, a ring of open eyelet windows, a second solid fan, then a crisp single crochet rim. The look is light and romantic, and it suits both everyday and holiday decor.
This pattern uses US crochet terms. The finished bow measures 6 in wide x 4 in tall (15.2 cm x 10.2 cm), not counting the hanging loop, which adds 1.5 in (3.8 cm).
Construction is simple. You crochet a small center circle and work four fan-shaped lobes in short rows straight off it. Then you edge the whole outline with one round of single crochet, wrap a ribbed band around the middle, and add the loop. It is one finished piece, and it uses only basic stitches.
Finished Size and Construction
- Finished size: 6 in x 4 in (15.2 cm x 10.2 cm), plus a 1.5 in (3.8 cm) loop
- Skill level: Easy (advanced beginner)
- Terminology: US crochet terms
- Yarn weight: Worsted (#4), cotton or cotton blend
- Hook: 4.0 mm (US G-6)
- Number of pieces: 1 bow motif (the small center band is sewn on as part of the same motif)
- Layout: single motif, four lobes around a center circle
- Center circle size: 1.5 in (3.8 cm) across
- Size before border: 5.5 in x 3.5 in (14.0 cm x 8.9 cm)
- Border depth: 0.25 in (0.6 cm) on every edge
Materials
Choose a smooth worsted-weight cotton or cotton blend in a light color. Cotton shows the eyelets clearly and holds its shape when hung. A soft acrylic also works, but it may need firmer blocking.
- Blush pink: 15 g, about 26 m (28 yd)
Tools:
- 4.0 mm (US G-6) crochet hook
- Tapestry needle
- Scissors
- Stitch markers (4)
- Rust-proof pins and a foam blocking mat
- Spray bottle with cool water
- Ruler or measuring tape
The yarn amount includes a margin of about 25 percent for your test piece, the short tails, and small differences in tension.
Abbreviations (US Terms)
- ch: chain
- sl st: slip stitch
- sc: single crochet
- dc: double crochet
- sc2tog: single crochet 2 together
- BLO: back loop only
- sp(s): space(s)
- st(s): stitch(es)
- RS / WS: right side / wrong side
Special stitch – valley sc2tog: Insert hook in the last row-end of one lobe, yarn over, pull up a loop. Insert hook in the first row-end of the next lobe, yarn over, pull up a loop. Yarn over and pull through all 3 loops on hook. This draws the two lobes together and keeps the notch between them sharp.
Gauge and Checkpoints
Gauge: 16 sc and 18 sc rows = 4 in (10.2 cm) with a 4.0 mm hook. Exact gauge is not critical for a decoration, but it controls the final size and how open the eyelets look.
Make one complete test motif before making several. Measure at each stage:
- After Center Rnd 1: 1 in (2.5 cm) across
- After Center Rnd 2: 1.5 in (3.8 cm) across
- Each lobe after Row 3: 1.5 in (3.8 cm) deep from the circle edge. Upper lobes are 2.75 in (7.0 cm) wide and lower lobes are 2 in (5.1 cm) wide.
- Before border: 5.5 in x 3.5 in (14.0 cm x 8.9 cm)
- After border: 6 in x 4 in (15.2 cm x 10.2 cm)
- Center band: 0.75 in x 3 in (1.9 cm x 7.6 cm)
If your piece is more than 0.25 in (0.6 cm) too big at any checkpoint, change to a 3.5 mm hook. If it is too small, change to a 4.5 mm hook. Check the center circle again before you continue, because every later measurement grows from it.
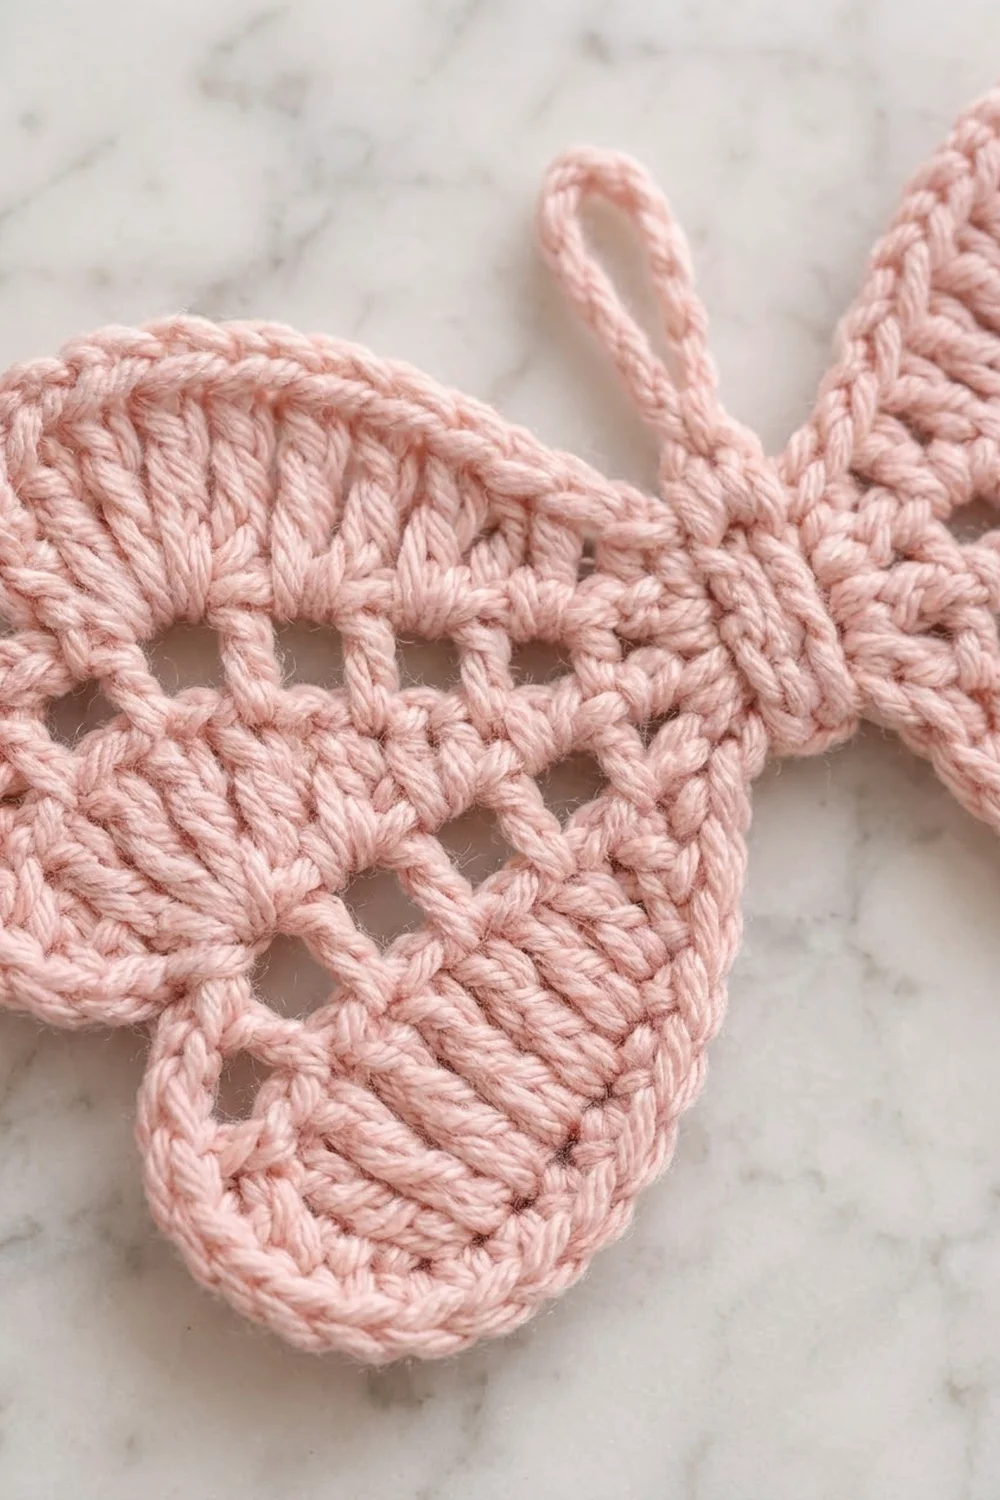
Center Circle
Use blush pink throughout.
Rnd 1: Make a magic ring. Ch 1, 12 sc in ring. Pull the ring closed and sl st to first sc. (12 sc)
Rnd 2: Ch 1, 2 sc in each st around. Sl st to first sc. (24 sc)
Number the stitches of Rnd 2 from 1 to 24, starting with the first sc of the round. Hold the circle RS facing with stitch 1 at the top center, just right of the joining seam.
Place markers to divide the circle:
- Top gap: sts 24 and 1 (left unworked)
- Upper-right lobe base: sts 2–7 (6 sts)
- Lower-right lobe base: sts 8–11 (4 sts)
- Bottom gap: sts 12 and 13 (left unworked)
- Lower-left lobe base: sts 14–17 (4 sts)
- Upper-left lobe base: sts 18–23 (6 sts)
Check: 2 + 6 + 4 + 2 + 4 + 6 = 24 sts. Fasten off and weave in the tail.
Lobes
All four lobes use the same three rows. Only the number of base stitches changes. In the counts below, n is the number of base stitches: n = 6 for upper lobes and n = 4 for lower lobes.
Row 1 (RS, solid fan): With RS facing, join yarn with sl st in the first base st of the lobe. Ch 3 (counts as dc), dc in same st, 2 dc in each remaining base st. Turn. (2n dc: 12 dc for upper lobes, 8 dc for lower lobes)
Row 2 (WS, eyelet row): Ch 5 (counts as dc + ch 2), dc in next dc, ch 2, dc in next dc. Repeat from * across, ending with a dc in the top of the turning ch-3. Turn. (2n dc and 2n − 1 ch-2 sps: 12 dc and 11 sps for upper lobes, 8 dc and 7 sps for lower lobes)
The ch-2 spaces are the open windows that run across the middle of each lobe.
Row 3 (RS, outer fan): Ch 3 (counts as dc), dc in same st, 2 dc in next ch-2 sp, dc in next dc. Repeat from * across. The last “dc in next dc” lands in the 3rd ch of the turning ch-5. Work 1 more dc in that same ch. Fasten off.
The Row 3 count is 2 dc at the start, plus 3 dc for each of the 2n − 1 spaces, plus 1 extra dc at the end. That adds up to 6n dc.
- Upper lobes: 2 + (11 x 3) + 1 = 36 dc
- Lower lobes: 2 + (7 x 3) + 1 = 24 dc
Work the lobes in this order, always with RS facing:
- Upper-right lobe on sts 2–7 (n = 6)
- Lower-right lobe on sts 8–11 (n = 4)
- Lower-left lobe on sts 14–17 (n = 4)
- Upper-left lobe on sts 18–23 (n = 6)
Each lobe now has three dc row-ends along each side. Upper and lower lobes on the same side touch at their bases, forming a V-shaped valley between them. Weave in all tails on the WS, keeping them out of the eyelets.
Lay the piece flat and check that it measures 5.5 in x 3.5 in (14.0 cm x 8.9 cm) before the border.
Center Band
Row 1: Ch 4, sc in 2nd ch from hook and in next 2 ch. (3 sc)
Rows 2–14: Ch 1, turn, sc in BLO of each st across. (3 sc)
Fasten off, leaving a 12 in (30.5 cm) tail for sewing. The band measures 0.75 in x 3 in (1.9 cm x 7.6 cm), with raised ridges from the back-loop rows. Set it aside until the border is done.
Border
The border is one round of sc around the full outline. It ties the four lobes into one smooth shape and gives the raised, rope-like rim.
Border gauge: 2 sc insertions per dc row-end, and 1 sc per dc across the top of each lobe.
Border Rnd: With RS facing, join yarn with sl st in st 1 of the center circle (top gap). Ch 1 and work as follows:
- Top gap, right half: sc in st 1. (1 sc)
- Upper-right lobe, inner side: 2 sc in each of the 3 row-ends. (6 sc)
- Upper-right lobe, arc: sc in each dc across Row 3. (36 sc)
- Upper-right lobe, outer side: 2 sc in each of the next 2 row-ends, 1 sc in the last (base) row-end. (5 sc)
- Right valley: valley sc2tog, using that same base row-end of the upper lobe and the base row-end of the lower lobe. (1 sc2tog)
- Lower-right lobe, outer side: 1 sc in the same base row-end, 2 sc in each of the next 2 row-ends. (5 sc)
- Lower-right lobe, arc: sc in each dc across Row 3. (24 sc)
- Lower-right lobe, inner side: 2 sc in each of the 3 row-ends. (6 sc)
- Bottom gap: sc in sts 12 and 13. (2 sc)
- Lower-left lobe: 6 sc up the inner side, 24 sc across the arc, and 5 sc down the outer side, worked as on the right.
- Left valley: valley sc2tog, worked as on the right. (1 sc2tog)
- Upper-left lobe: 5 sc up the outer side, 36 sc across the arc, 6 sc down the inner side.
- Top gap, left half: sc in st 24. (1 sc)
Sl st to the first sc. Fasten off.
Count per wing: 6 + 36 + 5 + 1 + 5 + 24 + 6 = 83 sts.
Round total: 83 (right wing) + 83 (left wing) + 2 (top gap) + 2 (bottom gap) = 170 sts.
Why the math works: A dc row-end is about as tall as 2 sc, so 2 insertions per row-end keep the lobe sides flat. At each valley, the base row-ends still get 2 insertions each: 1 sc plus one leg of the sc2tog. That keeps the count even while the sc2tog pulls the notch inward. The outer arcs already gained their fullness in Row 3, so 1 sc per dc keeps them smooth. The border adds 0.25 in (0.6 cm) on every edge, taking the piece from 5.5 in x 3.5 in (14.0 cm x 8.9 cm) to 6 in x 4 in (15.2 cm x 10.2 cm).
Attach the Band and Hanging Loop
Wrap the band vertically around the center so it covers the center circle front and back. The ridges should run horizontally on the front. Sew the two short ends together on the back with the long tail. Pull gently as you sew so the band pinches the middle slightly, which makes the wings flare. Tack the band to the top and bottom gap stitches so it cannot slide.
Hanging loop: Join yarn with sl st in the center st of the band’s top edge. Ch 12, sl st in the same st to form a loop.
Loop Rnd: Ch 1, work 18 sc into the ch-12 loop, sl st to the first sc. Fasten off and weave in ends.
The covered loop stands 1.5 in (3.8 cm) above the bow and is strong enough to hang without stretching.
Final Blocking
- Weave in every remaining tail on the WS and trim close.
- Lightly mist the bow with cool water until it is damp, not soaked.
- Lay it RS up on the blocking mat.
- Pin the center band straight and vertical.
- Pin the tip of each lobe so the bow measures 6 in x 4 in (15.2 cm x 10.2 cm).
- Pin into each valley to sharpen the notch between upper and lower lobes.
- Ease the outer arcs into smooth curves and open each eyelet with a fingertip.
- Shape the loop upright and let the piece dry completely before unpinning.
Final Quality-Control Checklist
- Center circle has 24 sc and measures 1.5 in (3.8 cm).
- Upper lobes end with 36 dc and lower lobes end with 24 dc.
- Each lobe shows a solid fan, a row of open eyelets, and a second solid fan.
- Border round totals 170 sts: 83 per wing, 2 at the top, and 2 at the bottom.
- Valleys between lobes are clearly notched.
- Band is centered, ridges run horizontally, and the back seam is hidden.
- Loop is centered and firmly anchored.
- Finished size is 6 in x 4 in (15.2 cm x 10.2 cm), plus a 1.5 in (3.8 cm) loop.
- No tails show through the eyelets.
Troubleshooting
Lobes cup or curl upward: Your dc rows are tight. Go up a hook size, or loosen the ch-2 spaces in Row 2.
Lobes ruffle: Your tension is loose. Go down a hook size, and check that Row 3 has exactly 36 or 24 dc.
Eyelets look closed: Make each ch-2 a little looser, and open the spaces during blocking.
Border waves along lobe sides: Work exactly 2 sc per row-end. Working 3 sc in a row-end will make it ruffle.
Valley looks rounded, not notched: Make sure you worked the valley sc2tog, and pin into the valley while blocking.
Band slides sideways: Tack it at the top and bottom gap stitches with a few extra stitches.
Loop stretches: Work the 18 sc firmly and space them evenly around the chain.
Care
Hand wash in cool water with mild soap, press the water out in a towel, and dry flat while reshaping the lobes. Do not tumble dry, because heat can distort the eyelets.
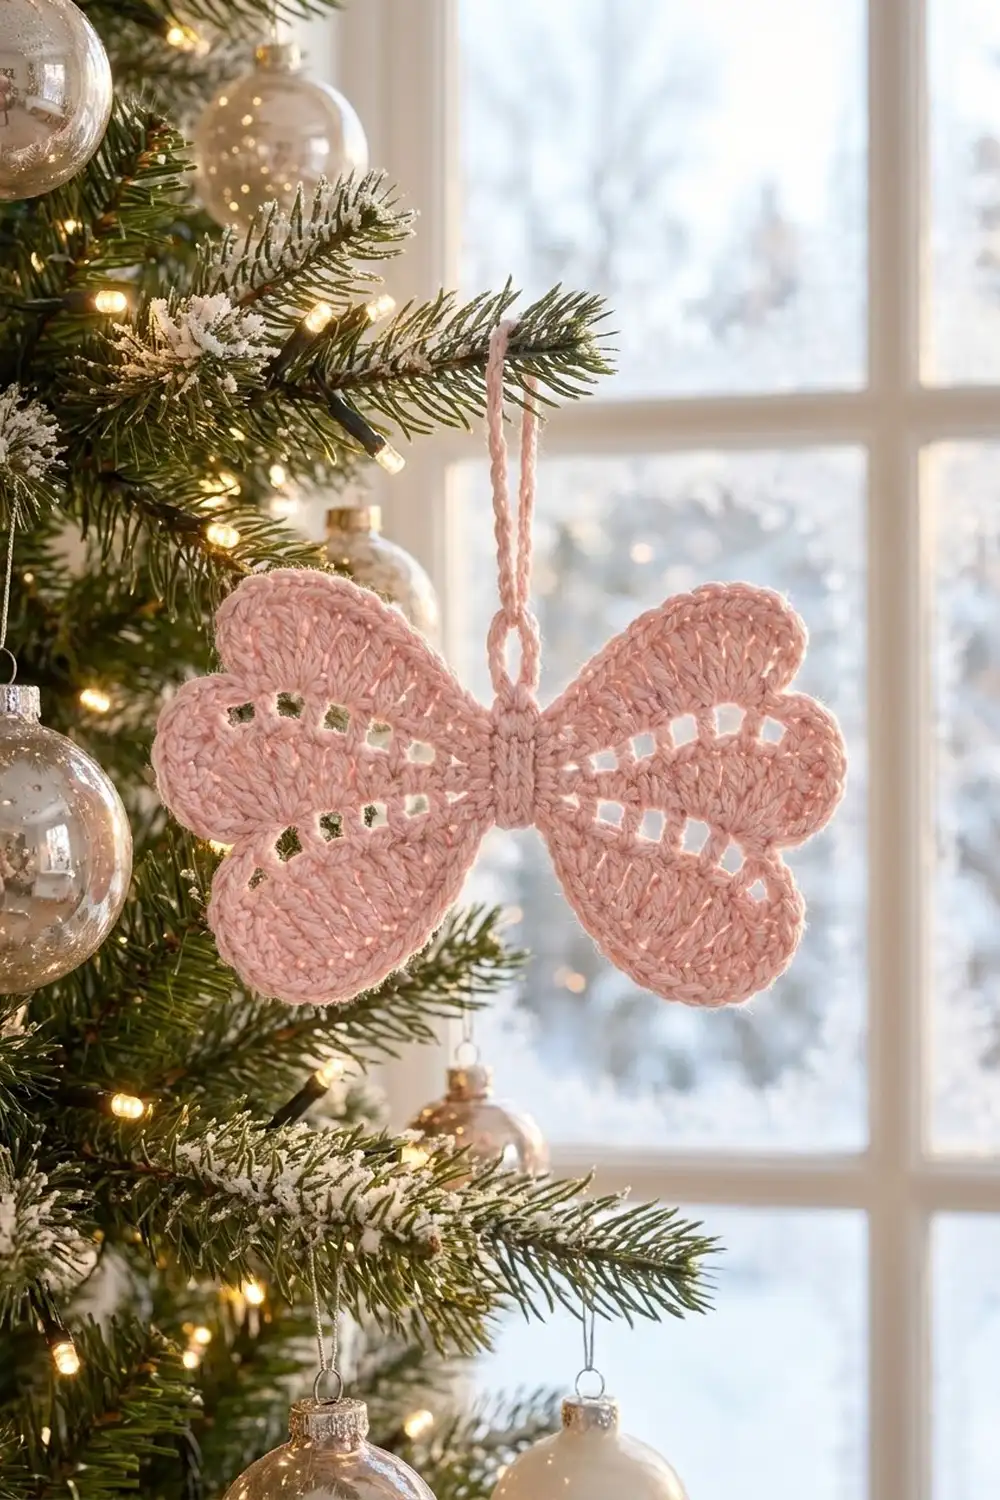
Final Notes
The measurement chain is short and easy to check. The center circle sets the base at 1.5 in (3.8 cm). Each lobe grows to 1.5 in (3.8 cm) deep, giving 5.5 in x 3.5 in (14.0 cm x 8.9 cm) before the border. One round of 170 sts adds 0.25 in (0.6 cm) on every edge, for a finished bow of 6 in x 4 in (15.2 cm x 10.2 cm). The 0.75 in x 3 in (1.9 cm x 7.6 cm) band pinches the middle, and the 1.5 in (3.8 cm) loop finishes the piece.
The bow is quick to make, so it works well as a gift topper, a tree ornament, or a small window hanging. Make one, check your numbers, and enjoy watching the eyelet texture open up as it blocks.
Happy crocheting!