

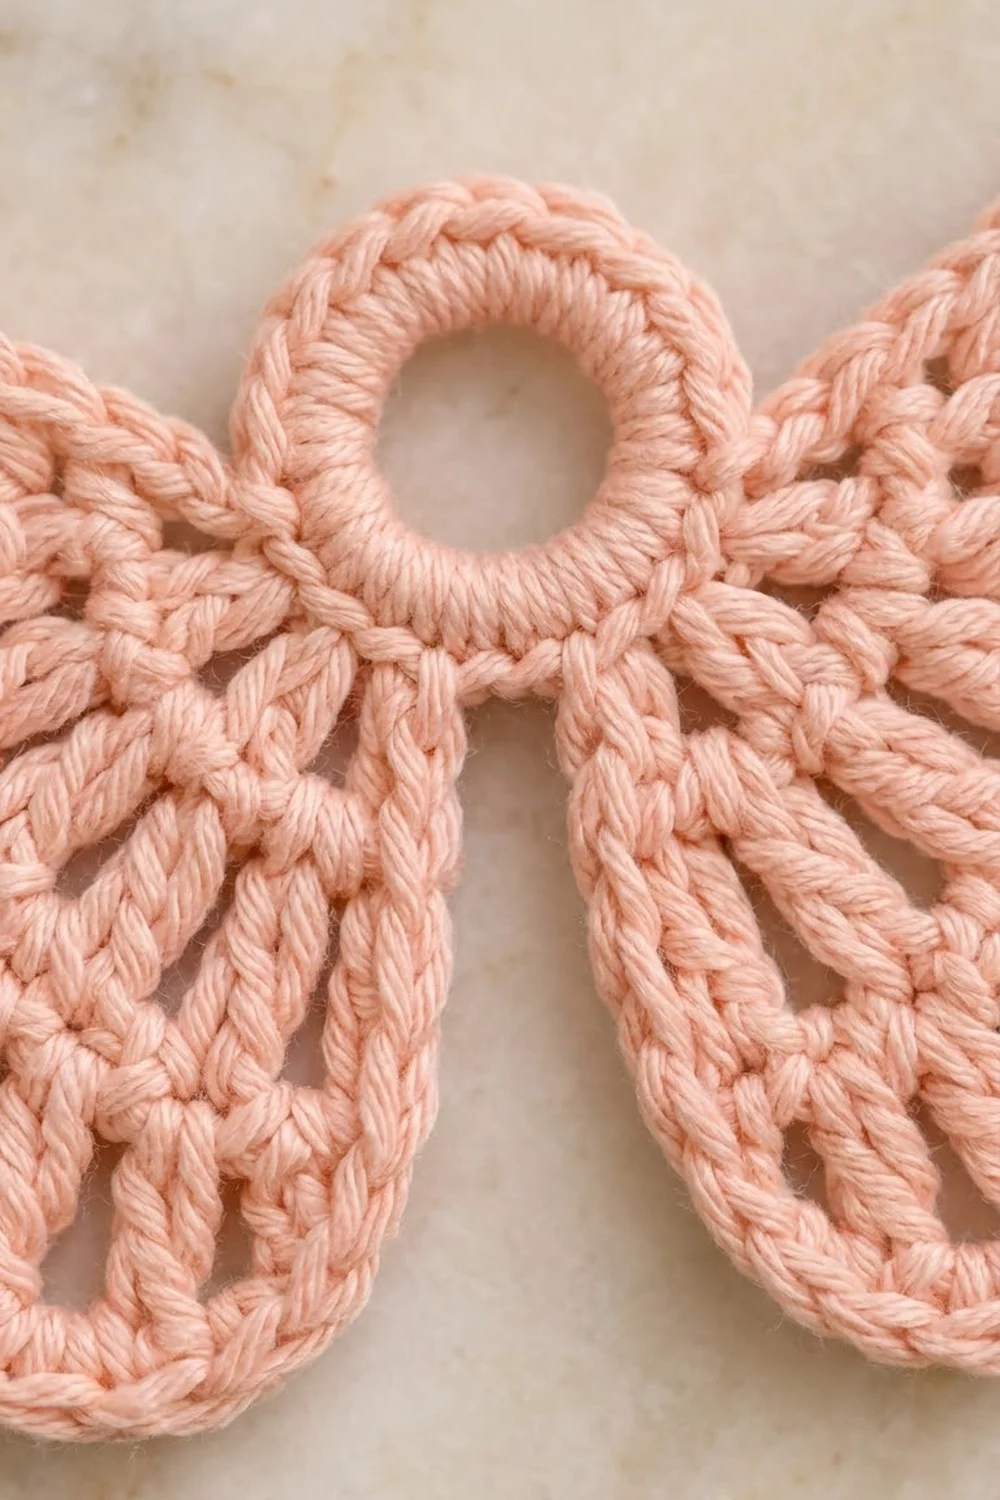
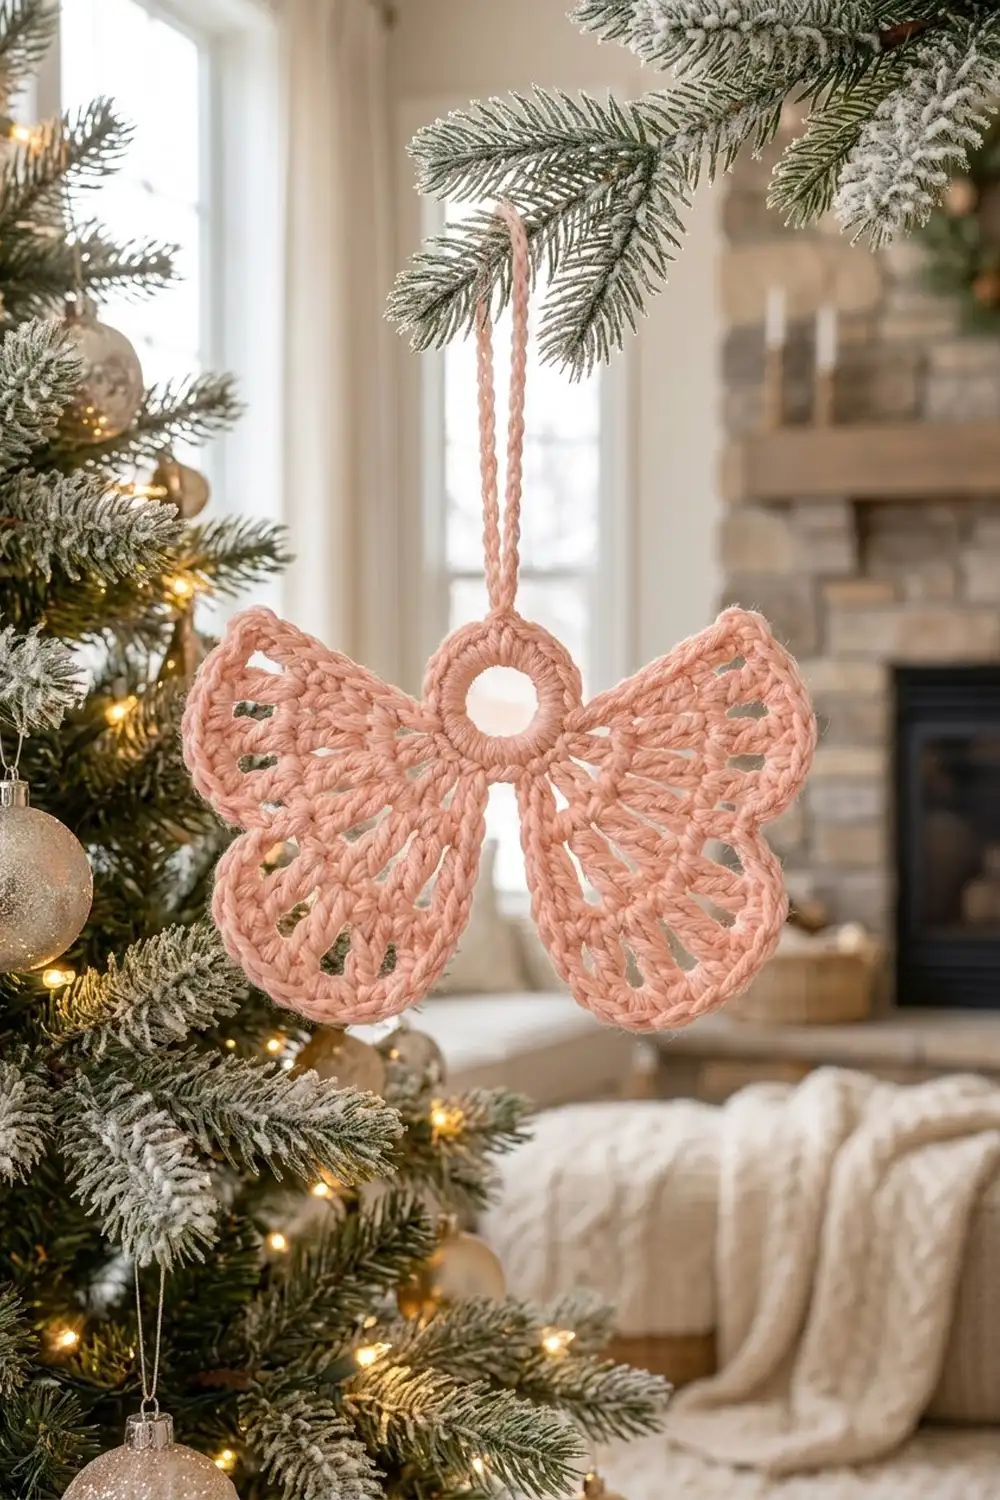
The Peach Petal Bow is a single openwork bow motif with a round center ring and two fan-shaped wings. Each wing is made of double crochet spokes that radiate out into lacy spaces. A smooth single crochet edge finishes each wing and dips into a soft notch, so every wing reads as two rounded lobes.
This sample uses one soft peach-pink DK yarn. With only one color, the texture does the work: dense stitches around the ring, airy spokes through the middle, and a neat rope-like edge around the whole outline. The bow looks sweet and a little vintage. You can use it as a gift topper, ornament, bag charm, or appliqué.
The pattern uses US crochet terms. After the border and blocking, the finished bow measures 5.75 in (14.6 cm) wide and 4 in (10.2 cm) tall.
Construction is simple. You crochet a ring and work each wing in 5 short rows straight off the ring. Then you add a 2-round border around the entire bow in one pass. There is no sewing and no assembly; the bow is one continuous piece.
Finished Size and Construction
- Finished size: 5.75 in (14.6 cm) wide x 4 in (10.2 cm) tall
- Skill level: Easy
- Terminology: US crochet terms
- Yarn weight: DK (#3, light)
- Hook: 4.0 mm (US G-6)
- Number of pieces: 1
- Layout: one bow motif (center ring with two wings), laid flat
- Piece size: 5.75 in (14.6 cm) x 4 in (10.2 cm)
- Size before border: 5.25 in (13.3 cm) x 3.5 in (8.9 cm)
- Border depth: 0.25 in (0.6 cm) on every edge
Materials
Pick a smooth DK yarn with good stitch definition. Cotton or a cotton-acrylic blend gives crisp spokes and a firm edge that holds the lobe shape after blocking. Fuzzy or brushed yarns blur the open spaces, so the spokes won’t show as clearly. A typical DK cotton gives about 125 m per 50 g, or 2.5 m per gram.
- Peach / blush pink (main color): 10 g, about 25 m (27 yd)
This covers the ring, both wings, the border, and the optional hanging chain. The amounts include a margin of about 25 percent for a test piece and weaving in ends.
Tools
- 4.0 mm (US G-6) crochet hook
- Tapestry needle
- 4 stitch markers
- Scissors
- Ruler or tape measure
- Blocking mat, rust-proof pins, and a spray bottle
Abbreviations (US Terms)
- ch – chain
- sl st – slip stitch
- sc – single crochet
- dc – double crochet
- sp(s) – space(s)
- st(s) – stitch(es)
- RS / WS – right side / wrong side
- [ ] – repeat the instructions in brackets the stated number of times
Special stitch – Spoke row: a row of dc worked into the dc of the row below, with chains between them. The chains get one longer each row (ch 1, then ch 2, then ch 3), so the dc spokes fan out from the ring like the ribs of a shell.
Gauge and Checkpoints
Gauge: 18 sc = 4 in (10.2 cm) with a 4.0 mm hook. For a single bow, gauge isn’t critical, but it sets the final size and how flat the wings lie.
To check gauge quickly, chain 20, work 3 rows of sc, and measure 18 sts across the middle row. If you plan to make several bows for gifts, keep this swatch as a tension reference.
Test one piece first. Make the ring and one wing, then measure before you start the second wing.
Checkpoint 1 – Ring: after Rnd 1, the ring is 1.25 in (3.2 cm) across the outside, with an opening of about 0.5 in (1.3 cm).
Checkpoint 2 – Wing after Row 4: the wing reaches 1.75 in (4.4 cm) out from the outer edge of the ring.
Checkpoint 3 – Wing after Row 5: the wing reaches 2 in (5.1 cm) out from the ring.
Checkpoint 4 – Before border: 5.25 in (13.3 cm) wide x 3.5 in (8.9 cm) tall.
Checkpoint 5 – After border and blocking: 5.75 in (14.6 cm) wide x 4 in (10.2 cm) tall.
If your bow is too big, change to a 3.5 mm hook. If it is too small, change to a 4.5 mm hook. If only the ring is off and the wings are right, change the ring chain by 2 ch (ch 8 or ch 12) and still work 24 sc in Rnd 1.
Pattern
Center Ring
Ch 10, sl st in first ch to form a ring.
Rnd 1 (RS): Ch 1, work 24 sc into the ring, sl st in first sc to join. (24 sc)
Number the stitches 1 to 24. Stitch 1 is the first sc, and it sits at the top center of the bow. Place markers in sts 6, 12, 18, and 24.
- Sts 1–5: top of ring (left bare)
- Sts 6–12: Wing A base (7 sts)
- Sts 13–17: bottom of ring (left bare)
- Sts 18–24: Wing B base (7 sts)
Check: 5 + 7 + 5 + 7 = 24. Fasten off.
The bare sts at the top and bottom make the small gaps above and below the ring. The lower gap is where the two lower lobes separate.
Wing A
Work in rows. Don’t join at the ends of rows.
Row 1 (RS): Join yarn in st 6, ch 3 (counts as dc), dc in same st, 2 dc in each of sts 7–12. Turn. (14 dc)
The 2-dc increases spread the wing into a fan right from the ring.
Row 2 (WS): Ch 4 (counts as dc + ch 1), [dc in next dc, ch 1] 12 times, dc in top of turning ch. Turn. (14 dc, 13 ch-1 sps)
Row 3 (RS): Ch 5 (counts as dc + ch 2), [dc in next dc, ch 2] 12 times, dc in 3rd ch of turning ch. Turn. (14 dc, 13 ch-2 sps)
Row 4 (WS): Ch 6 (counts as dc + ch 3), [dc in next dc, ch 3] 12 times, dc in 3rd ch of turning ch. Turn. (14 dc, 13 ch-3 sps)
The 14 dc spokes now radiate from the ring with open spaces between them. For Row 5, number the spokes dc 1 to dc 14 and the spaces sp 1 to sp 13.
Tips for clean spokes: work every dc into the top of the dc below it, not into the chain space. That keeps each spoke in a straight line from the ring to the edge. Keep the chains a little looser than your dc so the wing can fan out flat. If a spoke leans, you probably skipped a dc or worked into the turning chain at the wrong point, so count to 14 before you turn.
Row 5 (RS) – lobe edge: Ch 1.
- Lobe 1: sc in dc 1, 3 sc in sp 1, sc in dc 2, [4 sc in next sp, sc in next dc] 4 times (sps 2–5, ending in dc 6), 3 sc in sp 6, sc in dc 7. (29 sc)
- Notch: 1 sc in sp 7. (1 sc)
- Lobe 2: sc in dc 8, 3 sc in sp 8, sc in dc 9, [4 sc in next sp, sc in next dc] 4 times (sps 9–12, ending in dc 13), 3 sc in sp 13, sc in dc 14 (3rd ch of turning ch). (29 sc)
Row 5 total: 29 + 1 + 29 = 59 sc. Fasten off.
Why the edge forms two lobes: the middle spaces of each lobe get 4 sc and the outer spaces get 3 sc. The center space gets only 1 sc. That one sc pulls the middle of the edge inward and makes the notch between the rounded upper and lower lobes.
Wing B
Rows 1–5: Join yarn in st 18 and repeat Wing A Rows 1–5 across sts 18–24. The counts are the same: 14 dc in Rows 1–4 and 59 sc in Row 5. Fasten off.
To keep the join tidy, pull up the new loop through the back of the ring stitch and work the first ch 3 snugly. That stops a gap opening where the wing meets the ring.
Checkpoint 4: the bow now measures 5.25 in (13.3 cm) wide x 3.5 in (8.9 cm) tall.
Stitch Count Summary
| Stage | Count |
|---|---|
| Ring Rnd 1 | 24 sc |
| Wing Row 1 | 14 dc |
| Wing Rows 2–4 | 14 dc + 13 sps each |
| Wing Row 5 | 59 sc |
Border
Border gauge: same as the body, 18 sc = 4 in (10.2 cm). Work 2 sc into each dc row end, because a dc row is about as tall as 2 sc. Work 1 sc into each sc row end.
The border goes around the whole bow in one continuous round. It covers 8 segments in this order: ring top, Wing A inner edge, Wing A outer edge, Wing A lower edge, ring bottom, Wing B lower edge, Wing B outer edge, Wing B inner edge.
Rnd 1 (RS): Join yarn in ring st 1. Ch 1, then:
- Ring top: sc in sts 1–5. (5 sc)
- Wing A inner edge: 2 sc in each of the 4 dc row ends (Rows 1–4), 1 sc in the Row 5 row end. (9 sc)
- Wing A outer edge: 3 sc in first sc of Row 5, sc in each of next 57 sc, 3 sc in last sc. That is 59 sts worked 1 per st + 4 extra sts at the two corners. (63 sc)
- Wing A lower edge: 1 sc in the Row 5 row end, 2 sc in each of the 4 dc row ends. (9 sc)
- Ring bottom: sc in sts 13–17. (5 sc)
- Wing B lower edge: work as Wing A inner edge. (9 sc)
- Wing B outer edge: work as Wing A outer edge. (63 sc)
- Wing B inner edge: work as Wing A lower edge. (9 sc)
Sl st in first sc to join.
Rnd 1 total: 5 + 9 + 63 + 9 + 5 + 9 + 63 + 9 = 172 sc.
Rnd 2 (RS): Sl st loosely in each sc around. (172 sl st) Fasten off.
The slip-stitch round gives the edge its neat rope texture without adding bulk.
Why the math works: each body stitch is used once, so no gaps form. Putting 2 sc into each dc row end matches the row height to the stitch height, so the wing sides stay flat. The 2 extra sts at each end of each outer edge (3 sc in the first and last st) turn the lobe tips without cupping. Rnd 2 is worked 1 per st, so it keeps exactly 172 sts and doesn’t change the shape.
Border depth: 0.25 in (0.6 cm).
– Width: 5.25 in (13.3 cm) before border + 0.25 in (0.6 cm) on each side = 5.75 in (14.6 cm).
– Height: 3.5 in (8.9 cm) before border + 0.25 in (0.6 cm) at top and bottom = 4 in (10.2 cm).
Optional Hanging Chain
Join yarn in the Rnd 2 st at the top center, above ring st 3. Ch 20 (about 3 in / 7.6 cm), then sl st back into the same st to form a loop. Fasten off.
Final Blocking
- Weave in all ends along the back of the sc edges, not through the open spaces.
- Lay the bow RS up on a blocking mat.
- Pin the center ring into a true circle, with the opening centered.
- Pin the tip of each lobe, then pin the notch on each wing slightly toward the ring.
- Measure: 5.75 in (14.6 cm) wide and 4 in (10.2 cm) tall. Move pins until it matches.
- Open the spaces between the spokes so each spoke runs straight out from the ring.
- Spray lightly with water until damp, not soaked.
- Let it dry completely, at least 6 hours, before you unpin it.
Final Quality-Control Checklist
- Ring has 24 sc and lies flat with an open center.
- Each wing has 14 straight dc spokes.
- Each Row 5 has 59 sc with a visible notch at the center.
- Upper and lower lobes are the same size on both wings.
- Border Rnd 1 has 172 sc; Rnd 2 has 172 sl st.
- Size is 5.75 in (14.6 cm) x 4 in (10.2 cm).
- All ends are hidden and trimmed.
Troubleshooting
Ring cups or ruffles: keep your tension even in Rnd 1. Change the starting chain by 2 ch and still work 24 sc.
Wings ruffle: Row 5 is too loose. Use a hook one size smaller for Row 5 only, or work 3 sc instead of 4 in sps 3 and 4.
Wings curl up: the chains in Rows 2–4 are too tight. Loosen them or use a hook one size larger for those rows.
Notch doesn’t show: make sure sp 7 gets only 1 sc, and pin the notch inward when blocking.
Lobes are uneven: recount Row 5. Each lobe must be 29 sc.
Wings are different sizes: you probably worked one wing at a different tension. Compare both Row 4 measurements against 1.75 in (4.4 cm) and redo the off wing.
Gap where a wing meets the ring: close it with the tail on the back using one or two small stitches.
Border pulls in: work the sl st round loosely, or use a hook 0.5 mm larger.
Care
Hand wash in cool water with mild soap. Press the water out in a towel and dry flat, re-pinning the lobes while damp if needed.
Final Notes
The measurement chain is short:
– Ring: 1.25 in (3.2 cm) across.
– Each wing: 1.75 in (4.4 cm) after Row 4 and 2 in (5.1 cm) after Row 5.
– Before border: 5.25 in (13.3 cm) x 3.5 in (8.9 cm).
– After border: the 0.25 in (0.6 cm) border brings it to 5.75 in (14.6 cm) x 4 in (10.2 cm).
If the ring and the first wing match these numbers, the rest follows: 24 sc, 14 spokes, 59 sc per wing, and 172 border stitches. The bow uses so little yarn that you can make a second one from the same ball to compare tension and choose the neater one.
Happy crocheting!