

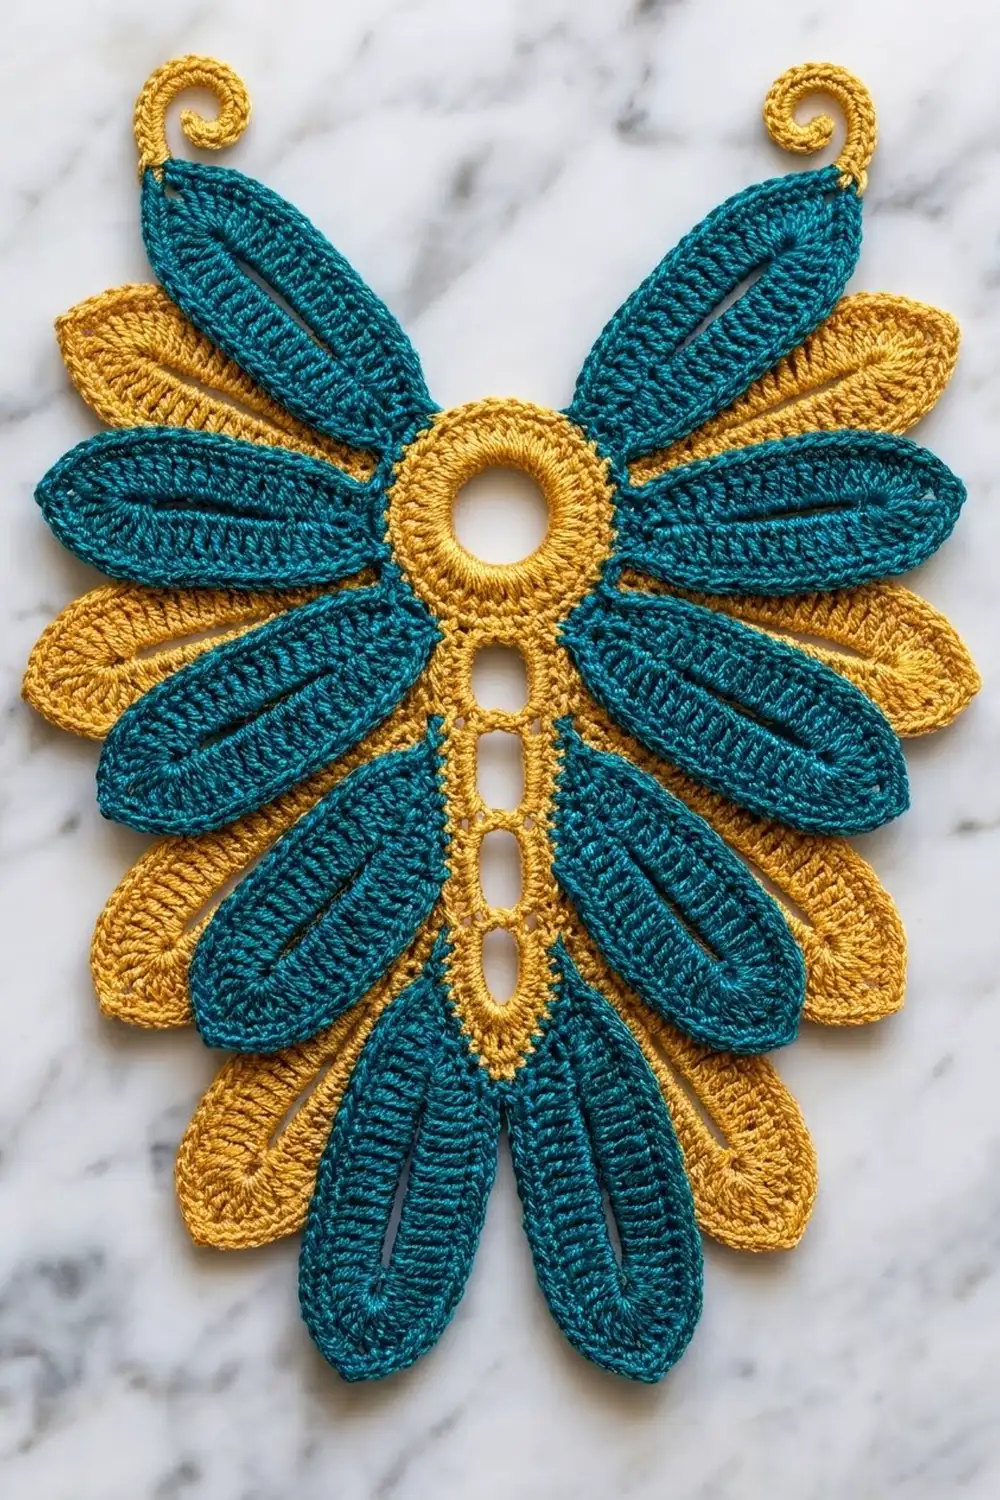
The Gilded Plume Wing Motif is a single lacy ornament shaped like a pair of open wings. A small gold ring sits at the top and a narrow gold lattice spine runs down the center. Seventeen rounded feathers fan out from the spine in alternating deep teal and warm gold.
The look is rich and slightly vintage, like an embroidered crest. The teal feathers sit in front and the gold feathers peek out from behind, so the color changes read as layers instead of stripes. The two topmost teal feathers end in small gold curls, which give the wings their lifted shape.
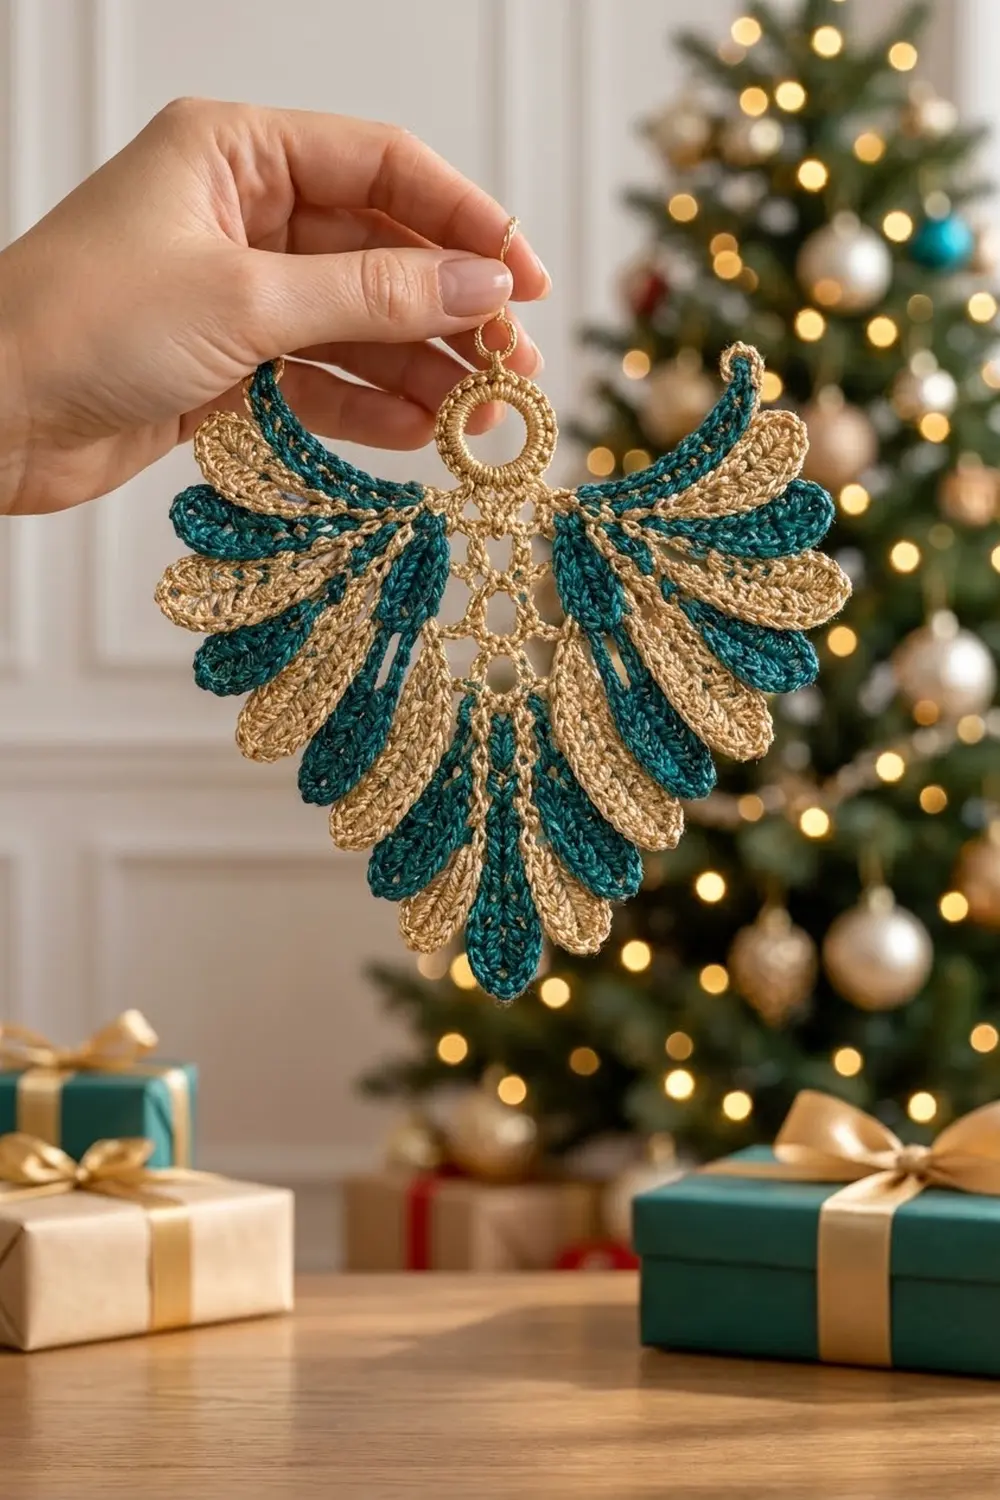
The pattern uses US crochet terms. After blocking, the motif measures about 6 in (15.2 cm) wide and 5.5 in (14.0 cm) tall. You can use it as a hanging ornament or a gift topper, or display it flat as a lace accent.
The construction is easy to follow. First you crochet the ring and spine as one piece and add one anchor round of single crochet. Then you work the gold feathers into the back loops of that round and the teal feathers into its front loops. Two gold curls finish the wing tips.
Finished Size and Construction
- Finished size: about 6 in (15.2 cm) wide x 5.5 in (14.0 cm) tall
- Skill level: Intermediate
- Terminology: US crochet terms
- Yarn weight: Sport (2), mercerized cotton
- Hook: 2.75 mm (US C-2)
- Number of pieces: 1 single motif
- Layout: radial fan with 8 feathers per wing plus 1 center feather
- Piece size: 5.5 in (14.0 cm) wide x 5.5 in (14.0 cm) tall before the curls
- Size before border: 5.5 in (14.0 cm) x 5.5 in (14.0 cm)
- Border depth: the wing-tip curls add about 0.25 in (0.6 cm) to each side
Materials
Choose a smooth, mercerized sport-weight cotton. It shows the stitches clearly, holds the feather shape after blocking and gives the motif a soft sheen. For the gold, use a gold-tone cotton or a cotton with a subtle metallic strand. Avoid fuzzy or very stretchy fibers, because the feathers lose their crisp edges.
- Gold: 10 g, about 31 m
- Teal: 8 g, about 25 m
The motif itself uses about half of these amounts. The quantities include a generous margin for a test feather and for weaving in ends.
Tools:
- 2.75 mm (US C-2) crochet hook
- Tapestry needle
- Scissors
- 4 locking stitch markers
- Rustproof pins and a blocking mat
- Spray bottle with water
- Optional: light spray starch
Abbreviations (US Terms)
- ch – chain
- sl st – slip stitch
- sc – single crochet
- hdc – half double crochet
- dc – double crochet
- sc2tog – single crochet 2 together
- sc3tog – single crochet 3 together
- sp – space
- BLO / FLO – back loop only / front loop only
- st(s) – stitch(es)
- rep – repeat
Special stitch – Feather:
- Sl st in the indicated loop, ch 24 and sl st in the same loop. This makes the ch-24 feather loop.
- Working into the loop: 2 sc, 2 hdc, 8 dc, 2 hdc, (sc, ch 2, sc) for the tip, 2 hdc, 8 dc, 2 hdc, 2 sc.
- Sl st in the same loop again.
Each Feather has 30 sts plus a ch-2 tip: 14 sts on each half and 2 sc at the tip. Keep the first 14 sts on one half of the loop so the tip lands exactly at the fold. The loop leaves a fine slit down the middle that looks like the feather’s vein.
Gauge and Checkpoints
Gauge in sc: 10 sc and 10 sc rows = 2 in (5.1 cm).
Matching the checkpoints below matters more than exact gauge. Test the start first: make the ring and spine, then work one Feather in scrap yarn on the anchor round and measure it. Pull the test Feather out once you have checked it.
- Ring after Round 1: about 1 in (2.5 cm) across the outside.
- Spine after Row 9: 1 in (2.5 cm) wide and 2 in (5.1 cm) long from the ring edge to the point.
- Ring after Anchor Round: about 1.4 in (3.6 cm) across.
- One Feather: 2 in (5.1 cm) from base to tip and 0.8 in (2.0 cm) at the widest point.
- After gold feathers: about 5 in (12.7 cm) across.
- After teal feathers: 5.5 in (14.0 cm) wide x 5.5 in (14.0 cm) tall.
- After curls and blocking: 6 in (15.2 cm) wide x 5.5 in (14.0 cm) tall.
If your Feather is longer than 2 in (5.1 cm), go down to a 2.5 mm hook. If it is shorter than 1.75 in (4.4 cm), go up to a 3.0 mm hook. Don’t change the ch-24 count to fix the size, because that changes how the stitches fit inside the loop.
Pattern
Part 1: Ring (Gold)
Ch 10, sl st in first ch to form a ring.
Round 1: Ch 1, 20 sc in ring, sl st in first sc. (20 sc)
Number the sts 1 to 20, starting with the first sc. Hold the ring so that sc 3 sits at the bottom center and sc 13 sits at the top center. Do not fasten off.
Part 2: Spine (Gold)
You work the spine in rows straight down from the bottom of the ring. It is 5 sts wide and forms three small square windows, each about 0.5 in (1.3 cm) wide.
Row 1 (RS): Ch 1, sc in same st as join and in next 4 sc (sc 1–5 of the ring). Turn. (5 sc)
Row 2: Ch 2 (counts as hdc), ch 3, sk next 3 sc, hdc in last sc. Turn. (2 hdc + 3 ch = 5 sts, 1 window)
Row 3: Ch 1, sc in first hdc, 3 sc in ch-3 sp, sc in top of turning ch. Turn. (5 sc)
Rows 4–7: Rep Rows 2–3 twice. (5 sc after Row 7, 3 windows in total)
Row 8: Ch 1, sc2tog, sc in next st, sc2tog. Turn. (3 sc)
Row 9: Ch 1, sc3tog. Do not turn. (1 st)
Spine check: 1 in (2.5 cm) wide and 2 in (5.1 cm) long from the ring edge to the point.
Part 3: Anchor Round (Gold)
This round outlines the spine and ring and gives every feather its own anchor stitch. Keep the RS facing.
Anchor Round:
- Ch 1, 3 sc in the sc3tog.
- Working up the side edge toward the ring: sc in end of Row 8, sc in end of Row 7, 2 sc in end of Row 6, sc in end of Row 5, 2 sc in end of Row 4, sc in end of Row 3, 2 sc in end of Row 2, sc in end of Row 1. (11 sc on this side)
- Sc in the next 4 free ring sts, sc in the 7 ring sts across the top, then sc in the next 4 free ring sts.
- Working down the other side edge, work 11 sc to mirror the first side.
- Sl st in first sc. (40 sc)
Check the count: 3 tip + 11 side + 4 ring side + 7 ring top + 4 ring side + 11 side = 40 sc. The 15 ring sts used here plus the 5 used by spine Row 1 account for all 20 ring sts.
Stitch map (call these R1–R40):
- R1–R3: tip (R2 is the bottom center)
- R4–R14: first side edge
- R15–R18: first ring side
- R19–R25: ring top (R22 is the top center)
- R26–R29: second ring side
- R30–R40: second side edge
Place markers in R2, R4, R18 and R26. Do not fasten off.
Part 4: Gold Feathers (Back Layer)
Work all gold Feathers in the BLO of the Anchor Round so they sit behind the teal layer.
Sl st in BLO of next 2 sts (R2–R3).
*Feather in BLO of next st, sl st in BLO of next 3 sts; rep from * 3 more times. (Feathers at R4, R8, R12 and R16; you end in R19.)
Sl st in BLO of next 8 sts (R20–R27).
*Feather in BLO of next st, sl st in BLO of next 3 sts; rep from * 2 more times, Feather in BLO of last st. (Feathers at R28, R32, R36 and R40.)
Sl st in first st of round. Fasten off. (8 gold Feathers, 4 per wing)
Checkpoint: The gold layer spans about 5 in (12.7 cm). The center bottom stitch (R2) and the ring stitches next to the top (R18 and R26) should still have free front loops.
Part 5: Teal Feathers (Front Layer)
Work all teal Feathers in the FLO of the Anchor Round, between the gold Feathers, so they lie on top.
With RS facing, join teal by working a Feather in FLO of R26.
*Sl st in FLO of next 3 sts, Feather in FLO of next st; rep from * 7 more times. (Feathers at R30, R34, R38, R2, R6, R10, R14 and R18.)
Fasten off. (9 teal Feathers)
The teal slip stitches sit low under the feather bases, where the overlapping feathers hide them.
Stitch summary: 17 Feathers in total. Each wing has 4 teal and 4 gold Feathers, alternating from a teal Feather at the top to a gold Feather beside the center. R2 holds the single teal center Feather. 17 Feathers x 30 sts = 510 feather sts.
Checkpoint: 5.5 in (14.0 cm) wide x 5.5 in (14.0 cm) tall.
Border
On this motif, the border is a gold finish on the two upper wing tips. The scalloped feather edge stays free and falls naturally.
Border gauge: Each curl ring measures about 0.4 in (1.0 cm) across. Each curl adds about 0.25 in (0.6 cm) to the width on its side.
Curl (make 2):
- Join gold with sl st in the ch-2 tip sp of the teal Feather at R18.
- Ch 7, sl st in 4th ch from hook to form a ring.
- 8 sc in ring, sl st in first sc.
- Sc in each of the 3 stem ch back toward the feather.
- Sl st in the ch-2 tip sp. Fasten off. (11 sc per curl: 8 in the ring + 3 on the stem)
Repeat on the teal Feather at R26.
Per side: 1 curl, 11 sc. Total: 2 curls, 22 sc.
Why the math works: Eight sc in a ch-4 ring is 2 sc per ch, which keeps a tiny ring flat. The stem has 3 ch and gets 3 sc, so it stays straight. R18 and R26 are each 4 sts from the ring’s top center (R22), on opposite sides, so the curls mirror each other exactly. The motif grows from 5.5 in (14.0 cm) to 6 in (15.2 cm) wide, which is 0.25 in (0.6 cm) per side.
Final Blocking
- Weave in all ends along the spine or inside the anchor round. Don’t trim them until after blocking.
- Spray the motif until it is evenly damp but not dripping.
- Lay it face up on the blocking mat. Pin the ring at the top and pin the center teal feather straight down.
- Pin the spine straight. It should measure 2 in (5.1 cm) from the ring to the point.
- Fan out each wing. Pin each feather tip through its ch-2 space, spacing the tips evenly.
- Check the width: 5.5 in (14.0 cm) across the feathers.
- Pin each gold curl so it turns up and outward. The total width is now 6 in (15.2 cm).
- For a crisp ornament, mist with light starch. Let the motif dry fully, then unpin it and trim the ends.
Final Quality-Control Checklist
- Ring Round 1 has 20 sc.
- The spine has 3 open windows and ends in a single point.
- The Anchor Round has 40 sc.
- 8 gold Feathers sit in the back loops.
- 9 teal Feathers sit in the front loops.
- Every Feather has 30 sts and a centered ch-2 tip.
- Each wing has 4 teal and 4 gold Feathers.
- Both curls have 11 sc and mirror each other.
- The finished size is 6 in (15.2 cm) x 5.5 in (14.0 cm).
- No ends show on the front.
Troubleshooting
The feather tip is off-center. The stitches slid around the loop. Push the first 14 sts toward the base before you work the tip.
The feathers ruffle. The stitches are too loose for the loop. Go down to a 2.5 mm hook or pack the stitches more firmly.
The feathers look skinny. Check that you worked all 8 dc on each half, and make sure the ch-24 loop isn’t twisted.
The teal feathers sit behind the gold. You swapped loops. Gold goes in the BLO and teal goes in the FLO.
The Anchor Round count is off. Recount the side edges: 2 sc in each hdc row end and 1 sc in each sc row end, for 11 sc per side.
The spine windows close up. Your ch-3 is too tight. Chain loosely so each window stays about 0.5 in (1.3 cm) wide.
The spine curves. Your turning chains are too tight. Loosen them slightly and pin the spine straight when blocking.
A curl flips backward. Turn it while the motif is damp and pin it facing up and outward.
The wings are uneven. Count the feathers on each wing. Each side needs 4 teal and 4 gold.
Care
Hand wash in cool water with mild soap and press the water out in a towel. Dry flat and re-pin the feathers if needed.
Final Notes
The measurement chain is short and easy to check:
- The ring measures 1 in (2.5 cm), then 1.4 in (3.6 cm) after the Anchor Round.
- The spine measures 1 in (2.5 cm) x 2 in (5.1 cm).
- Each Feather is 2 in (5.1 cm) long.
- The finished wings span 5.5 in (14.0 cm).
- The curls bring the motif to 6 in (15.2 cm) wide x 5.5 in (14.0 cm) tall.
If each checkpoint matches, the finished motif will too. Hang it from the top ring as an ornament or display it flat as a lace accent.
Happy crocheting!