

The Rosy Ribbon Bow is a soft, vintage-style bow in dusty rose pink and cream. Two rounded teardrop wings sit above two long lacy tails, and a ribbed pink band wraps the middle like a real ribbon knot.
The pink makes up the solid wing centers, the tail centers and the band. A cream edge outlines every part. On the wings the edge is smooth and rope-like; on the tails it becomes open eyelets topped with rounded scallops, with a small loop at each tip.
This pattern uses US crochet terms. The finished bow is about 7.5 in (19.1 cm) wide and 9 in (22.9 cm) tall.
You will make two wings in rounds around a short chain, two tails as narrow pink strips worked in rows, and one small band. Each wing and tail then gets a cream edging. Last, you stack the parts and cinch the middle with the band.
Finished Size and Construction
- Finished size: about 7.5 in (19.1 cm) wide × 9 in (22.9 cm) tall
- Skill level: Easy+
- Terminology: US crochet terms
- Yarn weight: worsted (#4)
- Hook: 5.0 mm (H-8)
- Number of pieces: 1 finished bow, made from 5 parts (2 wings, 2 tails, 1 band)
- Layout: wings side by side, tails hanging behind the middle in a slight V, band wrapped around the center
- Part sizes: wing 4 in × 2.75 in (10.2 × 7.0 cm); tail 2 in × 8.25 in (5.1 × 21.0 cm); band 1.25 in × 2.5 in (3.2 × 6.4 cm)
- Size before border: wing core 3.25 in × 1.75 in (8.3 × 4.4 cm); tail core 0.75 in × 7.5 in (1.9 × 19.1 cm)
- Border depth: wings about 0.45 in (1.1 cm); tails about 0.6 in (1.5 cm)
Materials
Use a smooth worsted-weight cotton or cotton blend so the scallops look crisp. Acrylic also works but will be a little softer.
- Dusty rose pink: 10 g / 20 m
- Cream: 15 g / 30 m
- 5.0 mm (H-8) crochet hook
- Tapestry needle
- Scissors
- Stitch markers (2–3)
- Rust-proof pins and a blocking mat
These amounts include a small safety margin.
Abbreviations (US Terms)
- ch – chain
- sl st – slip stitch
- sc – single crochet
- hdc – half double crochet
- dc – double crochet
- dc2tog – double crochet 2 together
- BLO – back loop only
- st(s) – stitch(es)
- sp – space
- sk – skip
- Rnd – round
Special stitches
- 5-st scallop: (sc, hdc, dc, hdc, sc) all in the same ch-3 loop.
- dc2tog: [yarn over, insert hook in next st, pull up a loop, yarn over, pull through 2 loops] twice, then yarn over and pull through all 3 loops on hook.
Gauge and Checkpoints
Gauge: 16 sc and 18 rows = 4 in (10.2 cm); 16 dc and 9 rows = 4 in (10.2 cm), using a 5.0 mm hook.
Make one wing first and measure it before you go on.
- Wing after Rnd 2 (pink): 3.25 in × 1.75 in (8.3 × 4.4 cm)
- Wing after Rnd 4 (cream): 4 in × 2.75 in (10.2 × 7.0 cm)
- Tail strip after Row 16: 0.75 in × 7 in (1.9 × 17.8 cm)
- Finished tail: 2 in × 8.25 in (5.1 × 21.0 cm)
If your wing is more than 0.25 in (0.6 cm) too big, go down to a 4.5 mm hook. If it is too small, go up to a 5.5 mm hook. Keep the stitch counts the same and change only the hook.
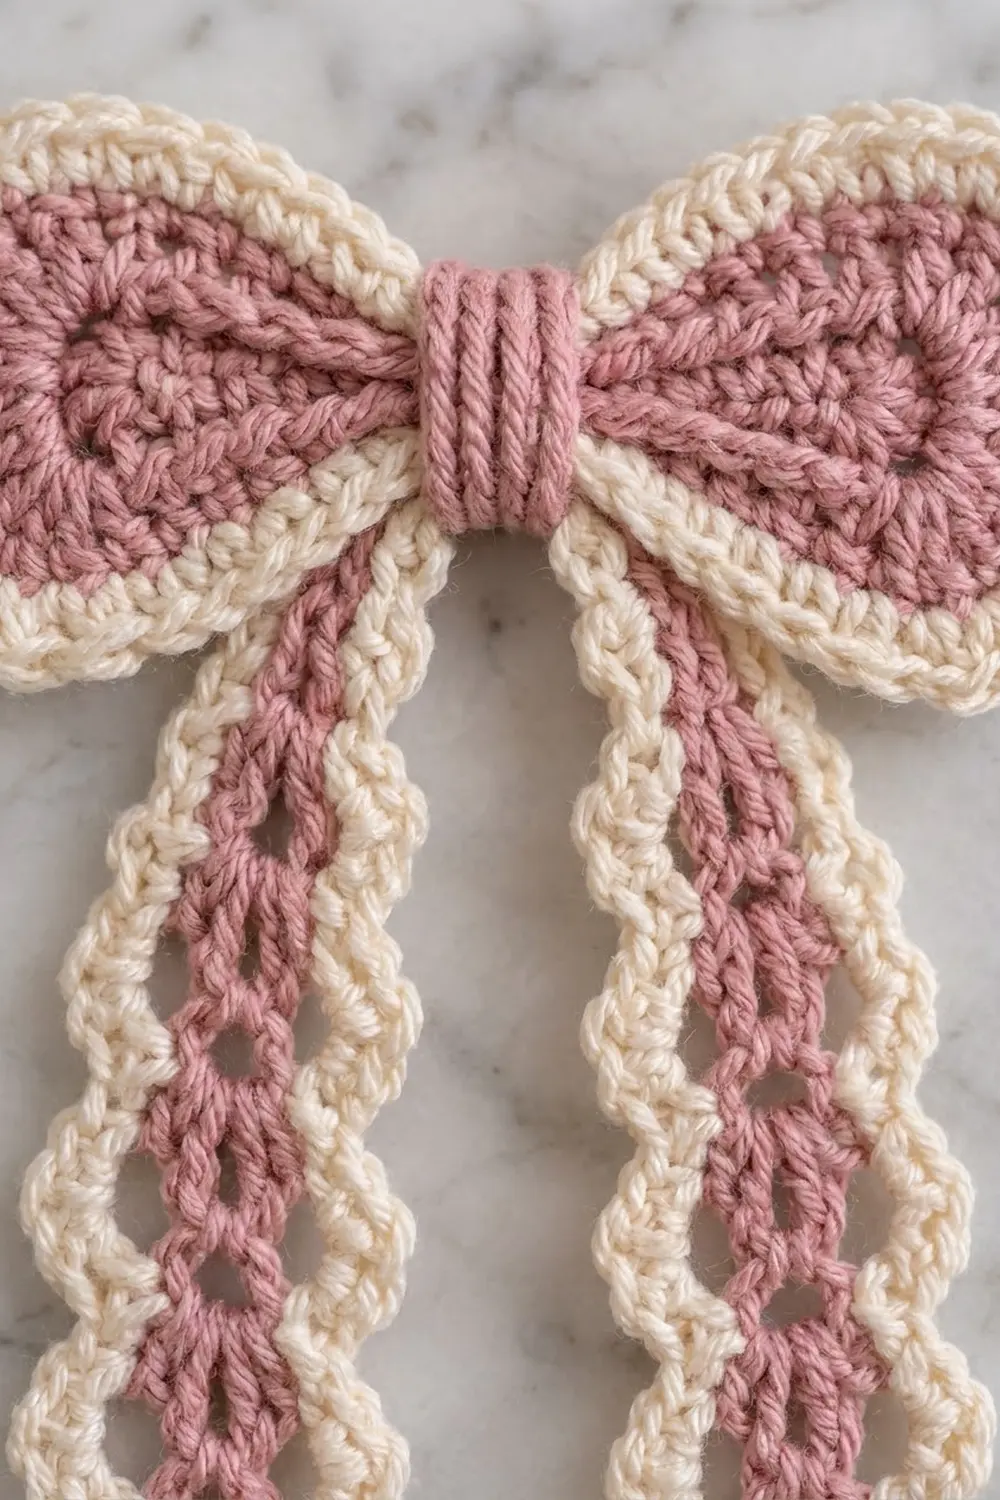
Wings (Make 2)
Work with pink. Each wing is worked in rounds around both sides of a foundation chain. The 7-dc fan makes the wide outer end, and the 3 sc at the other end make the narrow end that gets pinched in the middle.
Foundation: Ch 8.
Rnd 1: Sc in 2nd ch from hook, hdc in next ch, dc in next 4 ch, 7 dc in last ch. Rotate and work along the other side of the chain: dc in next 4 ch, hdc in next ch, 2 sc in the last ch (the same ch as the first sc). Sl st to first sc. (20 sts)
Count check: one side has 1 sc + 1 hdc + 4 dc = 6, the fan has 7, the other side has 4 dc + 1 hdc = 5, and the narrow end adds 2 sc. 6 + 7 + 5 + 2 = 20.
Rnd 2: Ch 1 (does not count as a st). Hdc in first 6 sts, 2 dc in each of next 7 sts, hdc in next 5 sts, 2 hdc in each of last 2 sts. Sl st to first hdc. (29 sts)
Count check: 6 + 14 + 5 + 4 = 29. The fan grows from 7 to 14 sts, which keeps the rounded end flat.
Fasten off pink and weave in the ends. The wing core should measure 3.25 in × 1.75 in (8.3 × 4.4 cm). Set both cores aside for the cream border.
Tails (Make 2)
Work with pink. The tail core is a 3-dc strip worked in rows, ending in a point.
Foundation: Ch 5.
Row 1: Dc in 4th ch from hook and in next ch. Turn. (3 sts; the skipped ch-3 counts as 1 dc)
Rows 2–16: Ch 3 (counts as dc), dc in next 2 sts. Turn. (3 sts)
Row 17 (point): Ch 2, dc2tog over the next 2 sts. (1 st)
Fasten off and weave in the ends. The strip should be 0.75 in (1.9 cm) wide and about 7 in (17.8 cm) long at Row 16, or 7.5 in (19.1 cm) including the point.
Rows 1–16 give exactly 16 row-ends on each long side. The cream eyelet round uses those row-ends in pairs, so that even number matters.
Center Band (Make 1)
Work with pink. Working in the back loop only makes ridges that stand vertically once the band is wrapped.
Foundation: Ch 6.
Row 1: Sc in 2nd ch from hook and in each ch across. Turn. (5 sts)
Rows 2–11: Ch 1, sc BLO in each st across. Turn. (5 sts)
Fasten off, leaving a 12 in (30.5 cm) tail for sewing. The band should be about 1.25 in × 2.5 in (3.2 × 6.4 cm).
Border
The cream edging is the border of this bow. Each wing and each tail gets its own edging before assembly.
Border gauge: each cream sc round adds about 0.22 in (0.6 cm) of depth. The tail’s eyelet round plus scallop round together add about 0.6 in (1.5 cm) per side.
Wing Border (both wings)
Number the 29 sts of Rnd 2 in four sections: side A (6), wide end (14), side B (5), narrow end (4).
Rnd 3: Join cream with sl st in first hdc. Ch 1. Sc in first 6 sts, [sc in next st, 2 sc in next st] 7 times, sc in next 5 sts, [2 sc in next st, sc in next st] twice. Sl st to first sc. (38 sts)
- Per section: side A 6, wide end 21, side B 5, narrow end 6.
Rnd 4: Ch 1. Sc in first 6 sts, [sc in next 2 sts, 2 2 sc in next st] 7 times, sc in next 11 sts. Sl st to first sc. (45 sts)
- Per section: side A 6, wide end 28, side B 5, narrow end 6.
Fasten off and weave in the ends. The wing should now be 4 in × 2.75 in (10.2 × 7.0 cm).
Why the math works: the wide end gains 7 sts every round (7, 14, 21, 28), just like a flat circle. The straight sides gain nothing, so they stay straight. The narrow end gains only 2 sts once, because the band will cinch it anyway.
Tail Border (both tails)
Hold the tail with Row 1 at the top and the point at the bottom.
Rnd 1 (eyelets): Join cream with sl st at the top right corner. Ch 1, work 3 sc evenly across the foundation edge. Then work down the first long side: [sc in next row-end, ch 3, sk next row-end] 8 times. At the point: (sc, ch 5, sc) in the top of Row 17. Then work up the second long side: [ch 3, sk next row-end, sc in next row-end] 8 times. Sl st to first sc.
- Top: 3 sc.
- Each long side: 8 sc and 8 ch-3 loops.
- Tip: 2 sc and 1 ch-5 loop.
- Total: 21 sc, 16 ch-3 loops, 1 ch-5 loop.
Rnd 2 (scallops): Ch 1. Sc in each of the 3 top sc. Down the first side: [sc in next sc, 5-st scallop in next ch-3 loop] 8 times. At the tip: sc in next sc, 9 sc in the ch-5 loop, sc in next sc. Up the second side: [5-st scallop in next ch-3 loop, sc in next sc] 8 times. Sl st to first sc. (110 sts)
- Top: 3.
- Each long side: 8 + (8 × 5) = 48.
- Tip: 1 + 9 + 1 = 11.
- Total: 3 + 48 + 11 + 48 = 110.
Fasten off and weave in the ends. The tail should be about 2 in × 8.25 in (5.1 × 21.0 cm).
Why the math works: each ch-3 loop spans 2 row-ends, so 16 row-ends make exactly 8 loops per side with nothing left over. Each skipped row-end stays open under its scallop, which creates the eyelets. Rnd 2 checks out as 21 sc worked into sc, plus 16 × 5 = 80 scallop sts, plus 9 sc in the tip loop: 21 + 80 + 9 = 110.
Assembling the Bow
- Lay the two wings side by side with the narrow ends overlapping by 0.5 in (1.3 cm). Whipstitch the overlap with cream. The span should be 7.5 in (19.1 cm).
- Place both tails behind the middle with their tops 0.5 in (1.3 cm) above the center line. Let the tops touch and the tips spread about 1 in (2.5 cm) apart. Tack the tails to the back of the wings.
- Pinch the middle into soft vertical folds.
- Wrap the band around the pinch from front to back, with the ridges running vertically. Sew the short ends together at the back and catch every layer.
- Optional: chain 20 in cream and sew it to the back of the band as a hanging loop.
The overall height should be about 9 in (22.9 cm).
Final Blocking
- Lightly spray the bow with water until it is damp, not soaking.
- Pin each wing into a smooth teardrop, keeping the wide ends rounded.
- Pin the tails straight in their slight V.
- Pin the tip of each scallop outward so the eyelets open up.
- Pin each tip loop open into a round shape.
- Check the measurements: 7.5 in (19.1 cm) wide and 9 in (22.9 cm) tall.
- Let it dry completely before unpinning.
Final Quality-Control Checklist
- Each wing has 29 pink sts and 45 cream sts.
- Each tail has 16 ch-3 eyelets and 110 sts in the last round.
- Both wings match each other in size, and so do both tails.
- The band ridges run vertically and the seam is hidden at the back.
- No pink shows through the cream edging.
- All yarn ends are woven in and trimmed.
- The bow measures 7.5 in × 9 in (19.1 × 22.9 cm).
Troubleshooting
- Wing wide end ruffles: you have added extra increases. Recount Rnd 3 for 21 sts at the wide end and Rnd 4 for 28.
- Wing wide end cups: your tension is too tight. Go up 0.5 mm for the cream rounds only.
- Tail curls lengthwise: steam block it, and keep your scallop dc’s relaxed.
- Uneven scallops: make sure you skip exactly one row-end per loop.
- Band too loose: take out 1 row. If it’s too tight, add 1 row.
- Tails twist: tack them flat behind the wings at two points instead of one.
Care
Hand wash in cool water with mild soap and press out the water in a towel. Lay flat, reshape and let it dry. Do not wring.
Final Notes
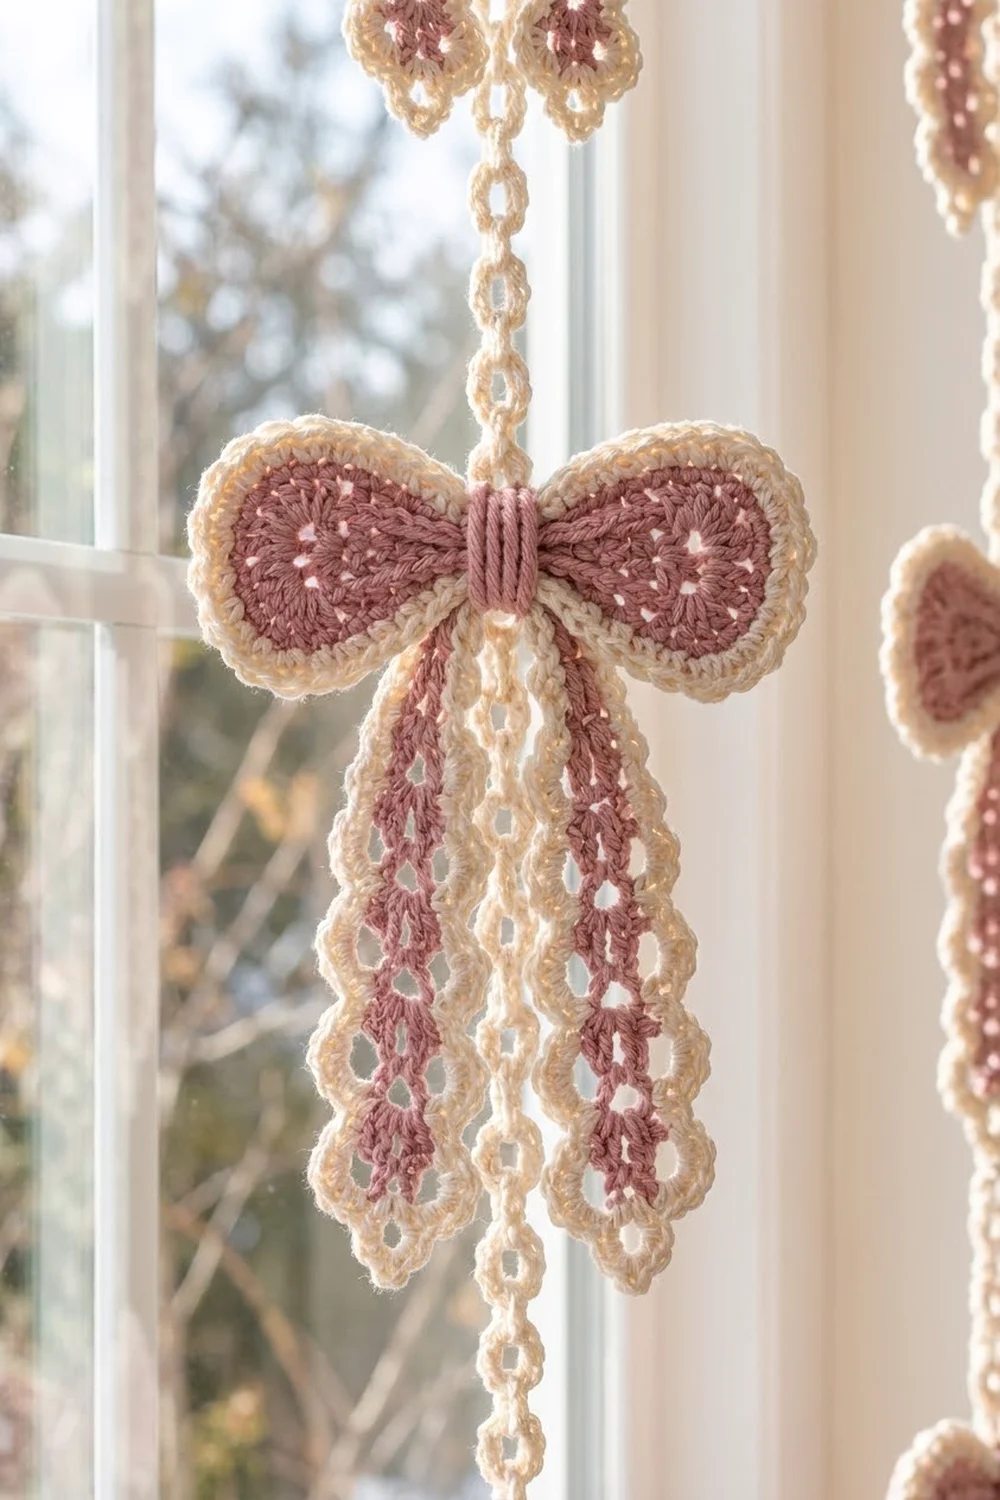
Here is the measurement chain. A 7-chain wing core grows to 3.25 in × 1.75 in (8.3 × 4.4 cm), and its cream border takes it to 4 in × 2.75 in (10.2 × 7.0 cm). A 16-row tail strip of 0.75 in × 7 in (1.9 × 17.8 cm) becomes a 2 in × 8.25 in (5.1 × 21.0 cm) scalloped tail. Overlapping the wings by 0.5 in (1.3 cm) and wrapping them with the band gives a bow 7.5 in (19.1 cm) wide and 9 in (22.9 cm) tall.
Check each stage against these numbers and your bow will match. Once you have one, you can make more and hang them in strands for a festive window.
Happy crocheting!