

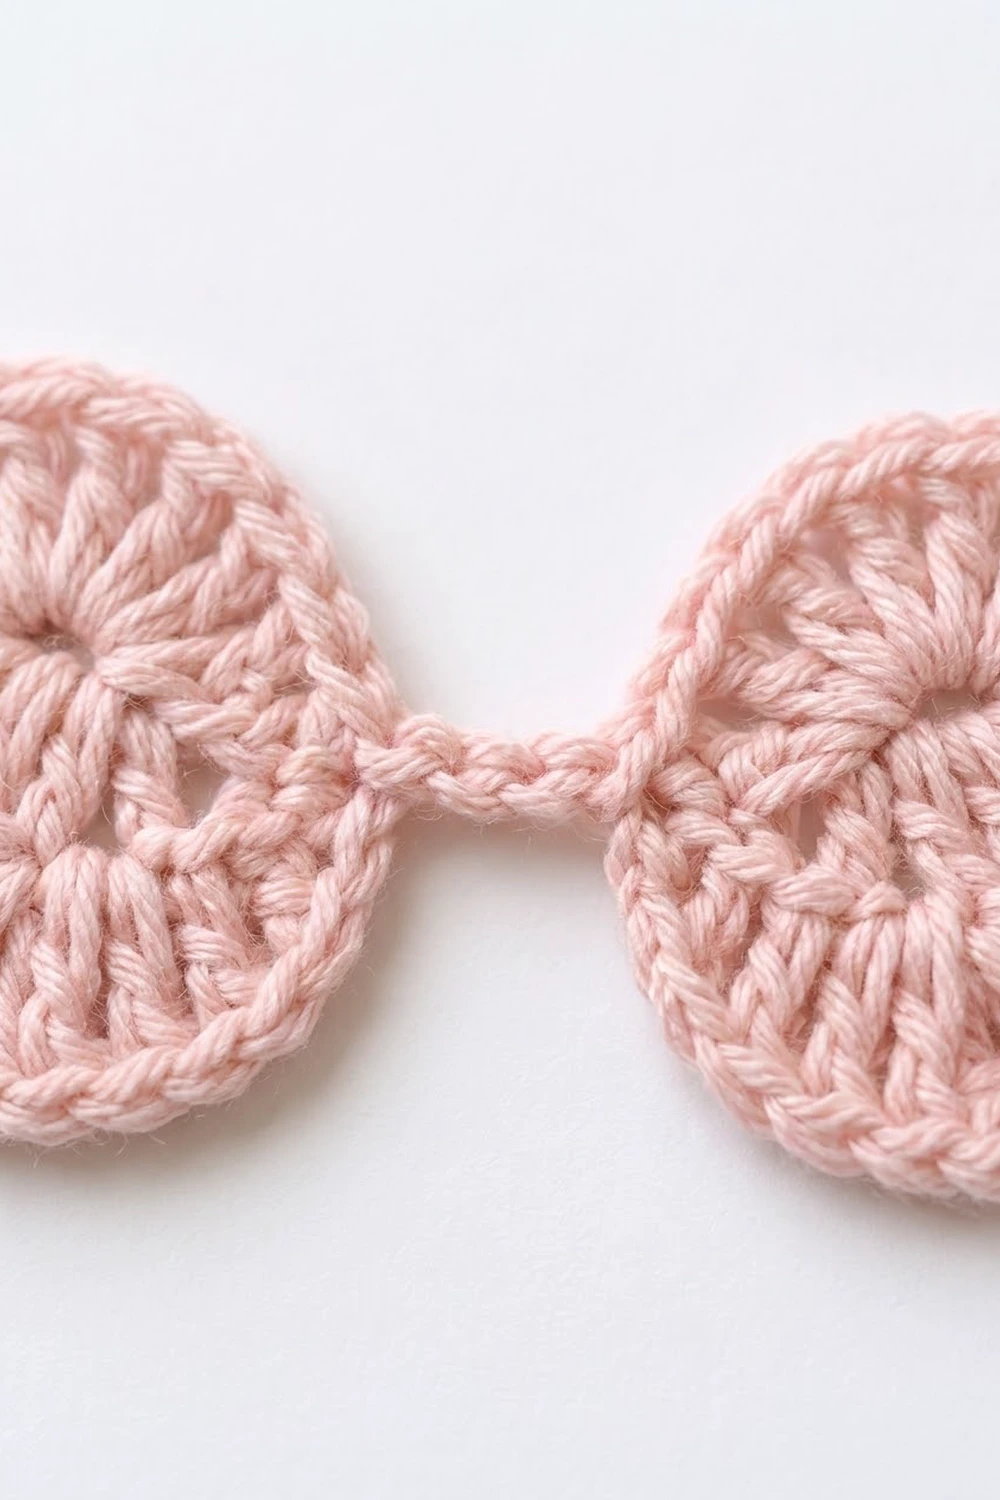
This Sweetheart Bow is a small, flat crochet appliqué with two rounded wings joined by a short chain bridge. Each wing has a large upper lobe and a smaller lower lobe. From a distance, the pair looks like two sideways hearts meeting in the middle.
The sample is worked in one soft pastel pink. Tall stitches fan out from a small center ring in each wing, and a smooth single crochet edge outlines the whole shape. The look is sweet, light, and a little vintage.
The pattern uses US crochet terms. The finished bow measures 5.25 in wide x 2.75 in tall (13.3 cm x 7.0 cm).
Construction is simple. You work two mirror-image wings in three rounds each: a fan round, a shaping round, and a single crochet border. Then you crochet a doubled chain bridge between the two inner points. The result is one finished piece, ready to sew onto curtains, bags, cardigans, or gift wrap.
Finished Size and Construction
- Finished size: 5.25 in x 2.75 in (13.3 cm x 7.0 cm)
- Skill level: Easy (advanced beginner)
- Terminology: US crochet terms
- Yarn weight: Worsted (#4), cotton or cotton blend
- Hook: 4.0 mm (US G-6)
- Number of pieces: 1 finished bow (2 wings plus 1 chain bridge)
- Layout: Wing A (left) – bridge – Wing B (right), mirror images
- Wing size (finished): 2.25 in wide x 2.75 in tall (5.7 cm x 7.0 cm)
- Wing size before border: 1.75 in wide x 2.25 in tall (4.4 cm x 5.7 cm)
- Border depth: 0.25 in (0.6 cm), one round of sc
- Bridge length: 0.75 in (1.9 cm)
Materials
Yarn: Choose a smooth worsted-weight cotton or cotton blend. Cotton holds the lobe shapes crisply and blocks flat. Avoid fuzzy or very splitty yarn, because the fan stitches and the notch between the lobes need clear definition.
- Light pink: 5 g, about 9 m (10 yd) per bow
Quantities include a margin for tails, a test wing, and small tension differences. If you plan to make several bows, multiply by the number of bows.
Tools:
- 4.0 mm (US G-6) crochet hook, plus 3.5 mm and 4.5 mm hooks for gauge adjustment
- Tapestry needle
- Scissors
- 1 stitch marker
- Ruler or tape measure
- Blocking mat, rust-proof pins, and a spray bottle
Abbreviations (US Terms)
- ch – chain
- sl st – slip stitch
- sc – single crochet
- hdc – half double crochet
- dc – double crochet
- tr – treble crochet
- sp – space
- st(s) – stitch(es)
- RS – right side
- MR – magic ring
Special technique – magic ring (MR): Wrap the yarn around two fingers to form a loop. Insert the hook, pull up a loop, and chain 1 to secure. Work the round into the loop, then pull the tail to close the center tightly.
Counting note: In Round 1, the beginning ch-4 counts as the first tr, and the beginning ch-3 counts as the first dc. In Rounds 2 and 3, the beginning ch-1 does not count as a stitch.
Gauge and Checkpoints
Base gauge: 16 sc and 16 rows = 4 in (10.2 cm) in sc with a 4.0 mm hook.
Test one wing first. A single wing is the best gauge swatch, because the tall fan stitches tell you more than a flat square does.
Checkpoints for one wing:
- After Round 1: about 1 in wide x 1.5 in tall (2.5 cm x 3.8 cm)
- After Round 2: 1.75 in wide x 2.25 in tall (4.4 cm x 5.7 cm)
- After Round 3 (border): 2.25 in wide x 2.75 in tall (5.7 cm x 7.0 cm)
Measure width from the tip of the inner point to the outer notch edge. Measure height from the top of the upper lobe to the bottom of the lower lobe. Lay the wing flat without stretching it. A difference of up to 0.125 in (0.3 cm) is fine.
If your wing is too big: change to a 3.5 mm hook and remake it.
If your wing is too small: change to a 4.5 mm hook and remake it.
If the size is right but the lobes cup: your tr stitches are too short for the ring. Pull up a slightly taller first loop on each tr.
Wing A (Left Wing)
Wing A has its inner point on the right, facing the bridge. Work with the RS facing you throughout.
Round 1 (fan round): Make a MR. Ch 4 (counts as first tr), 7 tr in ring, ch 2, 6 dc in ring, ch 2. Join with sl st to top of beginning ch-4. Pull the ring tight.
Count: 14 sts (8 tr + 6 dc) and 2 ch-2 sps.
The 8 tr form the upper lobe. The first ch-2 sp is the outer notch, on the far left. The 6 dc form the lower lobe. The second ch-2 sp is the inner point, on the right.
Round 2 (shaping round): This is a growth round. Ch 1. Work the upper lobe: sc in same st as join, 2 hdc in next tr, 2 dc in each of next 4 tr, 2 hdc in next tr, sc in last tr (14 sts).
Notch: sl st in ch-2 sp (1 st).
Lower lobe: sc in first dc, 2 hdc in next dc, 2 dc in each of next 2 dc, 2 hdc in next dc, sc in last dc (10 sts).
Inner point: 3 sc in ch-2 sp (3 sts). Join with sl st to first sc.
Count: 28 sts (upper lobe 14, notch 1, lower lobe 10, inner point 3).
The change from sc to hdc to dc is what rounds each lobe. The tallest stitches sit at the tops of the lobes, and the short stitches taper toward the notch and the inner point. The single sl st keeps the notch deep, which creates the heart shape.
Check the wing now: 1.75 in x 2.25 in (4.4 cm x 5.7 cm). Do not fasten off. Work Round 3 for Wing A now (see Border below), then make Wing B.
Wing B (Right Wing)
Wing B is a mirror image of Wing A, so its inner point faces left. You still work counterclockwise with the RS facing, so the lower lobe comes first.
Round 1 (fan round): Make a MR. Ch 3 (counts as first dc), 5 dc in ring, ch 2, 8 tr in ring, ch 2. Join with sl st to top of beginning ch-3. Pull the ring tight.
Count: 14 sts (6 dc + 8 tr) and 2 ch-2 sps.
The first ch-2 sp is the outer notch, on the far right. The second ch-2 sp is the inner point, on the left.
Round 2 (shaping round): Ch 1. Lower lobe: sc in same st as join, 2 hdc in next dc, 2 dc in each of next 2 dc, 2 hdc in next dc, sc in last dc (10 sts).
Notch: sl st in ch-2 sp (1 st).
Upper lobe: sc in first tr, 2 hdc in next tr, 2 dc in each of next 4 tr, 2 hdc in next tr, sc in last tr (14 sts).
Inner point: 3 sc in ch-2 sp (3 sts). Join with sl st to first sc.
Count: 28 sts (lower lobe 10, notch 1, upper lobe 14, inner point 3).
Lay Wing B beside Wing A, both RS up. Both upper lobes should be on top, with the inner points facing each other.
Border
The border is one round of sc on each wing. It gives the smooth, rope-like outline and brings each wing to its finished size.
Border gauge: 4 sc per 1 in (2.5 cm) along the edge. One round adds 0.25 in (0.6 cm) on every side.
Round 3 on Wing A (trim round)
Ch 1.
Upper lobe (14 sts): sc in first 3 sts, [2 sc in next st, sc in next st] 4 times, sc in last 3 sts. Count: 14 worked + 4 added = 18 sc.
Notch: sl st in the sl st. Count: 1.
Lower lobe (10 sts): sc in first 2 sts, [2 sc in next st, sc in next st] 3 times, sc in last 2 sts. Count: 10 worked + 3 added = 13 sc.
Inner point (3 sts): sc in each of next 3 sc. Count: 3 sc. Place a marker in the center sc of these 3.
Join with sl st to first sc.
Round count: 28 worked + 7 added = 35 sts (upper 18, notch 1, lower 13, inner point 3).
Fasten off, leaving a 6 in (15.2 cm) tail.
Round 3 on Wing B (trim round)
Ch 1.
Lower lobe (10 sts): sc in first 2 sts, [2 sc in next st, sc in next st] 3 times, sc in last 2 sts. Count: 10 worked + 3 added = 13 sc.
Notch: sl st in the sl st. Count: 1.
Upper lobe (14 sts): sc in first 3 sts, [2 sc in next st, sc in next st] 4 times, sc in last 3 sts. Count: 14 worked + 4 added = 18 sc.
Inner point (3 sts): sc in each of next 3 sc. Count: 3 sc. Mark the center sc.
Join with sl st to first sc. Round count: 28 worked + 7 added = 35 sts. Fasten off.
Why the math works
Each sc round sits one row further from the center, so its outer edge is longer. On the upper lobe, the 8 dc from Round 2 make the widest curve. Increasing in every other one of those 8 sts adds 4 sts and keeps the edge flat. The lower lobe is smaller, so its 6-stitch curve gets 3 increases.
The notch and the inner point get no increases. These are inward or sharp corners, and extra stitches there would soften the heart shape. The total grows from 28 to 35 sts, an increase of 7. That is enough for the wing to lie flat without ruffling.
Attach the Bridge
Place the wings RS up, inner points facing, about 0.75 in (1.9 cm) apart.
- Join pink with sl st in the marked center sc of Wing A’s inner point.
- Ch 5.
- Sl st in the marked center sc of Wing B’s inner point.
- Sl st back in each of the 5 ch, working into the back bump.
- Sl st in the center sc of Wing A again. Fasten off.
Bridge count: 5 ch + 5 sl st. The sl st pass doubles the bridge, so it looks like a firm little cord and does not stretch. It should measure 0.75 in (1.9 cm). If yours is longer, redo it with ch 4.
Width check: 2.25 in + 0.75 in + 2.25 in = 5.25 in (13.3 cm).
Final Blocking
- Weave in all tails along the border sc on the wrong side. Trim close.
- Spray the bow with cool water until it is damp but not soaked.
- Lay it RS up on the blocking mat.
- Pin the center of each MR first, so both rings sit on one horizontal line.
- Pin the top of each upper lobe and the bottom of each lower lobe to reach 2.75 in (7.0 cm) total height.
- Pin each outer notch inward with one pin, so the heart dip stays sharp.
- Pin the outer edges to reach 5.25 in (13.3 cm) total width. Keep the bridge straight but not stretched.
- Let the bow dry completely before removing the pins.
Final Quality-Control Checklist
- Each wing has 35 sts in Round 3: 18 upper, 1 notch, 13 lower, 3 inner point.
- Both upper lobes are on top and both lower lobes are on the bottom.
- Both MR centers are closed tightly with no gap.
- Each wing measures 2.25 in x 2.75 in (5.7 cm x 7.0 cm).
- The bridge measures 0.75 in (1.9 cm) and is doubled with sl st.
- The full bow measures 5.25 in x 2.75 in (13.3 cm x 7.0 cm).
- The notches are clearly visible on both outer edges.
- All tails are woven in and invisible from the RS.
Troubleshooting
The lobes ruffle. Your border is too loose, or you added extra increases. Recount the upper lobe to 18 sc and the lower lobe to 13 sc, or go down one hook size for Round 3 only.
The lobes cup or curl. Round 3 is too tight. Work the border with a 4.5 mm hook and keep the same counts.
The two wings face the same way instead of mirroring each other. You worked Wing B in the Wing A order. Wing B starts with the dc fan, not the tr fan.
The notch disappears. You worked a sc in the notch instead of a sl st. Use a sl st there in both Round 2 and Round 3, and pin the notch during blocking.
The ring has a hole. Pull the MR tail firmly before weaving it in, then weave it in a circle around the center.
The bridge sags. Use ch 4 instead of ch 5, and keep the sl st return pass snug.
Care
Hand wash in cool water with mild soap, press out the water in a towel, and dry flat. If the bow is sewn onto fabric, wash the whole item gently on a cool cycle inside a mesh bag.
Final Notes
The measurement chain is short and easy to check. Round 1 gives a fan about 1 in x 1.5 in (2.5 cm x 3.8 cm). Round 2 shapes each wing to 1.75 in x 2.25 in (4.4 cm x 5.7 cm). The sc border adds 0.25 in (0.6 cm) on every side, for 2.25 in x 2.75 in (5.7 cm x 7.0 cm). Two wings plus a 0.75 in (1.9 cm) bridge make a finished bow of 5.25 in x 2.75 in (13.3 cm x 7.0 cm).
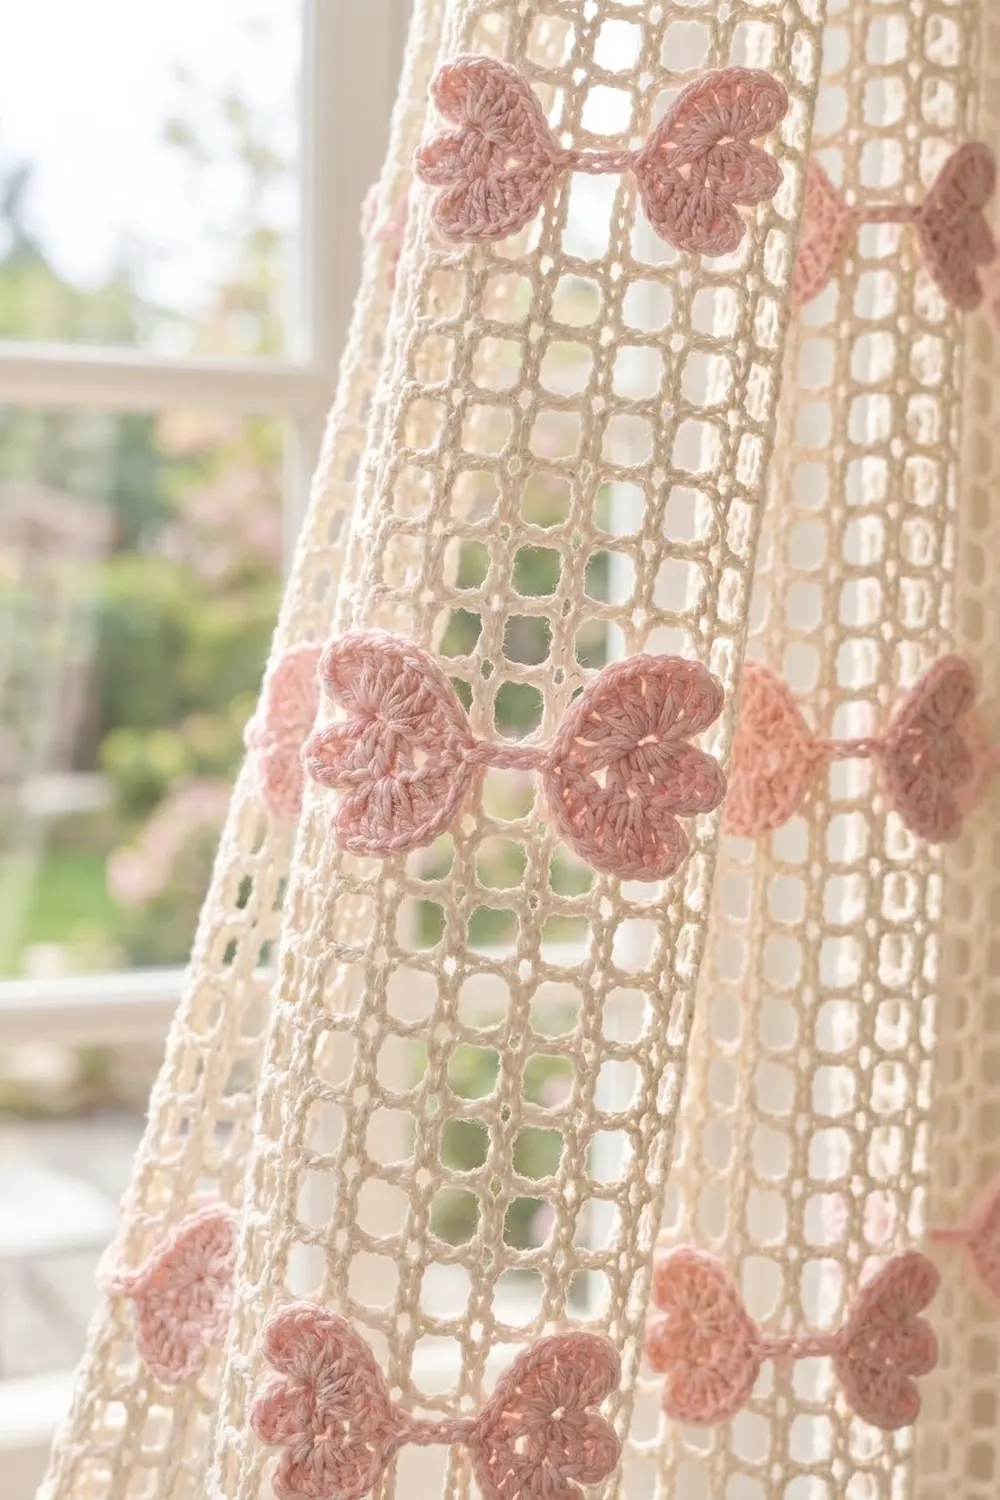
Once your first bow matches those numbers, the rest go quickly. Make one for a hair clip, or a whole stack to sew in rows onto a cream mesh curtain.
Happy crocheting!