

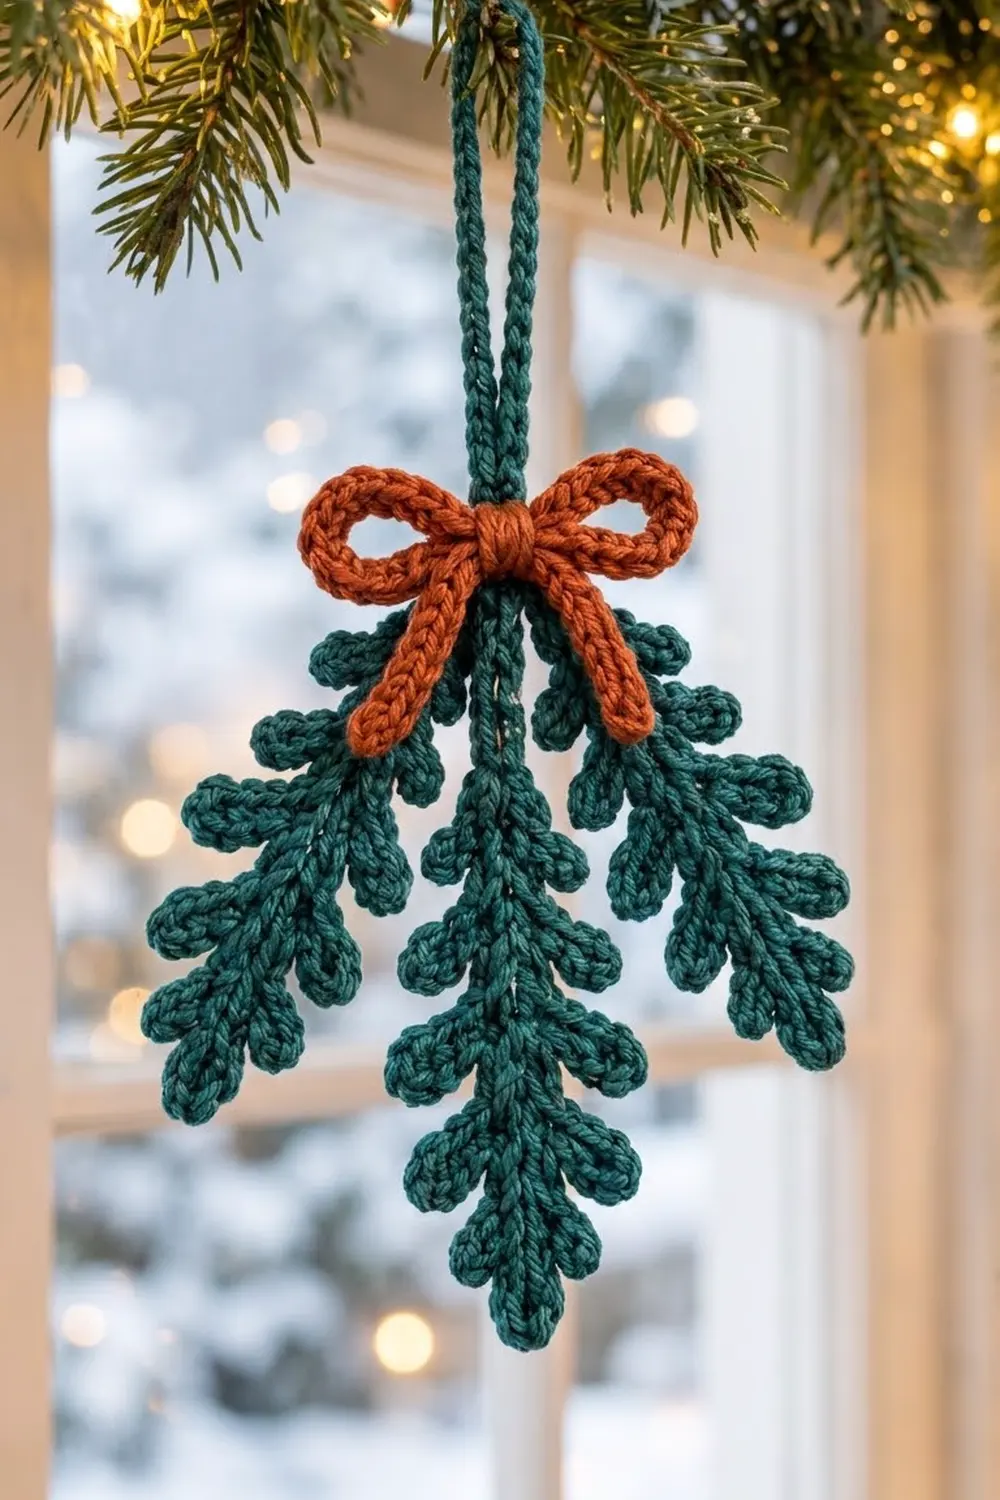
This little ornament is a bundle of three crocheted pine sprigs tied with a rust-orange bow. The long center sprig hangs straight down, and the two shorter sprigs fan out on either side. Each sprig has a firm spine and chunky fronds with rounded tips, so it looks like a fresh evergreen cutting.
The colors are a deep teal green for the sprigs and the hanging loop, and a warm rust orange for the bow. It’s a cozy, rustic piece that looks good on a tree, on a garland, on a door handle or tied to a gift.
The pattern uses US crochet terms. The finished ornament is about 5 in (12.7 cm) wide and 6 in (15.2 cm) tall from the top of the bow to the tip of the center sprig. The hanging loop adds another 2.5 in (6.4 cm), so the total hanging height is about 8.5 in (21.6 cm).
Here’s how it’s built. Each sprig starts as a single foundation chain. You make the tip frond first, then work up one side of the chain adding fronds, and back down the other side adding the matching fronds. A slip-stitch cord makes the loop and another makes the bow. Finally you stitch everything together at the stems.
Finished Size and Construction
- Finished size: 5 in (12.7 cm) wide x 6 in (15.2 cm) tall, plus a 2.5 in (6.4 cm) loop
- Skill level: Easy / advanced beginner
- Terminology: US crochet terms
- Yarn weight: DK (light worsted, #3)
- Hook: 3.5 mm (E-4)
- Number of pieces: 5 (1 center sprig, 2 side sprigs, 1 loop cord, 1 bow cord)
- Layout: Center sprig hanging straight down, one side sprig on each side angled about 30 degrees outward, loop and bow at the top of the stems
- Center sprig: 6 in (15.2 cm) long x 2.25 in (5.7 cm) wide
- Side sprig: 5.2 in (13.2 cm) long x 2.25 in (5.7 cm) wide
- Size before edge finish: The return pass along the second side of the chain is the edge finish. Before it, a sprig has fronds on one side only and is about 1.25 in (3.2 cm) wide.
- Edge depth: The edge is made by the fronds themselves, each 0.8–1 in (2.0–2.5 cm) deep. No border round is added.
Materials
Yarn: Use a smooth DK yarn with good stitch definition. Mercerized cotton or a cotton blend gives the crisp, rounded frond tips you see here. Acrylic works too, but it can look fuzzier. Stay away from very splitty or fluffy yarns, because you’ll be working into the back of a chain a lot.
- Color A – Teal green: 15 g (about 34 m / 37 yd), for the three sprigs and the hanging loop
- Color B – Rust orange: 5 g (about 11 m / 12 yd), for the bow
These amounts are based on DK yarn at about 225 m per 100 g and include a margin for your gauge swatch and weaving in ends. One ornament uses about 11 g of Color A and 2 g of Color B.
Tools:
- 3.5 mm (E-4) crochet hook
- Tapestry needle
- Scissors
- Stitch marker (optional)
- Blocking mat or folded towel, and rust-proof pins
- Spray bottle with water
Abbreviations (US Terms)
- ch – chain
- sl st – slip stitch
- sc – single crochet
- st(s) – stitch(es)
- rep – repeat
- [ ] – work the instructions in brackets as one group
Special stitches:
- F5 (short frond): Ch 5, 3 sc in 2nd ch from hook, sc in next 3 ch. That’s 6 sts, and it makes a frond with a rounded tip about 0.8 in (2.0 cm) long.
- F6 (long frond): Ch 6, 3 sc in 2nd ch from hook, sc in next 4 ch. That’s 7 sts, and it makes a frond about 1 in (2.5 cm) long.
- Anchor sl st: After a frond, sl st into the same spine chain you worked before the frond. This sets the frond firmly against the spine.
The 3 sc worked into one chain is what makes the rounded, bulb-like tip on each frond.
Gauge and Checkpoints
Gauge: 5 sl st worked along a chain = 1 in (2.5 cm). Ten of them = 2 in (5.1 cm). Your F6 frond should measure 1 in (2.5 cm) from spine to tip.
Test one piece first. Make the center sprig before anything else. It works as your gauge swatch.
Checkpoints:
- After the foundation chain and tip frond: The 26 spine chains, stretched gently, should be about 5.2 in (13.2 cm) long.
- After Side A: The sprig should be 6 in (15.2 cm) long including the tip frond, and about 1.25 in (3.2 cm) wide.
- After Side B: It should still be 6 in (15.2 cm) long and now 2.25 in (5.7 cm) wide.
- Side sprigs: Each should be 5.2 in (13.2 cm) long and 2.25 in (5.7 cm) wide.
If your piece is too big: Change to a 3.25 mm hook, or tighten your chains. Loose foundation chains are the most common reason the spine comes out too long.
If your piece is too small or stiff: Change to a 3.75 mm hook. If the slip stitches are hard to work, make each one a little looser. Slip stitches tend to tighten up as you go.
Center Sprig (Make 1)
Use Color A. Leave a 6 in (15.2 cm) starting tail, because you’ll use it for joining later.
Foundation and tip frond: Ch 31. Work 3 sc in the 2nd ch from the hook, then sc in the next 3 ch. (This makes the tip frond: 6 sts. 26 spine chains remain.)
The spine chains are numbered 1 to 26 from the tip toward the stem. Chains 1 to 20 carry fronds, and chains 21 to 26 are the bare stem.
Side A (working up toward the stem):
[Sl st in next 4 ch, F5, anchor sl st in the same ch] 2 times. (Fronds at spine ch 4 and 8.)
[Sl st in next 4 ch, F6, anchor sl st in the same ch] 3 times. (Fronds at spine ch 12, 16 and 20.)
Sl st in the last 6 ch. (This is the bare stem.)
Side A count: 31 sl st (20 along the spine + 5 anchors + 6 stem) and 5 fronds (2 x 6 sts + 3 x 7 sts = 33 sts).
Now turn the work so you can crochet into the free loops on the other side of the foundation chain. Don’t fasten off.
Side B (working down toward the tip):
Sl st in the free loops of the first 6 ch. (Spine ch 26 to 21, the stem.)
[Sl st in next ch, F6, anchor sl st in the same ch, sl st in next 3 ch] 3 times. (Fronds at spine ch 20, 16 and 12.)
[Sl st in next ch, F5, anchor sl st in the same ch, sl st in next 3 ch] 2 times. (Fronds at spine ch 8 and 4.)
Sl st into the base of the tip frond. Fasten off and leave a short tail.
Side B count: 32 sl st (6 stem + 20 spine + 5 anchors + 1 join) and 5 fronds (33 sts).
Center sprig total: 6 + 64 + 65 = 135 sts, 11 fronds in all (5 pairs plus the tip).
On Side B, each frond lands on the same spine chain as its partner on Side A, so the fronds come out in matching pairs.
Side Sprigs (Make 2)
Use Color A. Leave a 6 in (15.2 cm) starting tail.
Foundation and tip frond: Ch 27. Work 3 sc in the 2nd ch from the hook, then sc in the next 3 ch. (Tip frond: 6 sts. 22 spine chains remain.)
Spine chains 1 to 16 carry fronds, and chains 17 to 22 are the bare stem.
Side A:
[Sl st in next 4 ch, F5, anchor sl st in the same ch] 2 times. (Fronds at ch 4 and 8.)
[Sl st in next 4 ch, F6, anchor sl st in the same ch] 2 times. (Fronds at ch 12 and 16.)
Sl st in the last 6 ch.
Side A count: 26 sl st (16 + 4 anchors + 6) and 4 fronds (2 x 6 + 2 x 7 = 26 sts).
Side B:
Sl st in the free loops of the first 6 ch.
[Sl st in next ch, F6, anchor sl st in the same ch, sl st in next 3 ch] 2 times.
[Sl st in next ch, F5, anchor sl st in the same ch, sl st in next 3 ch] 2 times.
Sl st into the base of the tip frond. Fasten off.
Side B count: 27 sl st (6 + 16 + 4 + 1) and 4 fronds (26 sts).
Side sprig total: 6 + 52 + 53 = 111 sts, 9 fronds in all.
Check the length: 22 spine chains ÷ 5 per inch = 4.4 in (11.2 cm), plus the 0.8 in (2.0 cm) tip, gives 5.2 in (13.2 cm).
Hanging Loop Cord (Make 1)
Use Color A. Ch 28. Sl st in the 2nd ch from the hook and in each remaining ch across. (27 sl st.) Fasten off and leave an 8 in (20.3 cm) tail.
The cord should be 5.4 in (13.7 cm) long. When you fold it in half and tuck the ends into the stems, the loop stands about 2.5 in (6.4 cm) tall.
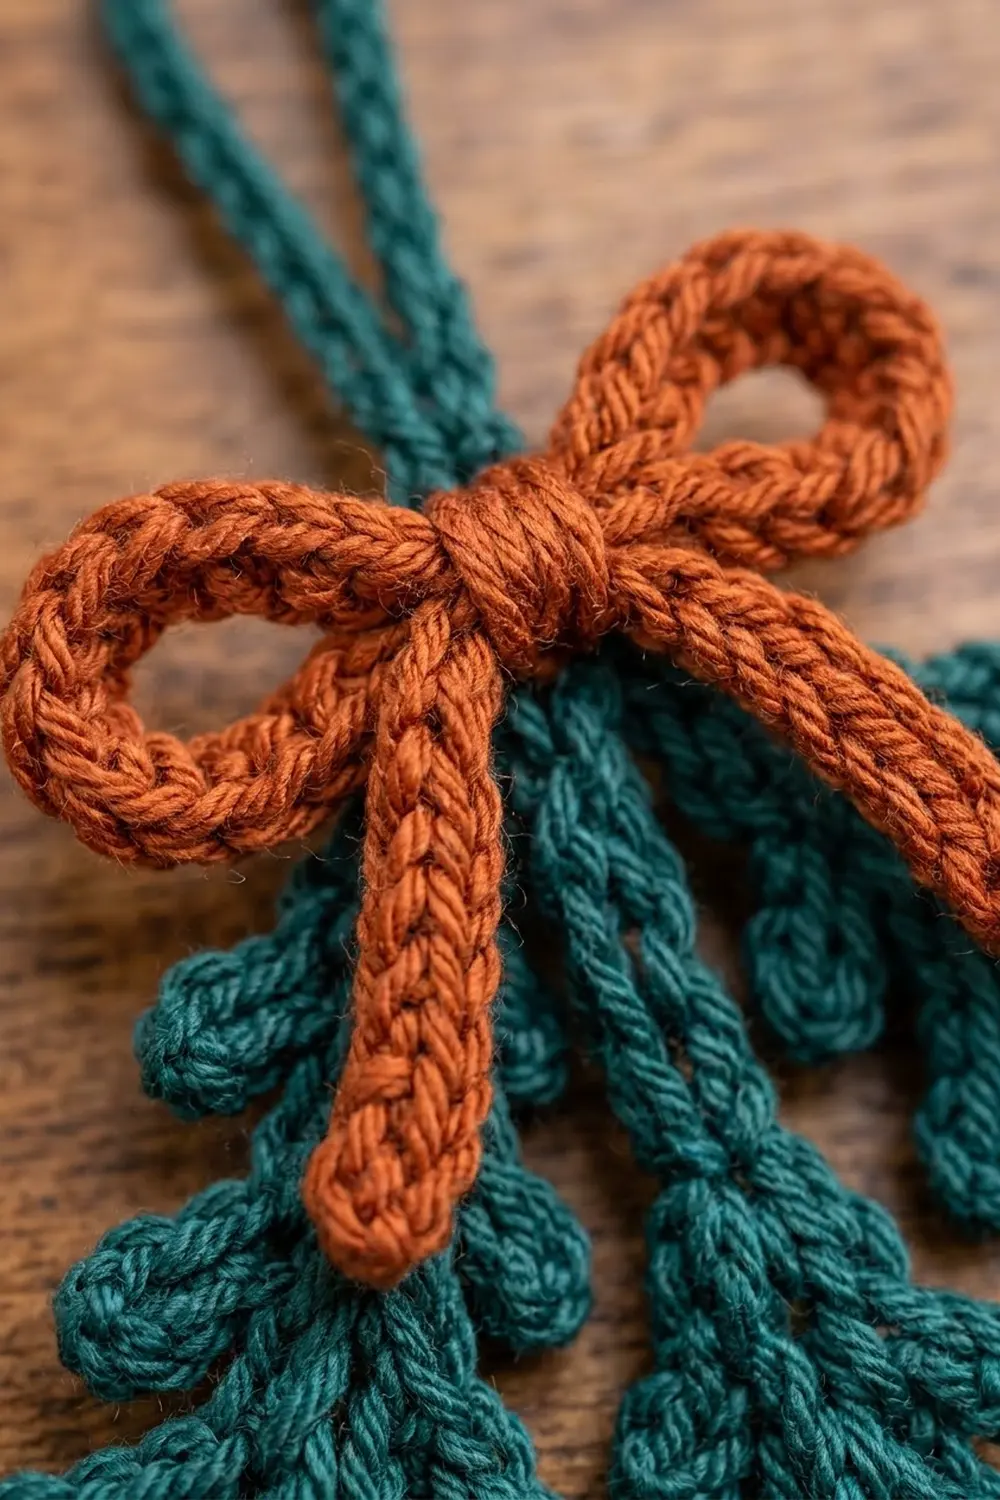
Bow Cord (Make 1)
Use Color B. Ch 61. Sl st in the 2nd ch from the hook and in each remaining ch across. (60 sl st.) Fasten off and weave in both ends now, before you tie the bow.
The cord should be 12 in (30.5 cm) long. Working the slip stitches back along the chain gives the thick, braided-looking cord you see in the bow.
Make All Pieces
For one ornament you’ll need:
- Color A: 1 center sprig, 2 side sprigs, 1 loop cord
- Color B: 1 bow cord
Layout (front view):
            ( loop )
          [ BOW / B ]
   side  \  | center |  /  side
   sprig  \ | sprig  | /   sprig
           \|        |/
            |        |
            |  tip   |
The tops of all three stems line up under the bow. The side sprigs point outward at roughly 30 degrees, and because they’re shorter, their tips end above the center tip.
Joining
Method: Whipstitch the stems together with Color A, using the starting tails.
Stitch-to-stitch logic: Each bare stem is 6 chains long on every sprig. Lay a side sprig behind the center sprig so its 6 stem stitches line up with center stem stitches 21 to 26, with the tops even. Join one stitch to one stitch. Pass the needle through a side-stem sl st and then the matching center-stem sl st, 6 passes in all. Do the same with the second side sprig on the other side.
Loop: Fold the loop cord in half. Push both ends down between the three stems so 0.4 in (1.0 cm) of each end is hidden. Use the loop tail to stitch through the whole bundle 3 times, then weave the tail in.
Tension: Pull each stitch just snug. If you pull too hard, the stems will bend and the side sprigs will tip forward. If you leave it too loose, the bundle will twist when it hangs.
Bow: Tie the bow cord around the bundle, over the joined stems, in a normal bow. Adjust it so each loop is about 1.25 in (3.2 cm) across and the tails are about 1.25 in (3.2 cm) long. Tack the knot to the bundle at the back with 2 stitches of Color A.
Size checkpoint: Hang the ornament by the loop. It should be 5 in (12.7 cm) wide across the splayed sprigs, and the bow should be about 2.75 in (7.0 cm) wide.
Border
This ornament has no separate border round. Side B is the edge finish. As you work down the second side of the chain, you add the matching fronds, and those fronds make the edge.
Edge gauge: 5 sl st = 1 in (2.5 cm) along the spine.
Center sprig edge counts per side:
- Side A: 31 sl st and 5 fronds (F5, F5, F6, F6, F6 from the tip)
- Side B: 32 sl st and 5 fronds (F6, F6, F6, F5, F5 from the stem)
Side sprig edge counts per side:
- Side A: 26 sl st and 4 fronds
- Side B: 27 sl st and 4 fronds
Why the math works: Both sides of a sprig are worked over the same chains, 26 for the center sprig or 22 for a side sprig. On both sides the fronds sit 4 chains apart, at the same chain numbers. Side B has exactly one more sl st than Side A, and that’s the joining sl st into the base of the tip frond. The anchor sl sts go into chains that are already counted, so they don’t add any length. That’s why both edges are the same length and the sprig hangs straight without curling.
Final Blocking
- Weave in all the remaining ends, except any you still need for tacking.
- Pin the ornament flat on the blocking mat with the right side up.
- Pin the center spine straight, 6 in (15.2 cm) from the top of the bow to the tip.
- Angle every frond slightly toward the tip of its sprig, at about 45 degrees from the spine. Pin through the rounded tip of each frond.
- Pin the side sprigs 30 degrees outward, so the total width is 5 in (12.7 cm).
- Shape the bow loops with your fingers and slip a pin inside each loop to keep it round.
- Mist the piece until it’s damp but not soaked. Let it dry completely, usually 6 to 12 hours.
- Unpin it and hang it up to check that it hangs straight.
Final Quality-Control Checklist
- The center sprig is 6 in (15.2 cm) long and the side sprigs are 5.2 in (13.2 cm) long.
- Each sprig is about 2.25 in (5.7 cm) wide.
- The center sprig has 5 frond pairs plus a tip, and each side sprig has 4 pairs plus a tip.
- Every frond tip is rounded, with 3 sc in one chain.
- The fronds on each sprig line up in pairs across the spine.
- The stem joins are hidden under the bow.
- The loop stands about 2.5 in (6.4 cm) tall and is firmly secured.
- The bow is about 2.75 in (7.0 cm) wide, with even loops and tails.
- The ornament hangs straight and doesn’t twist.
- All ends are woven in and nothing shows on the front.
Troubleshooting
The sprig curls into a C shape: One side is tighter than the other. Make sure you worked both sides over every chain, and try to keep your Side B slip stitches the same tension as Side A.
The fronds don’t line up in pairs: You probably miscounted the spine chains. Count 6 stem sts first on Side B, then follow the repeat exactly.
The frond tips are pointed instead of round: Work all 3 sc into the 2nd chain from the hook, not 1 sc.
The spine is too long: Your chains are loose. Go down a hook size for the foundation chain only.
The bow comes untied or slips: Tack the knot with 2 stitches through the bundle, and put a tiny stitch through each loop at the back.
The ornament tips forward: The loop is attached too far toward the back. Move its ends to the middle of the bundle.
Care
Spot clean with cool water and mild soap, then pin flat to dry. Store the ornament flat in tissue paper so the fronds and bow keep their shape.
Final Notes
Everything in this pattern follows from one measurement: 5 sl st per inch along a chain. At that gauge, the 26 spine chains of the center sprig make 5.2 in (13.2 cm), and the tip brings it to 6 in (15.2 cm). The 22 spine chains of a side sprig give 5.2 in (13.2 cm) including the tip. Fronds of 0.8–1 in (2.0–2.5 cm) on each side make each sprig 2.25 in (5.7 cm) wide. Splay the side sprigs and the ornament is 5 in (12.7 cm) wide, with a 2.5 in (6.4 cm) loop and a 2.75 in (7.0 cm) bow on top. Check the center sprig first and the rest will come out the right size.
If you’d like to fill a garland, make as many ornaments as you like. They each use only a few grams of yarn.
Happy crocheting!