

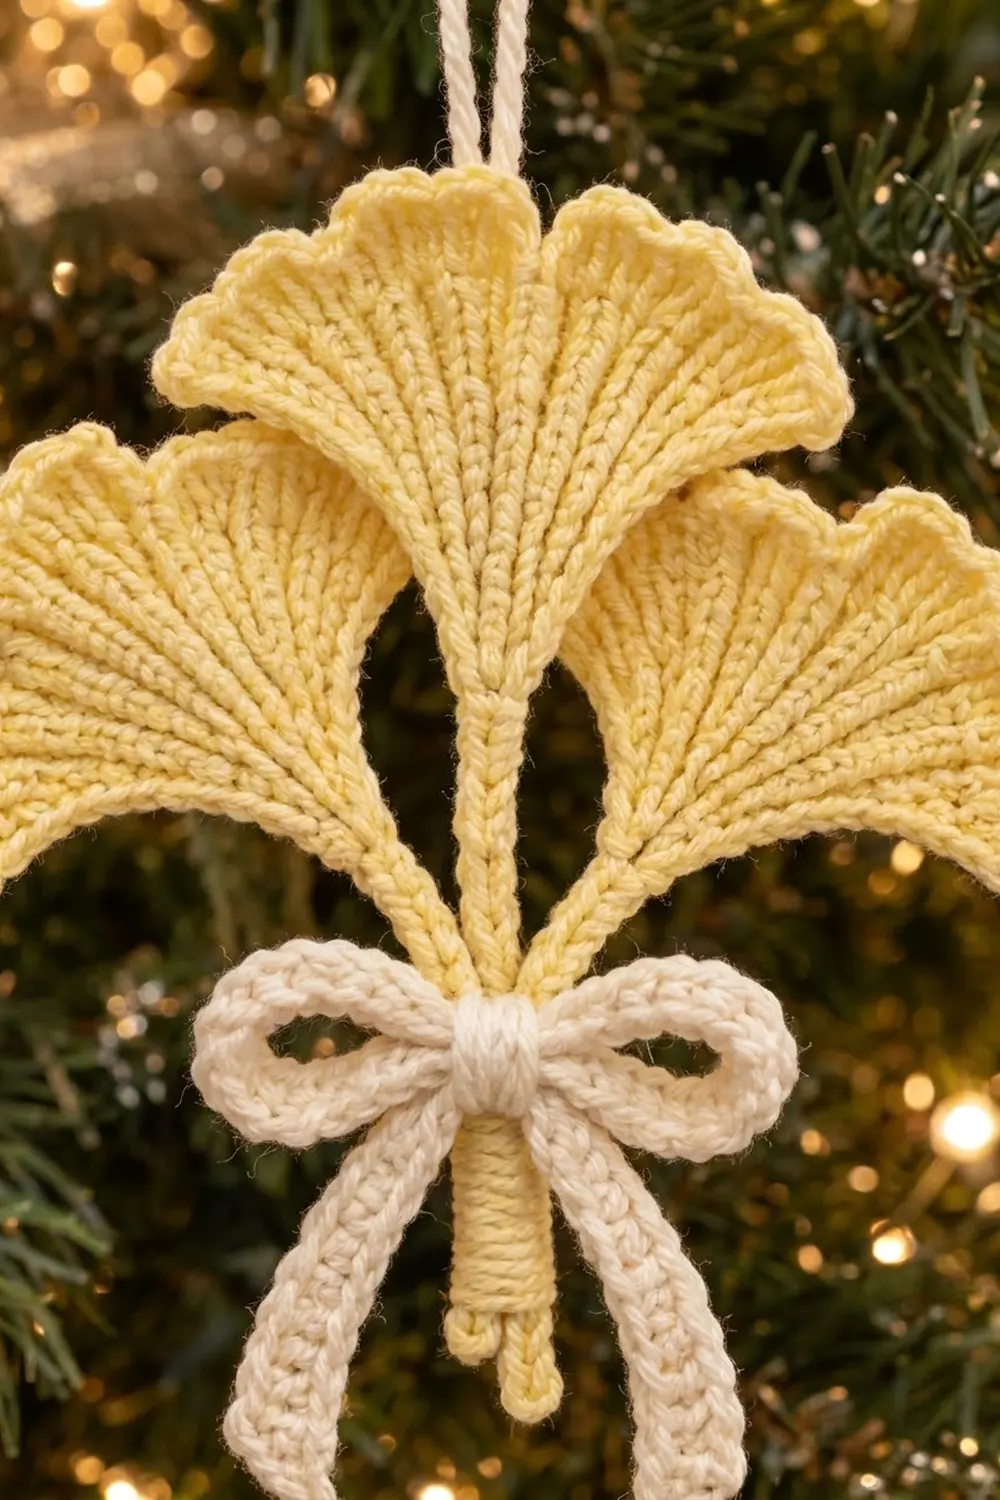
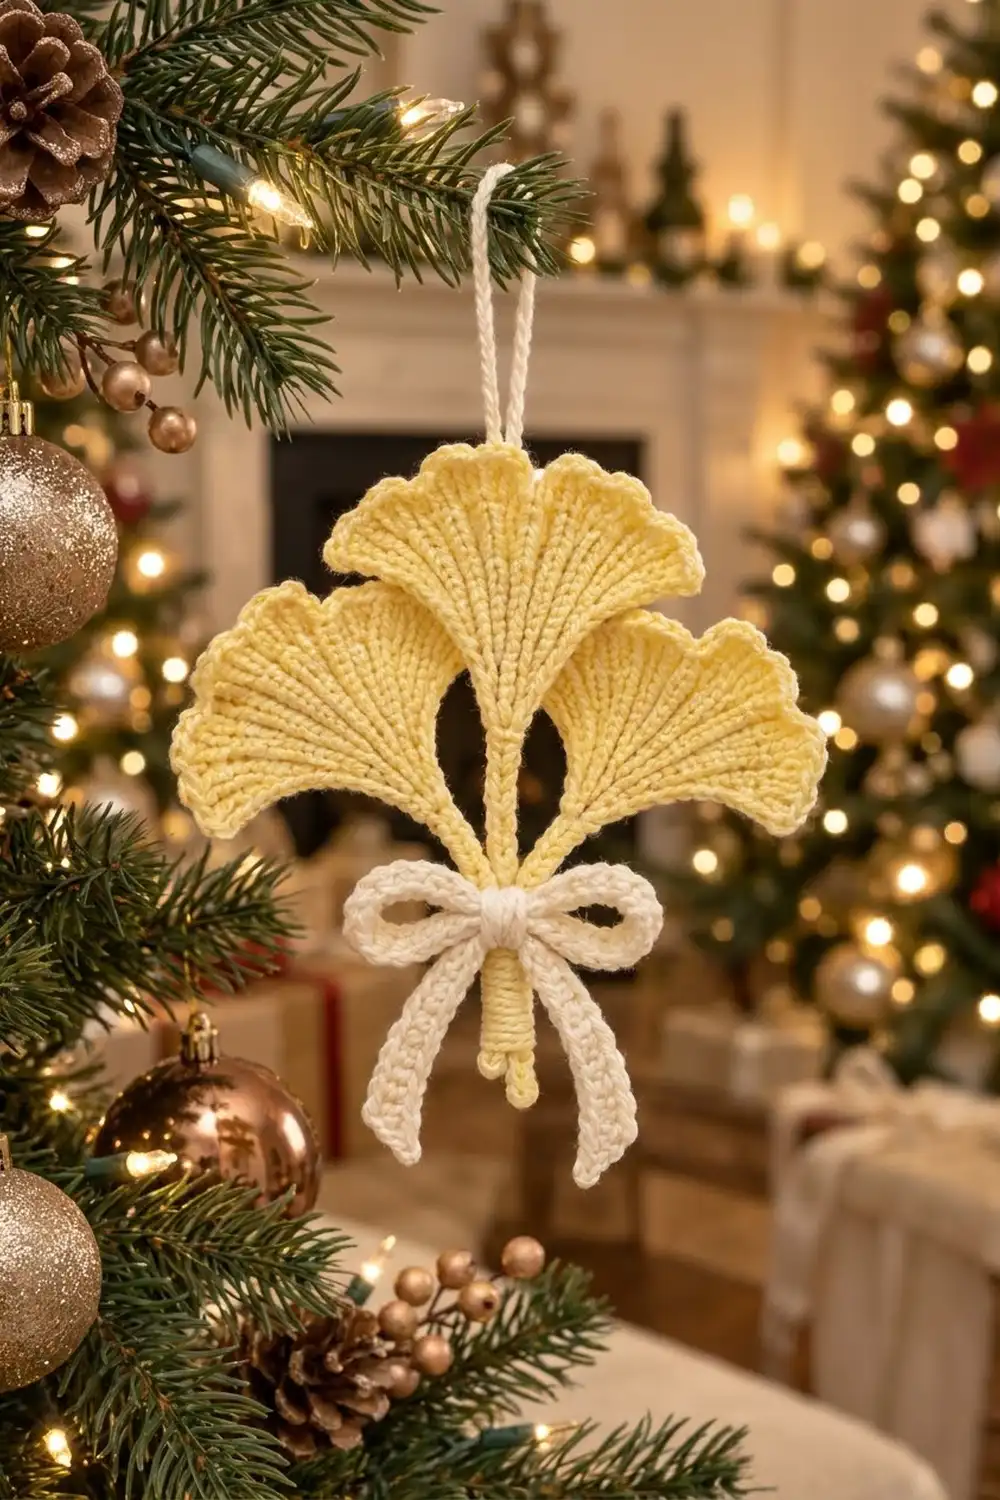
The Golden Ginkgo Trio is a light, elegant ornament made of three fan-shaped ginkgo leaves gathered with a cream bow. Each leaf has fine ribs that spread out from the base, a small notch at the top and a soft scalloped edge. It looks like a ginkgo leaf even from across the room.
The colors are simple: pale butter yellow for the leaves and cream for the bow and hanging loop. Against green branches and gold baubles, the soft yellow looks warm and doesn’t compete with the lights. The style is calm and botanical rather than cute.
This pattern uses US crochet terms. The finished ornament measures about 6 in (15.2 cm) wide and 7 in (17.8 cm) tall, not counting the 3 in (7.6 cm) hanging loop. Each leaf fan is 3.5 in (8.9 cm) wide and 1.875 in (4.8 cm) tall.
Construction is straightforward. You work each leaf as a small fan in rows from a magic ring, add a scalloped edging round, then add a slip-stitch stem. A narrow strip becomes the bow, a chain becomes the loop, and you stitch everything together at the stems.
Finished Size and Construction
- Finished size: about 6 in (15.2 cm) wide x 7 in (17.8 cm) tall, plus a 3 in (7.6 cm) loop
- Skill level: Advanced beginner
- Terminology: US crochet terms
- Yarn weight: Sport weight (#2) cotton
- Hook: 2.75 mm (US C/2)
- Number of pieces: 5 (3 leaves, 1 bow strip, 1 hanging loop)
- Layout: one top leaf, with two side leaves angled outward and overlapping it in front, and all stems gathered at the bottom
- Leaf size (finished): 3.5 in (8.9 cm) wide x 1.875 in (4.8 cm) tall, fan only
- Leaf size before border: 3.25 in (8.3 cm) wide x 1.67 in (4.2 cm) tall
- Border depth: about 0.2 in (0.5 cm) along the top, 0.125 in (0.3 cm) along the sides
Materials
Choose a smooth mercerized cotton in sport weight. Cotton holds the fan shape after blocking and shows the ribs crisply. Avoid fuzzy or very soft acrylic, which blurs the scallops.
- Pale butter yellow: 6 g, about 18 m (leaves, stems and wrapping)
- Cream: 3 g, about 9 m (bow and hanging loop)
These amounts include about 30 percent extra for a gauge test and yarn tails.
Tools:
– 2.75 mm (US C/2) crochet hook
– Tapestry needle
– Scissors
– Stitch marker
– Rust-proof pins and a blocking mat or folded towel
– Spray bottle with water
– Ruler or tape measure
Abbreviations (US Terms)
- ch – chain
- sl st – slip stitch
- sc – single crochet
- hdc – half double crochet
- dc – double crochet
- st(s) – stitch(es)
- BB – back bump of the chain
Special stitch – picot: ch 3, sl st in the 3rd ch from the hook. This makes one small rounded scallop.
Magic ring: wrap the yarn around two fingers to form a loop, insert the hook, draw up a loop and work the stitches into the ring. Pull the tail to close it.
Gauge and Checkpoints
Gauge: 22 dc and 12 rows = 4 in (10.2 cm) in dc worked in rows. Each dc row is about 0.33 in (0.8 cm) tall.
Make one complete leaf first and measure it. It works as your gauge test, and you can still use it in the ornament.
Checkpoints (measured flat, from the ring to the top edge):
- After Row 1: about 0.33 in (0.8 cm) tall
- After Row 3: about 1 in (2.5 cm) tall and 2 in (5.1 cm) wide
- After Row 5: about 1.67 in (4.2 cm) tall and 3.25 in (8.3 cm) wide
- After the border: 1.875 in (4.8 cm) tall and 3.5 in (8.9 cm) wide
If your leaf is too big, go down to a 2.5 mm hook. If it is too small, go up to a 3.0 mm hook. A difference of 0.25 in (0.6 cm) in leaf width is fine. Anything larger will change the ornament’s proportions.
Leaf (Make 3)
Use pale butter yellow. Work the fan in rows, turning at the end of each row. The ch 3 at the start of each row counts as a dc throughout.
Row 1: Make a magic ring. Ch 3, 4 dc in ring. Pull the ring closed firmly. Turn. (5 dc)
Row 2: Ch 3, dc in the same st, 2 dc in each of the next 4 sts. Turn. (10 dc)
Row 3: Ch 3, dc in the same st, dc in the next st, 2 dc in the next st, dc in the next st; repeat from * 3 more times. Turn. (15 dc)
Row 4: Ch 3, dc in the same st, dc in the next 2 sts, 2 dc in the next st, dc in the next 2 sts; repeat from * 3 more times. Turn. (20 dc)
Check your count here. Rows 1 through 4 each add 5 sts, so Row 4 should have 20 sts. The fan opens to a wide wedge of about 156 degrees and should lie flat.
Row 5 (notch row): Ch 3, dc in the next st, 2 dc in the next st, dc in the next 4 sts, 2 dc in the next st, hdc in the next st, sc in the next 2 sts, hdc in the next st, 2 dc in the next st, dc in the next 4 sts, 2 dc in the next st, dc in the last 2 sts. Do not turn. (24 sts: 20 dc, 2 hdc, 2 sc)
Row 5 works into all 20 sts of Row 4 and adds 4 increases. The 2 sc at the center are shorter than the dc around them, which makes the shallow ginkgo notch. Each half of the row mirrors the other.
Do not fasten off. Go straight to the Border round in the Border section below, then come back here for the stem.
Stem
Work the stem after you finish the Border round.
Top leaf: Join yellow with a sl st into the ring between the 2 base sc of the border. Ch 19, sl st in the BB of the 2nd ch from the hook and in the BB of each ch across, then sl st into the ring. (18 sl st) Fasten off, leaving an 8 in (20.3 cm) tail.
Side leaves (make 2): Work as for the top leaf, but ch 13. (12 sl st)
At about 6 sl sts per inch, the top stem is 3 in (7.6 cm) long and each side stem is 2 in (5.1 cm) long.
Bow Strip
Use cream.
Row 1: Ch 67, sc in the 2nd ch from the hook and in each ch across. Turn. (66 sc)
Row 2: Ch 1, sc in each st across. Fasten off. (66 sc)
The strip measures about 11 in (27.9 cm) long and 0.4 in (1.0 cm) wide.
Hanging Loop
Use cream. Ch 37 and fasten off, leaving 6 in (15.2 cm) tails at both ends. The chain is about 6 in (15.2 cm) long and folds into a 3 in (7.6 cm) loop.
Make All Pieces
- Pale butter yellow: 3 leaves (Rows 1–5, Border, Stem). One leaf gets the long 18 sl st stem; two get the short 12 sl st stem.
- Cream: 1 bow strip, 1 hanging loop
Layout (front view):
           [ loop ]
         [ TOP LEAF ]
  [ SIDE LEAF ] | [ SIDE LEAF ]
          \     |     /
           \    |    /
            [  BOW  ]
             stem ends
The side leaves sit lower than the top leaf, tilt outward at about 30 degrees and overlap the lower corners of the top leaf in front.
Joining (Assembly)
Method: whipstitch with the yellow stem tails, then tie the bow.
- Lay the top leaf face up. Place the side leaves on top of it, one on each side, so their fans overlap the lower corners of the top fan by about 0.75 in (1.9 cm).
- Line up the stem ends so all three stems end at the same point.
- Matching the stitches: the lowest 6 sl sts of each side stem lie against the lowest 6 sl sts of the top stem. Whipstitch each side-stem sl st to the matching top-stem sl st, one to one. This joins the stems over 1 in (2.5 cm).
- On the back, tack each side fan to the top fan with 2 small stitches where they overlap, so the leaves stay spread.
- Wrap a yellow tail around the stem bundle 6 times just above the joined section and secure it on the back.
- Fold the hanging loop in half and sew both ends to the back of the top leaf, behind the center of Row 4, so it doesn’t show from the front.
- Tie the bow strip around the stems about 0.75 in (1.9 cm) above the stem ends, centered on the wrapped section. Make two loops about 1 in (2.5 cm) long and leave tails about 3 in (7.6 cm) long. Wrap a short cream tail around the knot to tidy it, and stitch through to the stems so the bow can’t slide.
Tension advice: pull the whipstitches just snug. If you pull too tightly, the stems twist and the side leaves turn forward.
Size checkpoint: before the bow, the assembled leaves measure about 6 in (15.2 cm) wide and about 5 in (12.7 cm) from the top of the top leaf to the stem ends. With the bow tails, the height is about 7 in (17.8 cm).
Border: Scalloped Leaf Edging
Work this round on each leaf right after Row 5, while the yarn is still attached.
Border gauge: 2 sc per dc row-end and 1 sc per top stitch. Two sc side by side are about as tall as one dc row, so the sides lie flat.
Border round: You are at the top corner at the end of Row 5. Ch 1, then:
- Side 1: working down the side, 2 sc in each of the 5 row-ends. (10 sc)
- Base: 2 sc into the magic ring at the point. (2 sc)
- Side 2: working up the other side, 2 sc in each of the 5 row-ends. (10 sc)
- Top: working across the Row 5 sts, sc in the next 2 sts, picot; repeat from * 11 more times. Sl st to the first sc of the round. (24 sc worked 1 per st + 12 picots)
Round total: 46 sc (10 + 2 + 10 + 24) + 12 picots. Fasten off and weave in the end.
Why the math works: Row 5 has 24 sts, which divides evenly by 2, so the 12 picots are spaced evenly. Because the round is symmetrical, the 6th picot lands right after the 2 center sc, at the notch, so the dip stays clear. Each side gets 5 rows x 2 sc = 10 sc, so both sides match exactly. The 2 base sc leave a clear gap between them where you join the stem.
Final Blocking
- Weave in all ends except the ones you need for assembly. It’s easiest to block each leaf before assembly, but you can also block the whole ornament.
- Lightly mist each leaf until damp, not soaked.
- Pin the fan on the mat to 3.5 in (8.9 cm) wide and 1.875 in (4.8 cm) tall.
- Put a pin in each picot along the top edge so the scallops round out evenly.
- Pin the center notch slightly lower than the two lobes.
- Pin each stem straight.
- Let it dry completely, at least 4 hours, before you unpin it.
- After assembly, shape the bow loops with your fingers and lightly mist them to set.
Final Quality-Control Checklist
- Each leaf has 24 sts in Row 5 and 12 picots along the top.
- Both straight sides have 10 sc and lie flat.
- The center notch is visible on all three leaves.
- The top stem has 18 sl sts and each side stem has 12.
- The stem ends line up evenly at the bottom.
- The side leaves overlap the top leaf in front, at matching angles.
- The bow is centered and doesn’t slide.
- The hanging loop is hidden at the back and centered.
- The ornament measures about 6 in (15.2 cm) wide and 7 in (17.8 cm) tall.
Troubleshooting
The fan cups instead of lying flat: your dc are too tight. Go up a hook size or loosen your yarn-overs.
The fan ruffles heavily: your dc are too tall. Go down a hook size, or check that you haven’t added extra increases.
The notch isn’t visible: make sure the 2 center sts in Row 5 are sc, then pin the notch down firmly during blocking.
The sides wave: you may have worked 3 sc in a row-end. Use exactly 2 per row-end.
The stems curl: sl sts worked tightly into the back bump always curl a little. Wet-block them straight and let them dry.
The leaves tip forward when hanging: sew the loop lower on the top leaf, behind Row 3 instead of Row 4.
Care
Spot clean with cool water and mild soap, then reshape and dry flat. Store the ornament flat in a box so the leaves and bow keep their shape.
Final Notes
The measurements build in a short, easy chain. Rows 1–5 make a 3.25 in (8.3 cm) fan, and the border brings each leaf to 3.5 in (8.9 cm) wide and 1.875 in (4.8 cm) tall. Stems of 3 in (7.6 cm) and 2 in (5.1 cm), joined over 1 in (2.5 cm), give an assembly about 6 in (15.2 cm) wide and 5 in (12.7 cm) tall. The bow brings the total height to 7 in (17.8 cm). Check your first leaf against the gauge, and the rest will fall into place.
Happy crocheting!