

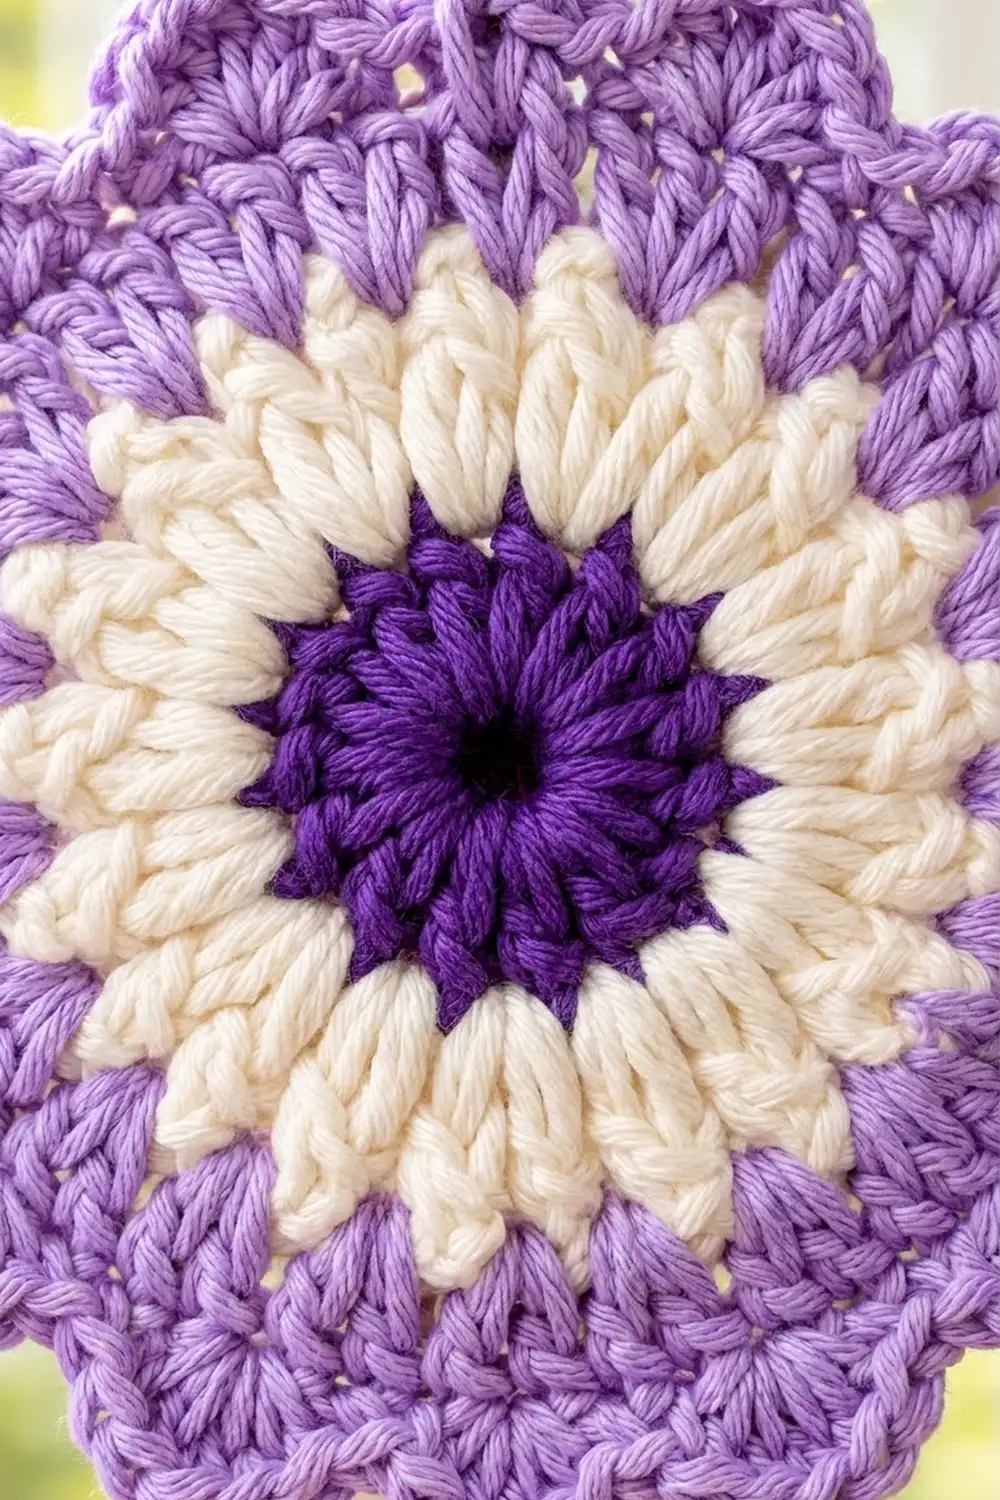
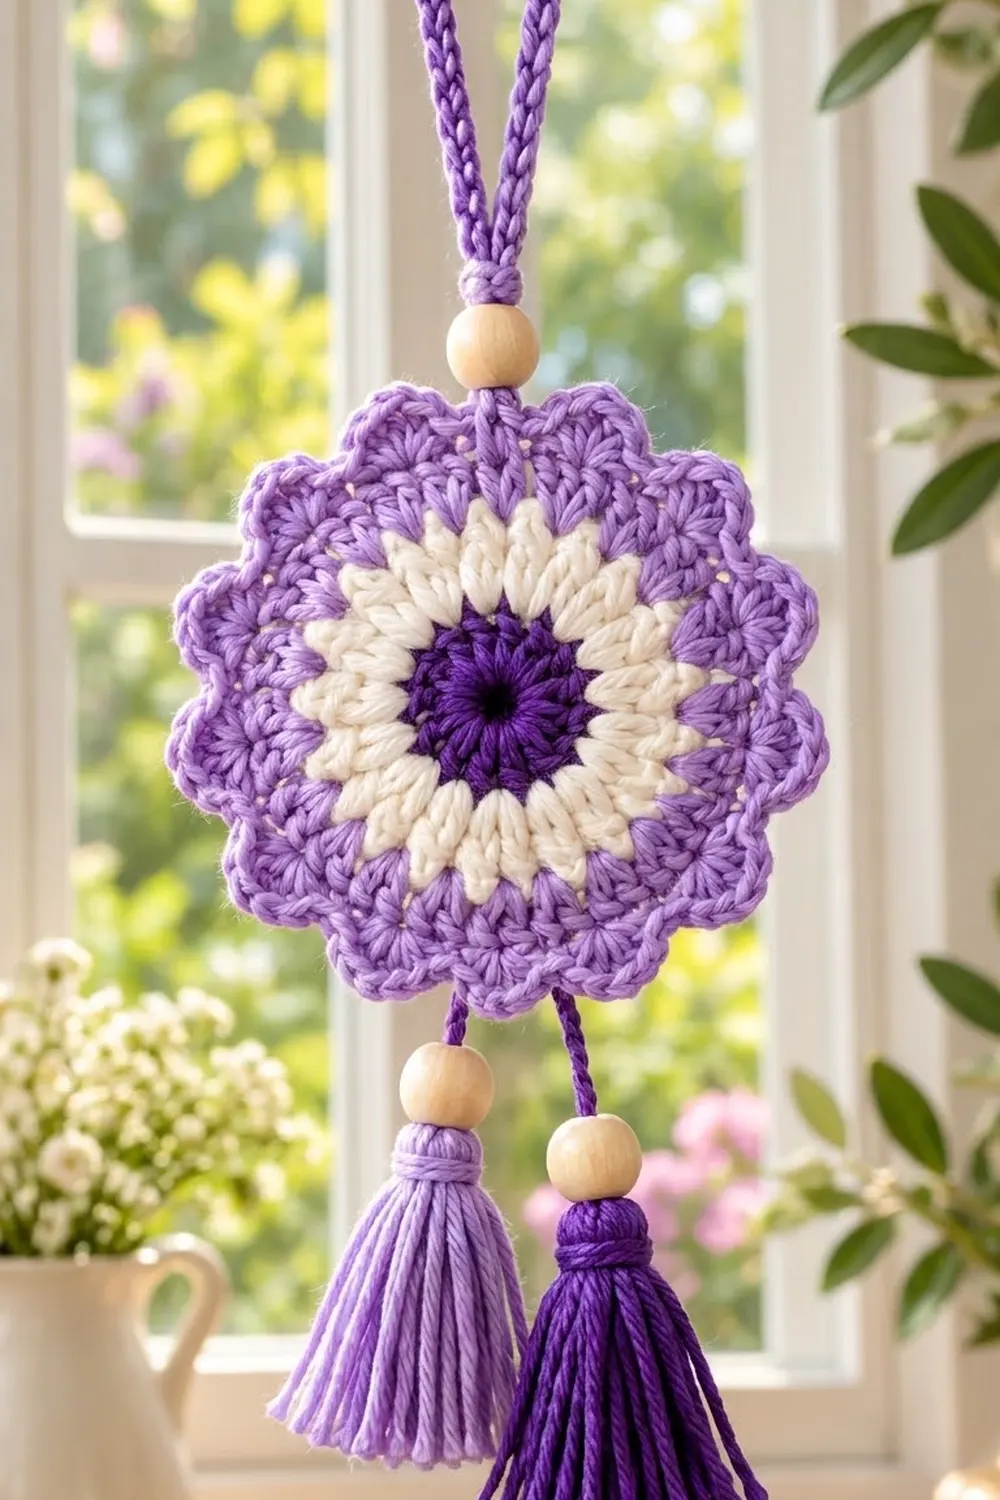
This hanging motif is a single round mandala. It has a deep violet center, a cream sunburst ring and a soft lilac scalloped edge. A crocheted cord loop at the top and two beaded tassels at the bottom turn it into a window or wall ornament.
The colors are deep violet, cream and lilac, finished with natural wooden beads. It suits a nursery, a reading nook or a rear-view mirror, or you can use it as a gift tag.
The pattern uses US crochet terms. The finished motif measures 4.5 in (11.4 cm) across, from scallop tip to scallop tip. With the loop and tassels, the whole hanging is about 11 in (27.9 cm) long.
You work six rounds from a magic ring:
– two violet rounds
– one cream round
– one lilac round of double crochet
– a lilac single crochet round and a scallop round, which form the border
Then you make a slip-stitch cord loop and two tassels and attach them with beads.
Finished Size and Construction
- Finished size: 4.5 in (11.4 cm) diameter motif; about 11 in (27.9 cm) total hanging length
- Skill level: Easy
- Terminology: US crochet terms
- Yarn weight: DK (weight 3) cotton or cotton blend
- Hook: 3.5 mm (E-4)
- Number of pieces: 1 crocheted motif, plus 1 cord loop and 2 tassels as trims
- Layout: one motif hung from the top, with tassels at the bottom
- Motif size before border (after Round 4): 3.25 in (8.3 cm)
- Border depth (Rounds 5-6): 0.625 in (1.6 cm) on each side
- Final motif size: 3.25 in + 0.625 in + 0.625 in = 4.5 in (11.4 cm)
Materials
Choose a smooth mercerized or combed cotton in DK weight. Cotton shows the stitches clearly and keeps the scallops crisp. Avoid fuzzy yarn, because it blurs the cream spokes.
- Color A – deep violet: 15 g, about 35 m (center and one tassel)
- Color B – cream: 5 g, about 12 m (sunburst ring)
- Color C – lilac: 20 g, about 46 m (outer rounds, border, cord and one tassel)
Tools:
- 3.5 mm (E-4) crochet hook
- 3 natural wooden beads, 12 mm, with a hole at least 4 mm wide
- Tapestry needle
- Scissors
- A piece of stiff card 3 in (7.6 cm) tall, for the tassels
- Stitch marker
- Pins and a blocking mat or folded towel
All quantities include a margin of about 20 percent for a test piece and tassel trimming.
Abbreviations (US Terms)
- ch – chain
- sl st – slip stitch
- sc – single crochet
- dc – double crochet
- st(s) – stitch(es)
- sk – skip
- rep – repeat
- MR – magic ring
Special stitch – Shell: work 7 dc into the same stitch.
Standing dc: start with a slip knot on the hook. Yarn over, insert the hook into the stitch and complete a dc as normal. This joins a new color without a ch-3.
Gauge and Checkpoints
Your first motif is your test piece. Measure it flat, without stretching, after these rounds:
- After Round 2: 1.75 in (4.4 cm) across
- After Round 4: 3.25 in (8.3 cm) across
- After Round 6: 4.5 in (11.4 cm) across, tip to tip
If your piece is more than 0.25 in (0.6 cm) too big at Round 2, switch to a 3.25 mm hook. If it is too small, switch to a 3.75 mm hook. Start again rather than changing hooks halfway, because a mid-motif hook change shows as a ripple.
If the motif cups into a bowl shape, your tension is too tight, so loosen up or go up a hook size. If it ruffles, your tension is too loose, so go down a hook size.
Pattern
The ch-3 at the start of a dc round counts as the first dc throughout. Join each round with a sl st to the top of the beginning ch-3, or to the first stitch.
Round 1 (Color A)
Make an MR. Ch 3 (counts as dc), then work 11 dc into the ring. Pull the ring closed. Sl st to the top of the ch-3.
Stitch count: 12 dc.
Round 2 (Color A)
Ch 3 (counts as dc), then work 1 dc in the same st. Work 2 dc in each of the remaining 11 sts. Sl st to the top of the ch-3.
Stitch count: 24 dc.
Checkpoint: 1.75 in (4.4 cm). Fasten off Color A and weave in the end on the back.
Round 3 (Color B)
Join Color B with a standing dc in any st. Work 1 dc in the same st, then dc in the next st. 2 dc in next st, dc in next st; rep from * 10 more times. Sl st to the first dc.
Stitch count: 36 dc (12 repeats of 3 dc).
Each pair of dc in one stitch is followed by a single dc. This rhythm creates the radiating spoke look of the cream ring. Fasten off Color B.
Round 4 (Color C)
Join Color C with a standing dc in the first dc of any 2-dc pair from Round 3. Dc in the next st, then work 2 dc in the next st. Dc in next 2 sts, 2 dc in next st; rep from * 10 more times. Sl st to the first dc.
Stitch count: 48 dc (12 repeats of 4 sts).
Checkpoint: 3.25 in (8.3 cm). This is the size before the border. Do not fasten off.
Border
The border is two rounds in Color C. The first is a single crochet round that firms up the edge. The second turns those stitches into 12 even scallops.
Border gauge: in the sc round, 48 sc fit around a 3.25 in (8.3 cm) circle. That works out to about 4.7 sc per 1 in (2.5 cm) of the circle’s edge. Each scallop uses 4 sts, so it covers about 0.85 in (2.2 cm) of the edge.
Because the motif is round, picture it as four equal quarters (top, right, bottom and left) to keep the scallops even.
Round 5 (Color C)
Ch 1. Sc in the same st as the join and in each st around. Sl st to the first sc.
Stitch count: 48 sc (48 worked 1-per-existing-stitch + 0 added). That is 12 sc per quarter.
Checkpoint: 3.75 in (9.5 cm) across.
Round 6 (Color C) – Scallops
Ch 1. Sc in the same st as the join. Sk 1 st, Shell (7 dc) in next st, sk 1 st, sc in next st; rep from * 10 more times. Sk 1 st, Shell in next st, sk 1 st, sl st to the first sc.
Stitch count: 12 shells and 12 sc (84 dc + 12 sc = 96 sts). That is 3 scallops per quarter.
Fasten off, leaving a 6 in (15.2 cm) tail to weave in.
Why the Math Works
Each scallop uses exactly 4 stitches of Round 5: one for the sc, one skipped, one for the shell and one skipped. 48 sc divided by 4 = 12 scallops, with no stitches left over. 48 also divides evenly into 4 quarters, so each quarter holds exactly 12 sc and 3 scallops. That keeps the edge symmetrical.
A 7-dc shell is full enough to curve outward over 4 stitches without ruffling. The sc between shells pulls the edge in and creates the dip between scallops. The border adds 0.625 in (1.6 cm) on each side: about 0.25 in (0.6 cm) from the sc round and 0.375 in (1.0 cm) from the shell height.
Hanging Loop
With Color C, ch 45. Sl st in the back bump of the 2nd ch from the hook and in each ch across. Stitch count: 44 sl sts. Fasten off, leaving 8 in (20.3 cm) tails at both ends.
The cord measures about 7 in (17.8 cm). Fold it in half. Thread both tails together through one wooden bead, then slide the bead down until the loop above it is 3 in (7.6 cm) tall.
Choose any sc in Round 6 to be the top center. Use the tails to sew the base of the cord securely to that sc and to the Round 5 stitch behind it, so the bead sits snugly against the edge. Knot the tails on the back and weave them in through the Round 5 sc.
Tassels
Make 1 tassel in Color C and 1 tassel in Color A.
- Wrap yarn around the 3 in (7.6 cm) card 30 times.
- Slide a 12 in (30.5 cm) piece of the same color under the wraps at the top and tie it tightly. Leave both ends long, because they become the hanging cord.
- Cut through the wraps along the bottom edge of the card.
- About 0.5 in (1.3 cm) below the top, wrap a separate 10 in (25.4 cm) piece of yarn around the tassel 5 times to form the neck. Knot it, then thread the ends down into the tassel.
- Trim the bottom evenly so the tassel measures about 3 in (7.6 cm) from top to tip.
Attaching the Tassels
Find the sc in Round 6 directly opposite the top-center sc. This is the bottom-center sc. The tassels hang from the middle (4th) dc of the shell on each side of it.
- Lilac tassel (left): thread both ends of the top tie through a wooden bead. Pass the ends through the middle dc of the left shell and tie a square knot on the back. Leave 0.75 in (1.9 cm) of cord showing between the edge and the bead.
- Violet tassel (right): do the same through the middle dc of the right shell, leaving 1.5 in (3.8 cm) of cord between the edge and the bead.
The different cord lengths let the tassels hang side by side without tangling. Weave the leftover ends into the back of Round 5.
Final Blocking
- Weave in every end before blocking, running each tail through stitches of its own color.
- Mist the motif with water until it is damp but not soaked. Keep the tassels dry.
- Lay the motif face up on a blocking mat or folded towel.
- Pin the center flat. Then pin the tip of each of the 12 scallops so the motif measures 4.5 in (11.4 cm) tip to tip.
- Measure between opposite scallops with a ruler in two directions. Both should read 4.5 in (11.4 cm).
- Let it dry completely, which takes about 4-6 hours.
- Unpin. Steam the tassels lightly from a distance and comb the strands straight with your fingers. Trim again if needed.
Final Quality-Control Checklist
- Round 1 has 12 dc and the ring is fully closed.
- Round 2 has 24 dc, Round 3 has 36 dc and Round 4 has 48 dc.
- Round 5 has 48 sc, and Round 6 has exactly 12 shells and 12 sc.
- The motif lies flat, with no cupping or ruffling.
- The motif is 3.25 in (8.3 cm) before the border and 4.5 in (11.4 cm) after.
- Color changes are tidy, with no gaps at the joins.
- The loop is 3 in (7.6 cm) tall above its bead and centered on the top sc.
- The tassels hang on either side of the bottom-center sc, lilac on the left and violet on the right.
- All ends are woven in and can’t be seen from the front.
Troubleshooting
There is a hole in the center. Pull the magic ring tail firmly, then weave it in a circle around the ring before trimming.
The motif cups. Your tension is too tight. Go up half a hook size, and check that each increase round has the full stitch count.
The edge ruffles. Your shells may have more than 7 dc, or you skipped too few stitches. Recount Round 6: each repeat must use 4 stitches of Round 5.
The scallops are uneven. You lost your place around the circle. Put a stitch marker in the first sc of Round 6 and count 3 scallops per quarter.
The color joins show a seam line. Use the standing dc join, and start each new color at a different point around the circle.
The motif tilts when hung. The loop is off-center. Check that 6 scallops sit on each side of the line from the loop to the bottom-center sc.
The tassels look thin. Add 5-10 more wraps.
Care
Hand wash gently in cool water with mild soap. Press the water out in a towel, then dry flat and reshape the scallops. Comb the tassels straight once they are dry.
Final Notes
The whole piece depends on hitting each measurement in turn:
– Round 2 reaches 1.75 in (4.4 cm).
– Round 4 reaches 3.25 in (8.3 cm) with 48 dc.
– Round 5 keeps those 48 stitches as sc and grows to 3.75 in (9.5 cm).
– Round 6 turns the 48 stitches into 12 scallops and finishes at 4.5 in (11.4 cm).
Add a 3 in (7.6 cm) loop and two 3 in (7.6 cm) tassels, and your sunburst is ready to hang in a sunny window.
Happy crocheting!