

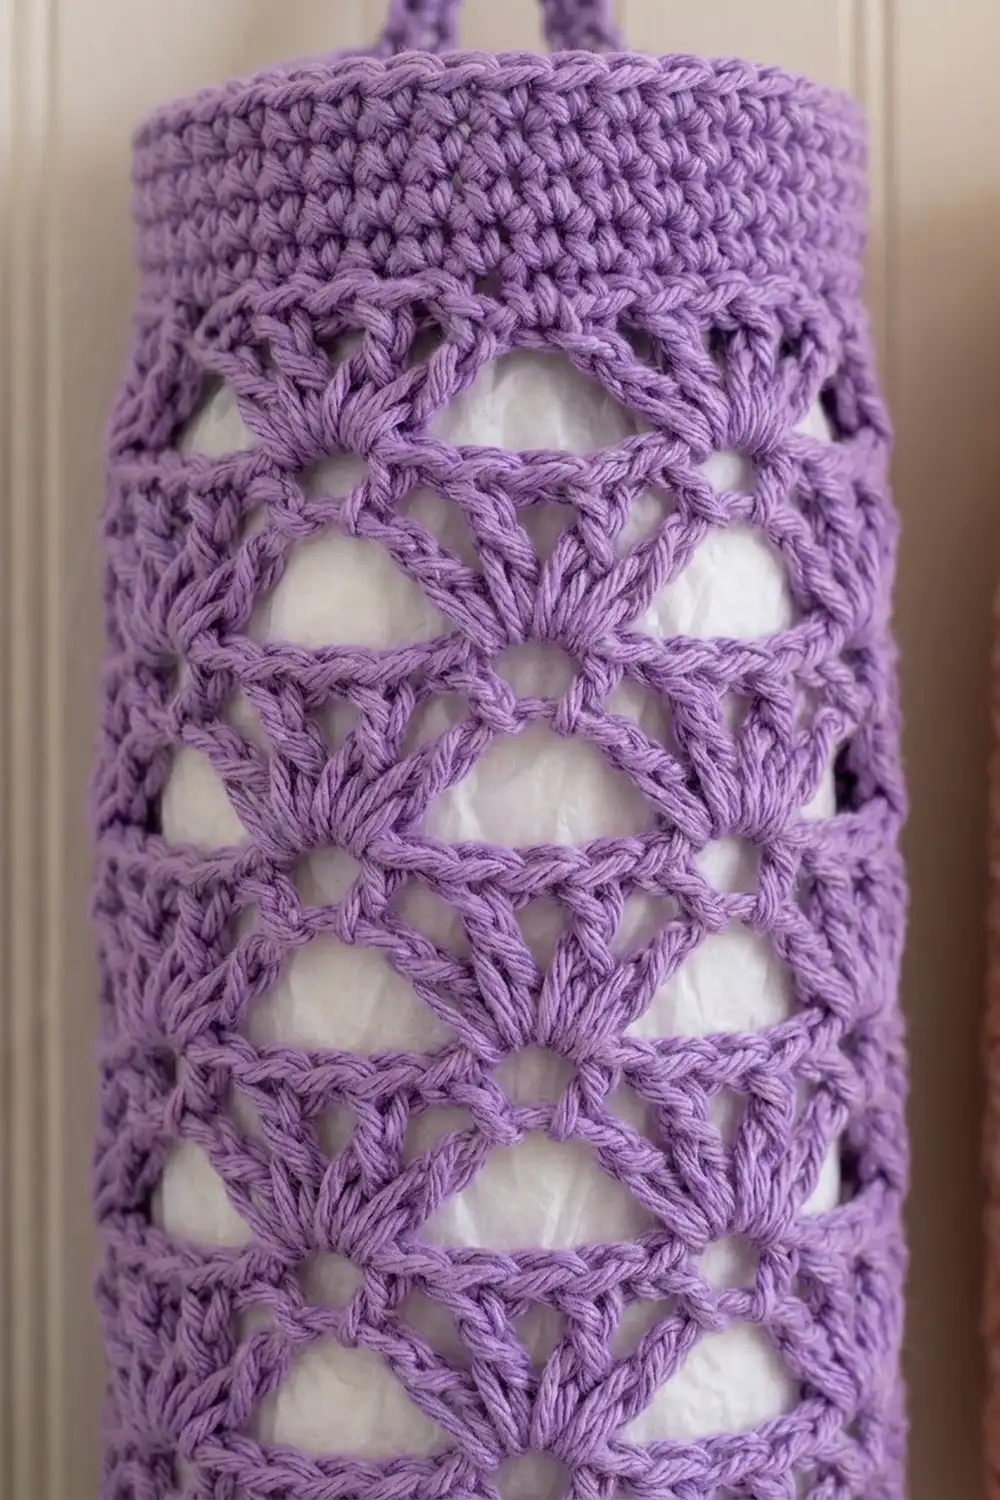
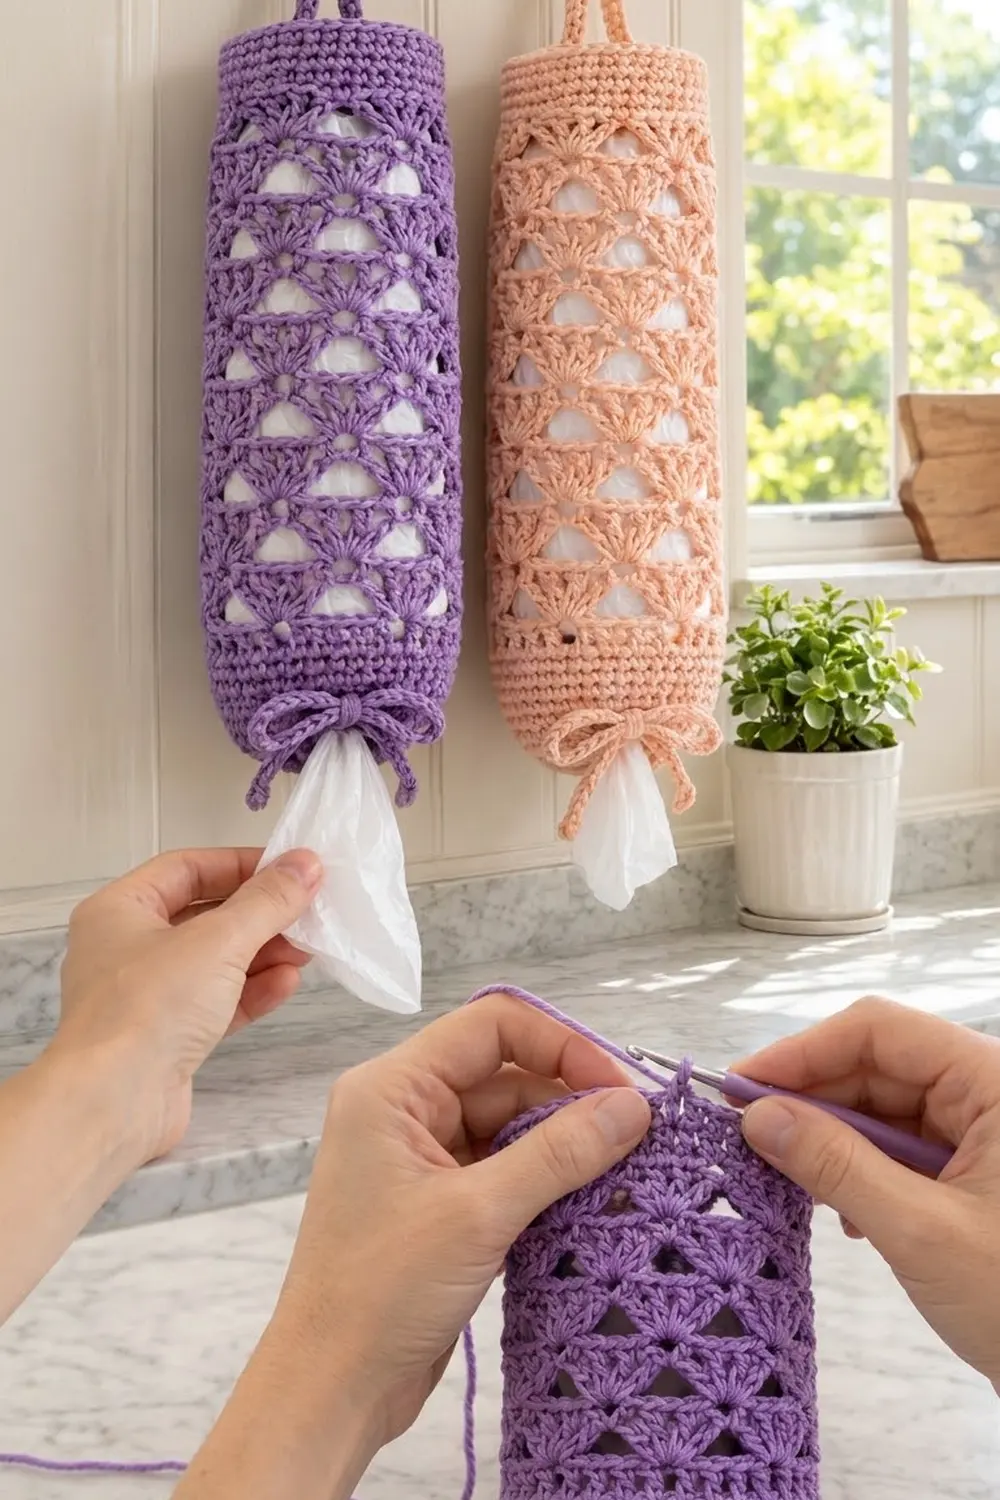
This plastic bag holder is a slim crocheted tube that hangs from a hook and keeps grocery bags tidy. You push bags in through the open top and pull them out one at a time through the cinched bottom. The body is covered in an openwork fan lace: rows of seven-stitch fans sit in a staggered pattern, with triangular windows between them that let the white bags show through.
The sample is lavender purple, and the same pattern also works in soft peach. Each holder uses one color only. Solid single crochet bands at the top and bottom frame the lace. A two-row strap makes the hanging loop, and a chain drawstring is threaded through an eyelet round near the bottom and tied in a bow.
The pattern uses US crochet terms. The finished holder measures 6 in (15.2 cm) wide when laid flat, which is a 12 in (30.5 cm) circumference, and 17 in (43.2 cm) long without the hanging loop.
The holder is worked top-down in joined rounds as one seamless tube. You make a single crochet top band, then 20 rounds of fan lace, then a single crochet bottom band with an eyelet round. A slip stitch rim finishes each edge. After that you sew on the strap and thread the drawstring.
Finished Size and Construction
- Finished size: 6 in (15.2 cm) wide flat × 17 in (43.2 cm) long, plus the hanging loop
- Skill level: Easy–Intermediate
- Terminology: US crochet terms
- Yarn weight: Worsted (#4) cotton or cotton blend
- Hook: US H-8 (5 mm)
- Number of pieces: 1 tube, plus 1 strap and 1 drawstring
- Layout: One vertical tube, worked in the round
- Piece size: 48 stitches around, 37 rounds tall
- Size before border: 6 in (15.2 cm) × 17 in (43.2 cm)
- Border depth: a slip stitch rim at the top and bottom, less than 1/8 in (0.3 cm)
Materials
Use a smooth worsted-weight cotton or cotton blend. Cotton holds the fan shapes crisply, doesn’t stretch out much under the weight of the bags, and can be washed. Avoid fuzzy yarns, because they blur the lace.
- Lavender purple (main sample): 100 g / 170 m (186 yd)
- Peach (alternate colorway): 100 g / 170 m (186 yd)
You only need one of these colors for each holder. The quantities include a margin of about 15% for swatching and the drawstring.
Tools:
- US H-8 (5 mm) crochet hook
- Tapestry needle
- 2 stitch markers
- Scissors
- Measuring tape
- A 2-liter bottle or rolled towel for blocking
- Rust-proof pins
Abbreviations (US Terms)
- ch – chain
- sl st – slip stitch
- sc – single crochet
- dc – double crochet
- st(s) – stitch(es)
- sp – space
- sk – skip
- rnd(s) – round(s)
- beg – beginning
Special stitches:
- Fan: 7 dc worked into the same stitch or space.
- V-st: (dc, ch 2, dc) worked into the same stitch.
Gauge and Checkpoints
- Single crochet in the round: 16 sts × 16 rnds = 4 in (10.2 cm)
- Fan lace: one 8-stitch repeat = 2 in (5.1 cm) wide, and 4 rnds (2 fan rnds + 2 V rnds) = 2.5 in (6.4 cm) tall
Test first: Work Rnds 1–10 before committing to the whole holder, then lay the tube flat and measure it. Each of the checkpoints below is the total length from the top edge.
- After Rnd 1: the flat width is 6 in (15.2 cm)
- After Rnd 6: 1.5 in (3.8 cm)
- After Rnd 10: 4 in (10.2 cm)
- After Rnd 26: 14 in (35.6 cm)
- After Rnd 33: 15.75 in (40.0 cm)
- After Rnd 37: 17 in (43.2 cm)
If your piece is too big, go down one hook size to US 7 (4.5 mm). If it’s too small, go up to US I-9 (5.5 mm). Don’t change the stitch count. The lace needs a multiple of 8 stitches, so 48 is the right number for this width. If your round count gives the right height but the width is wrong, change the hook rather than adding stitches.
Pattern
Join every round with a sl st to the first stitch. Don’t turn. Put a marker in the first stitch of each round.
Top Band
Rnd 1: Ch 48 and join with a sl st to the first ch to form a ring, taking care not to twist the chain. Ch 1, then sc in each ch around. Join. (48 sc)
Rnds 2–6: Ch 1, sc in each st around. Join. (48 sc)
The top band should measure 1.5 in (3.8 cm) tall.
Fan Lace Body
Rnd 7 (first Fan rnd): Ch 1, sc in the first st. Sk 3 sts, Fan in the next st, sk 3 sts, sc in the next st. Repeat from * 4 more times. Then sk 3 sts, Fan in the next st, sk 3 sts, and join to the first sc. (6 Fans + 6 sc = 48 sts: 42 dc + 6 sc)
Each repeat uses exactly 8 stitches of the band (1 sc + 3 skipped + 1 Fan base + 3 skipped), and 6 repeats × 8 = 48.
Rnd 8 (V rnd): Ch 5 (counts as dc + ch 2), then dc in the same sc as the join to complete the first V-st. Ch 3, sc in the center (4th) dc of the next Fan, ch 3, V-st in the next sc. Repeat from * 4 more times. Then ch 3, sc in the center dc of the last Fan, ch 3, and join to the 3rd ch of the beg ch-5. (6 V-sts, 6 sc, 12 ch-3 sps)
The ch-3 spaces form the triangular windows. The V-sts sit between the Fans of the round below, and the sc sit on the Fan centers.
Rnd 9 (Fan rnd): Sl st into the first ch-2 sp. Ch 3 (counts as dc), then 6 dc in the same sp. Sk the ch-3 sp, sc in the next sc, sk the ch-3 sp, Fan in the ch-2 sp of the next V-st. Repeat from * 4 more times. Then sk the ch-3 sp, sc in the last sc, sk the last ch-3 sp, and join to the top of the beg ch-3. (6 Fans + 6 sc = 48 sts)
Because these Fans are worked into the V-sts, they sit between the Fans of Rnd 7. This creates the staggered pattern.
Rnd 10 (V rnd): Sl st in the next 3 dc, so you’re at the center dc of the first Fan. Ch 1, then sc in that same st. Ch 3, V-st in the next sc, ch 3, sc in the center dc of the next Fan. Repeat from * 4 more times. Then ch 3, V-st in the last sc, ch 3, and join to the first sc. (6 V-sts, 6 sc, 12 ch-3 sps)
Rnds 11–26: Repeat Rnds 9–10 eight more times. (10 Fan rnds and 10 V rnds in total)
The rule is simple: Fans always go into V-st spaces, and V-sts always go into the sc of the previous Fan round. This is what alternates the Fan positions.
Before you continue, check that the lace section is 12.5 in (31.8 cm) tall and the total length is 14 in (35.6 cm).
Bottom Band
Rnd 27 (conversion rnd): Ch 1. Then, around the whole round: sc in each dc of each V-st, 1 sc in each ch-2 sp, sc in each sc, and 2 sc in each ch-3 sp. Join.
Each repeat works out to: dc 1, ch-2 sp 1, dc 1, ch-3 sp 2, sc 1, ch-3 sp 2 = 8 sts. Overall, that’s 18 sts worked 1-per-existing-st (12 dc + 6 sc) + 30 extra (6 ch-2 sps × 1 + 12 ch-3 sps × 2) = 48 sc. If your total isn’t 48, fix it before going on.
Rnds 28–33: Ch 1, sc in each st around. Join. (48 sc)
The bottom band (Rnds 27–33) should measure 1.75 in (4.4 cm). The total length should now be 15.75 in (40.0 cm).
Rnd 34 (eyelet rnd): Ch 4 (counts as dc + ch 1), sk the next st. Dc in the next st, ch 1, sk the next st. Repeat from * around. Join to the 3rd ch of the beg ch-4. (24 dc + 24 ch-1 sps = 48 sts)
Rnds 35–37: Ch 1. In Rnd 35, sc in each dc and each ch-1 sp; in Rnds 36–37, sc in each st. Join each rnd. (48 sc)
The eyelet round adds 0.5 in (1.3 cm) and the cuff adds 0.75 in (1.9 cm), for a total length of 17 in (43.2 cm). Don’t fasten off yet.
Border (Rim Finish)
Border gauge: One sl st per st, 4 sts per inch (2.5 cm), which is the same as the sc band. Because of this, the rim doesn’t flare or pull in.
Bottom rim, Rnd 38: Sl st loosely in each st around. Join. Fasten off. (48 sl sts: 24 per side when flattened)
Top rim: Attach yarn at the beginning tail. Sl st loosely into the free loop of each foundation ch. Join and fasten off. (48 sl sts: 24 per side when flattened)
Why the math works: The tube is 48 sts around. Laid flat, it has 2 sides of 24 sts each, with the fold points falling between stitches. Since there are no corners, nothing is added at the folds. At 4 sts per inch, 24 sts = 6 in (15.2 cm), which matches the flat width.
Hanging Loop
Row 1: Ch 37, then sc in the 2nd ch from the hook and in each ch across. (36 sc)
Row 2: Ch 1, turn, and sc in each st across. (36 sc) Fasten off and leave a 10 in (25.4 cm) tail.
The strap measures 9 in (22.9 cm). Lay the tube flat and mark the two fold stitches at the top: st 1 and st 25. Sew one end of the strap to the inside of Rnds 1–3 at each mark, overlapping it by 0.5 in (1.3 cm). When the holder hangs, the strap rises to a peak about 3 in (7.6 cm) above the rim.
Drawstring
Make a chain 30 in (76.2 cm) long, which is about 105 ch, and fasten off. Weave it in and out through the 24 ch-1 sps of Rnd 34, starting and ending at the front center. Tie an overhand knot at each end. Pull the drawstring until the bottom opening is about 1.5 in (3.8 cm) across, and tie it in a bow.
Final Blocking
- Untie the drawstring and pull it fully open.
- Soak the holder in cool water for 10 minutes, then press the water out gently. Don’t wring it.
- Slide the holder over a 2-liter bottle or a towel rolled to a 12 in (30.5 cm) circumference.
- Ease the length to 17 in (43.2 cm) and keep the rounds straight.
- Open each triangular window with your fingers, then pin the Fan tips if they curl.
- Lay the strap flat beside the holder.
- Let everything dry completely, then re-thread and tie the drawstring.
Final Quality-Control Checklist
- 48 sts in every solid round and in each Fan round
- 6 Fans per Fan round, staggered from one round to the next
- 6 V-sts and 12 ch-3 windows in each V round
- 10 Fan rounds in total
- 24 eyelets in Rnd 34
- Flat width 6 in (15.2 cm), length 17 in (43.2 cm)
- Strap ends sewn securely at opposite fold points
- Drawstring knotted at both ends, with the bow centered at the front
- All ends woven in on the inside
Troubleshooting
- The Fans stack instead of staggering: You worked a Fan into a sc instead of into a V-st space. Rip back to the V round and check where each Fan goes.
- The round count is off after Rnd 27: Count by repeats. Each repeat should give 8 sc. Most often a ch-3 sp got 1 sc instead of 2.
- The tube twists in a spiral: Make sure each join goes into the first st and not the beg chain, and check that the foundation ring wasn’t twisted.
- The lace looks too tall: Your dc may be loose. Try working the Fans with a tighter yarn-over, or go down a hook size.
- The bags fall out: Pull the drawstring tighter so the opening is about 1 in (2.5 cm) across.
- The strap stretches: Add a third row of sc, or line the strap with cotton tape.
Care
Machine wash on a cold, gentle cycle in a mesh bag, or hand wash. Reshape the holder while damp and dry it flat or over a bottle.
Final Notes
Here’s the measurement chain, from top to bottom. Gauge comes first: 16 sts = 4 in (10.2 cm), so 48 sts gives a 12 in (30.5 cm) circumference, or 6 in (15.2 cm) flat. The 6-round top band adds 1.5 in (3.8 cm). The 20 lace rounds add 12.5 in (31.8 cm). The bottom band adds 1.75 in (4.4 cm). The eyelet round adds 0.5 in (1.3 cm), and the cuff adds 0.75 in (1.9 cm). Altogether, that’s 17 in (43.2 cm).
If you check each of these along the way, your holder will hang straight, the Fans will stagger evenly, and bags will come out one at a time.
Happy crocheting!