

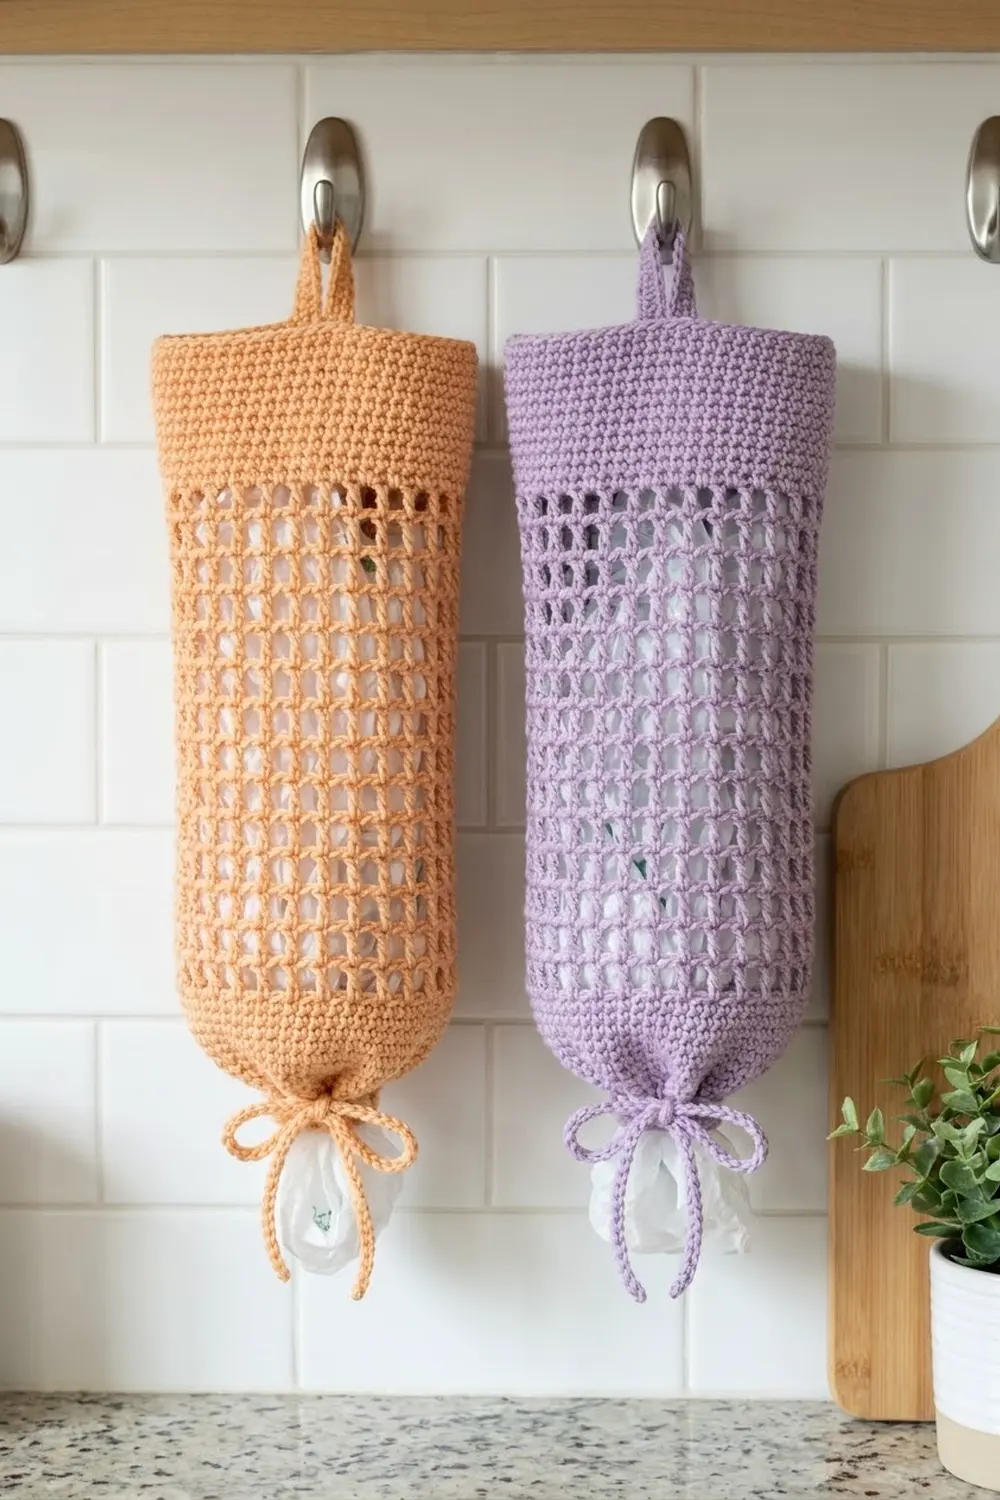
The Pantry Windowpane Bag Holder is a tall crochet tube that keeps loose plastic grocery bags tidy. It has firm single-crochet bands at the top and bottom and a crisp filet mesh body. The square windows let you see when the holder is getting full or nearly empty.
The sample holders are peach and soft lavender, and one color is used per holder. Smooth cotton gives clear stitch definition, stands up to kitchen use, and keeps its shape on a hook. The look is simple and modern, with a bit of a farmhouse feel.
This pattern uses US crochet terms. The finished holder is 15 in (38.1 cm) around and 16 in (40.6 cm) tall, not counting the strap. With the loop, it hangs about 23 in (58.4 cm) long.
The holder is worked bottom-up in joined rounds as one seamless piece. You start with a bottom band that includes an eyelet round, then work 21 rounds of filet mesh, then a solid top band. After that, you crochet a strap directly off the rim and make a chain drawstring. Stuff bags in at the top and pull them out through the gathered bottom.
Finished Size and Construction
- Finished size: 15 in (38.1 cm) circumference × 16 in (40.6 cm) tall
- Diameter (filled): about 4.8 in (12.2 cm)
- Hanging length with strap: about 23 in (58.4 cm)
- Skill level: Easy
- Terminology: US crochet terms
- Yarn weight: Worsted (#4) cotton
- Hook: 5.0 mm (H-8)
- Number of pieces: 1 tubular body with an attached strap, plus 1 drawstring cord
- Layout: Single tube worked in joined rounds, bottom to top
- Piece size: 60 stitches around
- Size before top band: 14 in (35.6 cm) tall after Round 30
- Top band depth: 2 in (5.1 cm), 9 rounds
Materials
Use a smooth, worsted-weight 100% cotton or cotton blend. Cotton holds its shape on a hook and doesn’t stretch much under the weight of the bags. Acrylic also works, but the mesh will droop more over time.
Yarn (per holder):
– Peach holder: Peach, 70 g / 110 m
– Lavender holder: Lavender, 70 g / 110 m
Each holder uses only one color. To make the pair shown, you need 70 g / 110 m of each color. These amounts include about a 25% safety margin over what the sample used.
Tools:
– 5.0 mm (H-8) crochet hook
– Locking stitch markers (at least 3)
– Tapestry needle
– Scissors
– Measuring tape
– Rust-proof pins and a rolled towel or a tall bottle for blocking
Abbreviations (US Terms)
- ch – chain
- sc – single crochet
- dc – double crochet
- sl st – slip stitch
- sk – skip
- st(s) – stitch(es)
- sp – space
- rnd(s) – round(s)
- beg – beginning
Special stitch – beginning mesh (beg ch-5): Ch 5 at the start of a mesh round. The first 3 chains count as a dc and the last 2 count as the first ch-2 space. Close each mesh round with a sl st into the 3rd chain of this beginning ch-5.
Gauge and Checkpoints
- Single-crochet gauge: 16 sc and 18 rnds = 4 in (10.2 cm)
- Mesh gauge: 1 mesh (1 dc + ch 2) = 0.75 in (1.9 cm) wide; 7 mesh rnds = 4 in (10.2 cm)
Use the bottom band as your test piece. Work Rounds 1–9, lay the band flat, and measure before you go any further. Because it’s worked in the round, it’s a true test of your gauge.
Checkpoints:
– After Rnd 9: The band is 2 in (5.1 cm) tall and 15 in (38.1 cm) around. Flat, it measures 7.5 in (19.1 cm) wide.
– After Rnd 16 (7 mesh rnds): The total height is 6 in (15.2 cm).
– After Rnd 30: The total height is 14 in (35.6 cm).
– After Rnd 39: The total height is 16 in (40.6 cm).
If your band is too big: Go down to a 4.5 mm hook and work Rounds 1–9 again.
If your band is too small: Go up to a 5.5 mm hook.
The stitch count stays at 60 either way. A difference of half an inch is fine for a bag holder, but anything more changes how the mesh sits.
Pattern
Bottom Band (Rounds 1–9)
Foundation: Ch 60. Sl st in the first ch to form a ring, taking care not to twist the chain.
Rnd 1: Ch 1. Sc in each ch around. Sl st in the first sc to join. (60 sc)
Rnd 2 (eyelet round): Ch 1. Sc in next 4 sts, ch 2, sk next 2 sts. Repeat from * 10 times total. Join with a sl st in the first sc. (40 sc + 10 ch-2 sps = 60 sts)
Rnd 3 (conversion round): Ch 1. Sc in each sc, and work 2 sc in each ch-2 sp. Join. (40 sc worked one per existing sc + 20 sc worked into the ch-2 sps = 60 sc)
The 10 eyelets are now firmly framed. They are 1.5 in (3.8 cm) apart, which gives an even gather.
Rnds 4–9: Ch 1. Sc in each st around. Join. (60 sc each rnd)
Place a marker in the joining stitch of Round 9. Stop here and check your gauge against the Rnd 9 checkpoint.
Mesh Body (Rounds 10–30)
Rnd 10 (set-up mesh round): Ch 5 (counts as dc + ch 2). Sk next 2 sts. Dc in next st, ch 2, sk next 2 sts. Repeat from * 19 times total. Sl st in the 3rd ch of the beg ch-5. (20 dc + 20 ch-2 sps = 60 sts; 20 mesh windows)
Check the math: the beginning ch-5 covers 3 stitches (1 for the dc position and 2 skipped). The 19 repeats cover 57 stitches. That adds up to 60.
Rnds 11–30: Ch 5 (counts as dc + ch 2). Dc in next dc, ch 2. Repeat from * 19 times total. Sl st in the 3rd ch of the beg ch-5. (20 dc + 20 ch-2 sps = 60 sts each rnd)
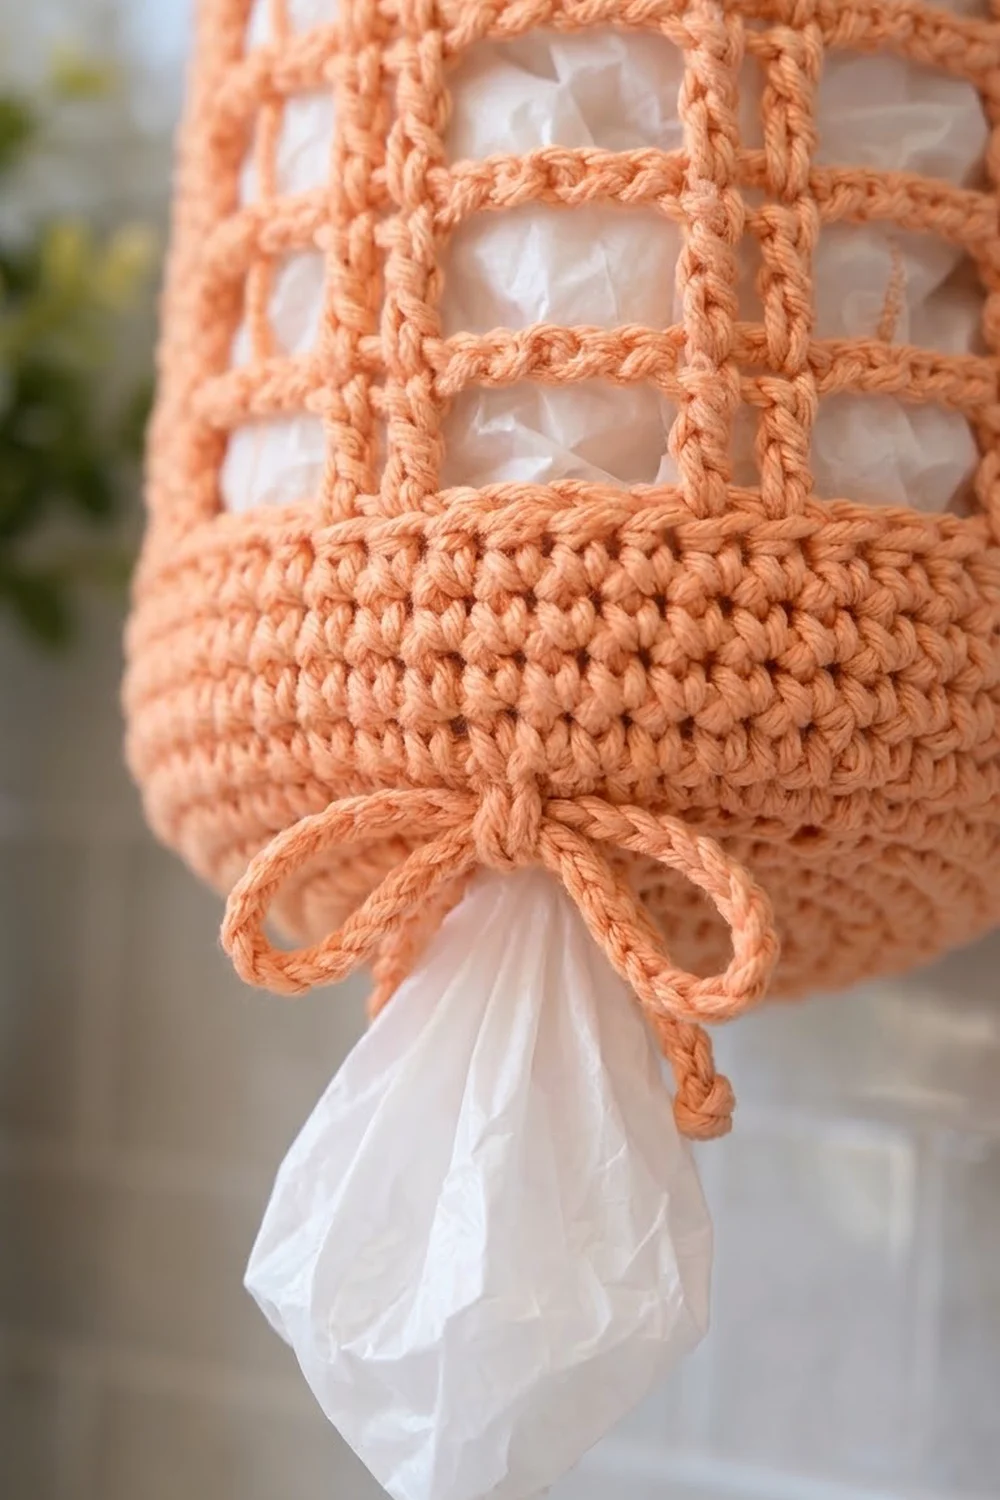
Always work each dc into the top of the dc below. This keeps the posts lined up in straight vertical columns and makes the square windows shown in the photo. The joins stack in one column, which you will turn to the back when you hang the holder.
Keep your ch-2 bars relaxed but not loose. Each one should lie flat across the top of its window.
Checkpoint: After Rnd 16, the piece measures 6 in (15.2 cm). After Rnd 30, it measures 14 in (35.6 cm). That’s 21 mesh rounds at 0.571 in each, for 12 in (30.5 cm) of mesh.
Border
On this one-piece tube, the “border” is the solid top band. It’s worked straight off the mesh and gives the strap something firm to anchor to.
Border gauge: 16 sc = 4 in (10.2 cm), the same as the bottom band. Both bands match the mesh width, so the tube stays straight instead of flaring or pulling in.
A tube has no corners, so the counts below are given per half. The two halves are the front and back, divided at the strap anchors.
Rnd 31 (conversion round): Ch 1. Sc in the same st as the join. Work 2 sc in the next ch-2 sp. Sc in next dc, 2 sc in next ch-2 sp. Repeat from * around. Join. (20 sc worked one per existing dc + 40 sc worked into the ch-2 sps = 60 sc; 30 sc per half)
Rnds 32–39: Ch 1. Sc in each st around. Join. (60 sc each rnd; 30 sc per half)
Do not fasten off.
Why the math works: Each mesh unit is 3 stitches wide (1 dc + ch 2), and 20 units × 3 = 60. Round 31 puts back exactly 3 sc per mesh unit (1 on the dc and 2 in the space), so the count returns to the 60 you started with. Sixty stitches at 4 per inch is 15 in (38.1 cm), matching the bottom band.
The top band is 9 rounds at 18 rounds per 4 in, which is 2 in (5.1 cm). That brings the total height to 2 + 12 + 2 = 16 in (40.6 cm).
Hanging Strap
The strap is worked in rows directly off the rim, starting at the join of Rnd 39 (stitch 1).
Row 1: Ch 1. Sc in the same st as the join and in the next 3 sts. Turn. (4 sc)
Rows 2–72: Ch 1. Sc in each sc across. Turn. (4 sc each row)
The strap measures 1 in (2.5 cm) wide and 16 in (40.6 cm) long.
Fasten off, leaving a 12 in (30.5 cm) tail.
Attach the strap: Count around Rnd 39 to stitches 31–34. These are directly opposite stitches 1–4, so the strap has exactly 30 stitches on each side between its anchors. Make sure the strap isn’t twisted. Then whipstitch the last row to the top of stitches 31–34 on the inside of the rim. Run the needle down through the first 2 band rounds to reinforce the join, then weave in the end.
The strap forms an arch that rises about 7 in (17.8 cm) above the rim.
Drawstring
Ch 90, about 24 in (61.0 cm). Sl st in the back bump of the 2nd ch from the hook and in each ch across (89 sl st). This makes a firm cord that won’t stretch. Fasten off and trim the tails to 0.5 in (1.3 cm), then knot each end.
Start at the front center. Weave the cord in and out through the 10 eyelets of Rnd 2 so both ends come out of neighboring eyelets at the front. Pull to gather the bottom to an opening of about 2 in (5.1 cm) across, then tie a bow.
Final Blocking
- Weave in all ends along the sc bands, where they will be hidden.
- Mist the holder lightly with water until it is damp but not soaked.
- Slide the holder over a tall bottle or a tightly rolled towel that is about 4.8 in (12.2 cm) across.
- Line the dc columns up so they run straight up and down, and nudge each window into a square about 0.75 in (1.9 cm) wide.
- Check the measurements while it’s still damp: 15 in (38.1 cm) around and 16 in (40.6 cm) tall.
- Lay the strap flat and pin it straight so it dries 1 in (2.5 cm) wide.
- Let everything dry completely before untying the drawstring blocker or hanging the holder.
Final Quality-Control Checklist
- Every round from Rnd 1 to Rnd 39 has 60 stitches.
- There are 10 evenly spaced eyelets in Rnd 2.
- Each mesh round has 20 windows, and all the columns stack vertically.
- There are 21 mesh rounds in total, making 12 in (30.5 cm) of mesh.
- The top and bottom bands are each 2 in (5.1 cm) deep.
- The strap is 4 sc wide and 72 rows long, and it isn’t twisted.
- The strap is anchored at stitches 1–4 and 31–34, exactly opposite each other.
- The drawstring gathers the base evenly and ties into a neat bow.
- The joining seam faces the wall.
Troubleshooting
- The tube flares above the bottom band: Your ch-2 bars are too loose. Tighten them slightly, or use 1 ch plus a tighter dc.
- The tube pinches in at the mesh: Your chains are too tight. Loosen up, or go up half a hook size for the mesh rounds only.
- The columns lean or spiral: You’re working the dc into a ch-sp instead of the dc below. Check that each dc goes under both top loops of the dc beneath it.
- The windows are rectangular instead of square: Your dc is too tall or too short for your chains. Adjust your yarn-over height, or block the windows firmly.
- The top band ruffles: You worked 3 sc in a ch-2 sp somewhere. Recount Rnd 31 to make sure it has 60 stitches.
- The bottom won’t close: The drawstring is too stiff or the eyelets are too small. Make sure each eyelet is a full ch-2 skip.
- The strap stretches over time: Add a row of sl st along both long edges, or work it with a 4.5 mm hook.
Care
Machine wash on cool in a mesh bag, or hand wash. Reshape it while damp and lay it flat to dry. Untie the drawstring before washing so the bow doesn’t tangle.
Final Notes
The whole design rests on one number: 60 stitches. At 16 sc per 4 in, 60 stitches gives a 15 in (38.1 cm) tube. Twenty mesh units of 3 stitches each keep that width unchanged.
The height builds in three parts:
– The bottom band adds 2 in (5.1 cm).
– The 21 mesh rounds add 12 in (30.5 cm), bringing the total to 14 in (35.6 cm).
– The top band adds 2 in (5.1 cm), for a finished height of 16 in (40.6 cm).
The 16 in (40.6 cm) strap rises about 7 in (17.8 cm), for a hanging length of roughly 23 in (58.4 cm). Check your gauge on the bottom band, count to 60 at every checkpoint, and the holder will come out right. Make one in each color for a matching pair.
Happy crocheting!