

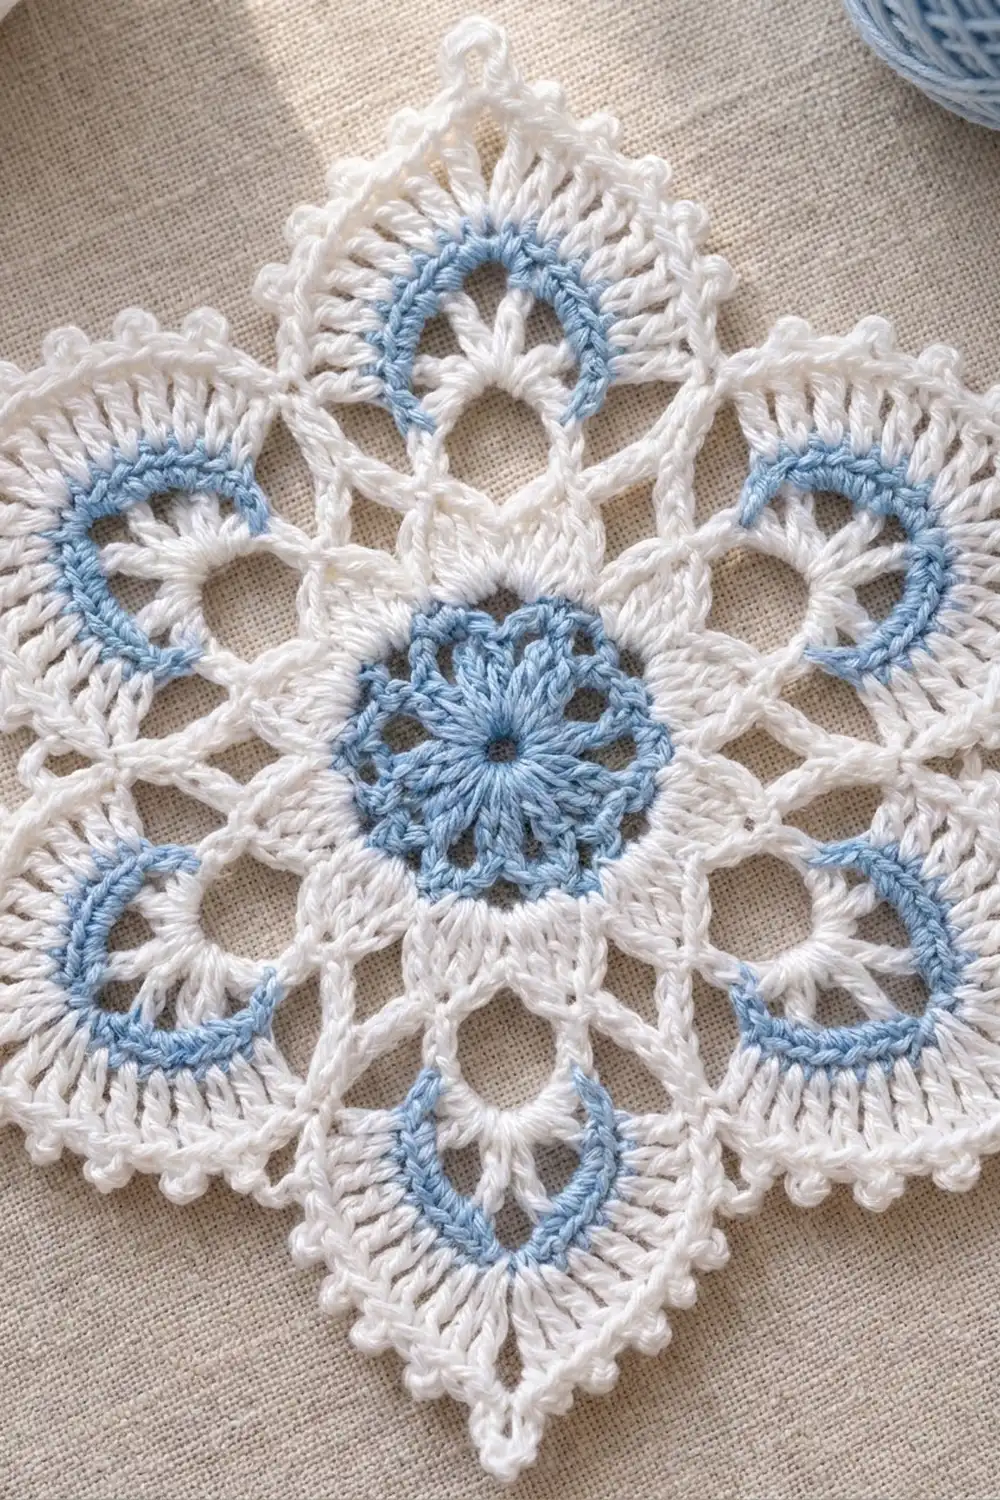
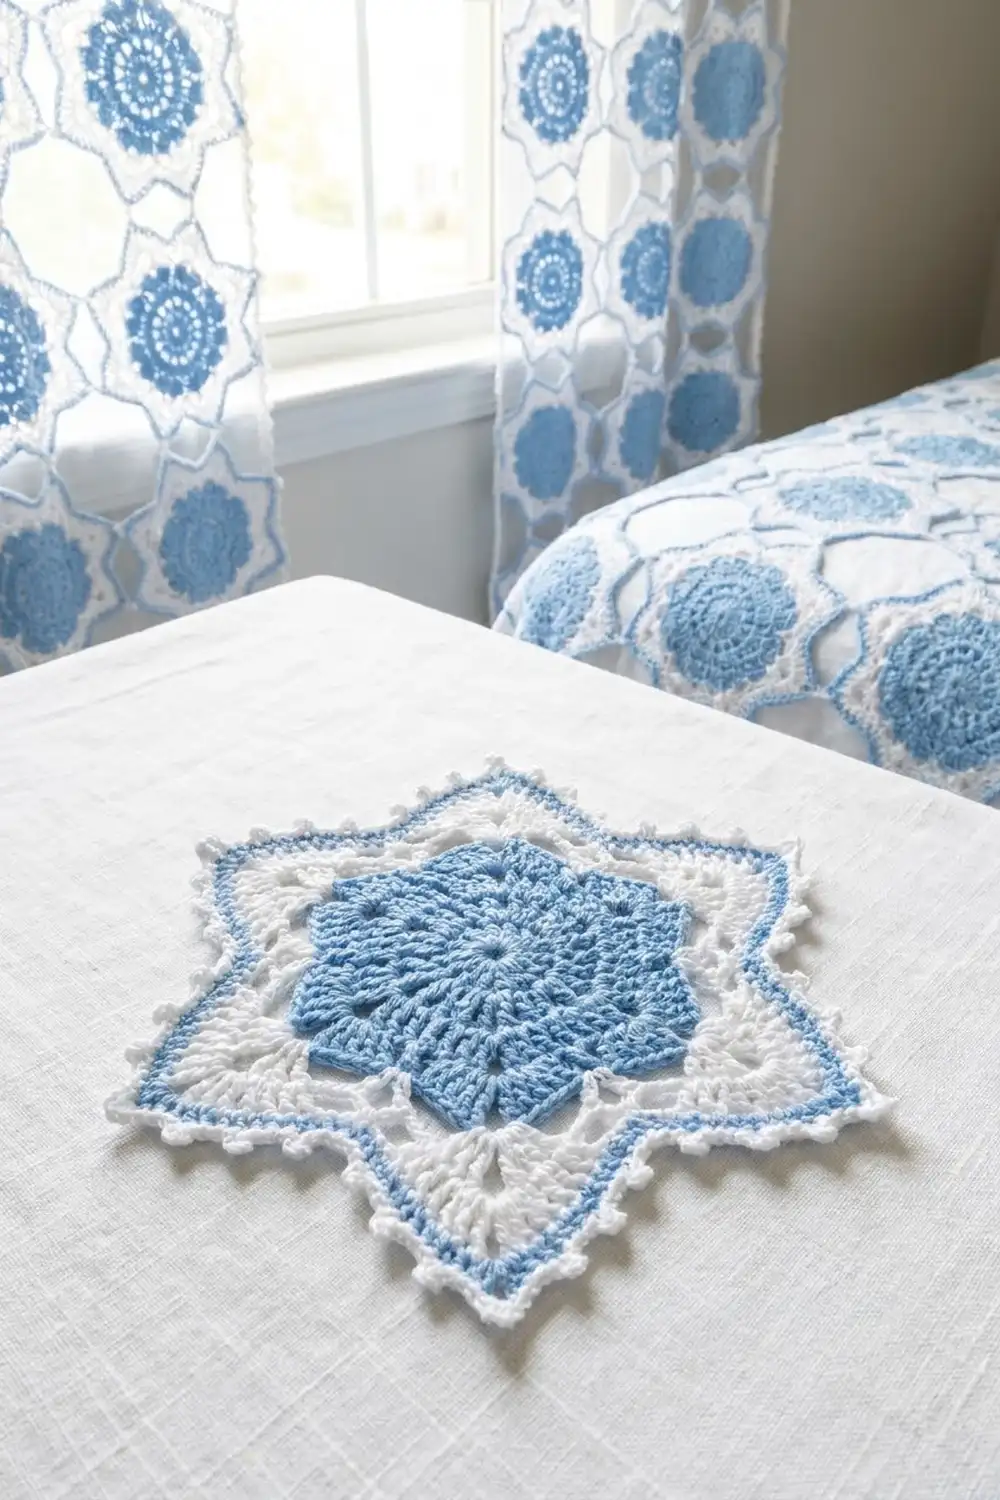
The Bluebell Frost Star is a single lace motif with six points. It has a soft blue center, six blue crescents, and crisp white points edged with tiny picots. It looks airy like a snowflake and has the calm colors of blue-and-white porcelain, so it works in spring and in winter.
You only need two colors: light powder blue and bright white. The blue goes in the dense center medallion and in a curved crescent inside each point. The white makes the open windows, the fanned points, and the picot edge.
This pattern uses US crochet terms. After blocking, the motif measures about 6.75 in (17.1 cm) from one tip to the opposite tip, and about 4.75 in (12.1 cm) from one valley to the opposite valley.
You work the whole piece in the round, from the center out. Three blue rounds make the medallion. One white round makes six large loops, and one blue round turns those loops into crescents. Two white rounds build a lacy frame and the pointed fans, and a last white round adds the picot border. It is one piece, so there’s no joining.
Finished Size and Construction
- Finished size: 6.75 in (17.1 cm) tip to tip; 4.75 in (12.1 cm) valley to valley
- Skill level: Easy intermediate
- Terminology: US crochet terms
- Yarn weight: Sport weight (#2) mercerized cotton
- Hook: 3.0 mm (US C/2 or D/3, depending on brand)
- Number of pieces: 1
- Layout: One six-pointed star, worked in the round
- Piece size: 6.75 in (17.1 cm) tip to tip
- Size before border: 6.25 in (15.9 cm) tip to tip, after Round 7
- Border depth: 0.25 in (0.6 cm) on each side, so the border adds 0.5 in (1.3 cm) tip to tip
Materials
Choose a smooth mercerized cotton in sport weight, about 50 g / 155 m (170 yd) per ball. Mercerized cotton gives clean stitch definition and a slight sheen, which help the crescents and picots stand out. Avoid fuzzy or very soft acrylic, because it blurs the lace.
- Color A (Powder Blue): 5 g, about 16 m (17 yd)
- Color B (White): 10 g, about 31 m (34 yd)
These amounts include a margin of about 30% for weaving in ends, re-working a round, and normal differences in tension.
Tools:
- 3.0 mm crochet hook
- Tapestry needle
- Small scissors
- Stitch marker
- Rustproof pins and a blocking mat or folded towel
- Spray bottle with water
- Ruler or tape measure
Abbreviations (US Terms)
- ch – chain
- sl st – slip stitch
- sc – single crochet
- hdc – half double crochet
- dc – double crochet
- st(s) – stitch(es)
- sp(s) – space(s)
- rep – repeat
- MR – magic ring
Special stitch – Picot: Ch 3, then sl st in the 3rd ch from the hook (the first ch you made). The picot sits on top of the stitch you just worked. It doesn’t count as a stitch.
Note: The beginning ch 3 counts as 1 dc throughout. The beginning ch 1 does not count as a stitch.
Gauge and Checkpoints
Gauge for this motif is measured on the center medallion: Rounds 1–3 = 2 in (5.1 cm) across. Work these three rounds first and measure before you go on. Since this is a single piece, your first try is your test piece. If the center is off, it’s quick to rip back and start again.
Measure at each checkpoint gently, without stretching:
- After Round 3: 2 in (5.1 cm) across
- After Round 4: 3.5 in (8.9 cm) across the loops
- After Round 5: 4.25 in (10.8 cm) across the crescents
- After Round 7: 6.25 in (15.9 cm) tip to tip
- After Round 8: 6.75 in (17.1 cm) tip to tip, after blocking
If your center is too big (over 2.25 in / 5.7 cm), go down one hook size. If it’s too small (under 1.75 in / 4.4 cm), go up one hook size. Lace rounds magnify any gauge difference, so a small error in the center turns into a big one at the tips.
Pattern
Center Medallion (Color A)
Round 1: With A, make a MR. Ch 3 (counts as dc), then work 11 dc in the ring. Pull the ring closed so only a small hole is left in the center. Sl st to the top of the beginning ch 3. (12 dc)
Round 2: Ch 3, dc in the same st as the join, then 2 dc in each st around. Sl st to the top of the beginning ch 3. (24 dc)
Round 3: Ch 3, 2 dc in next st, dc in next st, 2 dc in next st; rep from * around. Sl st to the top of the beginning ch 3. (36 dc)*
This round has 12 evenly spaced increases, which gives 6 sections of 6 sts each. That count of six is what sets up the six points. Fasten off A.
Checkpoint: the medallion should lie flat and measure 2 in (5.1 cm).
Petal Loops (Color B)
Round 4: Join B with a sl st in any st of Round 3. Ch 1, sc in the same st, ch 9, skip next 5 sts, sc in next st; rep from * 4 more times, ch 9, skip the last 5 sts, sl st to the first sc. (6 sc, 6 ch-9 loops)*
Check the math: each repeat uses 1 sc plus 5 skipped sts, so 6 sts × 6 repeats = 36 sts. Each loop arches over 5 skipped sts, which leaves an open window between the loop and the blue center. Keep the chains even and not too loose. Fasten off B.
Blue Crescents (Color A)
Round 5: Join A with a sl st in any ch-9 loop. Ch 1, then in the same loop work (sc, hdc, 9 dc, hdc, sc). In the next ch-9 loop work (sc, hdc, 9 dc, hdc, sc); rep from * around. Sl st to the first sc. (78 sts: 13 sts in each of 6 crescents)*
This is a conversion round. Instead of working into each chain, you work every stitch into the loop itself as a fan: 13 sts in each of the 6 loops, for 78 sts in total. The sc from Round 4 stay behind the work. The short sc and hdc at each end taper the fan, so it curves into a crescent around the open window below. Fasten off A.
To keep track, number the 13 sts of each crescent like this: st 1 = sc, st 2 = hdc, sts 3–11 = dc (st 7 is the center dc), st 12 = hdc, st 13 = sc.
Lacy Frame (Color B)
Round 6: Join B with a sl st in st 1 of any crescent. Ch 1, sc in st 1, ch 4, skip sts 2–4, sc in st 5, ch 5, skip sts 6–8, sc in st 9, ch 4, skip sts 10–12, sc in st 13; rep from * across each crescent. Sl st to the first sc. (24 sc and 18 ch-sps: 4 sc, 2 ch-4 sps, and 1 ch-5 sp per crescent)*
St 13 of one crescent sits right next to st 1 of the next crescent, so there’s no chain between crescents. The chains sit just above the blue dc, which forms a band of small white windows between the crescent and the point you’ll make next. Do not fasten off.
Pointed Fans (Color B)
Round 7: Ch 1. Sc in the first sc of the crescent, 5 dc in next ch-4 sp, (3 dc, ch 3, 3 dc) in next ch-5 sp, 5 dc in next ch-4 sp, skip the 2 center sc, sc in the last sc of the crescent; rep from * around. Sl st to the first sc. (108 sts and 6 ch-3 tips: 18 sts per point)*
Each point has 1 sc + 5 dc + 6 dc + 5 dc + 1 sc = 18 sts. The ch-3 in the middle makes a sharp tip. The sc at each end sits next to the sc of the neighboring point, which pulls in a clean valley.
Each side of a point, from valley to tip, has exactly 9 sts: 1 sc + 5 dc + 3 dc. Remember this number, because the border is built on it.
Checkpoint: the star should measure 6.25 in (15.9 cm) tip to tip. Do not fasten off.
Border
The border is one picot round in B. Border gauge is 1 sc in each st of Round 7, with a picot after every 3rd sc. In this yarn, the border adds 0.25 in (0.6 cm) to each edge.
Round 8: Ch 1. Work the following for each of the 6 points:
- Side 1 (valley to tip): Sc in next 3 sts, picot, sc in next 3 sts, picot, sc in next 3 sts. (9 sc, 2 picots)
- Tip: In the ch-3 sp, work (2 sc, picot, 2 sc). (4 sc, 1 picot)
- Side 2 (tip to valley): Sc in next 3 sts, picot, sc in next 3 sts, picot, sc in next 3 sts. (9 sc, 2 picots)
Repeat for all 6 points. Sl st to the first sc. Fasten off, leaving a 6 in (15.2 cm) tail.
Count per point: 9 + 4 + 9 = 22 sc and 5 picots. Round total: 132 sc and 30 picots.
Why the math works: Each side has 9 sts from Round 7, and 9 divides evenly by 3. That means the picots land in the same places on every side, so the edge looks symmetrical. Since you work one sc into each st, the border stays flat. At each valley, the sc sit side by side with no picot between them, which keeps the valleys sharp. The 4 sc in each ch-3 tip, with a picot in the middle, add to the point without making it cup.
Final Blocking
- Weave in all ends through stitches of the same color: blue tails into the blue rounds, white tails into the white rounds. Wait to trim until after blocking.
- Spray the motif lightly until it’s damp all the way through. Or soak it in cool water and roll it in a towel to remove the extra water.
- Lay it face up on a blocking mat. Gently ease the center flat first.
- Pin each of the 6 tips at the center picot. Space them evenly so opposite tips are 6.75 in (17.1 cm) apart.
- Pin each valley so opposite valleys are 4.75 in (12.1 cm) apart.
- Open each picot with the tip of a pin, and nudge each blue crescent into an even curve.
- Let the motif dry completely. Then remove the pins and trim the tails.
Final Quality-Control Checklist
- The center hole is small and neat, with no gap at the MR.
- The blue medallion is flat and measures 2 in (5.1 cm).
- All 6 open windows under the crescents are the same size.
- All 6 blue crescents have 9 dc and taper evenly at both ends.
- Each point has 18 sts in Round 7 and a clear ch-3 tip.
- Each side of each point has 2 picots, and each tip has 1 picot (30 in total).
- The valleys are sharp and all the same depth.
- The motif measures 6.75 in (17.1 cm) tip to tip and 4.75 in (12.1 cm) valley to valley.
- All ends are woven in and can’t be seen from the front.
Troubleshooting
The center cups or ruffles. Cupping means too few stitches or tension that’s too tight. Ruffling means tension that’s too loose. Recount Round 3 (36 dc) and change hook size if you need to.
The ch-9 loops look floppy. Your chains are looser than your stitches. Work the chains a little more firmly, or try ch 8 for each loop and keep everything else the same.
The crescents don’t curve. Check that each fan has an hdc and sc at both ends, and that all 13 sts are worked into the loop, not split across it.
Round 6 doesn’t line up. Recount the stitches in your crescents. The sc must land in sts 1, 5, 9, and 13 for the windows to come out even.
The points look rounded. Check the ch-3 tip in Round 7, and pin the tips firmly when you block.
The picot edge pulls in. Make each picot chain loosely, and check that you have 22 sc per point, not fewer.
The blue color change looks messy. Join each new color with a sl st in the back of the work, and weave tails through stitches of the matching color.
Care
Hand wash in cool water with mild soap, press the water out in a towel, and dry flat, pinning the tips again if needed. Don’t use bleach, because it can yellow white cotton and fade the blue.
Final Notes
The measurements build on each other step by step. A 2 in (5.1 cm) blue center leads to 3.5 in (8.9 cm) loops, then 4.25 in (10.8 cm) crescents, then a 6.25 in (15.9 cm) star before the border. The picot round brings the finished star to 6.75 in (17.1 cm). If your center matches gauge, every later round falls into place.
The stitch counts follow the same steady logic: 12, 24, and 36 in the center, then 6 loops, 78 crescent sts, a 24 sc frame, 108 fan sts, and 132 sc with 30 picots on the edge. Check each number as you go, and your star will come out crisp and even.
Happy crocheting!