

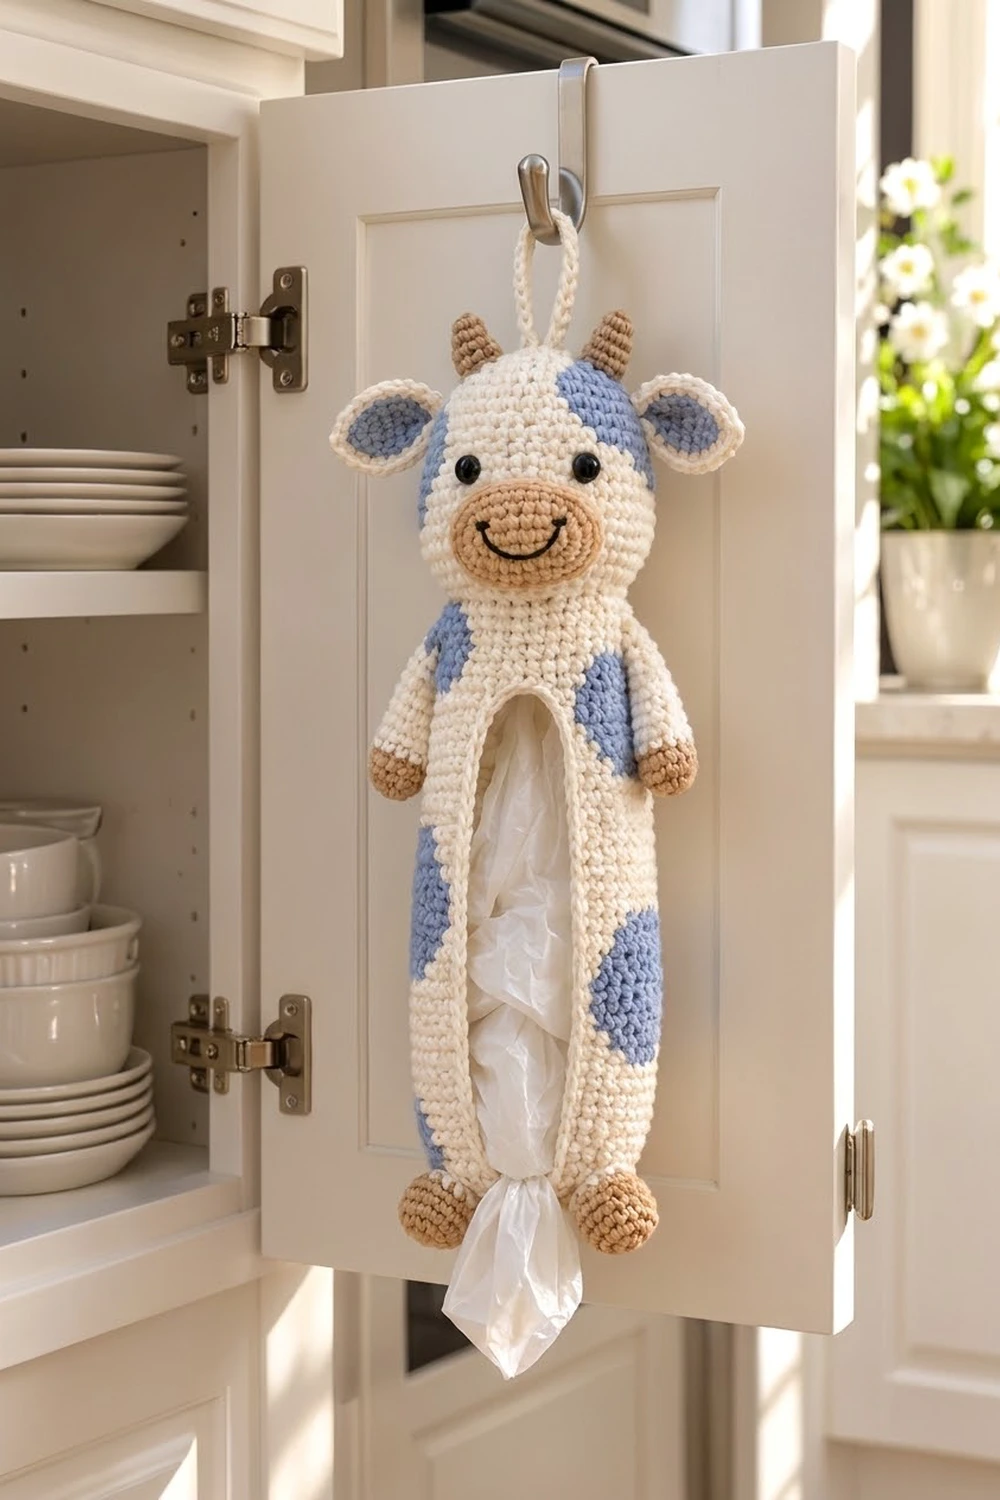
This cheerful cow keeps your plastic grocery bags tidy and in one place. Bags go in through a long oval window on the front and come out one at a time through a small hole between the cow’s feet. A cream hanging loop slips over a cabinet door or a hook.
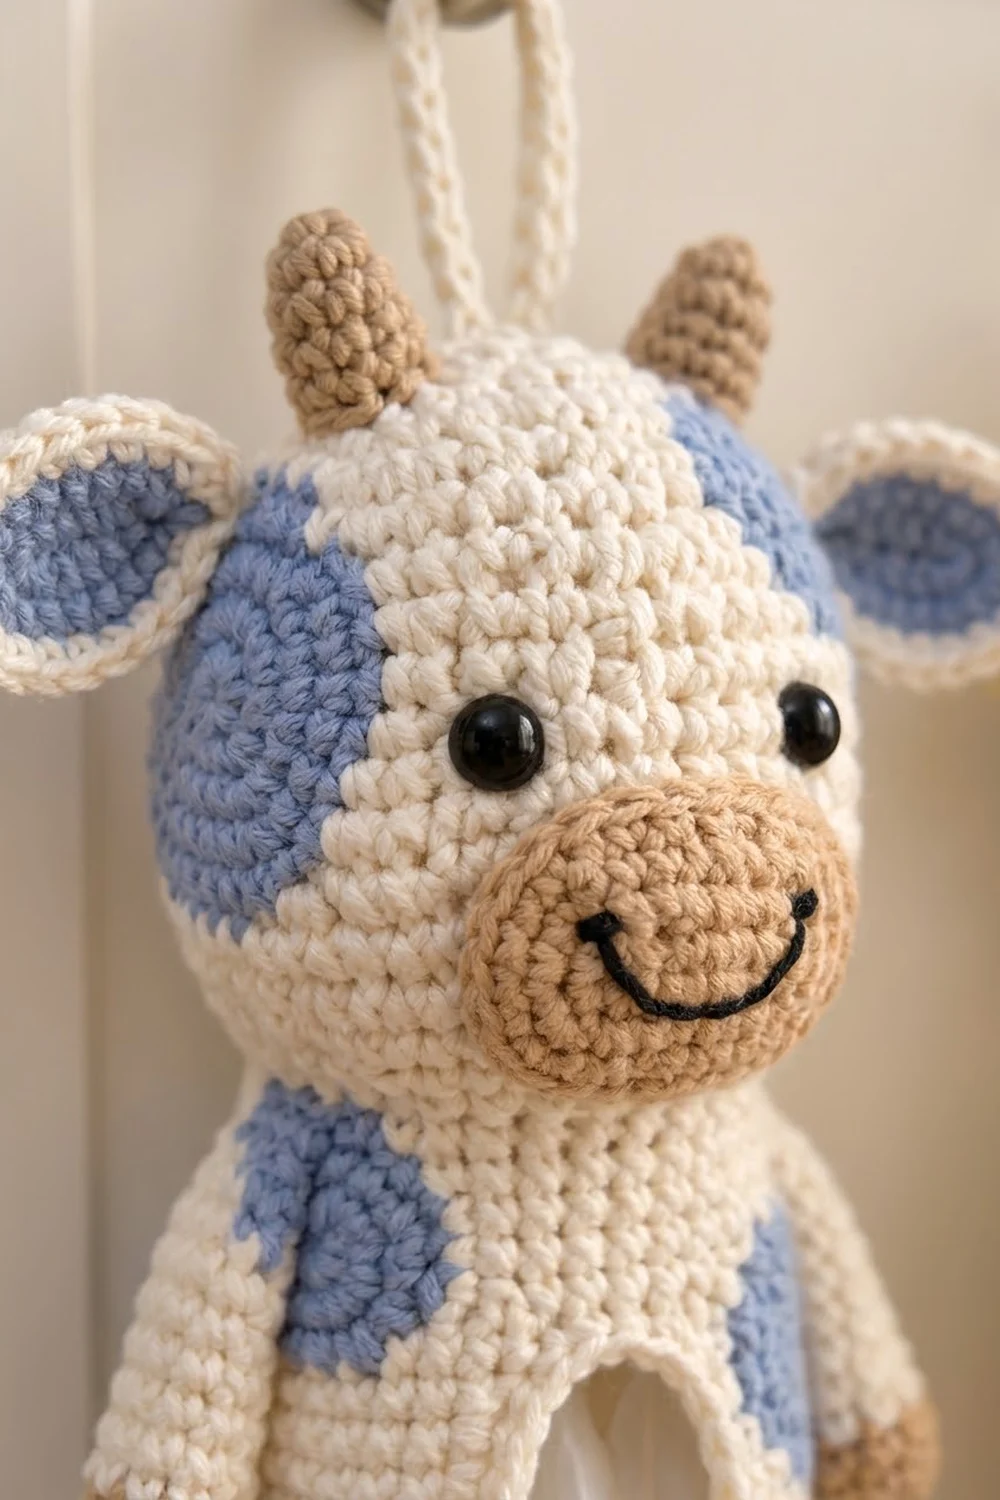
The color scheme is soft and fresh: a cream body, flat periwinkle-blue spots, and tan for the horns, muzzle, paws and feet. Safety eyes and a stitched black smile give the cow a friendly face. The style is classic amigurumi, worked mostly in single crochet so the fabric is firm and neat.
This pattern uses US crochet terms. The finished holder is about 3.6 in (9.1 cm) wide at the body and 14.5 in (36.8 cm) tall from the top of the head to the bottom of the feet, or 16.5 in (41.9 cm) including the loop.
Construction is simple. You work the body as a tube from the bottom up, switch to rows to leave the oval window, then close it back into rounds. Next you make the head and small parts, sew everything on, and finish the window with a two-round border.
Finished Size and Construction
- Finished size: 3.6 in (9.1 cm) wide × 14.5 in (36.8 cm) tall, or 16.5 in (41.9 cm) with the loop
- Skill level: Intermediate
- Terminology: US
- Yarn weight: Worsted (#4) cotton
- Hook: 3.75 mm (F-5)
- Number of pieces: 24 (1 body, 1 head, 1 muzzle, 2 ears, 2 horns, 2 arms, 2 legs, 1 loop, 12 spots)
- Layout: one vertical figure, with the head on top of the body tube and the legs below it
- Body size: 3.6 in (9.1 cm) flat width × 11 in (27.9 cm) wall height
- Window size before border: 8 in (20.3 cm) × 1.8 in (4.6 cm)
- Border depth: about 0.25 in (0.6 cm)
Materials
Choose a smooth cotton or cotton-blend worsted yarn of about 100 m per 50 g. Cotton holds its shape and does not stretch out with the weight of the bags.
- Cream: 80 g / 160 m
- Periwinkle blue: 20 g / 40 m
- Tan: 15 g / 30 m
- Black: about 2 m of yarn or embroidery floss for the smile
Tools:
– 3.75 mm (F-5) hook
– 8 mm black safety eyes (1 pair)
– Fiberfill stuffing (a small handful)
– Stitch markers
– Tapestry needle
– Sewing pins
– Scissors
The yarn amounts include about a 20% margin.
Abbreviations (US Terms)
- ch – chain
- sl st – slip stitch
- sc – single crochet
- hdc – half double crochet
- dc – double crochet
- inc – 2 sc in the same stitch
- sc2tog – single crochet 2 together (decrease)
- BLO – back loop only
- MR – magic ring
- st(s) – stitch(es)
- rnd(s) – round(s)
Special stitch – sc2tog: Insert the hook in the next st, yarn over and pull up a loop. Insert the hook in the following st, yarn over and pull up a loop. Yarn over and pull through all 3 loops on the hook.
Work all rounds in a continuous spiral unless the pattern says to join. Move your marker up each round.
Gauge and Checkpoints
Gauge: 18 sc and 20 rnds = 4 in (10.2 cm). That works out to 4.5 sts and 5 rnds per inch.
Make the body first and use it as your test piece:
- After Rnd 3: the flat base ring measures about 2.3 in (5.8 cm) across.
- After Rnd 13: the tube measures 3.6 in (9.1 cm) wide when flattened, and the wall is 2 in (5.1 cm) tall.
- After Row 40: the wall is 10 in (25.4 cm) tall.
- After Rnd T5: the wall is 11 in (27.9 cm) tall.
If your tube is wider than 3.6 in (9.1 cm), go down half a hook size. If it is narrower, go up half a size. Fix this before Rnd 13, because every later part is sized to match the body.
Body (Cream)
Base
Ch 16 and join with a sl st to form a ring, taking care not to twist the chain.
- Rnd 1: Ch 1, sc in each ch around. (16)
- Rnd 2: (sc, inc) 8 times. (24)
- Rnd 3: (2 sc, inc) 8 times. (32)
Lower wall
- Rnd 4: In BLO, sc in each st around. (32) This makes a crisp fold where the base turns up into the wall.
- Rnds 5–13: Sc in each st around. (32)
Flatten the tube so your marker sits at the center of one face. That face is now the front.
Window section (worked in rows)
The ch 1 at the start of each row does not count as a stitch.
- Row 1: Ch 1. Skip the next 2 sts, sc in the next 28 sts, and leave the last 2 sts unworked. Turn. (28) This leaves a 4-st gap centered on the front.
- Row 2: Ch 1, sc in each st across. Turn. (28)
- Row 3: Ch 1, sc2tog, sc in the next 24 sts, sc2tog. Turn. (26)
- Row 4: Ch 1, sc across. Turn. (26)
- Row 5: Ch 1, sc2tog, sc in the next 22 sts, sc2tog. Turn. (24)
- Rows 6–36: Ch 1, sc across. Turn. (24 in each of these 31 rows)
- Row 37: Ch 1, inc, sc in the next 22 sts, inc. Turn. (26)
- Row 38: Ch 1, sc across. Turn. (26)
- Row 39: Ch 1, inc, sc in the next 24 sts, inc. Turn. (28)
- Row 40: Ch 1, sc across. Do not turn. (28)
The gap is 4 sts wide at the ends, 6 sts on the stepped rows and 8 sts through the middle. That taper gives the window its rounded oval ends.
Top wall
At the end of Row 40, ch 4 and sl st to the first sc of Row 40 to close the ring.
- Rnd T1 (conversion round): Ch 1, sc in the 28 sts, then sc in each of the 4 ch. 28 + 4 = 32 sts.
- Rnds T2–T5: Sc in each st around. (32)
Fasten off, leaving a 24 in (61.0 cm) tail for sewing on the head. Do not stuff the body.
Head (Cream)
- Rnd 1: 6 sc in a MR. (6)
- Rnd 2: Inc in each st around. (12)
- Rnd 3: (sc, inc) 6 times. (18)
- Rnd 4: (2 sc, inc) 6 times. (24)
- Rnd 5: (3 sc, inc) 6 times. (30)
- Rnd 6: (4 sc, inc) 6 times. (36)
- Rnd 7: (5 sc, inc) 6 times. (42)
- Rnd 8: (6 sc, inc) 6 times. (48)
Checkpoint: the flat circle measures about 3.2 in (8.1 cm) across.
- Rnds 9–16: Sc in each st around. (48)
Insert the safety eyes between Rnds 10 and 11, with 8 sts between them.
- Rnd 17: (6 sc, sc2tog) 6 times. (42)
- Rnd 18: (5 sc, sc2tog) 6 times. (36)
- Rnd 19: (4 sc, sc2tog) 6 times. (30) Mark this round with a strand of scrap yarn; you will sew the body here.
- Rnd 20: (3 sc, sc2tog) 6 times. (24)
Stuff the head firmly.
- Rnd 21: (2 sc, sc2tog) 6 times. (18)
- Rnd 22: (sc, sc2tog) 6 times. (12)
- Rnd 23: Sc2tog 6 times. (6)
Fasten off and close the hole. The finished head is about 3.4 in (8.6 cm) wide and 3 in (7.6 cm) tall.
Muzzle (Tan)
Ch 7.
- Rnd 1: Sc in the 2nd ch from the hook, sc in the next 4 ch, 3 sc in the last ch. Working along the other side of the chain, sc in the next 4 ch, then 2 sc in the same ch as the first sc. (14)
- Rnd 2: Inc, sc in the next 4 sts, inc in each of the next 3 sts, sc in the next 4 sts, inc in each of the last 2 sts. (20)
- Rnd 3: Sc in each st around. (20) This even round makes the edge cup into a shallow dome.
Sl st to join and fasten off with a long tail. The muzzle is about 2.2 in (5.6 cm) × 1.2 in (3.0 cm). Embroider a curved black smile across the center.
Ears (Make 2)
With blue, ch 7.
- Rnd 1: Sc in the 2nd ch from the hook, hdc in the next ch, dc in the next 2 ch, hdc in the next ch, 3 sc in the last ch. Working along the other side, hdc in the next ch, dc in the next 2 ch, hdc in the next ch, sc in the same ch as the first sc. Sl st to the first sc. (13)
- Rnd 2: Change to cream. Ch 1, sc in the next 6 sts, 3 sc in the center st of the tip, sc in the last 6 sts. Sl st to join. (15)
Fasten off with a tail. Each ear is a leaf shape about 1.7 in (4.3 cm) long.
Horns (Tan, Make 2)
- Rnd 1: 4 sc in a MR. (4)
- Rnd 2: (sc, inc) 2 times. (6)
- Rnds 3–4: Sc in each st around. (6)
Stuff lightly. Each horn is 0.8 in (2.0 cm) tall.
Arms (Make 2)
- Rnd 1: With tan, 6 sc in a MR. (6)
- Rnd 2: (sc, inc) 3 times. (9)
- Rnd 3: Sc in each st around. (9)
- Rnds 4–10: Change to cream. Sc in each st around. (9)
Stuff the paw only. Flatten the opening and whipstitch it closed. Each arm is 2 in (5.1 cm) long.
Legs (Make 2)
- Rnd 1: With tan, 6 sc in a MR. (6)
- Rnd 2: Inc in each st around. (12)
- Rnd 3: In BLO, sc in each st around. (12) This forms the sole edge.
- Rnd 4: Sc in each st around. (12)
- Rnd 5: Change to cream. (2 sc, sc2tog) 3 times. (9)
- Rnds 6–7: Sc in each st around. (9)
Stuff, flatten the opening and close it. Each leg is 1.4 in (3.6 cm) long.
Hanging Loop (Cream)
Ch 21. Sc in the 2nd ch from the hook and in each ch across. (20) The strip is about 4.4 in (11.2 cm) long.
Spots (Blue)
Large spot (make 10). Ch 5.
– Rnd 1: Sc in the 2nd ch from the hook, sc in the next 2 ch, 3 sc in the last ch. On the other side, sc in the next 2 ch, then 2 sc in the first ch. (10)
– Rnd 2: Inc, sc in the next 2 sts, inc in each of the next 3 sts, sc in the next 2 sts, inc in each of the last 2 sts. (16)
Each large spot is about 1.7 in (4.3 cm) × 0.9 in (2.3 cm).
Small spot (make 2). Work Rnd 1 only. (10) Each small spot is about 1.3 in (3.3 cm) × 0.5 in (1.3 cm).
Make All Pieces
- Cream: 1 body, 1 head, 1 loop, plus Rnd 2 of each ear, Rnds 4–10 of each arm and Rnds 5–7 of each leg
- Blue: 10 large spots, 2 small spots and the centers of 2 ears
- Tan: 1 muzzle, 2 horns, plus the paw rounds of the arms and the foot rounds of the legs
Assembly layout:
            [ loop ]
   [ear] [horn] [horn] [ear]
           [  head  ]
           [ muzzle ]
  [arm]   [body top]   [arm]
          [ window  ]
          [body base]
       [leg] (hole) [leg]
Joining (Assembly)
Method: Whipstitch with matching yarn and a tapestry needle. Pin every part in place before you sew.
- Head to body. Push the body’s top edge up against the head along the marked Rnd 19. Sew one body stitch to each head stitch. The body has 32 sts and Rnd 19 has 30, so ease in 1 extra body stitch on each side. The head overlaps the body by about 0.5 in (1.3 cm).
- Muzzle. Sew it over Rnds 12–17 of the head, just below the eyes, stuffing it lightly as you go.
- Horns and ears. Sew the horns between Rnds 4 and 5 of the head, 6 sts apart. Pinch the base of each ear and sew it in Rnd 7, just outside a horn.
- Arms. Sew them to the sides of the body, 1 in (2.5 cm) below the head.
- Legs. Sew them to the front of the base on either side of the hole, so the feet hang about 1 in (2.5 cm) below the body.
- Spots. Lay each spot flat and sew around its edge. Place 4 large spots on the front of the body and 4 on the back, 2 on the head (one around an eye and one on the crown), and 1 small spot on each arm.
- Loop. Fold the strip in half and sew both ends to the center top of the head.
Tension: Make small stitches and keep them snug but not tight. If you pull too hard, the tube puckers.
Size check: The assembled holder should be 14.5 in (36.8 cm) tall without the loop.
Border
Border gauge: The sides of the window are made of row ends, at 5 rows per inch. The border stitches lie at 4.5 sts per inch. Working 9 sc for every 10 row ends keeps the edge flat.
Window border (cream, worked with the front facing you). Join the yarn at the bottom of the window.
- Rnd 1:
- Bottom: sc in each of the 4 unworked sts of Rnd 13. (4)
- Side: work up the 40 row ends, putting 1 sc in each row end but skipping every 10th one. (36)
- Top: sc in the underside of each of the 4 ch. (4)
- Other side: work down the 40 row ends the same way. (36)
- Sl st to join. Total: 4 + 36 + 4 + 36 = 80 sts.
- Rnd 2: Sl st in each st around. (80)
Why the math works: 36 sts ÷ 4.5 sts per inch = 8 in, and 40 rows ÷ 5 rows per inch = 8 in. The side border is exactly as long as the window, so it neither ruffles nor pulls tight.
Bottom-hole edging: Sl st in each of the 16 loops on the underside of the foundation chain. (16)
Final Blocking
- Lightly mist the body with water. Do not get the stuffed parts wet.
- Lay the holder flat, with the window centered on the front.
- Pin the window into a smooth oval 8 in (20.3 cm) tall.
- Check that the body is 3.6 in (9.1 cm) wide all the way down.
- Let it dry completely before hanging it.
Final Quality-Control Checklist
- The body measures 3.6 in (9.1 cm) × 11 in (27.9 cm).
- The window has rounded ends and lies flat, with 80 border sts.
- The head is centered on the body, with the eyes level.
- The ears, horns, arms and legs are placed evenly on both sides.
- All spots lie flat and every yarn end is hidden.
- The bottom hole is clear, so bags pull out easily.
Troubleshooting
- The body twists: Your spiral is drifting. Flatten the tube and check that the marker stays at center front.
- The window is too wide: Check the counts for Rows 5–36; there should be exactly 24 sts in each row.
- The window border ruffles: You skipped too few row ends. Count 36 sts per side.
- The window border pulls tight: You skipped too many row ends, or your hook is too small for the border. Redo the border.
- Stuffing shows through: Go down a hook size for the head.
- Bags fall out of the bottom: Add a second round of sl sts around the hole.
Care
Hand wash in cool water, press out the water in a towel, and lay flat to dry. Don’t wring it, so the stuffed parts and the window keep their shape.
Final Notes
The measurements build on each other. A gauge of 18 sc per 4 in (10.2 cm) gives a 32-st body that is 3.6 in (9.1 cm) wide. The 40 window rows make an 8 in (20.3 cm) window, and the 55 wall rounds make an 11 in (27.9 cm) body. With the head and feet added, the holder is 14.5 in (36.8 cm) tall. For a matching pair, swap the cream for buttercup yellow and make a second cow.
Happy crocheting!