

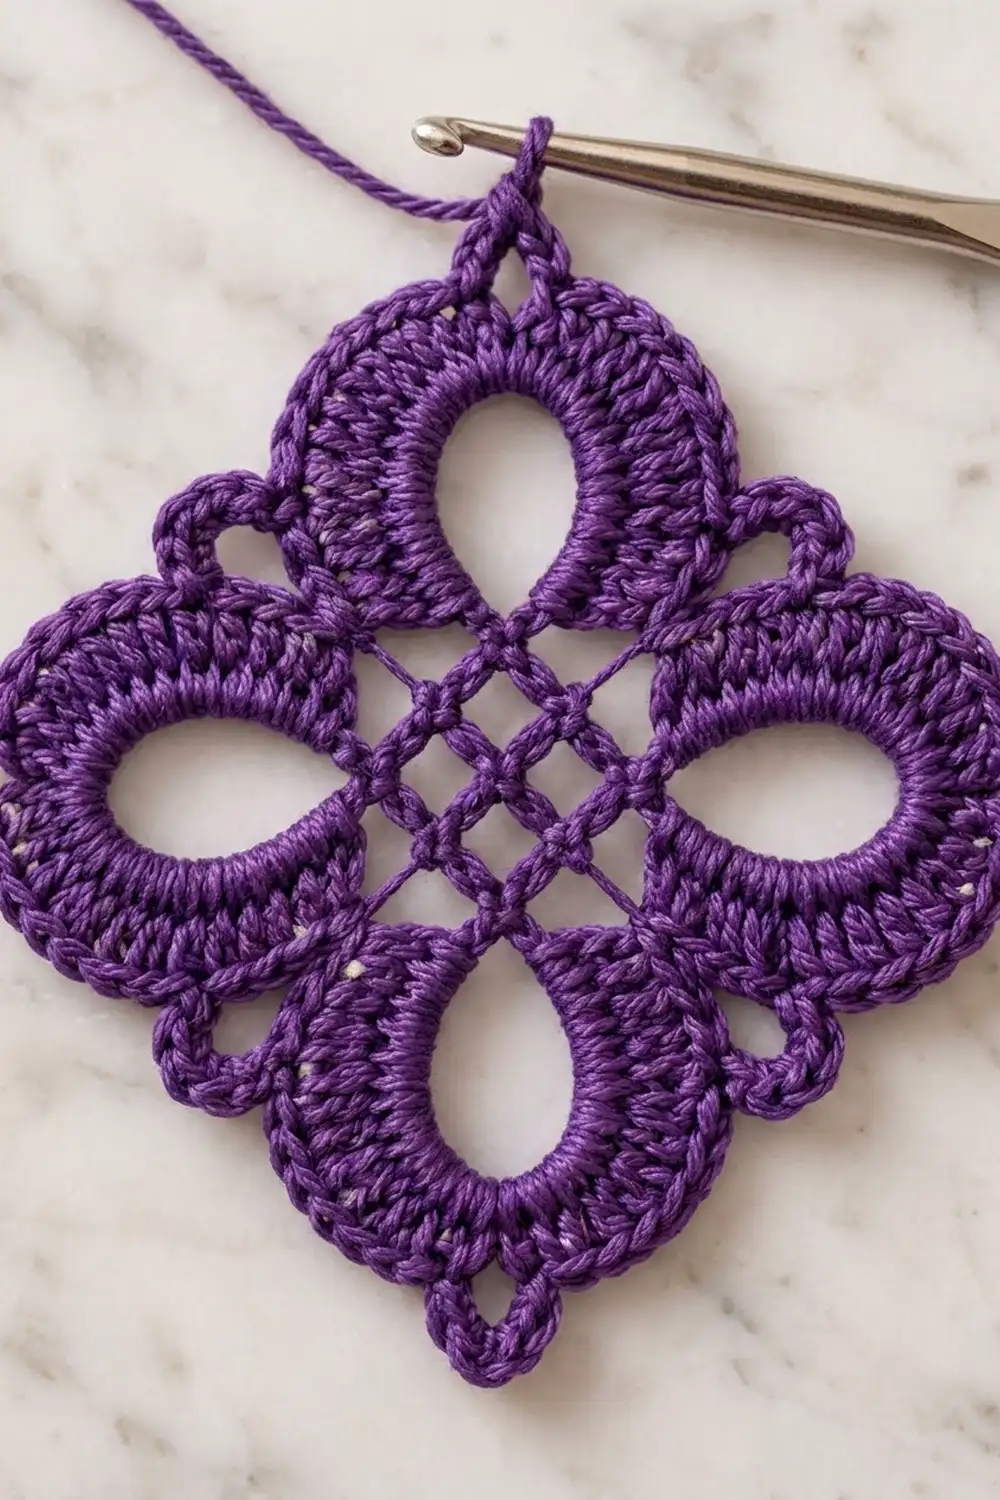
The Violet Lattice Petal Motif is a small lace diamond with a lot going on. A woven-looking lattice sits at the center. Four plump teardrop petals open outward from it, each framing an oval window, and tiny chain rings in the valleys finish the scalloped outline.
The sample is worked in one color, a deep violet purple cotton. A single color shows off the texture best, because light catches the dense petal bands and passes through the open lattice and petal holes. The style is inspired by classic Irish lace, but the motif works up quickly in DK-weight cotton.
This pattern uses US crochet terms. The finished motif measures 5.5 in (14.0 cm) from petal tip to petal tip after blocking. It is worked in the round as one piece, so there are no seams.
Here is the construction in short. You start with a chain-space center (Rounds 1–2), then chain four long loops that become the petal frames (Round 3). You cover the loops with dense hdc and dc (Round 4) and shape them with an sc round (Round 5). A final picot border (Round 6) adds the tip picots and valley rings.
Finished Size and Construction
- Finished size: 5.5 in (14.0 cm) tip to tip, measured across opposite petals
- Skill level: Intermediate
- Terminology: US crochet terms
- Yarn weight: DK / light worsted (weight 3) cotton
- Hook: 3.5 mm (E-4)
- Number of pieces: 1
- Layout: single motif, displayed on point as a diamond
- Piece size: 5.5 in (14.0 cm)
- Size before border: 5 in (12.7 cm) after Round 5
- Border depth: 0.25 in (0.6 cm) on each side
Materials
Yarn advice: Choose a smooth, tightly plied mercerized cotton or cotton blend in DK weight. Mercerized cotton gives the crisp stitch definition and slight sheen you see in the sample, and it holds the open lattice flat after blocking. Avoid fuzzy or very splitty yarns, because they blur the petal windows.
- Deep violet purple (main and only color): 15 g, about 33 m (36 yd)
This amount includes a margin of roughly 30% over what one motif actually uses. That leaves enough for a gauge swatch, one round you might need to pull out, and long tails to weave in.
Tools:
– 3.5 mm (E-4) crochet hook
– Tapestry needle
– Scissors
– Locking stitch markers (at least 4)
– Blocking mat and rustproof pins
– Spray bottle with clean water
– Ruler or tape measure
Abbreviations (US Terms)
- ch – chain
- sl st – slip stitch
- sc – single crochet
- hdc – half double crochet
- dc – double crochet
- sc2tog – single crochet 2 together
- sk – skip
- sp(s) – space(s)
- st(s) – stitch(es)
- rep – repeat
Special stitches:
- Tip picot: Ch 3, sl st in 3rd ch from hook.
- Ring picot: Sc in the indicated st, ch 6, then sl st into the front loop and left leg of the sc you just made. This closes the chain into a small round ring that stands out from the edge.
Gauge and Checkpoints
Gauge: 20 sc and 22 rows = 4 in (10.2 cm) in sc rows with a 3.5 mm hook.
Lace motifs are hard to judge from a flat swatch alone, so test one full motif first. Use these checkpoints and measure the motif relaxed but not yet blocked:
- After Round 1: 1.25 in (3.2 cm) across
- After Round 2: 1.75 in (4.4 cm) across
- After Round 4: 4.5 in (11.4 cm) tip to tip across opposite petals
- After Round 5: 5 in (12.7 cm) tip to tip
- After Round 6 and blocking: 5.5 in (14.0 cm) tip to tip
If your motif is too big: Go down to a 3.25 mm (D-3) hook, or chain the long ch-12 loops in Round 3 more firmly.
If your motif is too small: Go up to a 3.75 mm (F-5) hook. If only the center is tight, work the magic ring and the chains in Rounds 1–2 more loosely.
A difference of up to 0.25 in (0.6 cm) at the Round 5 checkpoint will usually block out.
Pattern
Before You Begin
Each round starts in a specific place, so read the full round before you begin it. The motif has four identical repeats, and each repeat is one petal plus one valley. Counting each repeat separately is the easiest way to keep the petals symmetrical. Keep a steady, medium tension throughout. Tight chains shrink the lattice, and loose chains make the petals floppy. Leave a 6 in (15.2 cm) starting tail for weaving in later.
Round 1 (center ring)
Make a magic ring.
Ch 5 (counts as dc + ch 2). *Dc in ring, ch 2; rep from * 6 more times. Join with sl st in 3rd ch of beginning ch-5. Pull the ring fully closed so there is no hole in the middle.
Count: 8 dc, 8 ch-2 sps.
Round 2 (lattice mesh)
Sl st into first ch-2 sp. Ch 1, sc in same sp. *Ch 3, sc in next ch-2 sp; rep from * 6 more times. Ch 3, join with sl st in first sc.
Count: 8 sc, 8 ch-3 sps.
The sc sit in the Round 1 spaces, and the chains cross over the dc posts. That crossing gives the center its woven, grid-like look. Keep the ch-3s even so the grid stays square.
Round 3 (petal frames)
Sl st into first ch-3 sp. Ch 1, sc in same sp.
*Ch 12, sc in next ch-3 sp (one petal frame made), ch 5, sc in next ch-3 sp; rep from * 3 more times, leaving out the final sc on the last repeat. Join with sl st in first sc.
Count: 8 sc, 4 ch-12 loops, 4 ch-5 sps.
Each ch-12 loop spans two neighboring spaces, making a long loop that will become the oval window of one petal. The ch-5 spaces sit on the diagonals between the petals and will become the valleys. Place a marker in each ch-12 loop so you don’t confuse them with the shorter spaces.
Round 4 (petal bands, growth round)
Sl st into first ch-12 loop. Ch 2 (does not count as a st).
*Work [2 hdc, 20 dc, 2 hdc] in the ch-12 loop, sk next sc, 5 sc in next ch-5 sp, sk next sc; rep from * 3 more times. Join with sl st in first hdc.
Count: 116 sts. Each petal has 24 sts and each valley has 5 sc, so each repeat has 29 sts × 4.
Pack the stitches tightly over each loop. Fitting 24 stitches onto a 12-chain loop forces the loop to arch into a rounded teardrop with an open oval center. This dense band is the thick, ridged petal you see in the photo.
Checkpoint: 4.5 in (11.4 cm) tip to tip.
Round 5 (petal shaping, growth round)
Ch 1. *Sc in next 4 sts, 2 sc in each of next 16 sts, sc in next 4 sts (petal done), sc2tog, sc in next st, sc2tog (valley done); rep from * 3 more times. Join with sl st in first sc.
Count: 172 sc. Each petal has 40 sc (4 + 32 + 4), and each valley has 3 sts made from the 5 Round 4 sts, so each repeat has 43 sts × 4.
The increases sit only over the center 16 dc of each petal, which rounds the petal top. The decreases pull the valleys in sharply to create the four-lobed outline.
Checkpoint (size before border): 5 in (12.7 cm) tip to tip.
Border
The border is Round 6, a single sc round with picots. It adds 0.25 in (0.6 cm) on each side.
Border gauge: about 5 sc per inch (2.5 cm) along the outer edge. That matches the 20 sc = 4 in (10.2 cm) gauge, so the edge lies flat without ruffling or cupping.
In this motif, each “side” is one petal plus the valley that follows it. There are 4 sides of 43 sts each, and the border keeps that count exactly.
Round 6 (picot edge, trim round)
Ch 1. *Sc in next 20 sts, tip picot, sc in next 20 sts (petal edge done), sc in next st, ring picot in next st, sc in next st (valley done); rep from * 3 more times. Join with sl st in first sc. Fasten off, leaving a 6 in (15.2 cm) tail.
Count: 172 sc worked 1 per existing stitch + 8 picots added (4 tip picots + 4 ring picots).
Per side: 40 petal sc + 3 valley sc = 43 sc, plus 1 tip picot and 1 ring picot.
Work the ring picot chains at the same tension as your other chains. A tight ring disappears into the valley, and a loose one droops.
Why the math works: Round 5 has 43 sts per side, and Round 6 works exactly 1 sc into each of them. The petal is split 20 + 20, so the tip picot lands at the exact center of the petal. The ring picot is worked into the middle of the 3 valley sts, so it lands exactly on the diagonal. Picots are made of chains and don’t use any base stitches, so no stitches are added or lost. Because the count doesn’t change, the edge stays the same length as Round 5, and the picots add depth without adding ruffles.
Final Blocking
- Weave in all ends securely through the backs of the dense petal stitches, not through the lattice, where tails would show.
- Soak the motif in cool water for 10 minutes. Gently press out the water in a towel without wringing.
- Lay it face up on the blocking mat, on point as a diamond.
- Pin the four petal tips first, through the tip picots, so it measures 5.5 in (14.0 cm) across opposite petals in both directions.
- Pin each ring picot open with one pin through its center so the ring stays round.
- Ease each petal into a smooth teardrop curve. Place a pin inside each oval window to open it evenly.
- Square up the center lattice by nudging the ch-3 spaces into an even grid.
- Mist lightly with water and let it dry completely, at least 12 hours, before unpinning.
Final Quality-Control Checklist
- Motif measures 5.5 in (14.0 cm) tip to tip in both directions
- Round 6 has 172 sc, 4 tip picots and 4 ring picots
- Every petal has an open, centered oval window
- All four petals are the same size and shape
- Tip picots sit at the exact center of each petal
- Ring picots sit exactly on the diagonals, in the valleys
- The center lattice is open and even, with no twisted chains
- The edge lies flat, with no cupping or ruffling
- All ends are woven in invisibly and trimmed
Troubleshooting
Petals look flat instead of rounded: You probably have fewer than 24 sts in the ch-12 loop, or your chains are too loose. Recount, and chain the loop more firmly.
Oval windows close up: Your Round 4 stitches are too tight. Go up one hook size for Round 4 only.
Motif cups into a bowl: Your Round 5 increases are too tight. Check that you worked exactly 16 pairs of sc per petal, or loosen your tension.
Edge ruffles: You may have added extra sc in Round 6. Recount to 43 per side.
Ring picots twist or fold: Sl st into the front loop and left leg of the sc, not into the chain, then pin the ring open while blocking.
Center lattice is uneven: Gently tug each ch-3 space to even out the tension before blocking, then block the center flat first.
Petals are different sizes: Count each repeat in Round 4 separately. One petal with 22 or 26 sts will throw off the symmetry.
Care
Hand wash in cool water with mild detergent, roll in a towel to remove moisture, and dry flat, re-pinning if needed. If the petals lose their shape, steam lightly from above.
Final Notes
The measurement chain is simple. The motif measures 1.25 in (3.2 cm) after Round 1 and 1.75 in (4.4 cm) after the lattice round. Covering the petal loops brings it to 4.5 in (11.4 cm), and the Round 5 shaping brings it to 5 in (12.7 cm) before the border. The picot border and blocking finish it at 5.5 in (14.0 cm). If you hit each checkpoint and keep 43 stitches per side through Rounds 5 and 6, your motif will match the sample.
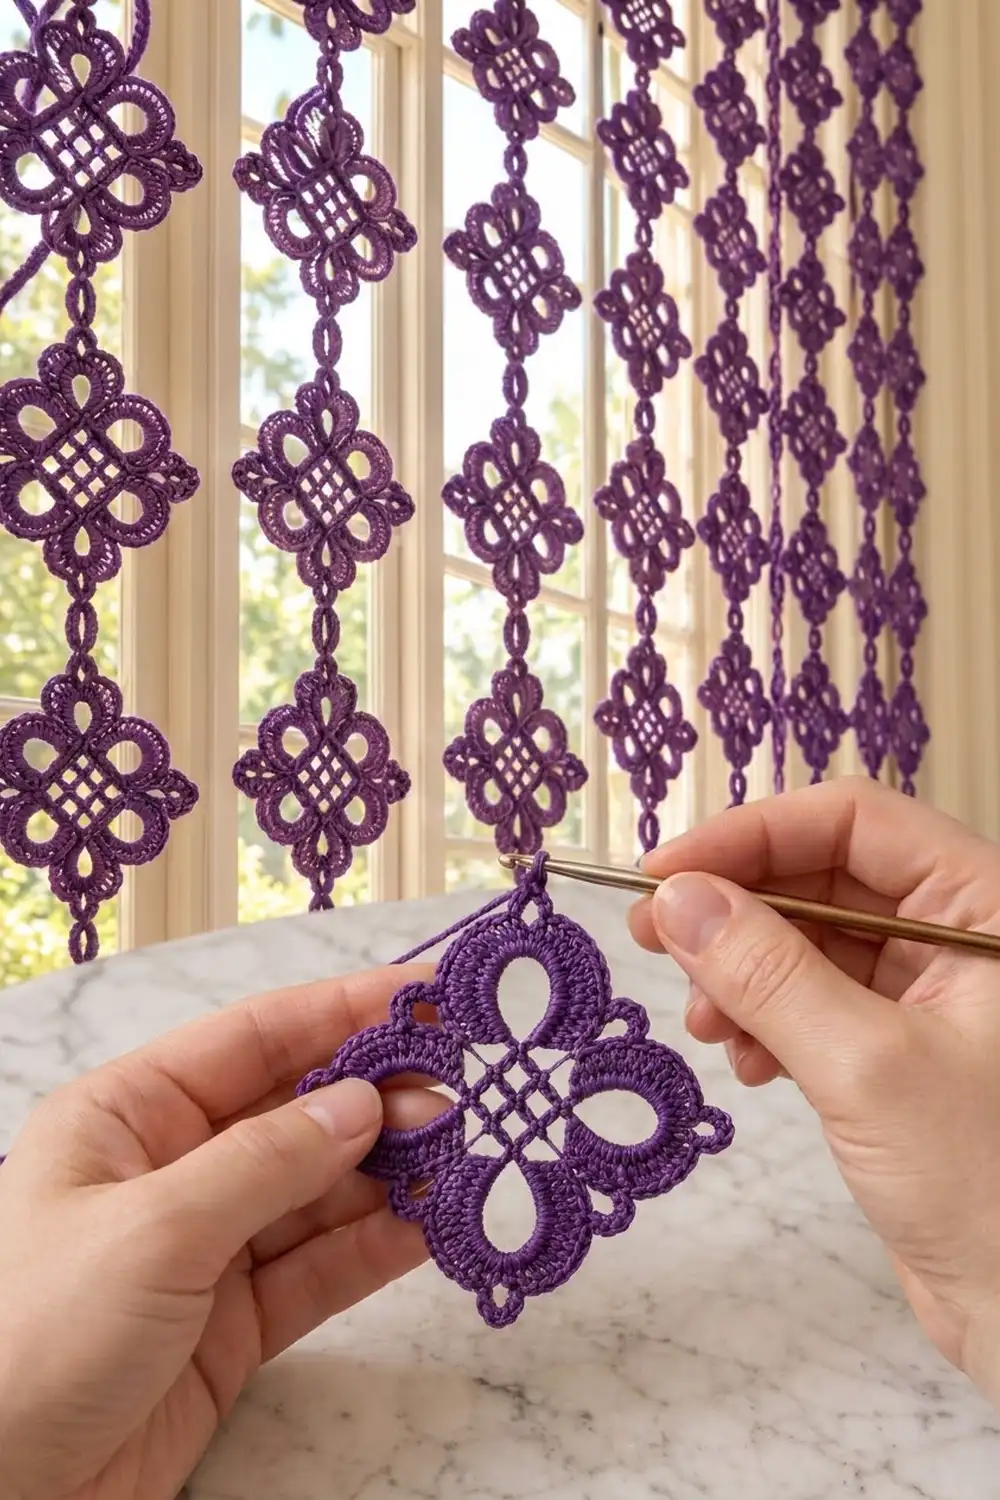
On its own, this motif makes a lovely ornament, sachet front, bookmark charm or window hanging.
Happy crocheting!