

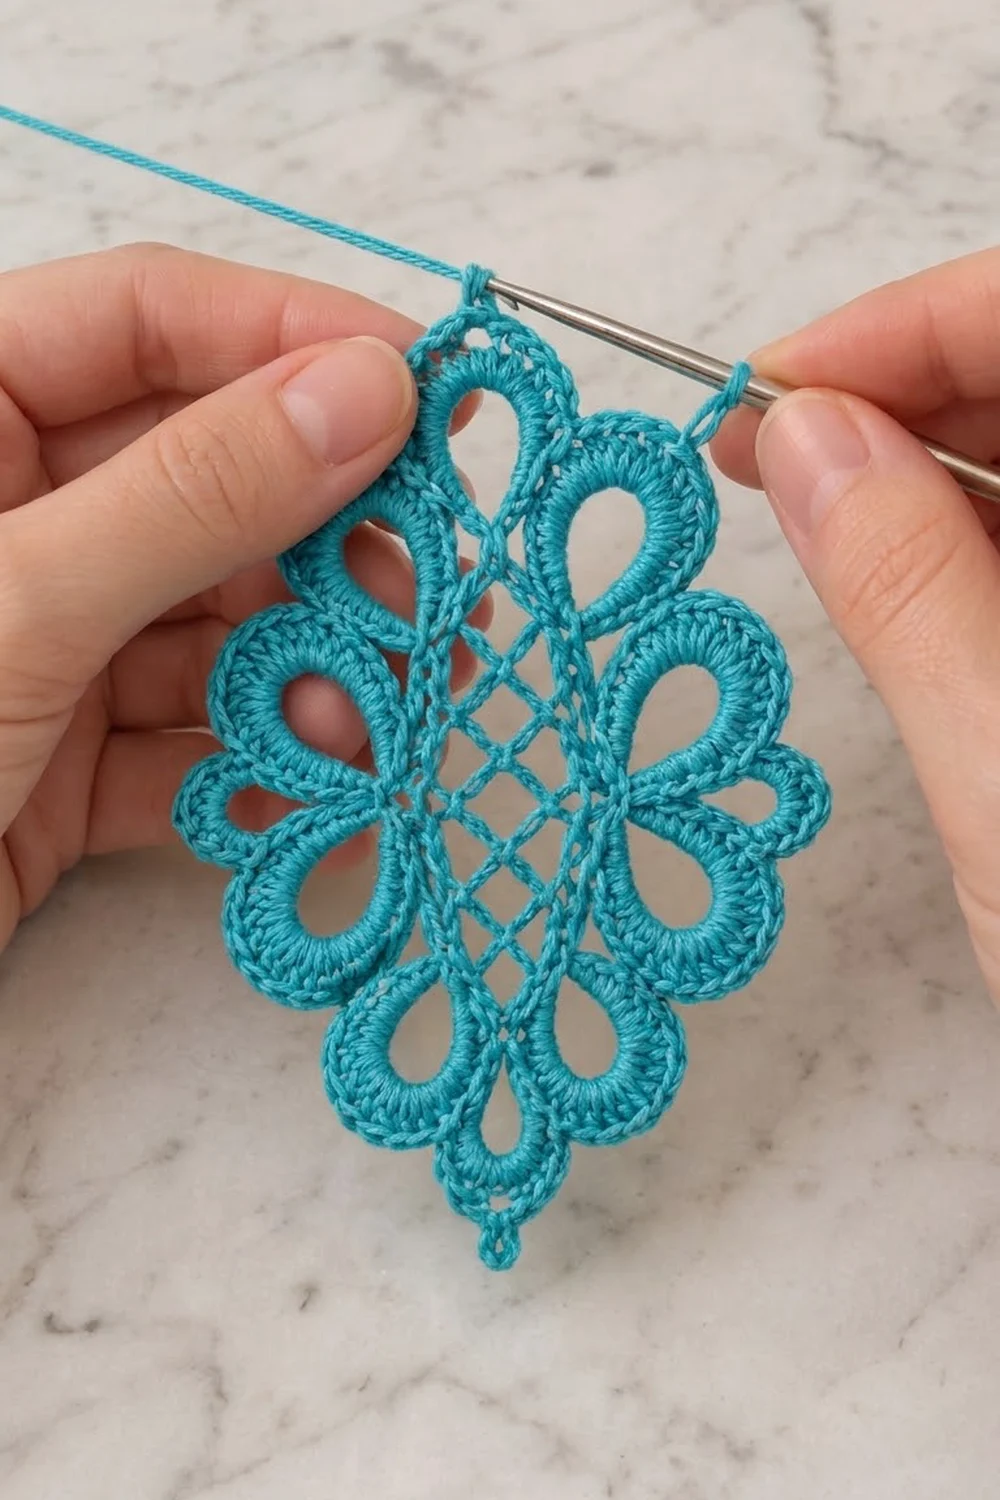
The Lagoon Lattice Diamond is a single lace motif with a calm, airy look. A narrow diamond frame holds a crisscross chain lattice in its center, and a ring of rounded teardrop loops fans out around it. The result reads like a stylized flower stretched into a long lozenge.
The sample uses one color, a bright turquoise mercerized cotton. The crisp thread shows off every stitch: the dense single crochet covering on each loop, the clean frame, and the open diamonds of the lattice. The style sits somewhere between Irish lace and modern geometric thread work. The pattern uses US crochet terms throughout.
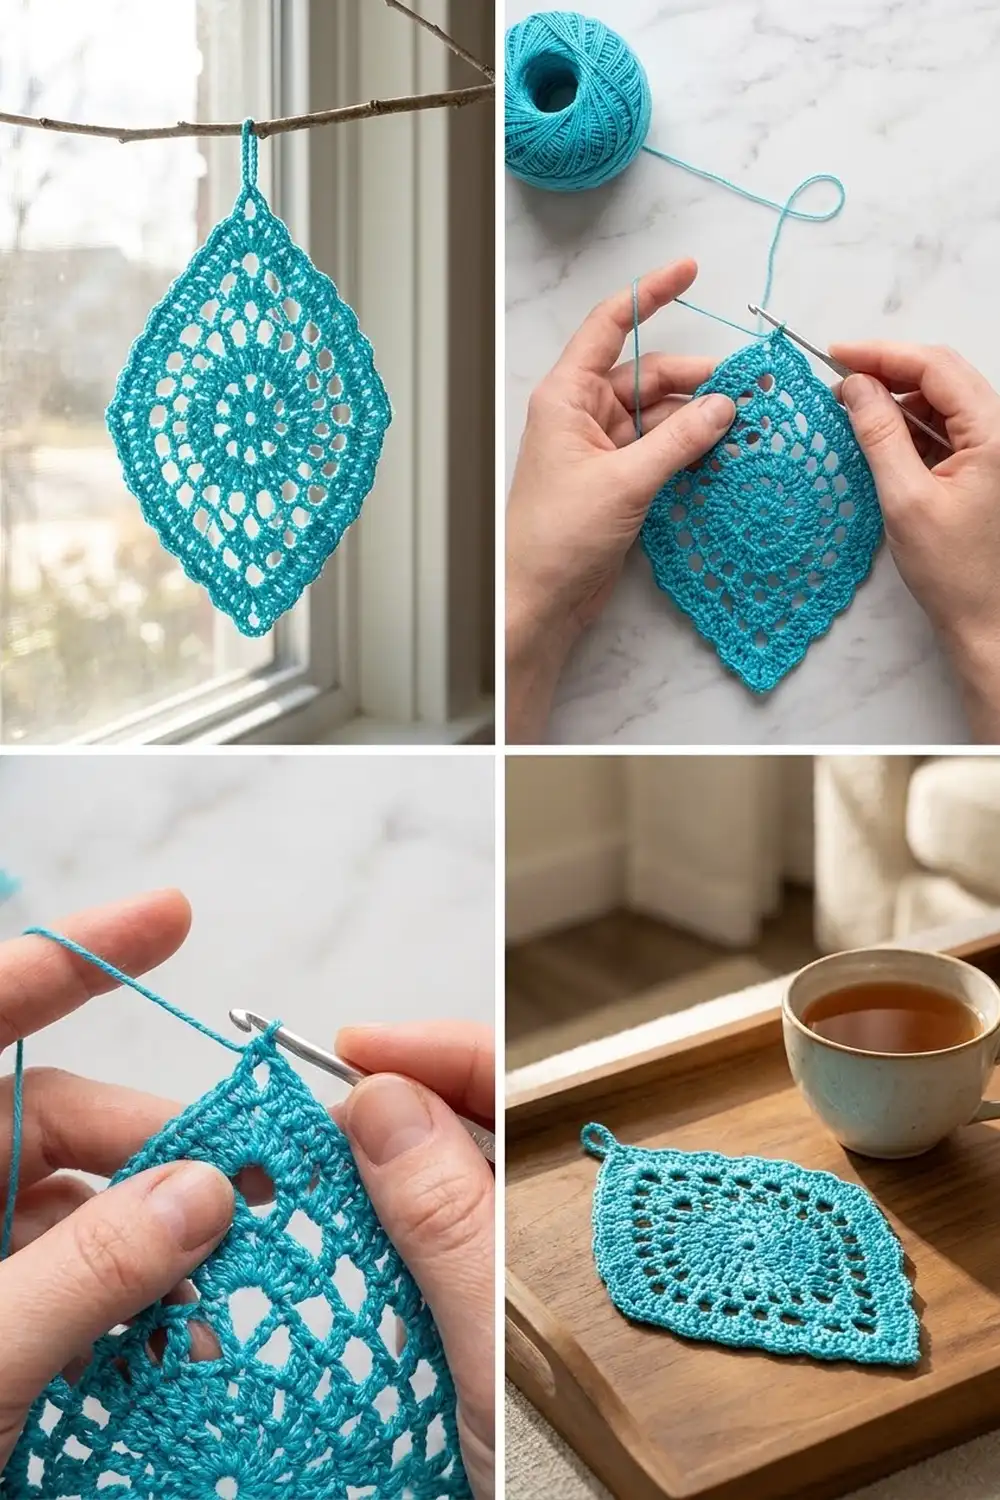
The finished motif measures 5 in (12.7 cm) wide by 7.25 in (18.4 cm) tall after blocking. It is one piece. Use it as an ornament, a hanging window charm, a gift tag, or a decorative appliqué on a bag or cushion.
Construction is simple to follow. You crochet a chain ring and shape it into a diamond frame over 2 rounds. Next you add the lattice by stretching chains across the inside of the frame. Last, you work one border round that builds 12 covered loops around the outside. Every stage has a measurement checkpoint, so you always know you are on track.
Finished Size and Construction
- Finished size: 5 in (12.7 cm) wide x 7.25 in (18.4 cm) tall, blocked
- Skill level: Intermediate
- Terminology: US crochet terms
- Yarn weight: Super fine (#1), fingering-weight mercerized cotton
- Hook: 2.5 mm (US B-1 or C-2, depending on brand)
- Number of pieces: 1
- Layout: Single motif, long axis vertical, points at top and bottom
- Piece size (frame only): 2 in (5.1 cm) wide x 4.5 in (11.4 cm) tall
- Size before border: 2 in (5.1 cm) x 4.5 in (11.4 cm)
- Border depth: 1.5 in (3.8 cm) at each side; 1.375 in (3.5 cm) at the top and bottom points
Materials
Choose a smooth, tightly plied mercerized cotton. It holds the loop shapes well, blocks crisply, and shows stitch definition. Avoid fuzzy or very soft yarns, because the lattice chains will sag and the loops will lose their rounded outline. A thread with a slight sheen also makes the covered loops look fuller.
- Turquoise (one color): 10 g, about 35 m (38 yd)
Tools:
- 2.5 mm crochet hook
- Tapestry needle
- Scissors
- 4 locking stitch markers
- Blocking mat and rustproof pins
- Spray bottle or light starch (optional)
The quantity above includes a margin of roughly 40 percent for swatching, tension differences, and weaving in ends.
Abbreviations (US Terms)
- ch – chain
- sc – single crochet
- sl st – slip stitch
- st(s) – stitch(es)
- sp – space
- rnd – round
Special stitch – Covered Loop (CL): Sc in the next st (this is the base sc). Chain the number given, then sl st into the base sc to close a teardrop-shaped ring. Work the stated number of sc into the ring, covering the chain completely. Sl st in the base sc to finish. A Covered Loop uses exactly 1 st of the round below.
Crossing sl st: Insert the hook under the chain you are crossing (around the whole chain, not into a stitch), yarn over, and pull through both the chain and the loop on the hook.
Gauge and Checkpoints
Gauge: 15 sc = 2 in (5.1 cm), worked in mercerized cotton with a 2.5 mm hook. Chains work up at the same rate, 7.5 ch per inch (2.5 cm).
To check, ch 16 and work 6 rows of sc (15 sc per row). Measure across the middle row without stretching.
Because this design is a single piece, the frame itself is your test piece. Work Rnds 1–2, then check before continuing.
- After Rnd 1: the ring, laid flat as a loose loop, measures about 9.6 in (24.4 cm) around.
- After Rnd 2: pinned as a diamond, the frame measures 2 in (5.1 cm) wide by 4.5 in (11.4 cm) tall.
- After the lattice: each lattice chain spans about 2.46 in (6.2 cm) and lies flat and slightly taut, with no droop.
- After the border: the blocked motif measures 5 in (12.7 cm) by 7.25 in (18.4 cm).
If your frame is too big: go down 0.25 mm in hook size, or chain more firmly. If it is too small: go up 0.25 mm. Do not change the stitch counts. All lattice and border positions depend on the 72-stitch frame.
Part 1: Diamond Frame
Foundation: Ch 72. Without twisting the chain, sl st in the first ch to form a ring.
Rnd 1: Ch 1, sc in each ch around, sl st in first sc to join. (72 sc)
Work each sc into one strand of the chain only. That leaves a free loop on the inside edge for the lattice later.
Number the stitches 1 to 72, with st 1 as the first sc. Place markers as follows:
- st 1 – top point
- st 19 – right side point
- st 37 – bottom point
- st 55 – left side point
Each diamond edge now has 17 sc between two marked points (17 x 4 = 68, plus 4 marked sts = 72).
Rnd 2 (conversion round): Ch 1. Work (sc, ch 2, sc) in st 1. Sc in each of the next 35 sts. Work (sc, ch 2, sc) in st 37. Sc in each of the next 35 sts. Sl st in first sc to join. Fasten off.
Count: 72 sc worked 1 per existing st + 2 extra sc at the points = 74 sc and 2 ch-2 sps.
Move the side markers up to Rnd 2, onto the sc above st 19 and st 55. Pin the frame as a diamond and confirm the Rnd 2 checkpoint. The side points are soft angles, not sharp corners; the border loops will define them.
Part 2: Center Lattice
The lattice is worked into the free loops of the foundation chain on the inside edge of the frame. Each free loop sits directly under the Rnd 1 sc with the same number. Count carefully; the crossings only line up if the anchor points are exact.
Every lattice line is ch 18, and every line crosses the three lines of the other direction at the same places: after ch 5, ch 9, and ch 13. This follows from the diamond shape, which is why all six lines are the same length.
Keep the frame pinned to a mat while you work the lattice. Tension is much easier to judge when the diamond is held at its true size.
Direction A (three parallel lines, upper left to lower right)
- Join yarn with a sl st in inner loop 60.
- Ch 18, sl st in inner loop 32.
- Sl st in inner loops 31, 30, 29, and 28 (4 sl sts).
- Ch 18, sl st in inner loop 64.
- Sl st in inner loops 65, 66, 67, and 68 (4 sl sts).
- Ch 18, sl st in inner loop 24.
Do not fasten off. Sl st along the inner loops from 23 down to 14 (10 sl sts). You are now ready for the second direction.
Checkpoint: three straight, parallel chains, evenly spaced about 0.5 in (1.3 cm) apart.
Direction B (three parallel lines, upper right to lower left)
Work each Direction B line as: ch 5, crossing sl st, ch 4, crossing sl st, ch 4, crossing sl st, ch 5. That is 18 ch with 3 crossings.
- From inner loop 14, work one Direction B line, then sl st in inner loop 42.
- Sl st in inner loops 43, 44, 45, and 46 (4 sl sts).
- Work one Direction B line, then sl st in inner loop 10.
- Sl st in inner loops 9, 8, 7, and 6 (4 sl sts).
- Work one Direction B line, then sl st in inner loop 50.
Fasten off and weave in the ends along the inner edge.
Checkpoint: the lattice now forms a 4 x 4 grid of small open diamonds, with 9 crossings in total. The middle crossing sits exactly at the center of the frame.
Border: Covered Loop Round
Border gauge
The border uses the same gauge, 7.5 sc per inch (2.5 cm). Chain each ring loosely enough to take its covering sc without cupping.
- Tip ring: ch 12, covered with 18 sc
- Small loop: ch 10, covered with 16 sc
- Large loop: ch 18, covered with 28 sc
Push the covering sc together as you go so no chain shows between them.
Rnd 3
Join yarn with a sl st in the top ch-2 sp.
Top tip: Ch 1, sc in the same sp (base sc). Ch 12, sl st in the base sc, 18 sc in the ring, sl st in the base sc.
Right side (37 sts, from top point to bottom point): Sc in next 4 sts, CL with ch 10 and 16 sc, sc in next 6 sts, CL with ch 18 and 28 sc, sc in next 6 sts, CL with ch 18 and 28 sc (this one lands on the marked right side point), sc in next 6 sts, CL with ch 18 and 28 sc, sc in next 6 sts, CL with ch 10 and 16 sc, sc in next 4 sts.
Bottom tip: Sc in the bottom ch-2 sp (base sc). Ch 12, sl st in the base sc, 18 sc in the ring, sl st in the base sc.
Left side (37 sts): Repeat the right side sequence exactly. The middle large loop lands on the marked left side point.
Sl st in the first sc to join. Fasten off and weave in the ends.
Counts per side
- Each side: 4 + 1 + 6 + 1 + 6 + 1 + 6 + 1 + 6 + 1 + 4 = 37 sts, matching the 37 sc per side in Rnd 2 (the second sc of the top pair, 35 edge sc, and the first sc of the bottom pair).
- Frame sc worked 1 per existing st: 74
- Extra base sc in the 2 ch-2 sps: 2
- Covering sc: 2 tip rings x 18 + 4 small x 16 + 6 large x 28 = 36 + 64 + 168 = 268
- Rnd 3 total: 74 + 2 + 268 = 344 sc, with 12 loops.
Why the math works
Each side holds 5 loop bases and 32 connecting sc. The connecting sc split as 4, 6, 6, 6, 6, 4, which is symmetrical. The middle loop falls on position 19 of 37, the exact center of the side and the frame’s side point. So the widest loop sits at the widest part of the diamond. The small loops sit 5 sts from each point, where the frame narrows.
Because a Covered Loop uses only 1 st below, no stitches are added to or lost from the frame. The frame stays at 74 sts, so it keeps its 2 in (5.1 cm) x 4.5 in (11.4 cm) shape. The loops add 1.5 in (3.8 cm) on each side, for 2 + 1.5 + 1.5 = 5 in (12.7 cm) of width. At the top and bottom, the tip rings and small loops add 1.375 in (3.5 cm) each, for 4.5 + 1.375 + 1.375 = 7.25 in (18.4 cm) of height.
The large loops are wider than the 6-st gaps between them, so they touch and overlap slightly at their bases. This is intended and gives the full, petal-like outline.
Final Blocking
- Soak the motif in cool water for 10 minutes. Press the water out in a towel; do not wring.
- Lay it face up on a blocking mat.
- Pin the top and bottom points first, 7.25 in (18.4 cm) apart.
- Pin the outer edge of each middle large loop, 5 in (12.7 cm) apart.
- Pin the frame’s side points so the diamond measures 2 in (5.1 cm) across.
- Put a pin inside each loop and ease it into a rounded teardrop. Large loops fan outward; small loops angle toward the points.
- Straighten each lattice chain. Pin at the crossings if needed.
- Mist with light starch if you want a stiff finish. Let it dry completely before unpinning.
Final Quality-Control Checklist
- Frame Rnd 2 has 74 sc and 2 ch-2 sps.
- All 6 lattice lines are straight, the same length, and crossed at 3 points each.
- The center crossing sits exactly in the middle of the frame.
- Rnd 3 has 12 loops: 2 tip rings, 4 small loops, 6 large loops.
- Each ring is fully covered with no chain showing.
- Left and right sides mirror each other.
- Blocked size is 5 in (12.7 cm) x 7.25 in (18.4 cm).
- All ends are woven in along solid stitches, not through the lattice.
Troubleshooting
Frame twists after Rnd 1. The foundation chain was twisted when you joined it. Start again; a twisted ring will not block flat.
Lattice sags. The chains are too loose. Rework the line with ch 17 instead of 18, keeping the crossings after ch 5, 9, and 13 (segments 5, 4, 4, 4).
Lattice pulls the frame inward. The chains are too tight. Work them slightly looser rather than adding chains.
Crossings land off-center. An anchor point is off by one. Recount the inner loops from st 1.
Loops ruffle. Too many covering sc for your tension. Work 26 sc in the large loops instead of 28.
Loops curl or show chain. Too few covering sc. Add 1–2 sc per ring, or chain more loosely.
Motif is too long or too wide. Check gauge on the frame first. If the frame measures correctly, re-block and pin more firmly.
Care
Hand wash in cool water with mild soap, then lay flat to dry, pinning it back into shape. Re-starch if the motif softens over time.
Final Notes
The measurement chain is short and easy to check. A gauge of 7.5 sc per inch gives a 72-st ring of 9.6 in (24.4 cm). Rnd 2 turns it into a 2 in (5.1 cm) x 4.5 in (11.4 cm) diamond with 74 sc. The six 18-ch lattice lines each span about 2.46 in (6.2 cm) and cross at ch 5, 9, and 13. The border uses all 74 frame sts, 37 per side, and adds 1.5 in (3.8 cm) at each side and 1.375 in (3.5 cm) at each point. The blocked total is 5 in (12.7 cm) x 7.25 in (18.4 cm).
Check each stage before moving on, and the finished motif will match.
Happy crocheting!