

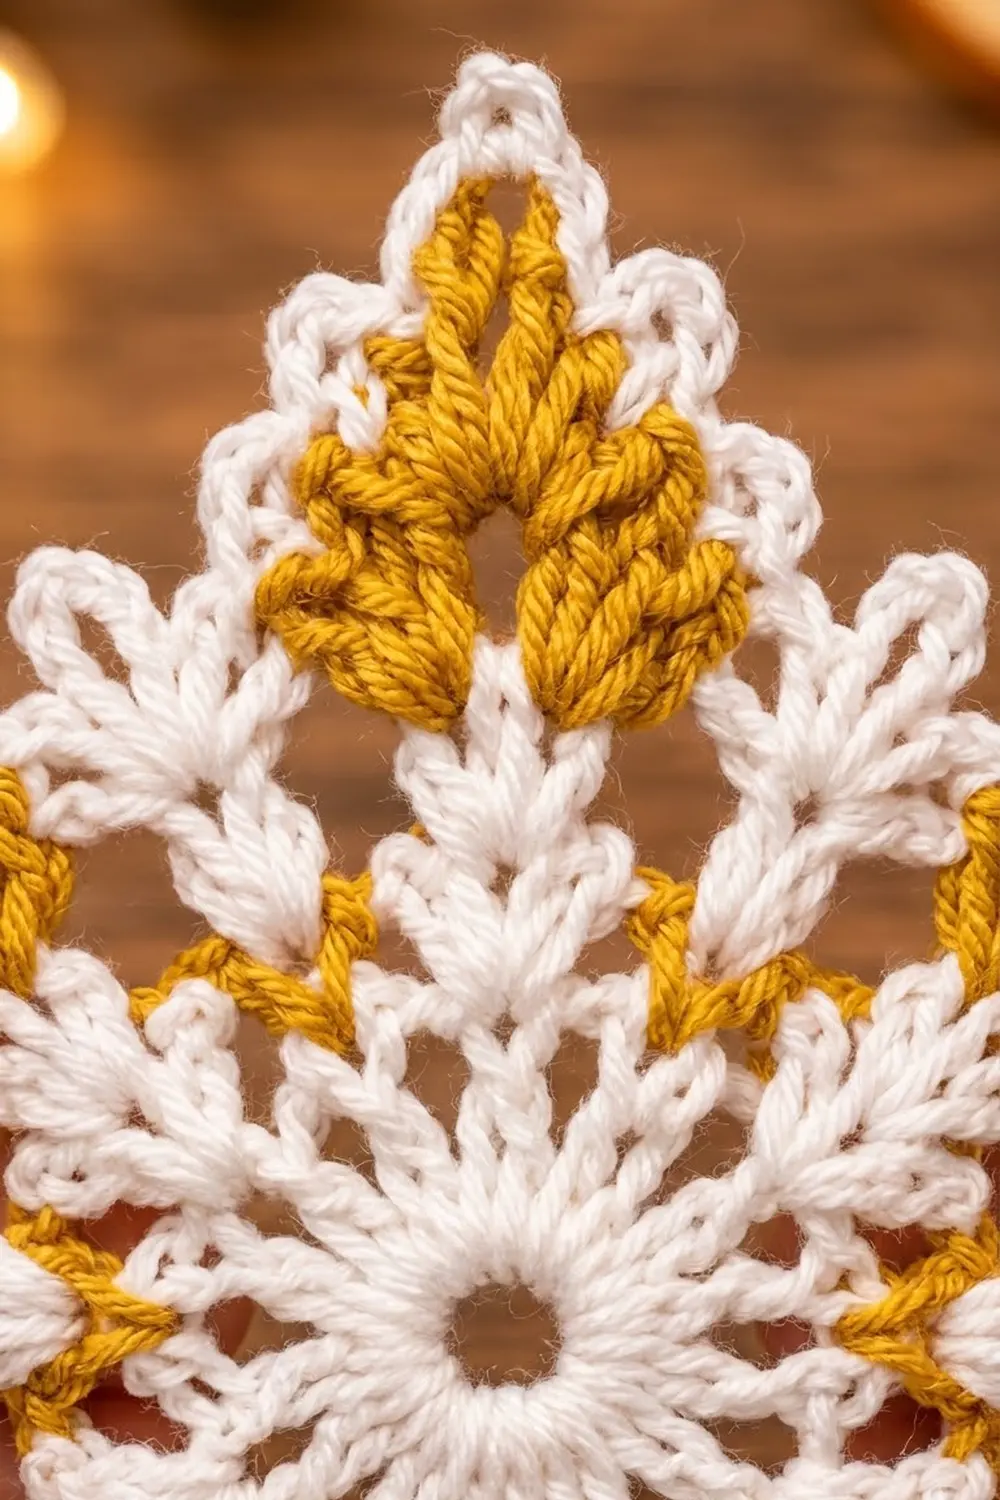
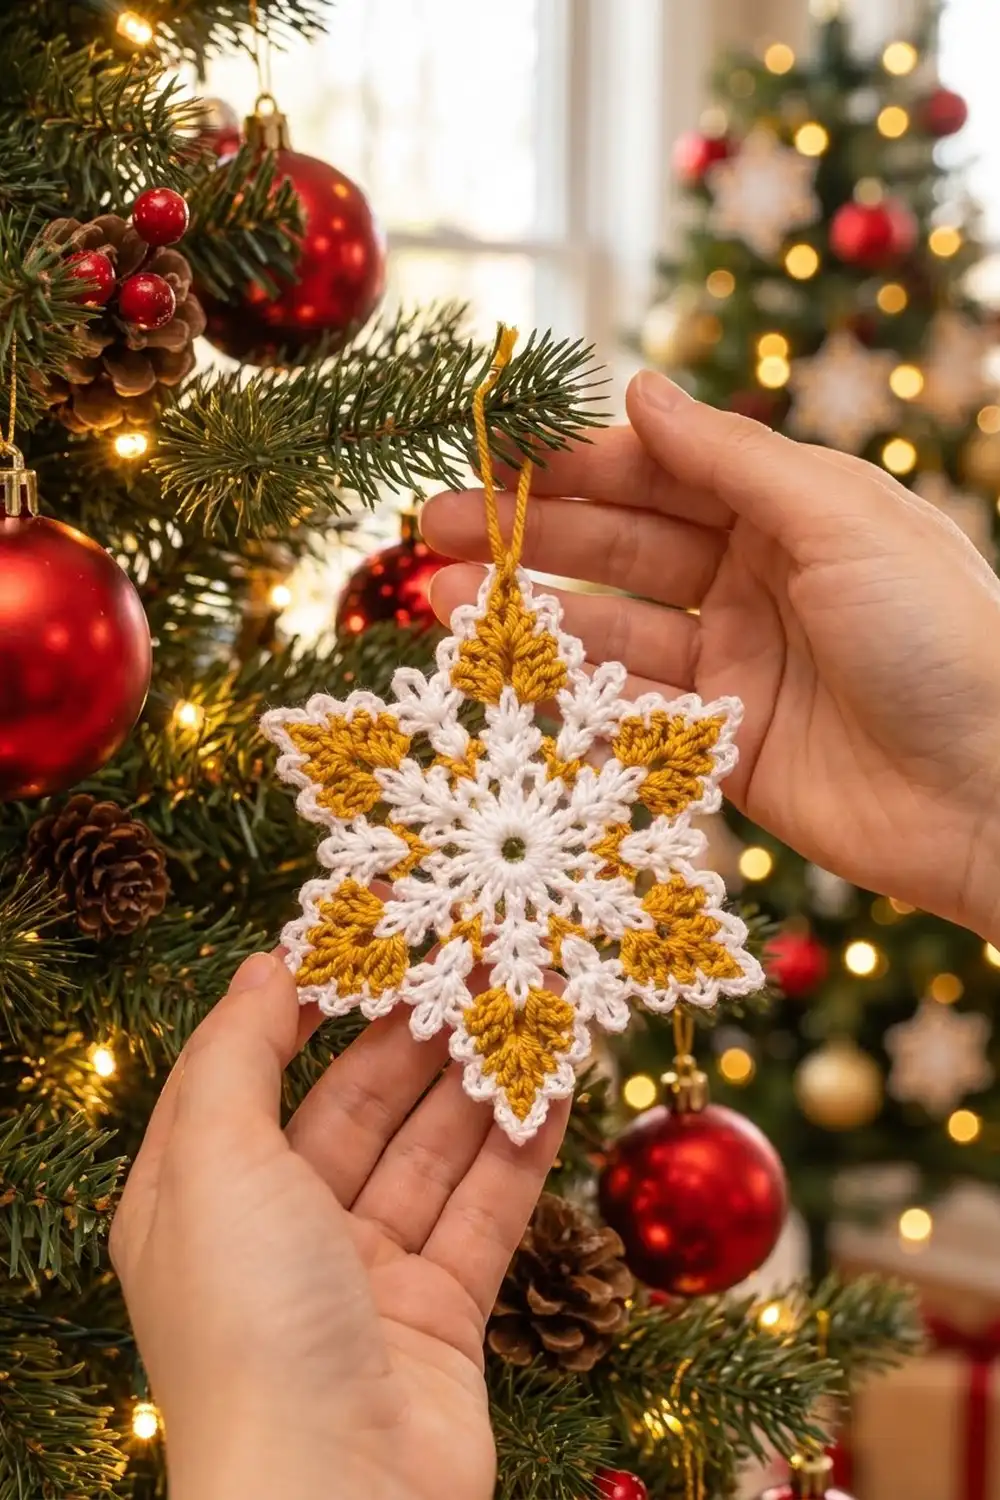
This six-pointed snowflake ornament pairs bright white with warm mustard gold. The white forms a lacy center and a clean outline. The gold fills each point with a bold V-shaped chevron and adds small accents in the valleys between points. The result looks crisp and classic, and it reads clearly on a tree even from across the room.
The pattern uses US crochet terms throughout. The finished ornament measures about 4.5 in (11.4 cm) from point to opposite point, and about 3.75 in (9.5 cm) from valley to opposite valley.
The snowflake is worked in the round as one single piece in five rounds. Rounds 1–3 are white and build the ring, the twelve spokes, and the six point shells. Round 4 is gold and adds the chevrons and valley accents. Round 5 is a white single crochet border that outlines every edge and finishes each tip with a picot. A gold chain loop is added last for hanging.
There is no joining and no assembly. If you can work dc, sc, and chain spaces, you can make this in under an hour.
Finished Size and Construction
- Finished size: 4.5 in (11.4 cm) point to point; 3.75 in (9.5 cm) valley to valley
- Skill level: Easy / Advanced Beginner
- Terminology: US crochet terms
- Yarn weight: DK (#3) cotton or cotton blend
- Hook: 3.5 mm (US E-4)
- Number of pieces: 1 (single motif)
- Layout: Single six-pointed star, worked in the round
- Piece size before border (after Round 4): 4 in (10.2 cm) point to point
- Border depth (Round 5): about 0.25 in (0.6 cm)
- Hanging loop: about 2.5 in (6.4 cm) long when folded
Materials
Use a smooth, mercerized DK cotton. Cotton holds crisp stitch definition and blocks flat, which matters for the sharp points. Acrylic also works, but it relaxes more and the points will be softer. Pick a true white and a deep mustard or golden yellow so the chevrons stand out against the outline.
Yarn:
– Color A – White: about 6 g (approx. 14 m)
– Color B – Mustard Gold: about 3 g (approx. 7 m), including the hanging loop
These quantities include a margin of about 20% for your gauge swatch, weaving in, and small tension differences. A standard 50 g ball of each color makes many ornaments.
Tools:
– 3.5 mm (US E-4) crochet hook
– Tapestry needle
– Small sharp scissors
– Stitch marker (optional, for the start of rounds)
– Blocking mat or folded towel
– Rustproof pins
– Spray bottle with water
– Optional: fabric stiffener or diluted white glue for a firm ornament
Abbreviations (US Terms)
- ch – chain
- sl st – slip stitch
- sc – single crochet
- dc – double crochet
- sp(s) – space(s)
- st(s) – stitch(es)
- rep – repeat
- beg – beginning
- standing sc – start with a slip knot on the hook, insert the hook into the indicated space, and complete a sc as usual. This lets you join the new color without a sl st.
Special stitch – Point Shell: (2 dc, ch 2, 2 dc) all in the same space.
Special stitch – Chevron: (3 dc, ch 3, 3 dc) all in the same space. This makes the gold V at each point.
Special stitch – Picot Tip: (2 sc, ch 3, 2 sc) all in the same space.
Gauge and Checkpoints
Gauge is not critical for an ornament, but it controls the final size and how flat the star lies. Make one full snowflake first and measure at each checkpoint. That snowflake is your swatch.
Gauge: Rounds 1–2 = 2 in (5.1 cm) in diameter.
Checkpoints:
– After Round 1: ring is about 1.25 in (3.2 cm) across, with a center hole about 0.4 in (1.0 cm) wide.
– After Round 2: circle is 2 in (5.1 cm) across.
– After Round 3: 3 in (7.6 cm) point to point.
– After Round 4: 4 in (10.2 cm) point to point.
– After Round 5: 4.5 in (11.4 cm) point to point.
If your piece is too big: switch to a 3.25 mm (US D-3) hook, or work chains a little tighter. Ruffling at Round 2 or 3 usually means your chain spaces are too loose.
If your piece is too small: switch to a 3.75 mm (US F-5) hook. Cupping at Round 3 or 4 usually means your chains are too tight. Loosen them before you loosen your dc.
Small differences of 0.25 in (0.6 cm) are fine. Blocking will even out most of that.
Pattern
Round 1 – Center Ring (Color A, White)
With white, ch 5 and sl st to the first ch to form a ring.
Ch 3 (counts as first dc). Work 11 dc into the ring. Sl st to the top of the beg ch-3.
Stitch count: 12 dc.
The ch-5 ring leaves the small open hole at the center. Do not pull the tail to close it.
Round 2 – Twelve Spokes (Color A)
Sl st into the next dc. That puts you between stitches, which you want for the first pair.
Ch 3 (counts as dc), dc in the same st, ch 2. 2 dc in the next dc, ch 2. Rep from * 10 more times. Sl st to the top of the beg ch-3.
Stitch count: 24 dc (12 pairs) and 12 ch-2 sps.
Each 2-dc pair becomes one of the twelve white spokes around the ring. Check: the circle should be 2 in (5.1 cm) across and lie flat.
Round 3 – Point Shells (Color A)
Sl st into the next dc, then sl st into the first ch-2 sp.
Ch 3 (counts as dc), work (dc, ch 2, 2 dc) in the same sp. This is your first Point Shell. Ch 1, sc in the next ch-2 sp, ch 1.
Point Shell (2 dc, ch 2, 2 dc) in the next ch-2 sp, ch 1, sc in the next ch-2 sp, ch 1. Rep from * 4 more times. Sl st to the top of the beg ch-3.
Stitch count: 24 dc (6 shells of 4 dc), 6 sc, 6 ch-2 tip sps, and 12 ch-1 sps.
This round sorts the 12 spaces of Round 2 into 6 points and 6 valleys. Shells sit in alternate spaces and sc sit in the spaces between them, so the valleys stay low. Check: 3 in (7.6 cm) point to point.
Fasten off white and weave in the tail.
Round 4 – Gold Chevrons and Valley Accents (Color B, Mustard Gold)
Join gold with a sl st in any ch-2 tip sp of a Point Shell.
Ch 3 (counts as dc), work (2 dc, ch 3, 3 dc) in the same sp. This is the first Chevron. Ch 1, skip the next 2 dc and ch-1 sp, dc in the next sc, ch 1, skip the next ch-1 sp and 2 dc.
Chevron (3 dc, ch 3, 3 dc) in the next ch-2 tip sp, ch 1, dc in the next sc, ch 1. Rep from * 4 more times. Sl st to the top of the beg ch-3.
Stitch count: 42 dc (6 Chevrons of 6 dc, plus 6 valley dc), 6 ch-3 tip sps, and 12 ch-1 sps.
Each Chevron stacks two 3-dc groups on top of the white shell. They lean apart at the tip to form the gold V. The single dc worked into each valley sc is the small gold accent between points. It sits lower than the Chevrons, so the star shape stays sharp.
Check: 4 in (10.2 cm) point to point. The points should look clearly triangular, with the gold V centered on each.
Fasten off gold and weave in the tail on the back.
Border
Round 5 – White Outline with Picot Tips (Color A)
The border is one round of white sc that outlines the whole star. Its job is to frame the gold, sharpen each point, and keep the edge from curling.
Border gauge: 13 sc per point repeat, covering about 2.25 in (5.7 cm) of edge from one valley center to the next. The border adds about 0.25 in (0.6 cm) beyond the gold edge.
Join white with a standing sc in any ch-3 tip sp of a Chevron. Work (sc, ch 3, 2 sc) in the same sp to finish the first Picot Tip. Then:
- sc in each of the next 3 dc,
- sc in the next ch-1 sp,
- sc in the valley dc,
- sc in the next ch-1 sp,
- sc in each of the next 3 dc.
Picot Tip (2 sc, ch 3, 2 sc) in the next ch-3 tip sp, sc in each of the next 3 dc, sc in the next ch-1 sp, sc in the valley dc, sc in the next ch-1 sp, sc in each of the next 3 dc. Rep from * 4 more times. Sl st to the first sc. Do not fasten off yet if you want a white loop. For the gold loop shown, fasten off.
Counts per point repeat (one “side” of the star):
– 7 sc worked 1 per existing dc (3 + 1 valley dc + 3)
– plus 2 sc worked into the 2 ch-1 sps
– plus 4 sc worked into the ch-3 tip sp
– = 13 sc and 1 ch-3 picot
Round total: 6 × 13 = 78 sc and 6 ch-3 picots.
Why the math works: Round 4 has 7 dc per repeat, and each one gets exactly 1 sc. That keeps the straight edges of the points flat. Each ch-1 sp gets 1 sc to fill the gap without adding bulk in the valley. All of the extra stitches go into the tip: 4 sc plus a ch-3 picot. That turns the corner sharply, so the point stays pointed instead of rounding off. Because the valley only gets 3 sc (ch-1 sp, dc, ch-1 sp) and no increase, it stays a true inward dip.
Check: 4.5 in (11.4 cm) point to point and 3.75 in (9.5 cm) valley to valley.
Hanging Loop (Color B)
Join gold with a sl st in any ch-3 picot. Ch 20. Sl st in the same picot. Fasten off, leaving a 4 in (10.2 cm) tail. Wrap the tail twice around the base of the loop to secure it, then weave it into the back of the point.
The loop measures about 2.5 in (6.4 cm) long when folded.
Final Blocking
Blocking is what turns a slightly ruffled star into a crisp, flat ornament. Cotton responds well.
- Weave in all ends before blocking. Trim them close only after the piece has dried.
- Dampen the ornament fully with a spray bottle, or soak it in cool water for 5 minutes and press it in a towel. Do not wring it.
- Pin the center flat on the mat with one pin through the center hole.
- Pin the six tips through each ch-3 picot. Set each tip 2.25 in (5.7 cm) from the center pin, which gives 4.5 in (11.4 cm) point to point. Space them evenly, like the numbers on a clock at 12, 2, 4, 6, 8, and 10.
- Pin the six valleys at the valley dc. Set each 1.875 in (4.8 cm) from the center, which gives 3.75 in (9.5 cm) valley to valley.
- Shape the Chevrons with your fingertips so both arms of each gold V lie flat and even.
- Optional stiffening: brush on fabric stiffener, or a mix of 1 part white glue to 1 part water. Blot off the extra so the spaces stay open.
- Let it dry fully, usually 6–12 hours, before unpinning.
Final Quality-Control Checklist
- [ ] The center hole is open and round, about 0.4 in (1.0 cm) wide.
- [ ] There are 12 white spokes, evenly spaced.
- [ ] There are 6 points, each with a centered gold V-shaped Chevron.
- [ ] There are 6 small gold accents, one in each valley.
- [ ] The white border is continuous, with 13 sc per repeat and 78 sc total.
- [ ] Each tip ends in a ch-3 picot.
- [ ] Point to point measures 4.5 in (11.4 cm).
- [ ] Valley to valley measures 3.75 in (9.5 cm).
- [ ] The piece lies flat with no cupping or ruffling.
- [ ] All ends are woven in and no tails show on the front.
- [ ] The hanging loop is secure and about 2.5 in (6.4 cm) long.
Troubleshooting
The center cups or puckers. Your Round 1 dc are too tight for the ring. Work them looser, or start with a ch-6 ring.
Round 2 ruffles. Your ch-2 sps are too long. Work tighter chains, or go down to ch 1 between pairs if needed, and keep the 2 dc in each st.
The points look rounded instead of sharp. Make sure the Picot Tip in Round 5 goes fully into the ch-3 tip sp and that you pin each picot firmly when blocking.
The gold V leans to one side. You may have started the Chevron off-center. Both 3-dc groups must go into the same ch-2 tip sp of the Round 3 shell.
The valleys bulge outward. Check that Round 5 has only 3 sc in each valley and that you skipped the right stitches in Round 4.
The color join shows on the front. Join new colors in a tip sp, where the dense stitches hide the join. Weave tails along same-color stitches on the back.
The stitch count is off in Round 5. Count one point repeat. You should have 4 sc in the tip, 3 sc on each straight edge, and 3 sc in the valley, for 13 total.
Care
Hand wash in cool water with a mild soap, press out the water in a towel, and pin flat to dry. If you stiffened it, simply re-block and re-stiffen after washing.
Final Notes
Each round has its own measurement checkpoint. The 12-dc ring grows to a 2 in (5.1 cm) circle with 12 spokes. Round 3 splits that circle into 6 points and 6 valleys at 3 in (7.6 cm). The gold Chevrons bring it to 4 in (10.2 cm). The 78-sc white border finishes it at 4.5 in (11.4 cm) point to point and 3.75 in (9.5 cm) valley to valley. If each checkpoint matches, the finished star will match too.
Make one in the colors shown, then try silver, red, or pale blue for the Chevrons to build a whole tree’s worth of ornaments.
Happy crocheting!