

This leaf curtain hangs in soft vertical strands, with dusty pink and cream leaves alternating down each cord and a round wooden bead sitting above every leaf. In front of a window it makes a light boho screen that lets the sun through and moves a little whenever the air does.
Each leaf has V-shaped ridges on either side of a raised center vein, and a neat slip-stitch outline finishes the edge. The cords are cream slip-stitch cords with a braided look. Natural wood beads pair well with the blush-and-cream colors.
This pattern uses US crochet terms. The curtain has six strands with five leaves each and hangs from a 24 in (61.0 cm) dowel. The longest strand is 43 in (109.2 cm) below the dowel.
You’ll crochet 30 leaves flat in back-loop rows worked around a foundation chain. Then you’ll make six cords, slide the beads on, and sew each leaf to its cord at two points. The last step is spacing the strands evenly on the dowel.
Finished Size and Construction
- Finished size: 24 in (61.0 cm) wide x 43 in (109.2 cm) long, measured from the dowel to the lowest leaf tip
- Skill level: Easy to intermediate
- Terminology: US
- Yarn weight: Worsted (#4), cotton or a cotton blend
- Hook: 4.0 mm (G-6)
- Number of pieces: 30 leaves and 6 cords
- Layout: 6 strands across, 5 leaves per strand
- Piece size (one leaf): 2.3 in (5.8 cm) x 3.5 in (8.9 cm)
- Leaf size before edging: 2.1 in (5.3 cm) x 3.3 in (8.4 cm)
- Edging depth: 0.1 in (0.3 cm) on every edge
Materials
Pick a smooth worsted cotton so the ridges and the vein show up clearly. Fuzzy yarn hides the V texture.
- Color A, Dusty Pink: 50 g / 95 m (for 15 leaves)
- Color B, Cream: 75 g / 140 m (for 15 leaves and all 6 cords)
These amounts already include a margin for your gauge swatch and small differences in tension.
Tools:
– 4.0 mm (G-6) crochet hook
– 30 round wooden beads, 16 mm, each with a hole of at least 6 mm
– Wooden dowel, 24 in (61.0 cm) long and 0.75 in (1.9 cm) thick
– Tapestry needle and a large-eye blunt needle
– Stitch markers
– Measuring tape
– Blocking mat and rust-proof pins
Abbreviations (US Terms)
- ch: chain
- sc: single crochet
- sl st: slip stitch
- BLO: back loop only
- st(s): stitch(es)
- RS / WS: right side / wrong side
Special stitch: back-bump slip stitch. Turn the chain over to find the little horizontal bump on its back. Insert the hook under that bump only and slip stitch. Working this way gives a round cord with a braided look.
Gauge and Checkpoints
Gauge: 16 sc x 18 rows = 4 in (10.2 cm) in sc with a 4.0 mm hook. Cord gauge: 4 ch = 1 in (2.5 cm).
Make one complete leaf before you start the rest, and check it at each stage:
- After Row 1: 2.9 in (7.4 cm) long x 0.6 in (1.5 cm) wide
- After Row 3: 1.4 in (3.6 cm) wide
- After Row 5: 2.1 in (5.3 cm) x 3.3 in (8.4 cm)
- After the edging: 2.3 in (5.8 cm) x 3.5 in (8.9 cm)
If the leaf is too big, go down to a 3.75 mm hook. If it’s too small, go up to a 4.5 mm hook. Don’t change the stitch counts, because the shape depends on them.
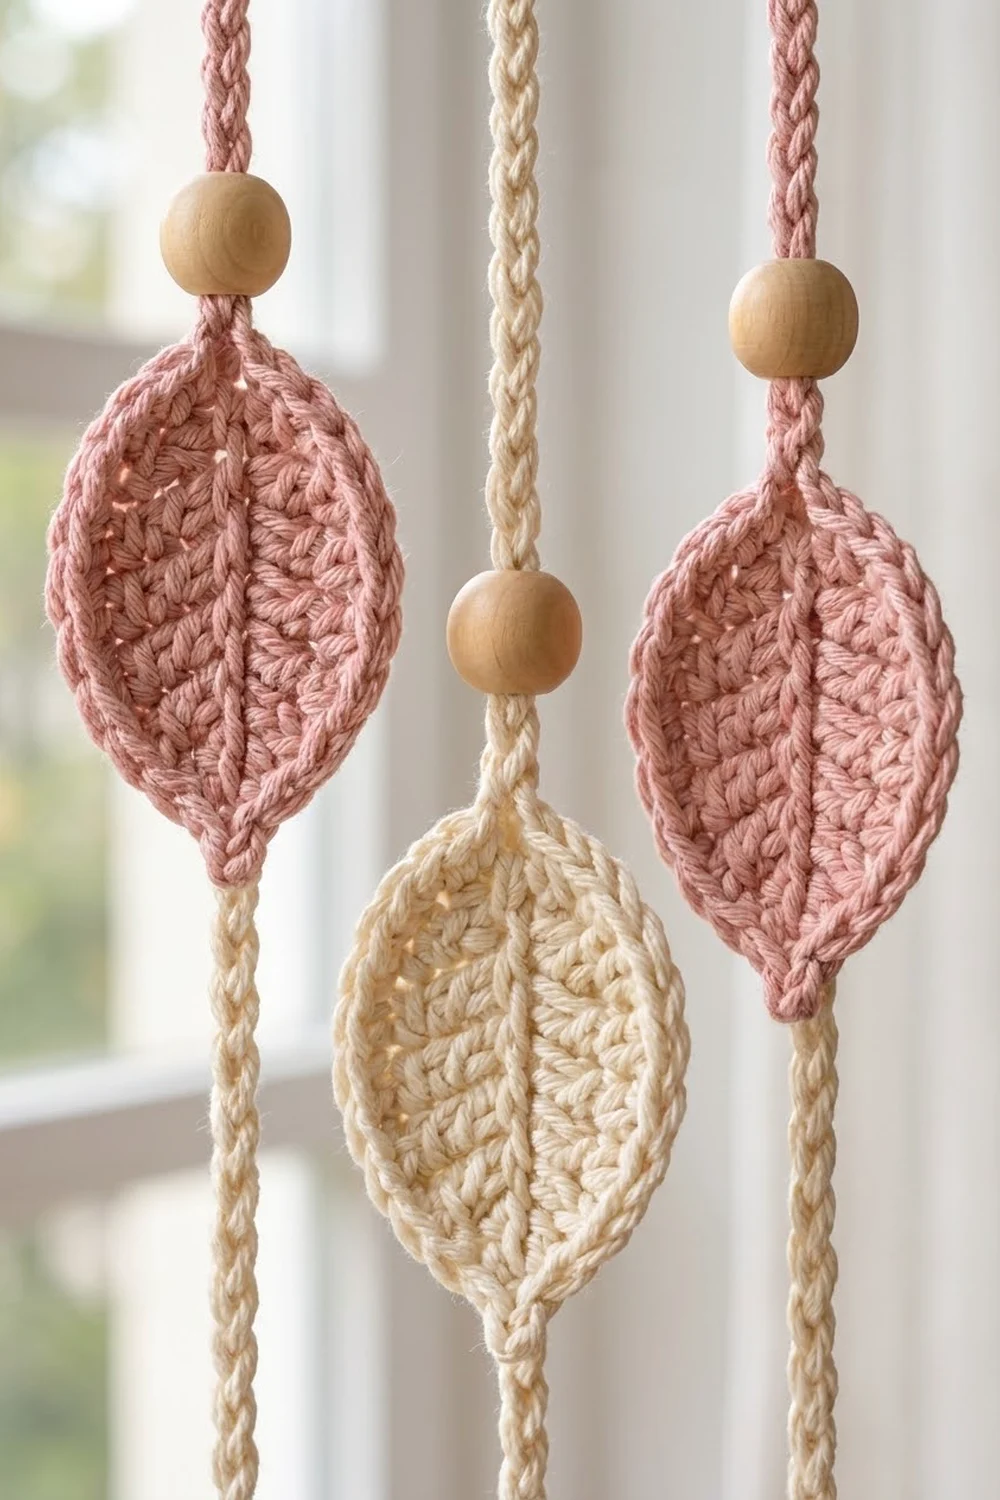
Leaf Pattern (Make 30)
Every row has 23 sts. Each row ends 2 sts short of the previous row, so the rows step back near the base. That shortening is what gives the leaf its oval shape and tilts the ridges into V shapes.
Foundation: Ch 12.
Row 1 (RS): Sc in the 2nd ch from the hook and in the next 9 ch (10 sc). Work 3 sc in the last ch; this is the leaf tip. Rotate and work along the other side of the foundation: sc in the next 10 ch. (23 sc)
Place a marker in the center sc of the 3-sc tip group. The skipped first chain marks the base point.
Row 2: Ch 1, turn. Sc BLO in the next 11 sts, 3 sc BLO in the marked center st, and sc BLO in the next 9 sts. Leave the last 2 sts unworked. (23 sc: 11 + 3 + 9) Move the marker to the center sc of the new 3-sc group.
Row 3: Ch 1, turn. Sc BLO in the next 10 sts, 3 sc BLO in the marked st, and sc BLO in the next 10 sts. Leave the last 2 sts unworked. (23 sc: 10 + 3 + 10) Move the marker.
Row 4: Ch 1, turn. Sc BLO in the next 11 sts, 3 sc BLO in the marked st, and sc BLO in the next 9 sts. Leave the last 2 sts unworked. (23 sc: 11 + 3 + 9) Move the marker.
Row 5: Ch 1, turn. Sc BLO in the next 10 sts, 3 sc BLO in the marked st, and sc BLO in the next 10 sts. Leave the last 2 sts unworked. (23 sc: 10 + 3 + 10) Keep the marker in place.
Why the count stays at 23: Each row adds 2 sts at the tip (1 st worked as 3) and leaves 2 sts unworked at the end, so the total doesn’t change. Rows 2 and 4 put 11 sts before the tip, and Rows 3 and 5 put 10. That difference just comes from where each row starts after turning.
Edging round (RS): Ch 1, turn so the RS faces you. Sl st in the next 11 sts. Work (sl st, ch 1, sl st) in the marked center st; this makes the pointed tip. Sl st in the next 11 sts.
Now work down the stepped edge toward the base: work 7 sl st evenly spaced, going into the unworked sts and the row ends. At the base point (the skipped foundation ch), work (sl st, ch 2, sl st); the ch-2 becomes the hanging loop. Work 7 sl st evenly up the second stepped edge. Join with a sl st to the first sl st.
Count: 40 sl st, plus the ch-1 tip and the ch-2 loop. That works out to 20 sl st on each half: 11 along the Row 5 edge, 1 at the tip, 7 along the stepped edge, and 1 at the base.
Fasten off and leave an 8 in (20.3 cm) tail for sewing the leaf to its cord.
Center vein: With the RS facing and matching yarn, start at the base and surface slip stitch along the foundation chain to the tip, making 11 sl st. Fasten off and weave in the ends.
Make All Pieces
- Color A (pink): 15 leaves
- Color B (cream): 15 leaves
- Cords (Color B): 3 long cords (strands 2, 4, 6) and 3 short cords (strands 1, 3, 5)
Short cord (make 3): Ch 169. Work a back-bump sl st in the 2nd ch from the hook and in each ch across. (168 sl st = 42 in / 106.7 cm)
Long cord (make 3): Ch 181. Work a back-bump sl st in the 2nd ch from the hook and in each ch across. (180 sl st = 45 in / 114.3 cm)
Each cord is about 0.2 in (0.5 cm) thick, so it fits through a 6 mm bead hole.
Layout grid (top to bottom, P = pink, C = cream):
Strand:  1   2   3   4   5   6
Leaf 1:  P   .   P   .   P   .
         .   C   .   C   .   C
Leaf 2:  C   .   C   .   C   .
         .   P   .   P   .   P
Leaf 3:  P   .   P   .   P   .
         .   C   .   C   .   C
Leaf 4:  C   .   C   .   C   .
         .   P   .   P   .   P
Leaf 5:  P   .   P   .   P   .
         .   C   .   C   .   C
Strands 1, 3 and 5 each have 3 pink and 2 cream leaves (9 P and 6 C in total). Strands 2, 4 and 6 each have 2 pink and 3 cream leaves (6 P and 9 C in total). Together that’s 15 of each color.
Joining
Method: Slide the beads onto each cord first. Then sew each leaf to the cord at two points, with the cord running behind the leaf on the WS.
- Thread the bottom end of a cord through the large-eye blunt needle. Slide 5 beads on and leave them loose for now.
- Lay the cord flat without stretching it. Fold the top 2 in (5.1 cm) down; that part will wrap around the dowel. Measure the hanging length from this fold.
- Short cords: Slide the first bead so its top sits 11.5 in (29.2 cm) below the fold. Long cords: place it at 14.5 in (36.8 cm). That extra 3 in (7.6 cm) creates the stagger between strands.
- Put the leaf’s ch-2 loop directly under the bead. Using the leaf’s tail, sew 3 small stitches through the center of the cord.
- Smooth the leaf down along the cord and sew the ch-1 tip to the cord in the same way, 3.5 in (8.9 cm) below the loop.
- Slide the next bead down so it starts 2 in (5.1 cm) below the leaf tip, and attach the next leaf under it.
Stitch-to-stitch logic: Each leaf is attached at exactly two points, the ch-2 loop and the ch-1 tip. The cord stays straight behind the center vein, so the leaf hangs flat and doesn’t twist. Gravity keeps each bead resting on the leaf below it.
Tension advice: Sew firmly, but don’t pull the cord into a pucker. Measure every gap with the strand lying flat and relaxed.
Size checkpoint: The leaf tops repeat every 6.1 in (15.5 cm), which is the 16 mm bead plus 3.5 in (8.9 cm) of leaf plus a 2 in (5.1 cm) gap. On a short strand, the last leaf tip should land 40 in (101.6 cm) below the fold. On a long strand it should land at 43 in (109.2 cm). Sew the cord end to the back of the last leaf tip.
Border: Top Edge on the Dowel
On this curtain, the dowel takes the place of a border, and strand spacing works like the border gauge.
Border gauge: One strand every 4 in (10.2 cm), measured center to center.
- Mark the center of the dowel. Make marks every 4 in (10.2 cm) on both sides of it until you have 6 marks: 2 in (5.1 cm) and then 6 in (15.2 cm) and 10 in (25.4 cm) from the center on each side.
- Left end: Leave 2 in (5.1 cm) of bare dowel, then hang strands 1, 2 and 3 on the first three marks.
- Right end: Hang strands 4, 5 and 6 on the remaining marks, again leaving 2 in (5.1 cm) bare.
- Wrap the folded 2 in (5.1 cm) at the top of each cord over the dowel and sew the end to the back of the cord with 4 stitches.
Why the math works: Five spaces of 4 in (10.2 cm) cover 20 in (50.8 cm), and two 2 in (5.1 cm) ends bring the total to 24 in (61.0 cm). Each leaf is 2.3 in (5.8 cm) wide, so neighboring leaves have a 1.7 in (4.3 cm) gap and never touch. Because the strands alternate between short and long, the leaves in neighboring strands sit 3 in (7.6 cm) apart vertically, which gives the staggered checker effect.
Final Blocking
- Before you join anything, lightly mist all 30 leaves.
- Pin each leaf to 2.3 in (5.8 cm) x 3.5 in (8.9 cm), with one pin at the tip and one at the base point.
- Use a finger to straighten the center vein so it runs in a straight line.
- Let the leaves dry completely before unpinning them.
- After assembly, hang the curtain and let the cords relax for 24 hours.
- Measure each strand again. If one has stretched, adjust it at the dowel wrap.
Final Quality-Control Checklist
- All 30 leaves measure 2.3 in (5.8 cm) x 3.5 in (8.9 cm)
- Every row on every leaf has 23 sts, and every edging round has 40 sl st
- The vein is straight and centered on each leaf
- Each strand has 5 beads, with one sitting right above each leaf
- Gaps between leaves are 2 in (5.1 cm)
- Short strands measure 40 in (101.6 cm) and long strands 43 in (109.2 cm)
- Strands hang 4 in (10.2 cm) apart, with a 2 in (5.1 cm) margin at each end of the dowel
- All ends are woven in on the WS
Troubleshooting
- Leaf curls: Your tension is too tight on the BLO rows. Block the leaf firmly, or go up 0.25 mm in hook size.
- Leaf is lopsided: You probably skipped moving the marker. Count 23 sts on every row.
- Cord won’t fit through the bead: Use beads with an 8 mm hole, or make the cord with a 3.5 mm hook.
- Leaves twist: Re-sew the tip so the cord sits right behind the vein.
- Strand is too long: Increase the dowel wrap by the extra length.
Care
Hand wash in cool water and lay the strands flat to dry. Take the beads off first if they’re unsealed, or dust the curtain gently instead.
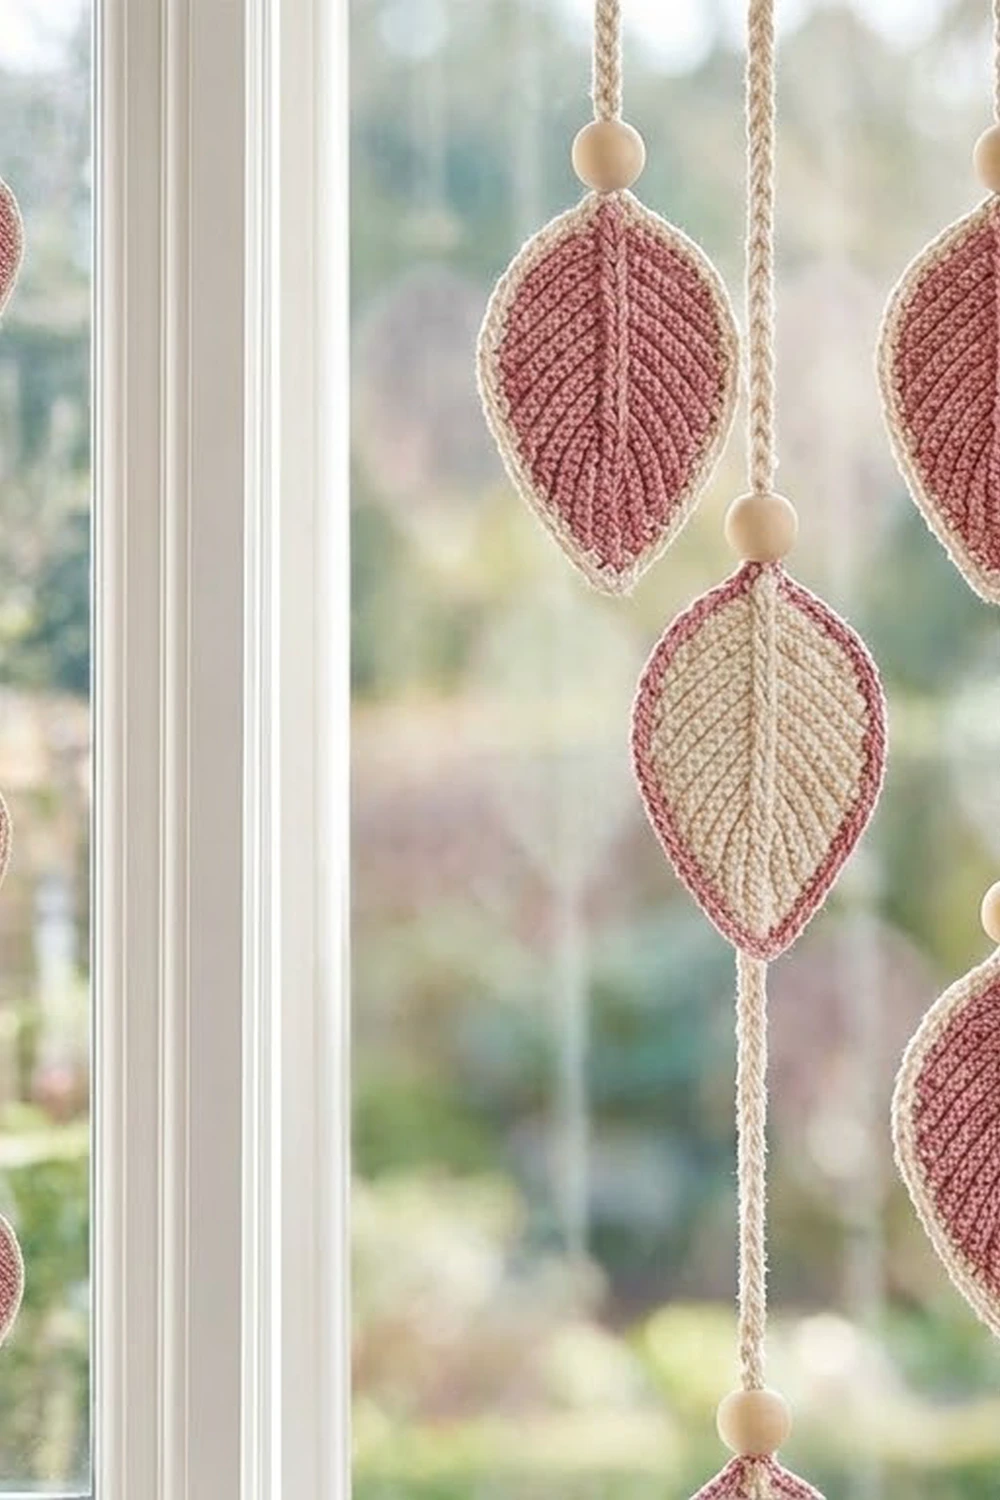
Final Notes
Here’s the measurement chain from start to finish. Hitting gauge gives you a 2.1 in (5.3 cm) x 3.3 in (8.4 cm) leaf, and the edging brings it to 2.3 in (5.8 cm) x 3.5 in (8.9 cm). With a bead and a 2 in (5.1 cm) gap, the leaves repeat every 6.1 in (15.5 cm). Five leaves per strand give hanging lengths of 40 in (101.6 cm) and 43 in (109.2 cm). Six strands spaced 4 in (10.2 cm) apart fill a 24 in (61.0 cm) dowel. If you check each step against these numbers, the curtain will hang evenly.
Happy crocheting!