

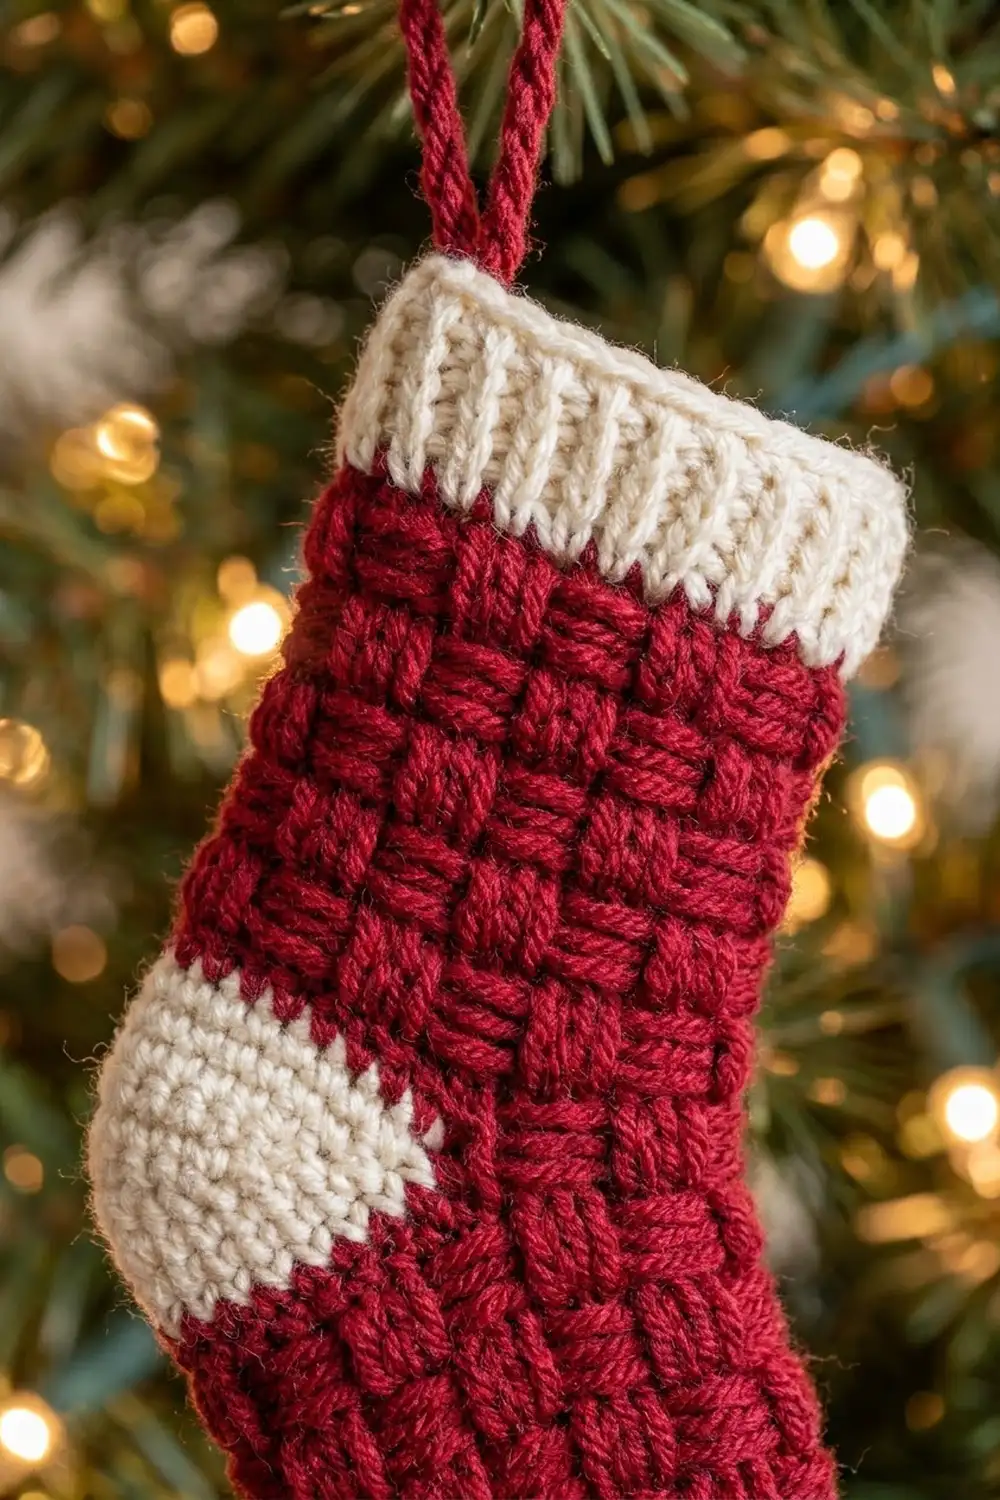
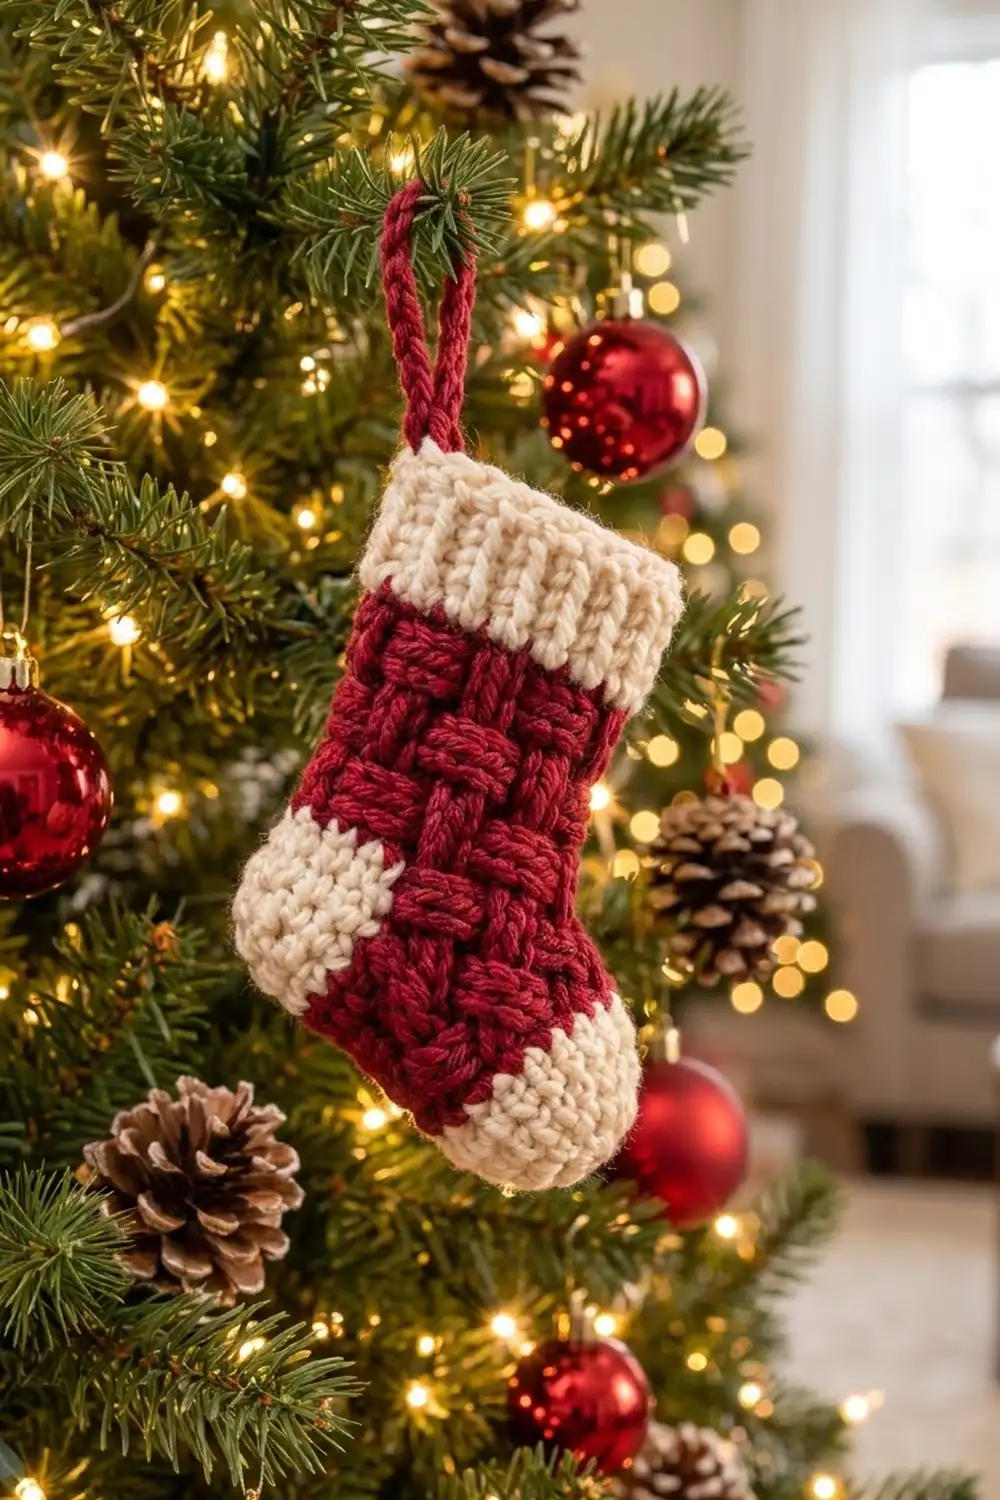
This little stocking is made to hang on the tree. The leg and foot are deep cranberry red in a raised basketweave texture. The cuff, heel and toe are soft cream. A twisted red loop at the top lets it hang from a branch, a gift tag or a garland hook.
The look is cozy and traditional. Each block of the basketweave has three front post double crochet columns next to three back post columns. The blocks swap every two rounds, so the fabric looks like woven strips. The cuff is a 1×1 post-stitch rib, which gives it neat vertical ridges.
This pattern uses US crochet terms. The finished ornament is about 4.75 in (12.1 cm) tall from the cuff top to the sole, not counting the loop. Lying flat, the leg is about 3 in (7.6 cm) wide and the foot is about 3.5 in (8.9 cm) long from heel to toe.
The stocking is made in one piece, in the round, from the top down. You chain a ring, work the leg in basketweave, leave an opening for an afterthought heel, then work the foot and the cream toe. Next you go back and work the cream heel into the opening. Last, you work the cream cuff into the starting chain and add the hanging loop.
Finished Size and Construction
- Finished size: 4.75 in (12.1 cm) tall x 3.5 in (8.9 cm) heel to toe
- Skill level: Intermediate (post stitches, working in rounds, afterthought heel)
- Terminology: US crochet terms
- Yarn weight: Worsted (#4)
- Hook: 4.0 mm (US G-6)
- Number of pieces: 1 (worked as one continuous piece, nothing sewn together)
- Layout: A single ornament, laid flat or hung by its loop
- Piece size (leg, flat): 3 in (7.6 cm) wide
- Size before border (cuff): 3.5 in (8.9 cm) tall
- Border depth (cuff): 1.25 in (3.2 cm); the cuff is 3.25 in (8.3 cm) wide flat
- Hanging loop: 1.5 in (3.8 cm) above the cuff
Materials
Choose a smooth, tightly plied worsted yarn. Cotton or a cotton blend shows the basketweave very clearly. Acrylic is softer and a little fuzzier, but it still works well. Avoid fluffy or brushed yarns, because they hide the post-stitch ridges.
Post stitches use more yarn than plain double crochet, so don’t plan your red by eye alone.
- Cranberry red (Color A): about 10 g / 20 m (22 yd), for the leg, foot and loop
- Cream (Color B): about 6 g / 12 m (13 yd), for the cuff, heel and toe
Tools:
- 4.0 mm (US G-6) crochet hook
- Tapestry needle
- 2 stitch markers
- Scissors
- A short piece of scrap yarn (optional, to mark the heel opening)
- Pins, a blocking mat and a spray bottle
These amounts include a margin of about 20 percent. That leaves room for gauge checks and for weaving in ends.
Abbreviations (US Terms)
- ch – chain
- sl st – slip stitch
- sc – single crochet
- dc – double crochet
- sc2tog – single crochet 2 together (decrease)
- st(s) – stitch(es)
- rnd(s) – round(s)
- FPdc – front post double crochet
- BPdc – back post double crochet
Special stitches:
- FPdc: Yarn over. Insert the hook from front to back to front around the post of the stitch below. Yarn over and pull up a loop, then (yarn over, pull through 2 loops) twice.
- BPdc: Yarn over. Insert the hook from back to front to back around the post of the stitch below, then finish it like a dc.
- Block A: *FPdc in next 3 sts, BPdc in next 3 sts; repeat from * as directed.
- Block B: *BPdc in next 3 sts, FPdc in next 3 sts; repeat from * as directed.
The post-stitch rounds start with ch 2, and the sc rounds start with ch 1. The starting chain does not count as a stitch. End every round with a sl st to the first stitch. Do not turn.
Gauge and Checkpoints
Basketweave gauge: 16 sts = 4 in (10.2 cm) around the tube, and 7 rnds = 2.5 in (6.4 cm) tall. Single crochet gauge: 5 sts = 1 in (2.5 cm).
The ornament is small, so the leg is your test piece. Work the leg through Rnd 7 and measure it before you go on.
Checkpoints:
- After Rnd 1: The ring of 24 dc lies flat as a tube about 3 in (7.6 cm) wide.
- After Rnd 7: The leg is 3 in (7.6 cm) wide flat and 2.5 in (6.4 cm) long.
- After the toe: The foot measures about 2.5 in (6.4 cm) from the heel opening to the toe tip.
- After the heel: The stocking without the cuff is 3.5 in (8.9 cm) tall.
- After the cuff: The total height is 4.75 in (12.1 cm).
If your leg is wider than 3.25 in (8.3 cm), change to a 3.75 mm hook. If it is narrower than 2.75 in (7.0 cm), change to a 4.5 mm hook. Do not change the stitch count, because the 3+3 blocks need a 24-stitch round.
Leg
Start with Color A.
Foundation: Ch 24 and sl st to the first ch to make a ring. Check that the chain is not twisted.
Rnd 1: Ch 2, dc in each ch around, sl st to the first dc. (24 dc)
Put a marker in the first stitch. Each round begins at the side of the leg. Stitches 1–12 are the front (shin) half, and stitches 13–24 are the back half.
Rnds 2–3: Ch 2, work Block A 4 times around, sl st to the first st. (24 sts: 12 FPdc, 12 BPdc)
Rnds 4–5: Ch 2, work Block B 4 times around, sl st to the first st. (24 sts)
The front post columns now sit above the back post columns of Rnds 2–3. This is the first change in the weave.
Rnds 6–7: Ch 2, work Block A 4 times around, sl st to the first st. (24 sts)
Tension tip: pull each post stitch up to the full height of a dc. Short post stitches make the leg stubby and the blocks hard to see.
Checkpoint: the leg is 3 in (7.6 cm) wide flat and 2.5 in (6.4 cm) long.
Heel Opening and Foot
Rnd 8 (heel opening): Ch 2, work Block B 2 times over sts 1–12, ch 12, skip sts 13–24, sl st to the first st. (12 sts + 12 ch = 24)
You can thread scrap yarn through the 12 skipped stitches so they are easy to find later.
Rnd 9: Ch 2, work Block B 2 times over the 12 front sts, dc in each of the 12 ch, sl st to the first st. (24 sts: 12 post sts + 12 dc)
Work each dc into the top loop and back bump of the chain. This keeps the bottom loops free for the heel.
Rnd 10: Ch 2, work Block A 4 times around, sl st to the first st. (24 sts)
On the sole side, this round works post stitches around the plain dc of Rnd 9, so the sole has the same texture as the top of the foot. Fasten off Color A.
Toe
Join Color B in the first st of Rnd 10. The toe is worked in sc. Each half gets two decreases, one at each side, so the toe stays flat and rounded.
Rnd 11: Ch 1, sc in each st around, sl st to the first sc. (24 sc)
Rnd 12: Ch 1, [sc2tog, sc in next 8, sc2tog] 2 times, sl st to the first st. (20 sts)
Rnd 13: Ch 1, [sc2tog, sc in next 6, sc2tog] 2 times, sl st to the first st. (16 sts)
Rnd 14: Ch 1, [sc2tog, sc in next 4, sc2tog] 2 times, sl st to the first st. (12 sts)
Rnd 15: Ch 1, [sc2tog, sc in next 2, sc2tog] 2 times, sl st to the first st. (8 sts)
Flatten the toe so the 4 top stitches lie over the 4 sole stitches. Ch 1 and sc through both layers 4 times to close it. Fasten off.
Heel
Join Color B at one corner of the heel opening.
Rnd 1: Ch 1, sc 1 in the corner gap, sc in each of the 12 skipped sts of Rnd 7, sc 1 in the other corner gap, sc in each of the 12 free bottom loops of the chain, sl st to the first sc. (26 sc: 13 per half)
The two corner stitches close the small holes at the ends of the opening.
Rnd 2: Ch 1, [sc2tog, sc in next 9, sc2tog] 2 times, sl st to the first st. (22 sts)
Rnd 3: Ch 1, [sc2tog, sc in next 7, sc2tog] 2 times, sl st to the first st. (18 sts)
Rnd 4: Ch 1, [sc2tog, sc in next 5, sc2tog] 2 times, sl st to the first st. (14 sts)
Rnd 5: Ch 1, [sc2tog, sc in next 3, sc2tog] 2 times, sl st to the first st. (10 sts)
Flatten the heel so 5 stitches face 5 stitches. Sc through both layers 5 times to close it. Fasten off and weave in the ends on the inside.
Checkpoint: laid flat, the stocking measures 3.5 in (8.9 cm) from the starting chain to the bottom of the heel.
Border: Ribbed Cuff
The cuff is the border of this piece. You work it upward into the free loops of the foundation chain, so the ribs point up and away from the leg.
Border gauge: In 1×1 post rib, 30 sts relax to about 6.5 in (16.5 cm) around, which lies flat at 3.25 in (8.3 cm) wide. Each rib round is about 0.33 in (0.8 cm) tall.
Hold the stocking upside down. Join Color B in a free loop of the foundation chain at the side marker position.
Rnd 1 (conversion round): Ch 1, sc in next 3 loops, 2 sc in next loop; repeat from * 6 times, sl st to the first sc. (24 sc worked 1 per loop + 6 extra sc = 30 sts; 15 per flat side)*
Per side: the front half has 12 starting loops plus 3 extra stitches, for 15. The back half is the same, 12 + 3 = 15. 15 + 15 = 30.
Rnd 2: Ch 2, FPdc in next st, BPdc in next st; repeat from * 15 times, sl st to the first st. (30 sts: 15 FPdc, 15 BPdc)*
Rnds 3–4: Ch 2, FPdc around the FPdc, BPdc around the BPdc; repeat from * 15 times, sl st to the first st. (30 sts)*
Fasten off and leave a 6 in (15.2 cm) tail.
Why the math works: 30 is an even number, so the 1×1 rib repeats evenly and has no leftover stitch at the join. Each flat side has 15 stitches, which is 7 full rib pairs plus 1 stitch. The two odd stitches meet at the side folds and disappear into the edge. The 6 extra stitches add 25 percent, which balances the way rib pulls in. The cuff lies about 0.25 in (0.6 cm) wider than the leg when flat, so it flares slightly as in the photo. The depth is 1 sc round plus 3 rib rounds, about 1.25 in (3.2 cm).
Hanging Loop
Hold Color A double. Join it at the top of the cuff on the back fold, which is the heel side. Ch 14 loosely, then sl st into the same stitch. Fasten off and weave the tails down into the cuff.
Twist the loop gently a few times in the direction of the ply, then let it relax. The doubled strands settle into a twisted cord. The loop stands about 1.5 in (3.8 cm) above the cuff.
Final Blocking
- Weave in every end on the inside, running each tail through stitches of the same color.
- Turn the stocking right side out. Push the heel and toe into shape with a finger.
- Lay it flat on a blocking mat with the foot pointing to one side and the heel at the back.
- Pin the leg to 3 in (7.6 cm) wide and the cuff to 3.25 in (8.3 cm) wide.
- Check that the total height is 4.75 in (12.1 cm) and the foot is 3.5 in (8.9 cm) long.
- Mist with water until damp but not soaked. Do not press the post stitches flat.
- Let it dry completely, at least 4 hours, then unpin.
- Optional: tuck a little tissue into the foot while it dries to keep it rounded.
Final Quality-Control Checklist
- Every basketweave round in the leg and foot has exactly 24 stitches.
- The blocks change every two rounds: A, A, B, B, A, A, B, B, A (Rnds 2–10).
- The starting ring has no twist, and the weave columns run straight.
- The heel opening is fully closed, with no holes at the corners.
- The heel and toe each close with a flat seam, and both seams lie at the bottom.
- The cuff has 30 stitches with even vertical ribs.
- The leg is 3 in (7.6 cm) wide, the cuff is 3.25 in (8.3 cm) wide and the height is 4.75 in (12.1 cm).
- The loop is secure and sits at the back fold.
- All ends are hidden inside.
Troubleshooting
The weave looks like plain ribbing. You probably forgot to switch blocks. Check that Rnds 4–5 start with BPdc and Rnds 6–7 start with FPdc.
The leg twists or spirals. The join is drifting. Always sl st into the first real stitch, not into the ch 2.
There are holes at the heel corners. Make sure you worked the corner gap stitches in heel Rnd 1. If a gap is still there, close it with a few stitches of cream yarn on the inside.
The toe is pointed instead of rounded. Your decreases are not at the sides. Recount so each half has the same number of stitches before you decrease.
The cuff is too tight. Work the post stitches more loosely, or go up one hook size for the cuff only.
The sole looks flat and plain. In Rnd 10, make sure you work post stitches around the dc of Rnd 9, not into their tops.
The ornament is too big or too small. Check your gauge after Rnd 7 and change the hook size. Do not change the stitch count.
Care
Hand wash in cool water with mild soap, press the water out in a towel and lay flat to dry. Store it flat with your other ornaments, away from damp.
Final Notes
The measurements are short and easy to check. The 24-stitch ring makes a leg 3 in (7.6 cm) wide flat. Seven rounds bring it to 2.5 in (6.4 cm) long. The foot, toe and heel bring the body to 3.5 in (8.9 cm). The 30-stitch cuff adds 1.25 in (3.2 cm), for a total of 4.75 in (12.1 cm), and the loop rises 1.5 in (3.8 cm) above that.
Make one for the tree, or make a few to tie onto gifts. Each one takes about an hour once you get into the basketweave rhythm.
Happy crocheting!