

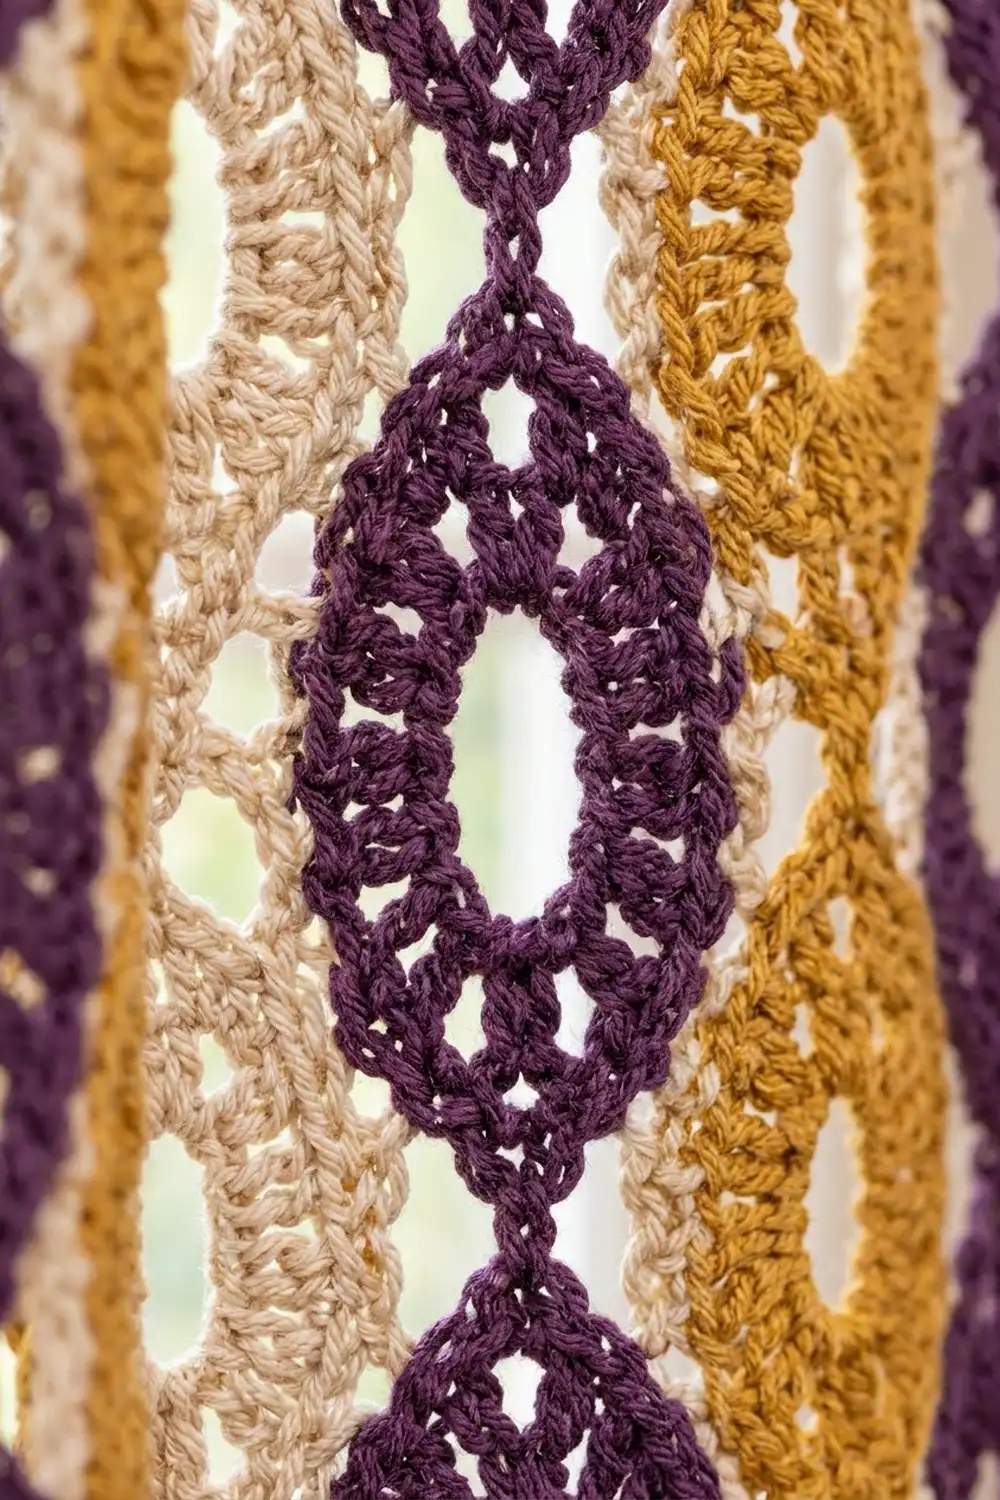
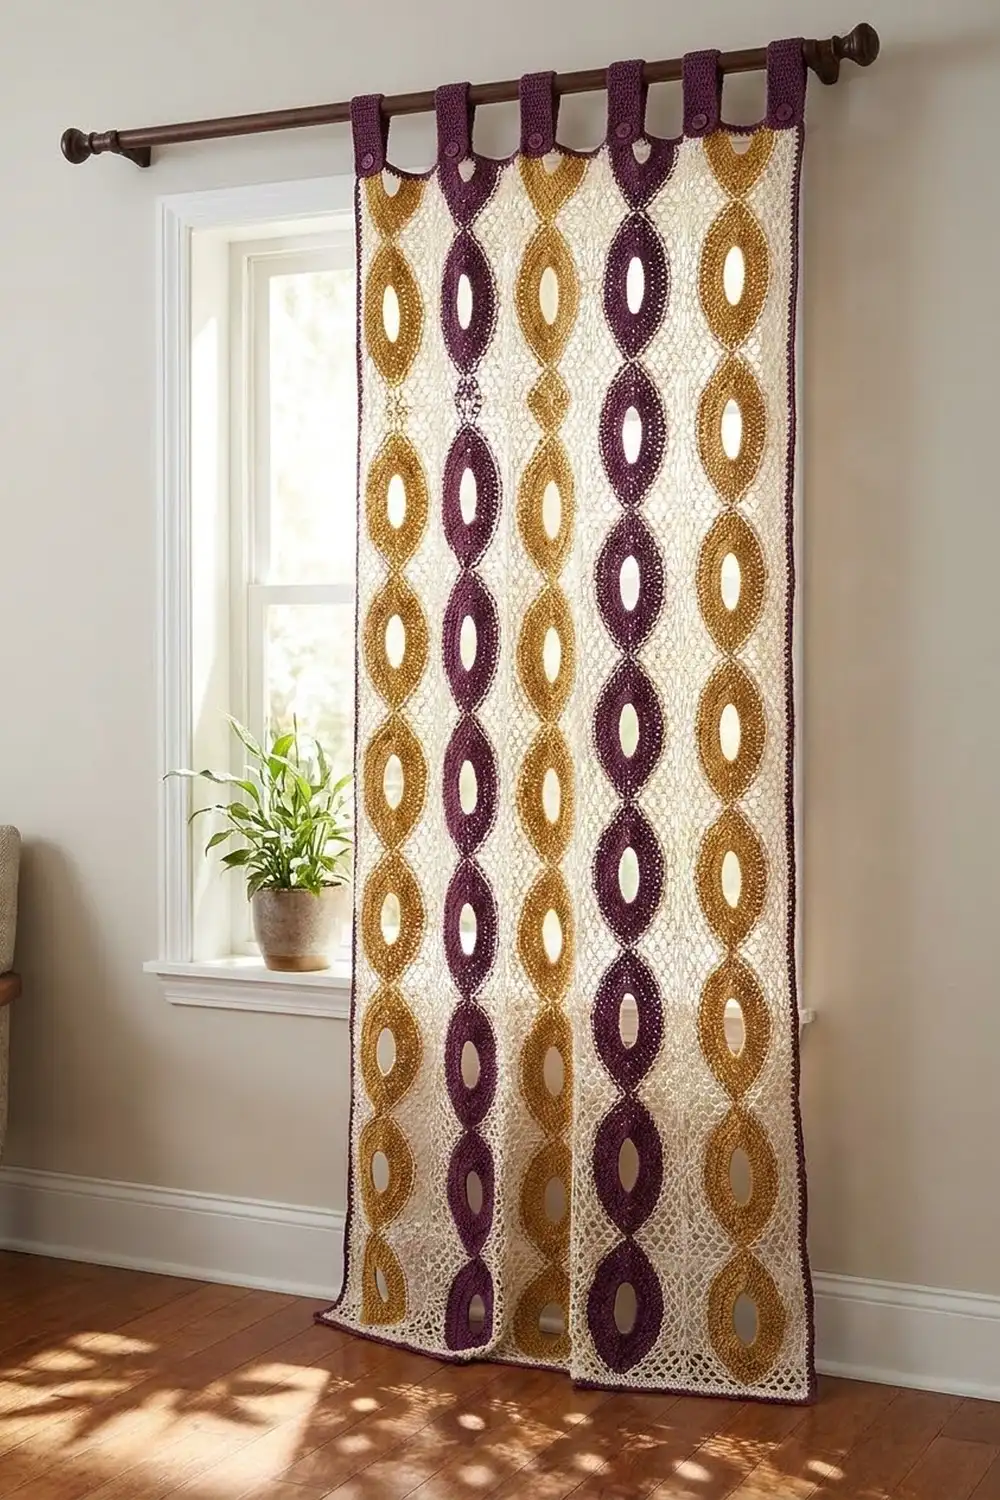
This curtain panel is made of tall columns of pointed almond shapes. Each almond has an open eyelet in the middle, and the tips of neighboring almonds touch, so every column reads as one linked chain running from the rod to the floor. Columns of deep plum, warm mustard gold, and soft cream almonds alternate across the width, and a cream lace frame between them lets daylight through.
The panel is worked in US crochet terms in worsted-weight cotton. One finished panel measures 39.75 in x 81.25 in (101.0 cm x 206.4 cm) before the tabs. The folded tabs add 3.5 in (8.9 cm), so the total hanging length is 84.75 in (215.3 cm).
Every almond is its own small rectangular tile. You crochet the almond in rounds around a chain ring, then add two cream rounds that square it into a rectangle. You make 99 tiles, join them into 9 columns of 11, join the columns side by side, add a cream border, and finish with 9 plum tabs across the top.
For a pair of curtains like the ones in the photo, make two identical panels.
Finished Size and Construction
- Finished panel size: 39.75 in x 81.25 in (101.0 cm x 206.4 cm), not counting tabs
- Skill level: Intermediate
- Terminology: US
- Yarn weight: Worsted (Category 4) cotton
- Hook: US H-8 (5 mm)
- Number of pieces: 99 tiles, plus 9 tabs worked onto the panel
- Layout: 9 columns x 11 rows
- Tile size: 4.25 in x 7.25 in (10.8 cm x 18.4 cm)
- Size before border: 38.25 in x 79.75 in (97.2 cm x 202.6 cm)
- Border depth: 0.75 in (1.9 cm) per side
Materials
Use a smooth, mercerized or combed worsted cotton, about 180 m per 100 g. Cotton hangs straight, holds its shape, and keeps the almond points crisp. Acrylic will stretch under the panel’s own weight.
- Plum (P): 265 g / 470 m (almonds and tabs)
- Mustard Gold (G): 130 g / 230 m (almonds)
- Cream (C): 1,040 g / 1,870 m (cream almonds, tile trim, joining, border)
All quantities include a margin of about 15%. Buy all of each color from one dye lot.
Tools:
– US H-8 (5 mm) crochet hook
– Tapestry needle
– Stitch markers
– Rust-proof pins and blocking mats
– Spray bottle
– Measuring tape
Abbreviations (US Terms)
- ch – chain
- sl st – slip stitch
- sc – single crochet
- dc – double crochet
- tr – treble crochet (yarn over twice)
- dtr – double treble crochet (yarn over 3 times)
- sp – space
- st(s) – stitch(es)
- rev sc – reverse single crochet (crab stitch)
- BLO – back loop only
Standing sc: Start with a slip knot on the hook. Insert the hook into the stitch or space, yarn over, pull up a loop, yarn over, and draw through both loops.
Corner group: (dtr, ch 3, dtr) worked in the same stitch.
Gauge and Checkpoints
Base gauge: 16 sc and 16 rows = 4 in (10.2 cm) in sc worked flat with the H-8 (5 mm) hook. The tile edges and the border both use this gauge.
Make and block one plum tile before you start the rest. Measure at each stage:
- After Round 3 (almond): about 3 in x 5.75 in (7.6 cm x 14.6 cm), tip to tip
- After Round 5 (tile): 4.25 in x 7.25 in (10.8 cm x 18.4 cm), lightly blocked
- One joined column: 4.25 in x 79.75 in (10.8 cm x 202.6 cm)
- Joined panel: 38.25 in x 79.75 in (97.2 cm x 202.6 cm)
- Bordered panel: 39.75 in x 81.25 in (101.0 cm x 206.4 cm)
If your tile is more than 0.25 in (0.6 cm) too big, drop to a 4.5 mm hook. If it is too small, go up to a 5.5 mm hook. Blocking will correct a small difference in height, but the 17-stitch short sides need to come out close to 4.25 in (10.8 cm), because width errors add up across 9 columns.
Tile Pattern (Make 99)
Rounds 1–3 are worked in the almond color (P, G, or C). Rounds 4–5 are always worked in C. Do not turn between rounds.
Foundation: With almond color, ch 18. Sl st in the first ch to form a ring. Lay it flat as a long, narrow loop. The ch you joined into is the top tip, and the 10th ch is the bottom tip.
Round 1: Ch 3 (counts as dc). Work (dc, ch 2, 2 dc) in the same ch as the join. Dc in each of the next 8 ch. Work (2 dc, ch 2, 2 dc) in the next ch. Dc in each of the next 8 ch. Sl st to the top of the beg ch-3.
(24 dc, 2 ch-2 tips; 12 dc along each side between tips)
Round 2: Sl st in the next dc and into the ch-2 sp. Ch 3 (counts as dc), then work (dc, ch 2, 2 dc) in the same sp. Dc in the next 3 dc, 2 dc in the next dc, dc in the next 4 dc, 2 dc in the next dc, dc in the next 3 dc. Work (2 dc, ch 2, 2 dc) in the next ch-2 sp. Repeat from * to * once more. Sl st to the top of the beg ch-3.
(36 dc: 4 at each tip and 14 along each side; 18 dc along each side between tips)
The two increases on each side round out the almond so it doesn’t come out as a straight-sided diamond.
Round 3: Sl st in the next dc and into the ch-2 sp. Ch 1. Work (sc, ch 3, sc) in the same sp. Sc in each of the next 18 dc. Work (sc, ch 3, sc) in the next ch-2 sp. Sc in each of the next 18 dc. Sl st to the first sc. Fasten off.
(40 sc: 18 along each side plus 2 at each tip; 2 ch-3 tip points)
Number the 18 side sc from 1 to 18, starting at the sc right after a tip group.
Round 4 (C, framing): Join C with a standing sc in the top ch-3 tip sp.
Ch 5. Skip the tip-group sc and side sc 1–2. Work a corner group in sc 3. Ch 4, skip sc 4–5, tr in sc 6. Ch 3, skip sc 7, dc in sc 8. Ch 5, skip sc 9–10, dc in sc 11. Ch 3, skip sc 12, tr in sc 13. Ch 4, skip sc 14–15, work a corner group in sc 16. Ch 5, skip sc 17–18 and the tip-group sc.
Sc in the bottom ch-3 tip sp. Repeat from * to * along the second side. Sl st to the first sc.
(2 tip sc, 4 corner groups, 4 tr, 4 dc)
The dtr corners rise up to the level of the tips, while the shorter dc at mid-side fit the bulge of the almond. That is what squares the shape.
Round 5 (C, conversion): Ch 1. Sc in the first sc. Then:
5 sc in the ch-5 sp, sc in the dtr, 3 sc in the corner ch-3 sp, sc in the dtr, 4 sc in the ch-4 sp, sc in the tr, 3 sc in the ch-3 sp, sc in the dc, 5 sc in the ch-5 sp, sc in the dc, 3 sc in the ch-3 sp, sc in the tr, 4 sc in the ch-4 sp, sc in the dtr, 3 sc in the corner ch-3 sp, sc in the dtr, 5 sc in the ch-5 sp, sc in the bottom tip sc.
Repeat from * to * once more. Sl st to the first sc. Fasten off and leave a 6 in (15.2 cm) tail.
(88 sc = 20 sc worked 1-per-stitch into the 20 Round 4 stitches + 68 sc worked into the ch-spaces)
The middle sc of each 3-sc corner is the corner stitch. Counted corner stitch to corner stitch, with both corners included:
- Short sides (top and bottom): 17 sc each
- Long sides: 29 sc each
Check: 17 + 17 + 29 + 29 − 4 shared corners = 88.
Make All Pieces
Make the tiles in these quantities (Rounds 4–5 in C on all of them):
- Plum almonds: 33 tiles (3 columns)
- Gold almonds: 22 tiles (2 columns)
- Cream almonds: 44 tiles (4 columns). These come out all cream and form the lacy columns between the colors.
Layout (9 columns x 11 rows, every row the same):
Col:  1  2  3  4  5  6  7  8  9
Row:  P  C  G  C  P  C  G  C  P
(repeat this row 11 times, tiles upright, tips pointing up and down)
Block every tile lightly to 4.25 in x 7.25 in (10.8 cm x 18.4 cm) before joining. Tiles that match in size join much more easily.
Joining
Method: Sl st join with C through the BLO.
- Make the columns. Place two tiles wrong sides together, short side to short side. Starting at the corner stitch, sl st through the back loop of the facing stitch on each tile. Join stitch to stitch: 17 sts to 17 sts, corner to corner. Keep going down the column until it has 11 tiles. Make 9 columns.
- Check one column. It should measure 4.25 in x 79.75 in (10.8 cm x 202.6 cm). If it is shorter, your join is too tight.
- Join the columns. Lay the columns out in order: P, C, G, C, P, C, G, C, P. Join each pair along the long edge, one stitch to one stitch: 11 tiles x 29 sts = 319 sts to 319 sts. Place a marker at each tile seam so the seams line up across the panel.
Tension: Keep the slip stitches as loose as the sc beneath them. A tight join will pucker a long curtain. If the seam doesn’t stretch as much as the tile, go up one hook size for joining.
Checkpoint: The joined panel measures 38.25 in x 79.75 in (97.2 cm x 202.6 cm). Seams add no stitches to the edge count.
Border
Border gauge: 16 sc and 16 rounds = 4 in (10.2 cm), the same as Round 5 of the tiles.
Starting counts:
- Top and bottom edges: 9 tiles x 17 sts = 153 sts each
- Side edges: 11 tiles x 29 sts = 319 sts each
These counts include the corner stitch of every tile. At each seam, work into both adjacent tile corner stitches. Don’t add any extra stitches at the seams.
Round 1 (C): Join C in the top-right panel corner stitch with a standing sc. Work 2 more sc in the same stitch. Sc in each stitch around, working 3 sc in each of the other 3 panel corner stitches. Sl st to the first sc.
(Top and bottom 155 each, sides 321 each; 948 sts total)
Round 2 (C): Ch 1. Sc in each sc around, working 3 sc in each center corner sc. Sl st to the first sc.
(Top and bottom 157 each, sides 323 each; 956 sts total)
Round 3 (C): Ch 1. Rev sc in each sc around. Sl st to the first st and fasten off.
(956 sts; no increases)
Why the math works: 153 sts ÷ 4 sts per in = 38.25 in (97.2 cm), and 319 sts ÷ 4 = 79.75 in (202.6 cm). Those are exactly the joined panel’s measurements, so the border lies flat without ruffling or pulling in. The 3 border rounds add 0.75 in (1.9 cm) on every side, which brings the panel to 39.75 in x 81.25 in (101.0 cm x 206.4 cm).
Tabs (Make 9, Worked onto the Panel)
Working in Round 2 of the top edge, count the top-left corner stitch as st 1. You will have 157 sts.
Placement: Tab 1 sits over sts 8–14. After that, skip 10 sts and work the next tab over 7 sts. The tabs land at sts 8–14, 25–31, 42–48, 59–65, 76–82, 93–99, 110–116, 127–133, and 144–150. Each tab is centered over one column, and the panel ends with 7 free sts at each side.
Row 1: With the right side facing, join P with a standing sc in the first tab stitch. Sc in the next 6 sts. Turn. (7 sc)
Rows 2–28: Ch 1, sc in each sc, turn. (7 sc per row)
After Row 28, the tab measures 1.75 in x 7 in (4.4 cm x 17.8 cm). Fasten off and leave a 12 in (30.5 cm) tail. Fold the tab to the back and whipstitch Row 28 to the back of border Round 1. This makes a loop 3.5 in (8.9 cm) tall, which fits a rod up to 1.5 in (3.8 cm) across.
Final Blocking
- Weave in all ends along the trim or the seams, never across an almond eyelet.
- Soak the panel in cool water with a little wool wash for 15 minutes. Press the water out gently, without wringing.
- Roll the panel in towels to take out most of the moisture.
- Lay it flat on mats and pin it to 39.75 in x 81.25 in (101.0 cm x 206.4 cm). Pin the corners first, then the middle of each edge.
- Pin each tile seam into a straight line. Pin the almond tips so they meet neatly.
- Leave it to dry completely, which takes 24–48 hours. Unpin it and hang it for a day so any extra length settles before you hem or adjust.
Final Quality-Control Checklist
- 99 tiles, each 4.25 in x 7.25 in (10.8 cm x 18.4 cm)
- Each tile edge has 17 / 29 / 17 / 29 sts with corners included (88 total)
- The column order is P, C, G, C, P, C, G, C, P, and all almonds point up and down
- Each column measures 79.75 in (202.6 cm)
- The border counts are 155/321 after Round 1 and 157/323 after Round 2
- 9 tabs, each 7 sts wide, each centered on a column
- The finished panel measures 39.75 in x 81.25 in (101.0 cm x 206.4 cm)
Troubleshooting
- The almond cups or ruffles: Round 2 increases are in the wrong place or your tension is uneven. Check that each side has 14 dc between the tip groups.
- The tile corners curl: The dtr are too tight. Pull the first loop up a little taller.
- The tile is too wide but the right height: Your sc gauge is loose. Use a smaller hook for Round 5 only.
- The seams pucker: Rejoin with a larger hook, or use whipstitch instead.
- The border ruffles: Count the starting stitches again. You should have 153 and 319, and no extra stitches at the seams.
- The tabs pull the top edge into scallops: Check that each tab has exactly 7 sts and is centered over its column.
Care
Hand wash in cool water with a mild detergent, or machine wash in a mesh laundry bag on a delicate cycle. Dry flat and re-block as needed. Never hang the panel to dry while it is wet.
Final Notes
The measurement chain follows from one gauge: 4 sc per inch.
- A 3 in x 5.75 in (7.6 cm x 14.6 cm) almond becomes a 17 x 29 stitch tile measuring 4.25 in x 7.25 in (10.8 cm x 18.4 cm).
- Joined 9 across and 11 down, the tiles make a 38.25 in x 79.75 in (97.2 cm x 202.6 cm) panel.
- The 0.75 in (1.9 cm) border brings it to 39.75 in x 81.25 in (101.0 cm x 206.4 cm).
Check your gauge at every stage and the panel will come out right.
Happy crocheting!