

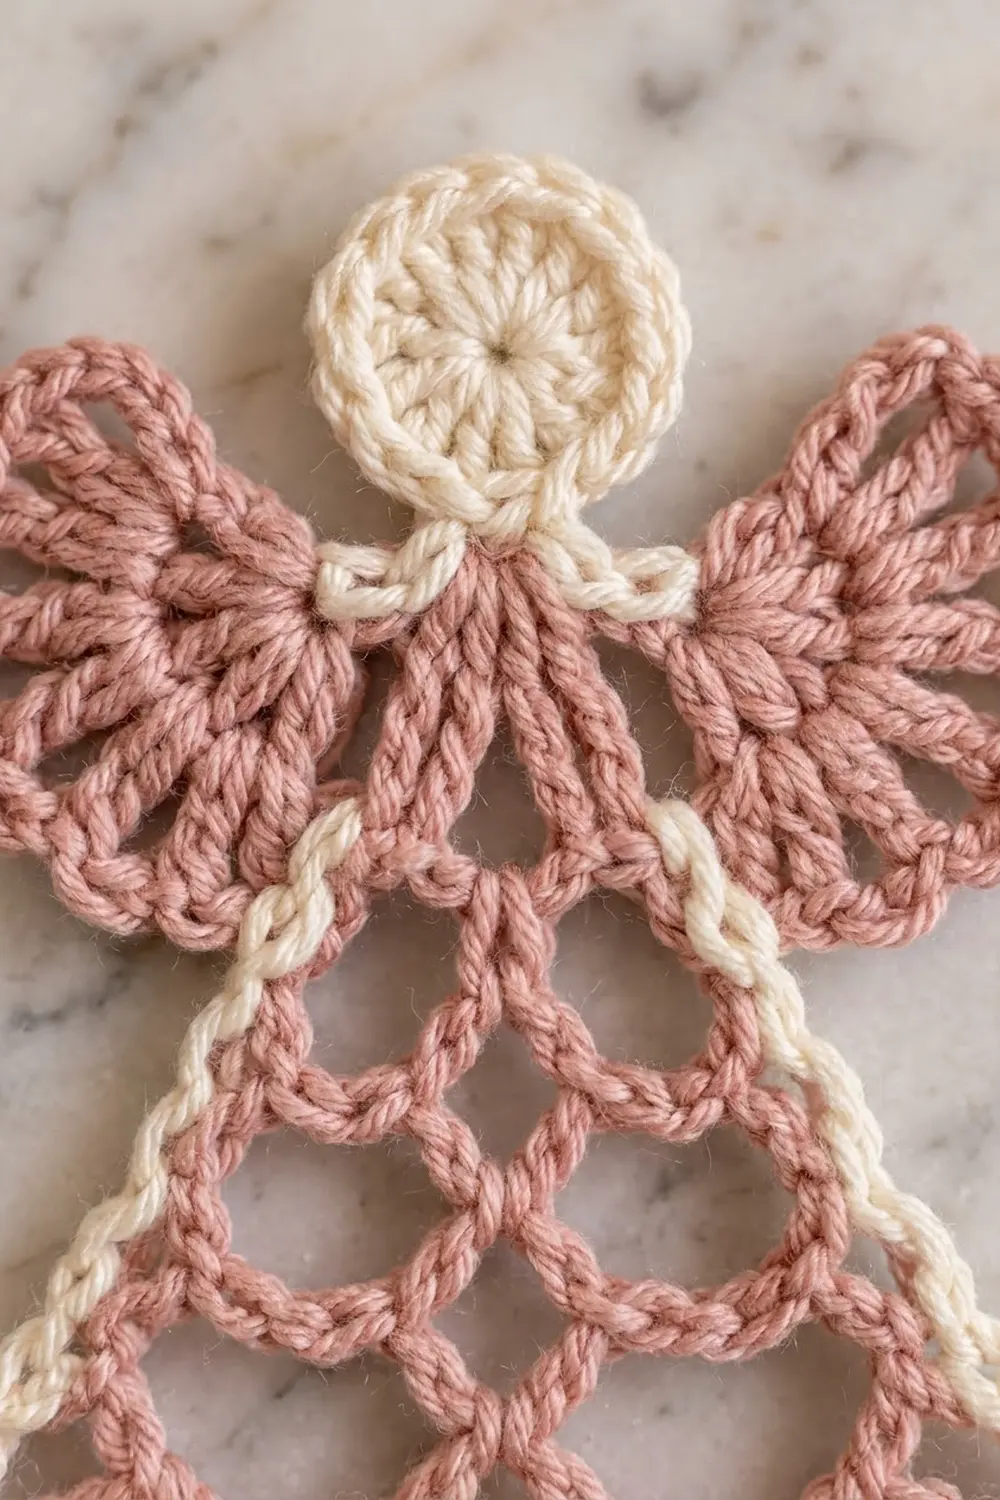
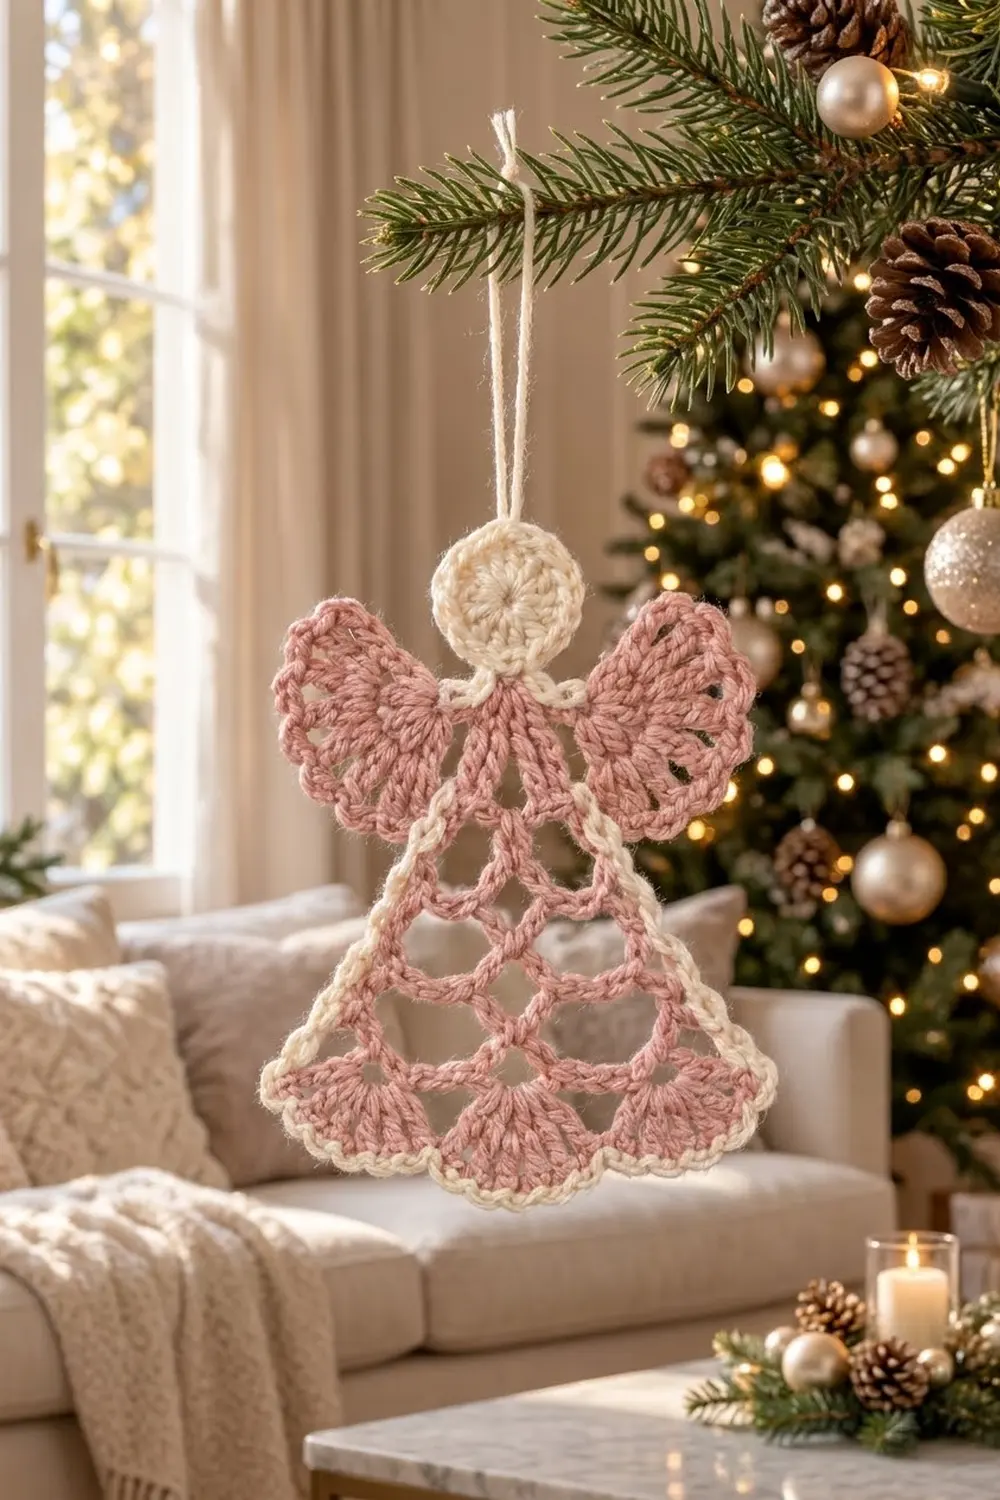
The Blush Lace Angel is a small, flat, lacy angel with a soft vintage look. A solid cream head sits above a pink lace dress. Two fan-shaped wings open out from the shoulders, and a crisp cream outline follows every curve of the shape.
There are two colors. Dusty blush pink is used for the dress and wings, and cream is used for the head and the outline. The open mesh lets light through, so the angel looks delicate on a tree, in a window or tied to a gift.
This pattern uses US crochet terms. The finished angel measures 4.5 in (11.4 cm) wide at the wingtips and 4.6 in (11.7 cm) tall, from the top of the head to the bottom of the hem border.
The construction is simple. You crochet the head in the round, then work the dress top-down in rows straight off the head. Next you add a wing on each shoulder and finish with one cream border round. The angel is a single piece, so there is no sewing and no joining.
Finished Size and Construction
- Finished size: 4.5 in (11.4 cm) wide × 4.6 in (11.7 cm) tall
- Skill level: Easy (advanced beginner)
- Terminology: US crochet terms
- Yarn weight: DK / light (#3), cotton or cotton blend
- Hook: 3.5 mm (E-4)
- Number of pieces: 1 (single motif)
- Layout: One angel: head, dress, two wings, border
- Piece size before border: 4.1 in (10.4 cm) wide × 4.4 in (11.2 cm) tall
- Border depth: 0.2 in (0.5 cm), one round of single crochet
Materials
Choose a smooth DK cotton or cotton blend. Cotton gives clear stitches, blocks crisply and keeps the lace loops open. Avoid fuzzy or brushed yarns because they fill in the mesh and blur the scallops.
- Color A – Blush Pink: 8 g / 20 m (dress and wings)
- Color B – Cream: 4 g / 10 m (head, border and optional hanging loop)
These quantities include a margin of about 20% for the gauge check and for weaving in ends.
Tools:
- 3.5 mm (E-4) crochet hook
- Tapestry needle
- Scissors
- 2 stitch markers
- Ruler or tape measure
- Blocking mat, rust-proof pins and a spray bottle
- Optional: spray starch for a stiffer ornament
Abbreviations (US Terms)
- ch – chain
- sl st – slip stitch
- sc – single crochet
- dc – double crochet
- sp – space
- sk – skip
- st(s) – stitch(es)
- RS – right side
- ( ) × n – repeat the instructions in parentheses n times
Special stitch – Fan: 9 dc worked into the same ch-5 space.
Special technique – Working around the post: insert the hook around the side of a stitch instead of into its top. You use this to start each wing on the shoulder.
Gauge and Checkpoints
Gauge matters on a motif this small. Make the head first and measure it before you start the dress. The head is your test piece.
- Head gauge: after Round 2, the head is 1.0 in (2.5 cm) across.
- Border gauge: 11 sc = 2 in (5.1 cm), so 5.5 sc = 1 in (2.5 cm).
Checkpoints:
- Head Round 1: 0.7 in (1.8 cm) across.
- Head Round 2: 1.0 in (2.5 cm) across.
- Dress Row 3: 2.0 in (5.1 cm) wide at the lowest loops.
- Dress Row 5: 3.2 in (8.1 cm) wide.
- Dress Row 6 (hem): 4.0 in (10.2 cm) wide; 4.4 in (11.2 cm) from head top to hem.
- Each wing: 1.5 in (3.8 cm) from shoulder to outer edge.
- Before border: 4.1 in (10.4 cm) from wingtip to wingtip.
- After border: 4.5 in (11.4 cm) wide × 4.6 in (11.7 cm) tall.
If the head is too big by more than 0.13 in (0.3 cm), go down to a 3.25 mm or 3.0 mm hook. If it is too small, go up to a 3.75 mm or 4.0 mm hook. Change hooks before you start the dress, because a small difference in the head grows across six rows.
Measure lace gently when it is flat, without stretching it. The mesh rows will open up a little more during blocking, and the checkpoints already allow for that.
Pattern Notes
- The head is worked in joined rounds. The dress and wings are worked in turned rows.
- A beginning ch 3 counts as a dc. A beginning ch 1 or ch 2 does not count as a stitch.
- Work chain loops at an even, relaxed tension. The loops shape the triangle of the dress, so they need to match in size.
- When a row says “sc in next ch-sp”, insert the hook into the space under the chain, not into a chain stitch. This keeps the mesh soft and easy to block.
- Leave 4 in (10.2 cm) tails and weave them in as you go. The border hides any ends worked along the edges.
Head
Use Color B (Cream).
Round 1: Make a magic ring. Ch 2 (does not count as a st), 12 dc in the ring. Pull the ring closed and sl st to the first dc. (12 dc)
Round 2: Ch 1, (sc in next st, 2 sc in next st) × 6. Sl st to the first sc. (18 sc)
Fasten off and weave in the ends. Check: 1.0 in (2.5 cm) across.
Hold the head RS facing, with the sl st join at the top. Place a marker in the sc at the bottom of the circle. This is head stitch 1. Head stitches 2 and 3 are the next two sc to its left.
Dress
Use Color A (Blush Pink). The dress is worked top-down in rows straight off the head. Turn at the end of every row.
Row 1 (RS, neck fan): Join pink with a sl st in head stitch 1. Ch 3 (counts as dc), dc in the same st, 3 dc in head stitch 2, 2 dc in head stitch 3. Turn. (7 dc)
This small fan forms the neck and shoulders. The two ends of this row are where the wings will go.
Row 2: Ch 1, sc in the first dc, (ch 3, sk 2 dc, sc in next dc) × 2. Turn. (3 sc, 2 ch-3 sps)
Row 3: Ch 1, sc in the first sc, (ch 4, sc in next ch-3 sp) × 2, ch 4, sc in the last sc. Turn. (4 sc, 3 ch-4 sps)
Row 4: Ch 1, sc in the first sc, (ch 4, sc in next ch-4 sp) × 3, ch 4, sc in the last sc. Turn. (5 sc, 4 ch-4 sps)
Row 5: Ch 1, sc in the first sc, (ch 5, sc in next ch-4 sp) × 4, ch 5, sc in the last sc. Turn. (6 sc, 5 ch-5 sps)
Each mesh row adds exactly one loop. The row has one sc anchor at each edge plus one in every loop below, so it always ends up with one more loop than the row before. This gives the dress its even triangle shape. Check: 3.2 in (8.1 cm) wide.
Row 6 (hem fans): Ch 1, sc in the first sc, (Fan in next ch-5 sp, sc in next sc) × 5. (5 fans; 45 dc + 6 sc = 51 sts)
Fasten off and weave in the ends. Check: 4.0 in (10.2 cm) wide at the hem, with each fan about 0.8 in (2.0 cm) wide, and 4.4 in (11.2 cm) from the top of the head to the hem.
Wings (Make 2)
Use Color A (Blush Pink). Both wings are worked the same way, one on each end of Dress Row 1.
Row 1: With RS facing, join pink with a sl st around the post of the end stitch of Dress Row 1. On one side this is the beginning ch-3, and on the other side it is the last dc. Ch 3 (counts as dc), 6 dc around the same post. Turn. (7 dc)
Row 2: Ch 3 (counts as dc), dc in the same st, 2 dc in each of the next 5 dc, dc in the top of the turning ch. Turn. (13 dc)
Row 3 (scallop edge): Ch 1, sc in the first dc, (ch 3, sk next dc, sc in next dc) × 6. (7 sc, 6 ch-3 sps)
Fasten off and weave in the ends. Repeat on the other shoulder.
Each wing should fan upward and outward beside the head, measuring 1.5 in (3.8 cm) from shoulder to edge. Check: 4.1 in (10.4 cm) from wingtip to wingtip. If one wing sits higher, gently ease it into place now. Blocking will set it later.
Border
Use Color B (Cream). Work one round with RS facing. The border gauge is 5.5 sc = 1 in (2.5 cm).
Set-up: Join cream with a sl st in the first sc of Dress Row 6, which is the corner at one end of the hem.
Hem: Ch 1, 2 sc in the same corner sc, sc in each of the next 9 dc, (sl st in the next sc between fans, sc in each of the next 9 dc) × 4, 2 sc in the last corner sc. (53 sts: 49 sc + 4 sl st)
Side 1 (working up the dress edge): 4 sc in the end of Row 6, 3 sc in the end of each of Rows 5, 4 and 3, then 1 sc in the end of Row 2 in the armpit. (14 sc)
Wing 1: 2 sc in the end of wing Row 1 (underside), 2 sc in the end of wing Row 2, sc in the first sc of wing Row 3, 4 sc in each of the 6 ch-3 sps, sc in the last sc of wing Row 3, 2 sc in the end of wing Row 2 (top side), 2 sc in the end of wing Row 1. (34 sc)
Head: Sl st loosely in each of the 15 free sc of head Round 2. (15 sl st)
Wing 2: Work the same as Wing 1, starting on the top side near the head. (34 sc)
Side 2 (working down the dress edge): 1 sc in the end of Row 2, 3 sc in the end of each of Rows 3, 4 and 5, 4 sc in the end of Row 6. (14 sc)
Sl st to the first sc. Round total: 53 + 14 + 34 + 15 + 34 + 14 = 164 sts. Fasten off.
Why the math works:
- Each fan has 9 dc, so it gets 9 sc. The outline follows the scallop without stretching or ruffling.
- The sl st between fans pulls the border into the dip between scallops, so each fan stays clearly rounded.
- Each mesh row is about 0.55 in (1.4 cm) tall. Three sc at 5.5 sc per inch also cover 0.55 in (1.4 cm), so the length matches exactly.
- The wing loops are ch-3, but they sit on an outer curve. Four sc per loop gives the extra length the curve needs, so the wings lie flat.
- The head is already cream, so sl sts carry the yarn around it without adding width.
- One round of sc adds 0.2 in (0.5 cm) to each outer edge. That takes the width from 4.1 in (10.4 cm) to 4.5 in (11.4 cm). It takes the height from 4.4 in (11.2 cm) to 4.6 in (11.7 cm), because only the hem edge adds height.
Optional hanging loop: Join cream with a sl st in the top sc of the head. Ch 12, then sl st in the same st. Fasten off. The loop is about 1.5 in (3.8 cm) long.
Final Blocking
- Weave in all remaining ends, hiding each one in stitches of the same color.
- Spray the angel evenly until it is damp but not dripping.
- Lay it RS up on the blocking mat.
- Pin the head into a round circle 1.0 in (2.5 cm) across.
- Pin the hem straight at 4.4 in (11.2 cm) wide, with one pin in the center of each of the 5 fans.
- Pin the two wingtips 4.5 in (11.4 cm) apart, fanning each wing out evenly.
- Open each mesh loop with the tip of a pin so the dress looks even.
- Check the height: 4.6 in (11.7 cm) from head top to hem border.
- Mist with spray starch if you want a stiff ornament.
- Leave it to dry completely before unpinning, about 4 to 6 hours.
Final Quality-Control Checklist
- The head has 18 sc and measures 1.0 in (2.5 cm).
- Dress Row 1 has 7 dc, and Rows 2 to 5 have 2, 3, 4 and 5 loops.
- The hem has 5 fans of 9 dc each (51 sts total).
- Each wing has 13 dc in Row 2 and 6 scallop loops in Row 3.
- The border has 164 sts and lies flat all around.
- Both wings match in size and angle.
- The angel is 4.5 in (11.4 cm) wide and 4.6 in (11.7 cm) tall.
- All ends are woven in and hidden.
Troubleshooting
The dress curls inward. Your mesh chains are too tight. Work the chains more loosely, or go up half a hook size for the dress only.
The hem ruffles. Your fans are too loose. Use a smaller hook for Row 6 or keep your dc shorter.
The wings cup forward. The border is too tight on the wing curve. Keep 4 sc per loop and loosen your tension there.
The wings look different from each other. Count the stitches on both sides: there should be 7 dc in Row 1 and 13 dc in Row 2.
The border puckers along the sides. You probably worked only 2 sc per mesh row. Use 3 sc per row end as written.
Gaps show at the head join. Make the head sl sts snug but not tight, and weave the pink tail behind the neck fan.
The dress is lopsided. Check that every row starts in the first sc and ends in the last sc. A missed edge anchor drops a loop on one side.
Care
Hand wash in cool water with mild soap, press out the water in a towel and dry flat. If the angel loses its shape, block it again and re-starch.
Final Notes
The whole angel follows one short chain of measurements. The head is 1.0 in (2.5 cm) across. The dress grows from 2.0 in (5.1 cm) at Row 3 to 3.2 in (8.1 cm) at Row 5 and 4.0 in (10.2 cm) at the hem. The wings bring the width to 4.1 in (10.4 cm). One round of border finishes the angel at 4.5 in (11.4 cm) wide × 4.6 in (11.7 cm) tall.
If you check the head first and count the loops in every mesh row, the rest falls into place. Make one for the tree, one for a gift tag and one for someone you love.
Happy crocheting!