

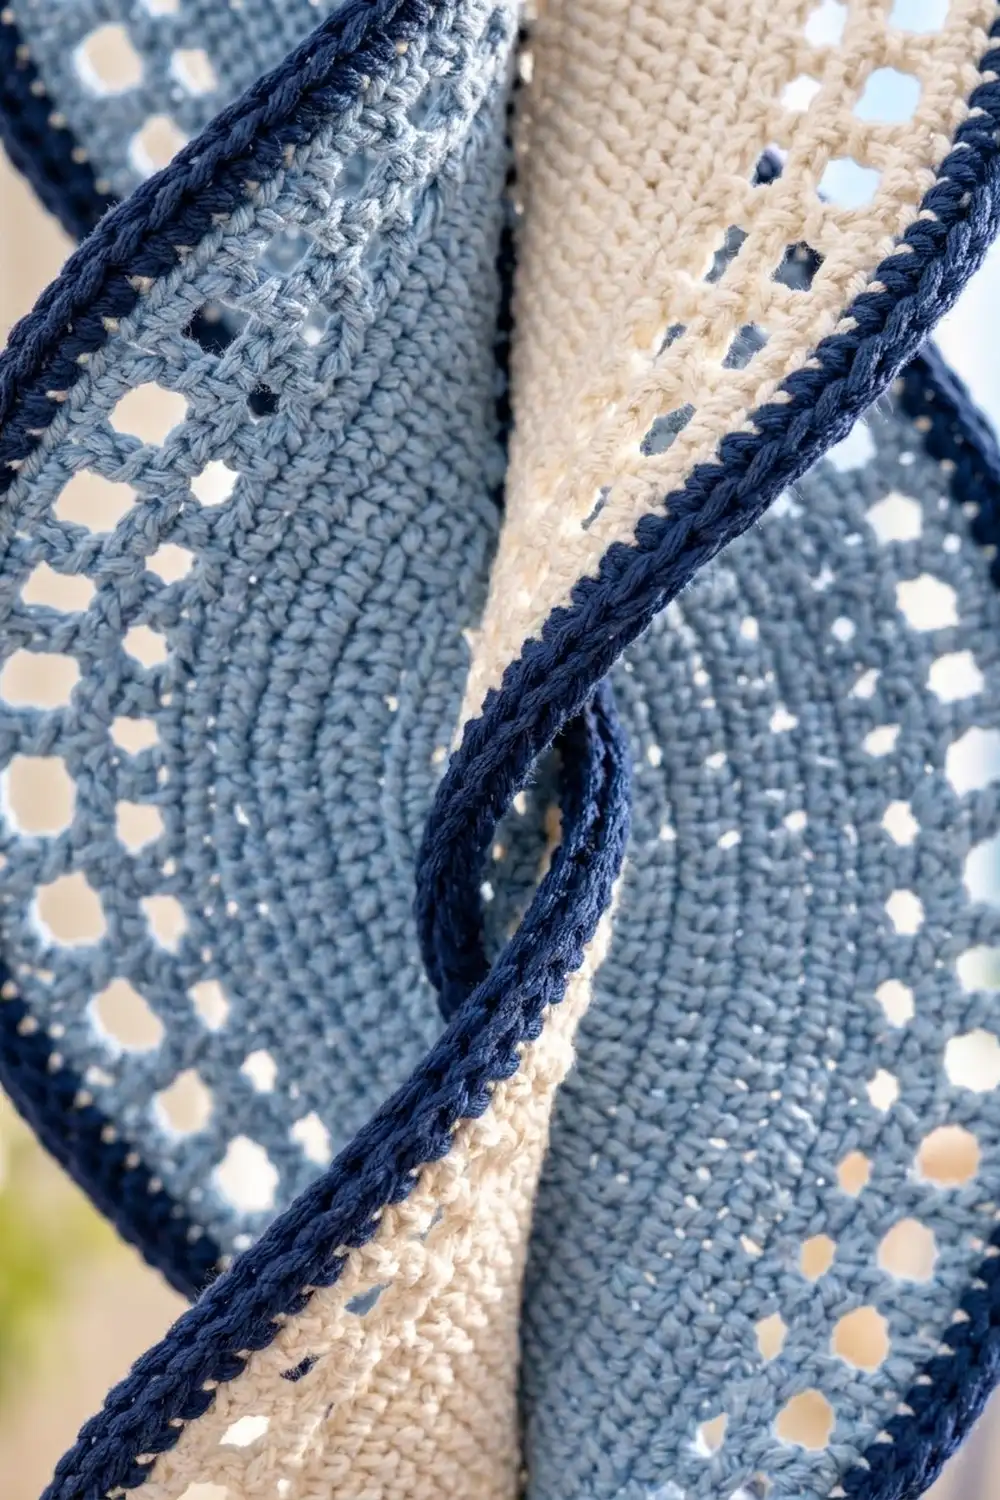
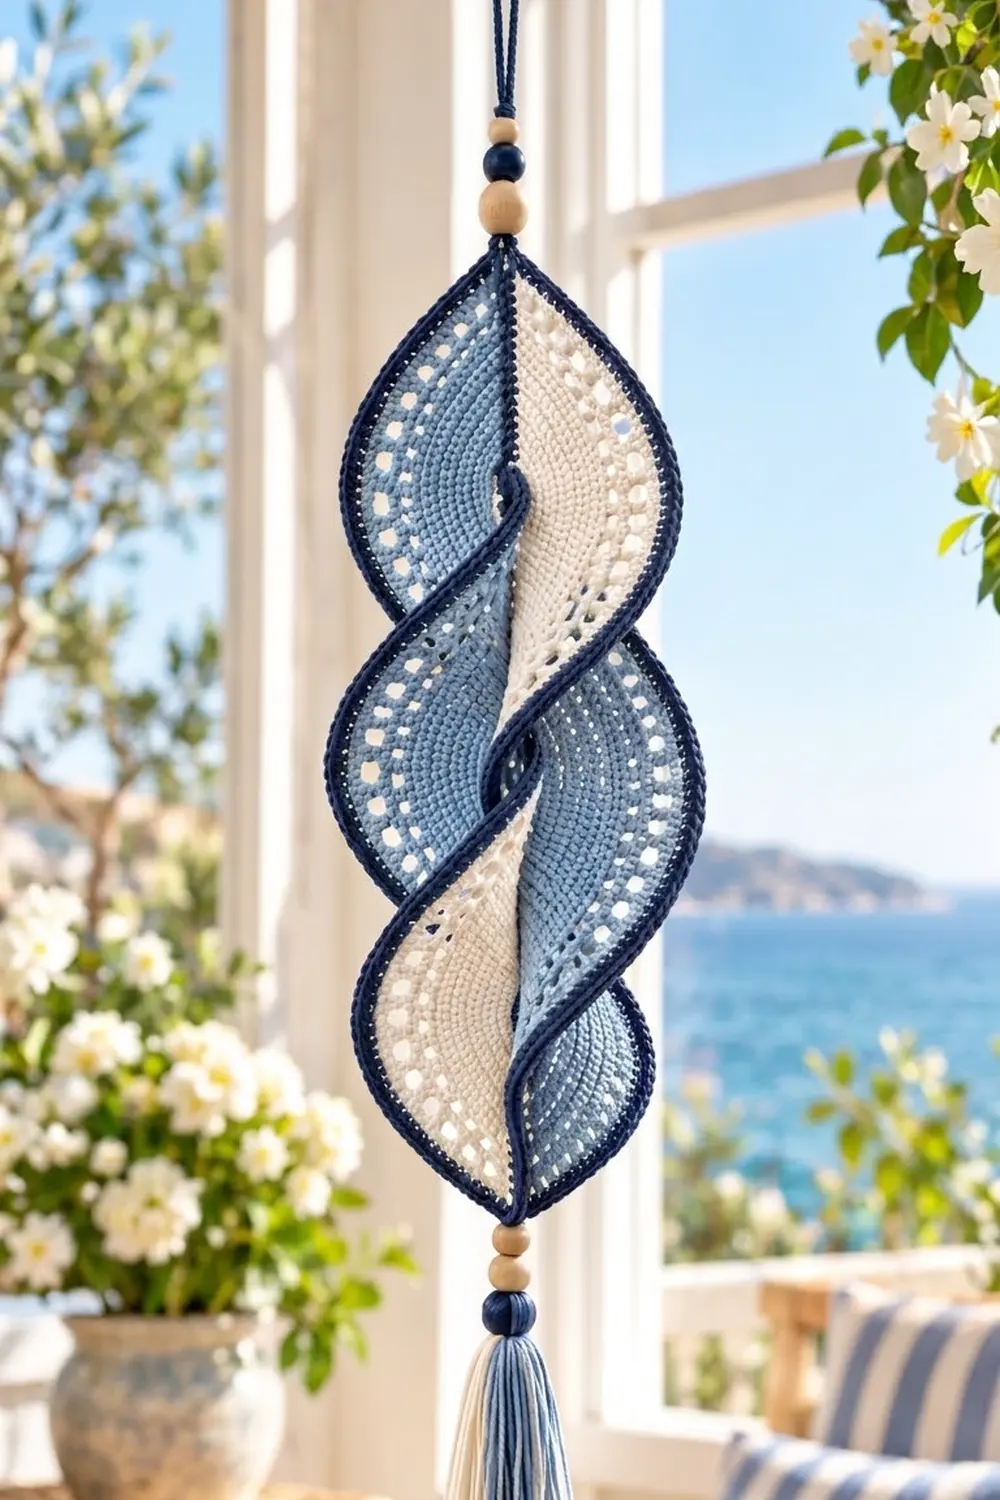
The Coastal Twist is a light, sculptural wall hanging that twists into a soft spiral as it hangs. It is one long pointed oval with two colored halves: light blue on one side and cream on the other, split by a fine navy spine. A corded navy border runs around the whole outline and traces the curves as the piece turns.
The palette is calm and seaside-inspired. Navy, light blue and cream wood-bead accents suit a sunroom, a porch window or a quiet corner. A row of eyelets near each outer edge lets light through and keeps the piece from feeling heavy.
This pattern uses US crochet terms. Flat and bordered, the piece measures 17 in (43.2 cm) long and 4.75 in (12.1 cm) wide. Once twisted and hung, it settles to about 16 in (40.6 cm) long and 4 in (10.2 cm) wide. With the beads and tassel, the full hanging is about 24 in (61.0 cm).
Construction is simple. You crochet a navy foundation spine, then work tapered rows of light blue along one side of it and cream along the other. Each row gives the outer edge more stitches than the spine has. A three-round navy border then outlines the shape. Because the outer edge is much longer than the center, the fabric naturally spirals, and stiffening and blocking set the twist.
Finished Size and Construction
- Finished size (flat, bordered): 17 in (43.2 cm) long x 4.75 in (12.1 cm) wide
- Finished size (twisted, hanging): about 16 in (40.6 cm) x 4 in (10.2 cm)
- Skill level: Intermediate
- Terminology: US crochet terms
- Yarn weight: DK (#3) cotton
- Hook: 3.5 mm (E-4)
- Number of pieces: 1
- Layout: a single vertical lens shape, with a light blue half and a cream half on either side of a navy spine
- Piece size before border: 16 in (40.6 cm) along the spine x 3.75 in (9.5 cm) wide
- Border depth: 0.5 in (1.3 cm) on each side, 3 rounds
Materials
Use a smooth, mercerized or combed DK cotton. Cotton holds the spiral well after stiffening and shows the eyelets cleanly. Avoid fuzzy or very stretchy yarns, because they blur the border and let the twist sag.
- Light blue: 25 g / 60 m (fabric half and tassel)
- Cream: 25 g / 60 m (fabric half and tassel)
- Navy: 20 g / 48 m (spine, border, hanging cord and tassel wrap)
Quantities include a margin of about 20%, so you won’t run short if your tension is slightly looser.
Tools:
– 3.5 mm (E-4) crochet hook
– Tapestry needle
– Scissors and stitch markers
– 2 navy wooden beads, 12 mm
– 4 natural wooden beads, 12 mm
– A piece of card 4 in (10.2 cm) tall for the tassel
– Fabric stiffener, or a starch solution
– Blocking mat, rust-proof pins and a spray bottle
Abbreviations (US Terms)
- ch – chain
- sl st – slip stitch
- sc – single crochet
- hdc – half double crochet
- dc – double crochet
- 2 dc in next – increase: 2 double crochet in the same stitch
- sk – skip
- sp – space
- st(s) – stitch(es)
- rev sc – reverse single crochet (crab stitch)
Special stitch – Reverse single crochet: Without turning, work from left to right (right to left if you crochet left-handed). Insert the hook into the next stitch to the right, yarn over, pull up a loop, then yarn over and pull through both loops. This makes the raised, corded edge.
Step stitches: These are the 3 stitches at each end of a row that the next row does not cover, either because you slip-stitched across them or because you left them unworked. They create the tapered tips.
Gauge and Checkpoints
Gauge: 20 sc and 22 rows = 4 in (10.2 cm); 18 dc and 9 rows = 4 in (10.2 cm).
Gauge matters most for the spine length. Work the spine first as your test piece: it is short and quick, and it sets the length of everything else.
Checkpoints:
1. Spine: 80 sc should measure 16 in (40.6 cm). Halfway along, 40 sc should measure 8 in (20.3 cm).
2. After Side A, Row 4: measured at the center, Side A should be 1.75 in (4.4 cm) deep from the edge of the spine.
3. After Side B: total width at the center should be 3.75 in (9.5 cm). The edges will already ripple. That is correct.
4. After the border: flat width is 4.75 in (12.1 cm). Flat length from tip to tip is 17 in (43.2 cm).
If the piece is too large: go down to a 3.25 mm (D-3) hook and redo the spine.
If the piece is too small: go up to a 3.75 mm (F-5) hook.
Allow 0.25 in (0.6 cm) of tolerance on the spine. Beyond that, change hooks. Don’t change the stitch counts, because the twist depends on the ratio between the spine and the outer edge.
Pattern
Spine (Navy)
Foundation: With navy, ch 81.
Spine row: Sc in 2nd ch from hook and in each ch across. (80 sc) Fasten off.
The sc tops form one long edge, and the free loops of the foundation chain form the other. Each edge has 80 working stitches. The navy spine becomes the dark center line of the finished piece.
Side A (Light Blue)
Work Side A into the 80 sc tops of the spine. Turn at the end of every row.
Row 1: Join light blue in the first sc. Ch 1, sc in first 3 sts, hdc in next 3 sts, dc in next 68 sts, hdc in next 3 sts, sc in last 3 sts. (80 sts) Turn.
The graded sc, hdc and dc heights start the pointed shape at each end.
Row 2 (growth row): Sl st in first 3 sts (sl sts do not count). Ch 1, sc in next 3 sts, hdc in next 3 sts. Dc in next 9 sts, 2 dc in next st; repeat from * 5 more times (6 increases). Dc in next 2 sts, hdc in next 3 sts, sc in next 3 sts. Leave the last 3 sts unworked. Turn.
Row 2 count: 3 sc + 3 hdc + 68 dc + 3 hdc + 3 sc = 80 sts, worked over 74 sts of Row 1.
Row 3 (growth row): Sl st in first 3 sts. Ch 1, sc in next 3 sts, hdc in next 3 sts. Dc in next 6 sts, 2 dc in next st; repeat from * 7 more times (8 increases). Dc in next 6 sts, hdc in next 3 sts, sc in next 3 sts. Leave the last 3 sts unworked. Turn.
Row 3 count: 3 sc + 3 hdc + 70 dc + 3 hdc + 3 sc = 82 sts, worked over 74 sts of Row 2.
Row 4 (eyelet growth row): Sl st in first 3 sts. Ch 1, sc in next 3 sts, hdc in next 3 sts, dc in next st. Ch 2, sk 1 st, dc in next st; repeat from * 30 more times (31 eyelets). Dc in next st, hdc in next 3 sts, sc in next 3 sts. Leave the last 3 sts unworked. Fasten off.
Row 4 count: 3 sc + 3 hdc + 33 dc + 31 ch-2 sps + 3 hdc + 3 sc. Count each ch-2 sp as 2 sts, so the total is 107 sts, worked over 76 sts of Row 3.
Check the middle section: you worked into 64 sts (1 + 62 + 1) and produced 95 sts (33 dc + 62 ch). The ch-2 eyelets add the largest burst of edge length, which is what drives the spiral.
Side B (Cream)
Turn the spine over so that the free loops of the foundation chain face up.
Rows 1–4: Join cream in the first free loop. Work Rows 1–4 exactly as for Side A, using the 80 free loops in place of the sc tops. Fasten off after Row 4.
Side B counts: Row 1 = 80, Row 2 = 80, Row 3 = 82, Row 4 = 107.
The piece now curls and ripples along both outer edges. Check width at the center: 3.75 in (9.5 cm).
Border (Navy)
Border gauge: 3 rounds = 0.5 in (1.3 cm) deep.
Edge layout for Round 1. Each long side has two tapered ends. Going from the last stitch of Row 4 toward a tip, each tapered end has:
– 4 row ends (Rows 4, 3, 2 and 1)
– 9 step stitches (3 from each of Rows 3, 2 and 1)
That makes 13 border stitches per end. The tip itself is the row end of the navy spine.
Round 1: Join navy in the first st of Row 4 on Side A.
– Side A, Row 4: Sc in each sc, hdc and dc, and work 2 sc in each ch-2 sp. (107 sc)
– Side A, tapered end: Moving toward the tip, sc in Row 4’s row end, then in the 3 step sts of Row 3, Row 3’s row end, the 3 step sts of Row 2, Row 2’s row end, the 3 step sts of Row 1 and Row 1’s row end. (13 sc)
– Tip: 3 sc in the spine row end.
– Side B, tapered end: Work as for Side A, mirrored. (13 sc)
– Side B, Row 4: As for Side A. (107 sc)
– Side B, tapered end: (13 sc)
– Tip: 3 sc in the spine row end.
– Side A, tapered end: (13 sc) Sl st to the first sc.
Round 1 count: each long side = 13 + 107 + 13 = 133 sc; each tip = 3 sc. Total = 133 + 133 + 3 + 3 = 272 sc.
Round 2: Ch 1. Sc in each st around, working 3 sc in the center sc of each tip group. Sl st to the first sc.
Round 2 count: 272 sts worked 1 per existing st, plus 4 extra (2 per tip) = 276 sc. Each long side has 133 and each tip has 5.
Round 3: Ch 1. Do not turn. Rev sc in each st around. (276 rev sc) Sl st to the first st and fasten off, leaving a 6 in (15.2 cm) tail.
Why the math works: The spine is 80 sts, but each outer edge carries 133 border sts, which is about 1.66 times the spine length. The fabric can’t lie flat with that much extra edge, so it rolls into a helix. The step stitches give the tapered ends enough border stitches that the tips don’t pucker. Adding 2 sts at each tip in Round 2 keeps the points sharp, and making Round 3 match Round 2 stitch for stitch keeps the corded edge even.
Hanging Cord and Tassel
Cord: Cut three 30 in (76.2 cm) strands of navy. Braid them firmly, then knot each end.
Top: Pull the cord through the top tip at the spine, just inside Round 1. Fold it to make a hanging loop. Thread on 1 wood bead and then 1 navy bead, so that the wood bead sits closest to the tip. Knot the cord above the beads.
Tassel: Wrap cream 15 times and light blue 15 times around the 4 in (10.2 cm) card. Tie the top with navy and cut the bottom loops. Wrap navy tightly around the tassel 0.5 in (1.3 cm) below the tie, then trim the strands evenly. The finished tassel is 4 in (10.2 cm) long.
Bottom: Sew a 10 in (25.4 cm) navy strand through the bottom tip. Thread on 2 wood beads, then 1 navy bead, then tie on the tassel. Weave in all ends.
Final Blocking
- Soak the piece in cool water for 10 minutes, then gently press out the water in a towel.
- Lay it flat and smooth the spine straight. Pin the spine at 16 in (40.6 cm), with both tips pinned out.
- Let the outer edges ripple freely. Do not try to force them flat.
- Brush on fabric stiffener while the piece is still damp. Work it into the border well.
- Unpin the piece and hang it by the top tip. Clip a light weight, such as a clothespin, to the bottom tip.
- Rotate the bottom tip about 1.5 turns until the halves wrap around each other evenly, with blue and cream alternating as you look down the piece.
- Let it dry completely, which takes about 24 hours. The twisted piece should hang at about 16 in (40.6 cm) x 4 in (10.2 cm).
- Remove the weight and attach the beads and tassel.
Final Quality-Control Checklist
- Spine is 80 sc and 16 in (40.6 cm) long
- Each side’s Row 4 has 107 sts, with 31 open eyelets
- Border Round 1 has 272 sts; Rounds 2 and 3 each have 276
- Tips are sharp and centered on the navy spine
- Corded edge is even, with no gaps at the steps
- Spiral is even, with about 1.5 turns
- Beads and tassel are secure and all ends are woven in
Troubleshooting
The piece lies flat and won’t twist. Your tension may be tight on the growth rows. Check the Row 4 counts, then stiffen and twist while the piece is damp.
It twists too tightly or ruffles into waves. Your dc may be loose. Go down a hook size for Rows 2–4 only.
The tips are blunt. Make sure you worked 3 sc at each tip in Round 1 and 3 sc in each tip’s center st in Round 2.
The border puckers at the tapered ends. You probably skipped some row ends. You need 13 sts per tapered end.
The eyelets close up. Work each ch-2 loosely, and open the holes with a finger when blocking.
The navy spine is hidden. Press the spine flat during blocking, before you start twisting.
Care
Dust gently, or spot-clean with cool water. If the piece gets fully wet, re-stiffen it and re-twist it while it is damp.
Final Notes
The whole design depends on one measurement chain. The 80-sc spine sets the length at 16 in (40.6 cm). Four tapered rows on each side bring the width to 3.75 in (9.5 cm) and grow the outer edge to 107 sts. A three-round border brings the width to 4.75 in (12.1 cm) and the length to 17 in (43.2 cm). Because the outer edge carries 133 sts against the 80-st spine, the piece turns into a spiral that hangs at about 16 in (40.6 cm) x 4 in (10.2 cm). If your spine measures correctly and your counts match, the twist will form on its own.
Happy crocheting!