
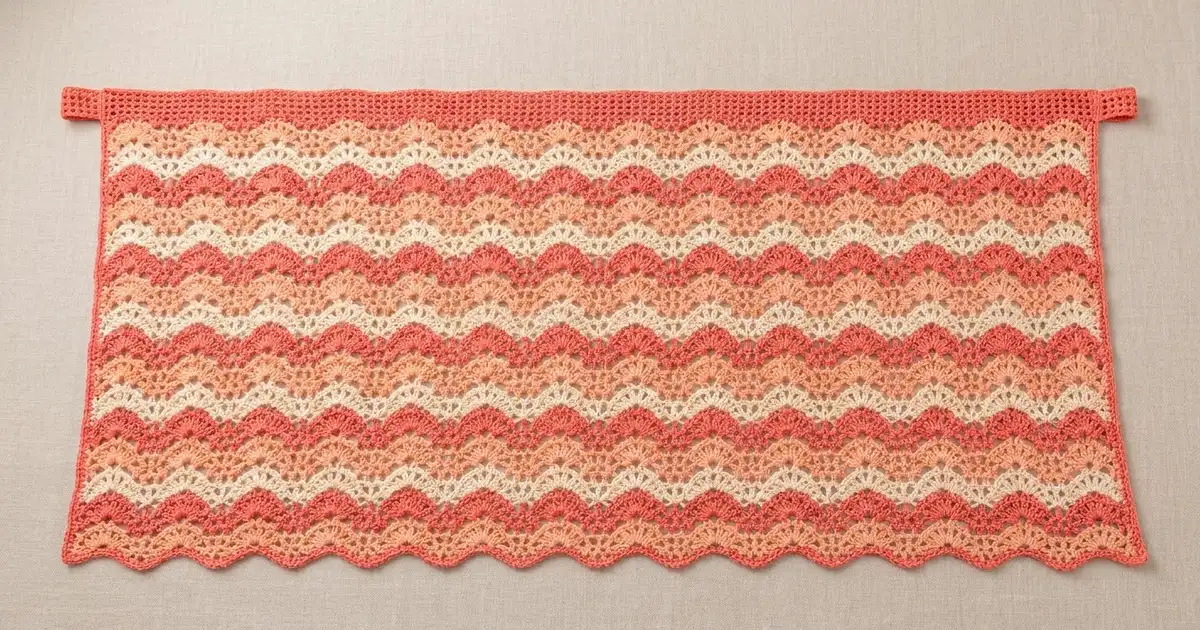
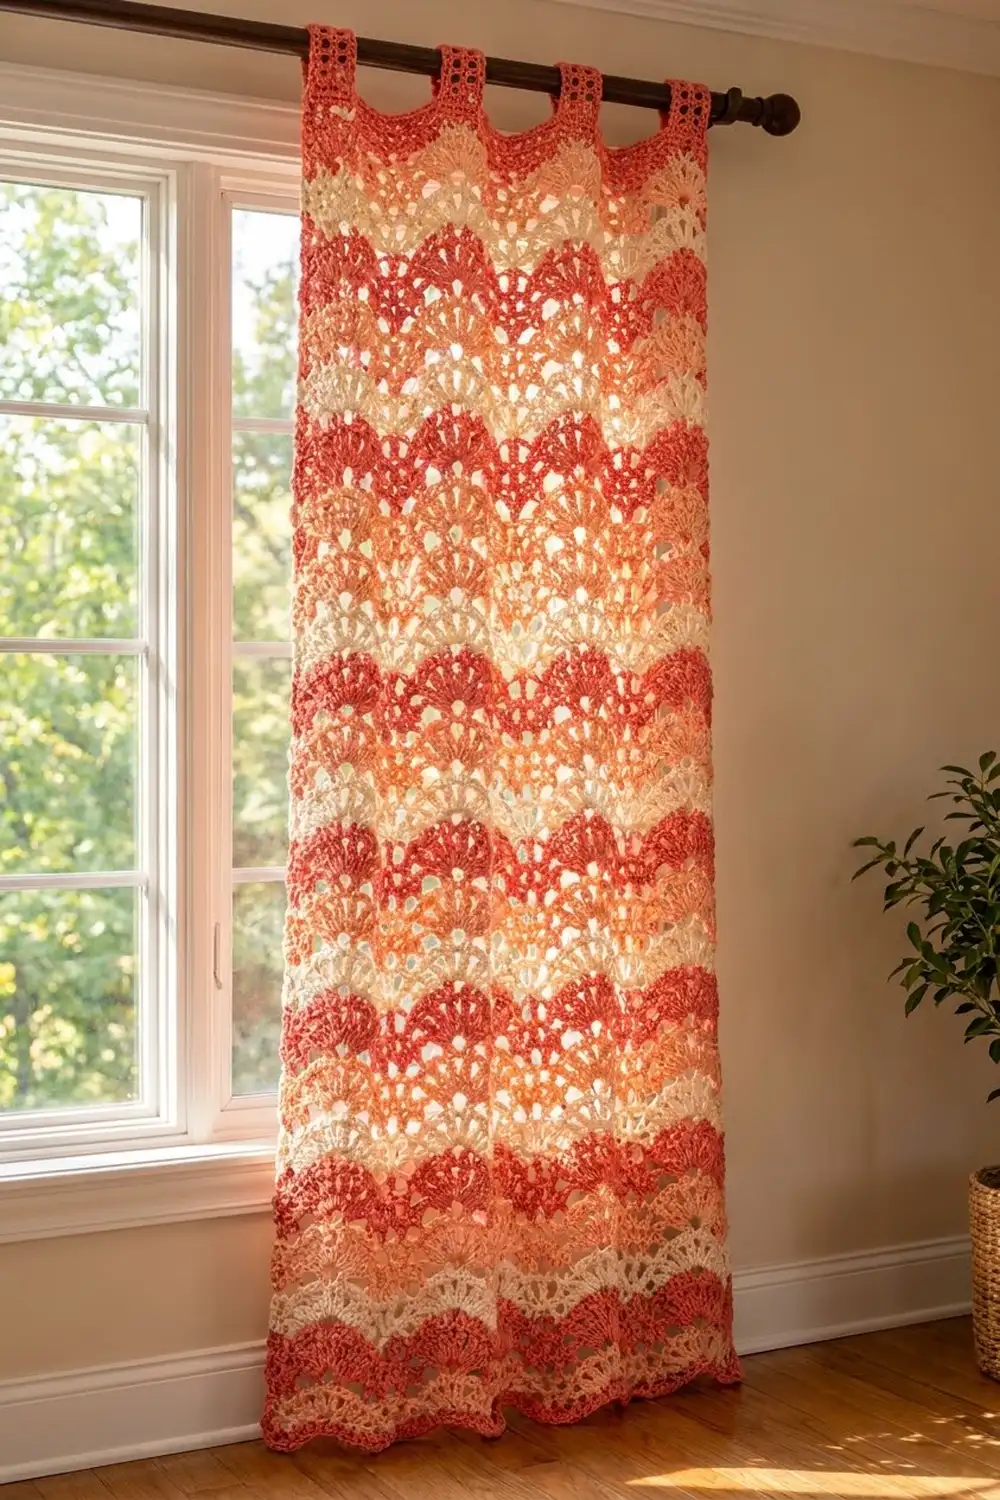
The Coral Tide curtain is a floor-length panel with tabs at the top, covered in rolling fan stripes. Each row is a line of plump shells that sits offset from the row below, so the color bands ripple like a soft tide across the window.
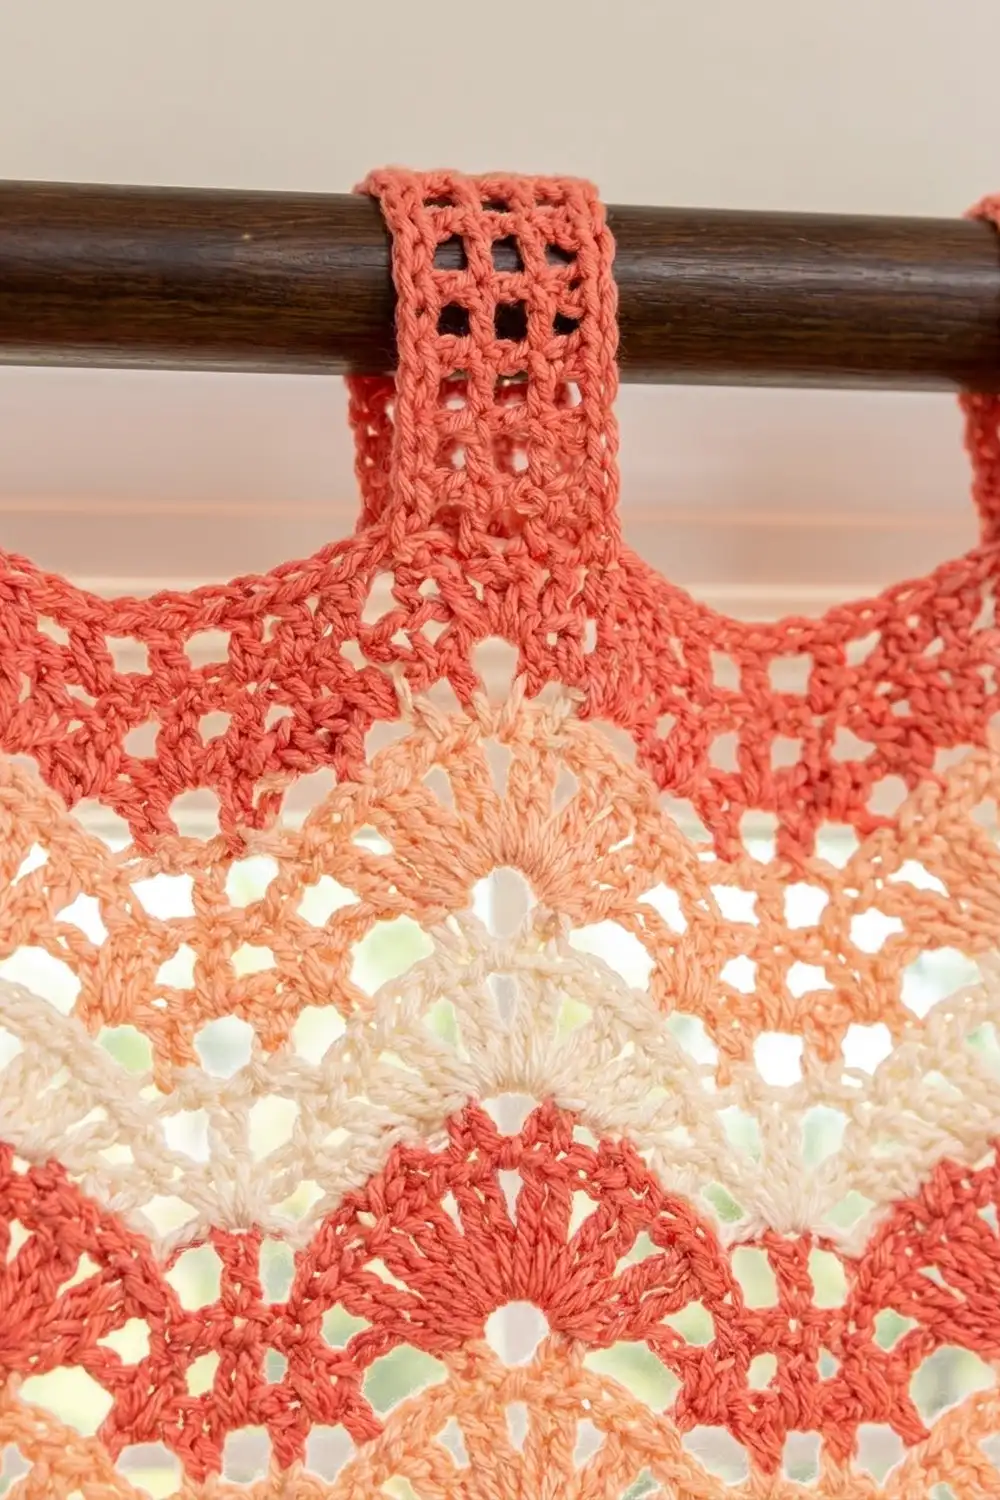
The colors are warm and summery: deep coral, soft peach and creamy white, changing every row. The top ends in a straight coral mesh band with seven coral mesh tabs. The bottom ends in a coral scalloped edge that matches the fans.
This pattern uses US crochet terms. One finished panel measures 40.5 in (102.9 cm) wide and 84 in (213.4 cm) long, from the scallop tips to the top edge. The tab loops add about 2.25 in (5.7 cm) above that.
The panel is one piece, worked flat in rows from the bottom up. You work a foundation row, 108 fan rows and a top band. Then you add the scalloped bottom edging and the side edging. Last, you crochet the tabs directly onto the top band. For a pair of curtains, make two identical panels.
Finished Size and Construction
- Finished size: 40.5 x 84 in (102.9 x 213.4 cm), not counting tab loops
- Skill level: Easy-intermediate (simple stitches, long project)
- Terminology: US crochet terms
- Yarn weight: Worsted weight (#4) cotton
- Hook: 5 mm (H-8)
- Number of pieces: 1 (the tabs are worked directly onto the panel)
- Layout: One rectangular panel, 129 stitches wide
- Piece size: 40.5 x 84 in (102.9 x 213.4 cm)
- Size before border: 40 x 81.25 in (101.6 x 206.4 cm)
- Border depth: bottom scallops 0.75 in (1.9 cm); top band 2 in (5.1 cm); side edging about 0.25 in (0.6 cm) per side
Materials
Choose a smooth worsted cotton or cotton blend, either mercerized or matte. The quantities below assume about 155 m (170 yd) of yarn per 100 g.
- Color A, Coral: 460 g, 713 m (780 yd)
- Color B, Peach: 360 g, 558 m (610 yd)
- Color C, Cream: 360 g, 558 m (610 yd)
These amounts are for one panel. They include an extra 10–15% to cover your gauge swatch and small differences in tension. Double them for a pair.
Tools:
- 5 mm (H-8) crochet hook
- Tapestry needle
- Stitch markers (at least 10)
- Measuring tape
- Rust-proof pins and a large blocking surface (a bed or clean carpet works)
- Spray bottle or steam iron
- Scissors
Abbreviations (US Terms)
- ch – chain
- sl st – slip stitch
- sc – single crochet
- hdc – half double crochet
- dc – double crochet
- tr – treble crochet
- sk – skip
- st(s) – stitch(es)
- sp – space
- RS / WS – right side / wrong side
Special stitch – Fan: 7 dc in the same stitch.
Half fan: at the start of a row, ch 3 (counts as 1 dc) and 3 dc in the same stitch. At the end of a row, 4 dc in the same stitch.
Gauge and Checkpoints
Gauge: 2 pattern repeats (16 sts) = 5 in (12.7 cm) wide, and 4 fan rows = 3 in (7.6 cm) tall, after light blocking. Each fan row is about 0.75 in (1.9 cm) tall.
Make a test swatch first. Ch 34. Work Row 1 (33 sc), then 8 fan rows as written below, using 4 repeats instead of 16. Your swatch should be 10 in (25.4 cm) wide and 6.25 in (15.9 cm) tall. Wash and dry it the way you will treat the finished curtain, then measure it again.
- Too big: go down half a hook size.
- Too small: go up half a hook size.
Measurement checkpoints for the panel:
- After Row 9: 40 in (101.6 cm) wide, 6.25 in (15.9 cm) tall
- After Row 41: 30.25 in (76.8 cm) tall
- After Row 109: 81.25 in (206.4 cm) tall
- After the top band: 83.25 in (211.5 cm) tall
- After the bottom edging: 84 in (213.4 cm) tall
Color Sequence
- Rows 1 and 2: Color A
- From Row 2 on, the fan rows rotate A, B, C, A, B, C…
- Row 109 (the last fan row) is Color C.
Carrying colors: because three colors rotate one row at a time, the next color is always waiting at the edge where you finish a row. Do not cut the yarn. Finish the last yarn over of each row’s last stitch with the next color, drop the old color and turn. Carry the waiting strands loosely up the side. The side edging will cover them later.
Main Panel
Foundation: With A, ch 130.
Row 1 (A): Sc in 2nd ch from hook and in each ch across, turn. (129 sc)
Row 2 (A): Ch 3 (counts as dc), 3 dc in first sc (half fan made), *sk 3 sc, sc in next sc, sk 3 sc, fan in next sc*; repeat from * 14 more times (15 fans). Then sk 3 sc, sc in next sc, sk 3 sc, 4 dc in last sc, changing to B in the last dc, turn. (129 sts: 2 half fans of 4 dc, 15 fans, 16 sc)
Row 3 (B): Ch 1, sc in first dc, *sk 3 dc, fan in next sc, sk 3 dc, sc in next dc*; repeat from * 15 more times, working the final sc in the top of the turning ch-3. Change to C, turn. (129 sts: 16 fans, 17 sc)
Each repeat uses 8 stitches of Row 2 and the first sc uses 1, so 1 + 16 x 8 = 129. The sc lands in the center dc of each fan, which shifts the fans by half a repeat and creates the wave.
Row 4 (C): Ch 3 (counts as dc), 3 dc in first sc, *sk 3 dc, sc in next dc (center of fan), sk 3 dc, fan in next sc*; repeat from * 14 more times. Then sk 3 dc, sc in center dc of last fan, sk 3 dc, 4 dc in last sc. Change to A, turn. (129 sts: 2 half fans, 15 fans, 16 sc)
Row 5 and every following odd row: Work as Row 3. (129 sts)
Row 6 and every following even row: Work as Row 4. (129 sts)
Rows 5–109: Keep alternating these two rows and keep the A, B, C color rotation. You will finish with Row 109, an odd row in Color C. That makes 108 fan rows, or 36 full color repeats. (129 sts in every row)
Border
The border has three parts: the top band, the bottom scalloped edging and the side edging. All three are worked in Color A. The tabs are worked last.
Border gauge: 4 sc = 1 in (2.5 cm) along the side edges. 129 sts = 40 in (101.6 cm) across the top and bottom.
Top Band
After Row 109, cut B and C, leaving 6 in (15.2 cm) tails. Join A in the usual way at the end of Row 109.
Row T1 (leveling row): Ch 4 (counts as tr), *dc in next dc, hdc in next dc, sc in next 3 dc, hdc in next dc, dc in next dc, tr in next sc*; repeat from * 15 more times. (129 sts: 17 tr, 32 dc, 32 hdc, 48 sc)
The tall trebles fill the dips between the fans, and the sc sit on the fan peaks, so the top becomes straight.
Row T2 (mesh): Ch 4 (counts as dc and ch 1), sk next st, dc in next st, *ch 1, sk next st, dc in next st*; repeat from * 62 more times, turn. (129 sts: 65 dc, 64 ch-1 sps)
Row T3 (mesh): Ch 4 (counts as dc and ch 1), sk ch-1 sp, dc in next dc, *ch 1, sk ch-1 sp, dc in next dc*; repeat from * 62 more times, working the last dc in the 3rd ch of the turning ch, turn. (129 sts: 65 dc, 64 ch-1 sps)
Row T4: Ch 1, sc in each dc and each ch-1 sp across, working the last sc in the 3rd ch of the turning ch. (129 sc) Fasten off.
The panel now measures 83.25 in (211.5 cm) tall.
Bottom Scalloped Edging
Turn the panel so the foundation chain is at the top, with RS facing. Join A in the first free loop of the foundation chain at the right-hand corner.
Row B1: Ch 1, sc in same loop, *sk 3 loops, fan in next loop, sk 3 loops, sc in next loop*; repeat from * 15 more times. (129 sts: 16 fans, 17 sc)
Do not fasten off. The 16 scallops hang downward and line up with the 16 repeats of the body.
Side Edging
Side 1: Ch 1 and rotate to work up the side edge. Work:
- 1 sc in the end of Row 1
- 3 sc in the end of each fan row (Rows 2–109)
- 3 sc in the end of Row T1
- 2 sc in the end of Row T2
- 2 sc in the end of Row T3
- 1 sc in the end of Row T4
(333 sc: 1 + 324 + 3 + 2 + 2 + 1) Fasten off. Work each sc around the carried strands so they are hidden inside the edging.
Side 2: With RS facing, join A at the top corner of the other side, in the end of Row T4. Work the same counts in reverse order down the side, then sl st to the first sc of Row B1. (333 sc) Fasten off.
Why the math works: The body is 81.25 in (206.4 cm) tall and the top band is 2 in (5.1 cm), which gives 83.25 in (211.5 cm) of side edge. At 4 sc per inch, that needs 333 sc, which is exactly what the row ends give you. Three sc per fan row comes to 6 sc per two rows, or 4 sc per 1 in (2.5 cm), so the edges stay flat and don’t ruffle or pull in. Across the bottom, 1 + 16 x 8 = 129 uses every foundation loop once, so the scallops don’t stretch or gather the panel.
Tabs (make 7)
With RS facing, you will work 7 tabs of 5 sts each into Row T4. Leave 2 sts free at each end and 15 sts between tabs: 2 + (7 x 5) + (6 x 15) + 2 = 129.
Tab Row 1: Sk first 2 sc, join A in next sc, ch 4 (counts as dc and ch 1), sk next sc, dc in next sc, ch 1, sk next sc, dc in next sc, turn. (5 sts: 3 dc, 2 ch-1 sps)
Tab Rows 2–12: Ch 4 (counts as dc and ch 1), sk ch-1 sp, dc in next dc, ch 1, sk ch-1 sp, dc in 3rd ch of turning ch, turn. (5 sts)
Fasten off, leaving a 12 in (30.5 cm) tail. Each tab is about 1.5 in (3.8 cm) wide and 6 in (15.2 cm) long.
For the next tab, sk 15 sc of Row T4 after the previous tab and join in the next sc. The tabs start in sts 3, 23, 43, 63, 83, 103 and 123, so the middle tab sits exactly in the center of the panel. The gaps between tabs measure about 4.7 in (11.9 cm).
Attaching tabs: Fold each tab to the WS. Sew the last tab row to the WS of the top band, along the line between Rows T1 and T2. This is about 1.5 in (3.8 cm) below the top edge. Use the tail to make small whip stitches through the back loops only, so nothing shows on the RS. Each loop stands about 2.25 in (5.7 cm) above the band and fits rods up to 1.25 in (3.2 cm) across.
Final Blocking
- Weave in all ends along the side edging or through stitches of the same color, going at least 2 in (5.1 cm) each way.
- Lay the panel flat on a large clean surface, RS up. If your surface is too short, block it in two halves.
- Measure and pin it to 40.5 in (102.9 cm) wide and 84 in (213.4 cm) long.
- Pin each of the 16 bottom scallops into a round curve, about 2.5 in (6.4 cm) apart from center to center.
- Pin the top band straight, pulling gently so the mesh squares open evenly.
- Mist the panel well with water, or hold a steam iron just above the fabric without pressing.
- Let it dry completely before unpinning, usually 12–24 hours.
Final Quality-Control Checklist
- Every row has 129 sts.
- The fans alternate cleanly and every fan has exactly 7 dc.
- The colors rotate A, B, C with none repeated or skipped.
- The top edge is straight, with no dips above the fans.
- There are 16 evenly spaced scallops along the bottom.
- Each side edge has 333 sc and lies flat.
- There are 7 evenly spaced tabs, all the same length and sewn at the same height.
- The finished panel measures 40.5 x 84 in (102.9 x 213.4 cm).
Troubleshooting
The panel is getting wider or narrower. Count to check for 129 sts. Usually a turning chain was missed, or a fan went into a dc instead of an sc.
The waves are not offset. On odd rows, make sure the sc goes into the center (4th) dc of each fan and the fans go into the sc.
The side edges ripple. Work 2 sc instead of 3 in every other fan row end. If the edges pull in instead, add 1 sc in every tenth row end. Recount so both sides match.
The top band dips. Check that each tr in Row T1 sits in an sc between fans.
The panel hangs too long. Cotton relaxes over time. Block it again to 84 in (213.4 cm), or sew the tabs a little lower on the band.
Care
Machine wash cold on a gentle cycle inside a laundry bag, or hand wash. Lay it flat to dry and reshape the scallops while it is damp. Don’t hang the panel while it is wet.
Final Notes
Here is how the measurements build up. The 129 sts give 40 in (101.6 cm) of width. The foundation row plus 108 fan rows give 81.25 in (206.4 cm) of length. The top band brings the panel to 83.25 in (211.5 cm), and the scalloped edging finishes it at 84 in (213.4 cm). The side edging adds about 0.25 in (0.6 cm) per side, for a final width of 40.5 in (102.9 cm). Check your gauge and count often, and your curtain will hang straight and true.
Happy crocheting!