
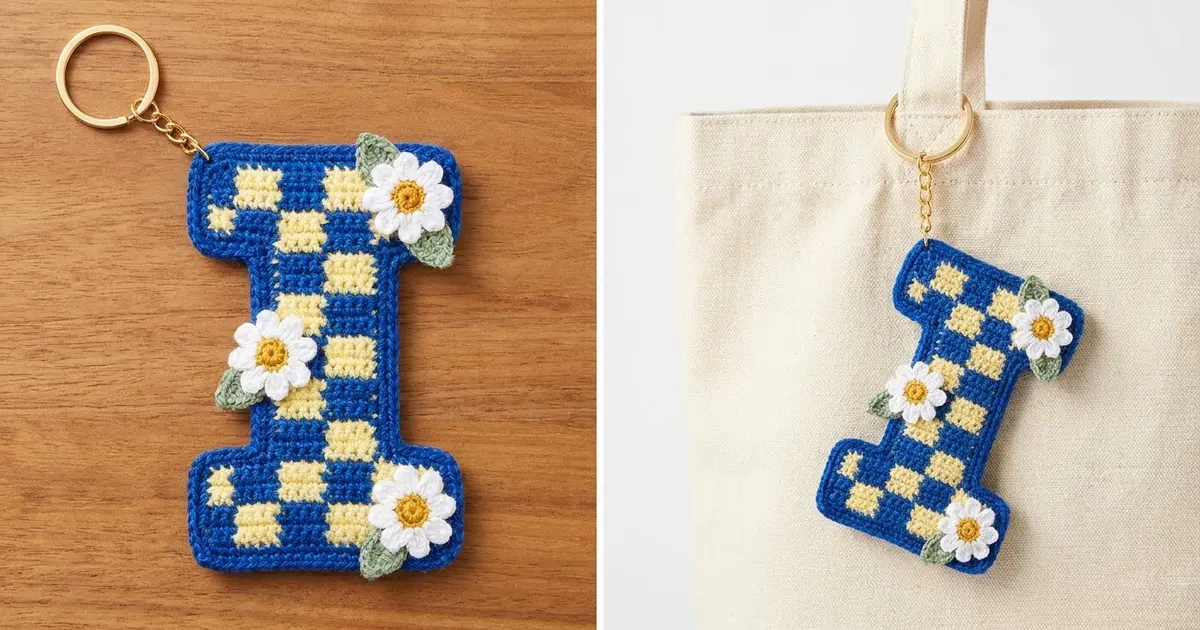
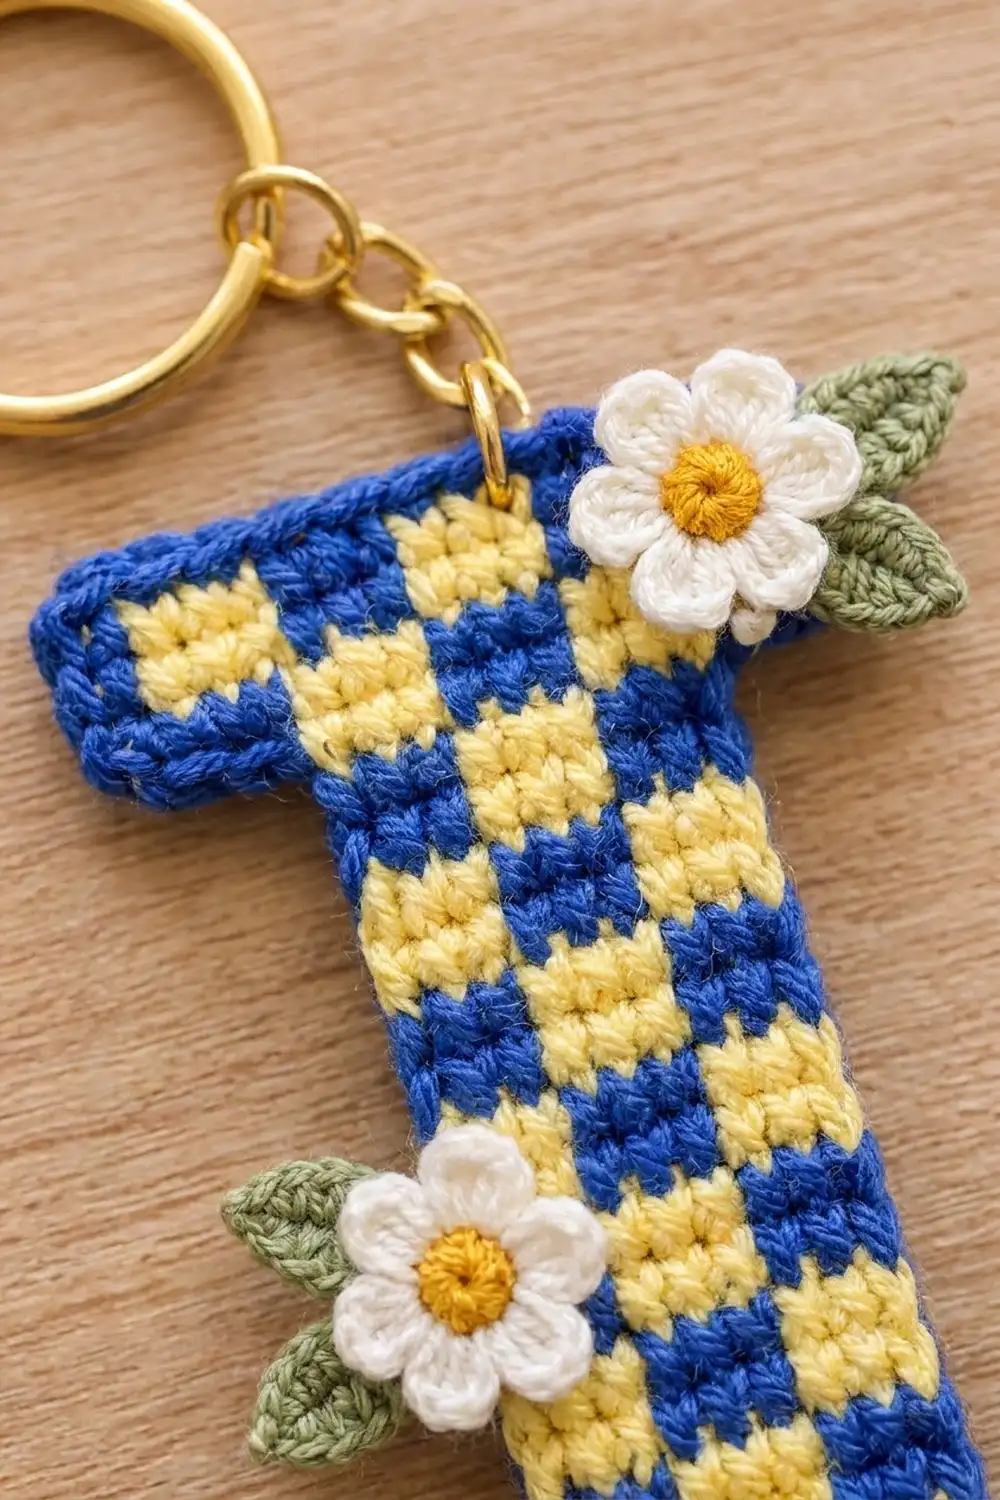
This little letter “I” is a checkered keychain in royal blue and soft butter yellow. Tiny white daisies on sage-green leaves sit on top. It’s bright and graphic, a bit retro, and it’s sturdy enough to clip to a tote bag, backpack, or set of keys.
The checkerboard is worked in tapestry single crochet. You carry both colors through every row, so the fabric comes out dense, firm, and nearly the same on both sides. The pattern uses US crochet terms throughout.
The finished keychain measures 3.2 in (8.1 cm) wide by 4.8 in (12.2 cm) tall, not counting the keyring.
You work the letter flat from the bottom up as one piece: the base bar first, then the narrower stem, then the top bar, which you widen with chains on one side and extended stitches on the other. One round of blue single crochet tidies the whole outline. Then you make three daisies and six leaves, sew them on, and attach the keyring.
Finished Size and Construction
- Finished size: 3.2 in (8.1 cm) wide × 4.8 in (12.2 cm) tall
- Skill level: Advanced beginner (tapestry color changes)
- Terminology: US crochet terms
- Yarn weight: DK / light worsted (#3), cotton recommended
- Hook: 3.5 mm (E-4)
- Number of pieces: 1 letter, plus 3 daisy and 6 leaf appliqués
- Layout: Single letter “I”; checkerboard of 2-stitch × 2-row blocks
- Letter before border: 2.8 in (7.1 cm) wide × 4.4 in (11.2 cm) tall
- Stem width before border: 1.2 in (3.0 cm)
- Border depth: 0.2 in (0.5 cm) on every side
Materials
Use a smooth, mercerized or matte cotton in DK or light worsted weight. Cotton holds the crisp checker edges and won’t stretch out on a keyring. Pick two colors with strong contrast so the squares stand out.
- Color A, royal blue: 6 g (about 14 m)
- Color B, pale butter yellow: 4 g (about 9 m)
- Color C, white or cream (petals): 2 g (about 5 m)
- Color D, golden yellow (flower centers): 1 g (about 2 m)
- Color E, sage green (leaves): 1 g (about 2 m)
These quantities include a margin for swatching and weaving in ends.
Tools:
– 3.5 mm (E-4) crochet hook
– Tapestry needle
– Gold split keyring, 1.25 in (3.2 cm), with a short chain of about 1 in (2.5 cm)
– One 6–8 mm jump ring and two pairs of flat-nose pliers
– Stitch markers
– Rustproof pins and a blocking surface
Abbreviations (US Terms)
- ch: chain
- sc: single crochet
- sc2tog: single crochet 2 together
- hdc: half double crochet
- dc: double crochet
- sl st: slip stitch
- st(s): stitch(es)
- RS: right side
- A / B: blue / yellow
Tapestry sc color change: Work the last sc of the old color until 2 loops are on the hook. Finish it with a yarn-over in the new color. Carry the unused color along the top of the previous row and work over it, so it is hidden inside the new stitches.
Extended sc (ext sc): Insert your hook into the base (the bottom “chain” part) of the last sc you made. Yarn over and pull up a loop. Yarn over and pull through 1 loop to make the base. Yarn over and pull through 2 loops. You’ve added 1 st to the edge of the row.
Gauge and Checkpoints
Gauge: 10 sc × 10 rows = 2 in (5.1 cm) in tapestry sc, with both colors carried.
Tapestry crochet tightens up the fabric. Swatch with the color you’re carrying, not plain sc in one color. Each checker block should be a near-perfect square of 0.4 in (1.0 cm).
The letter is the swatch, so check these measurements as you go:
- After Row 4: 2.8 in (7.1 cm) wide × 0.8 in (2.0 cm) tall
- After Row 18: stem 1.2 in (3.0 cm) wide; total height 3.6 in (9.1 cm)
- After Row 22: 2.8 in (7.1 cm) wide × 4.4 in (11.2 cm) tall
- After the border: 3.2 in (8.1 cm) × 4.8 in (12.2 cm)
If it’s too big: go down to a 3.25 mm hook, or tug the carried strand a little snugger every few stitches.
If it’s too small: go up to a 3.75 mm hook.
If the blocks are tall rectangles: make sure your sc aren’t loose on the yarn-over, and keep your chain-1 turns tight.
The Letter
Color sequences. All rows are multiples of 2-st blocks.
- Wide Pattern 1 (14 sts): [2 A, 2 B] 3 times, 2 A
- Wide Pattern 2 (14 sts): 2 B, [2 A, 2 B] 3 times
- Stem Pattern 1 (6 sts): 2 A, 2 B, 2 A
- Stem Pattern 2 (6 sts): 2 B, 2 A, 2 B
Each sequence reads the same from either end, so you can follow it left to right on every row no matter which way you’re working. The ch-1 at the start of a row never counts as a stitch.
Base Bar (Rows 1–4)
Row 1: With A, ch 15. Sc in 2nd ch from hook and in each ch across, laying B along the chain and working over it. Follow Wide Pattern 1. (14 sc)
Row 2: Ch 1, turn. Sc in each st, following Wide Pattern 1. (14 sc)
Row 3: Ch 1, turn. Sc in each st, following Wide Pattern 2. (14 sc)
Row 4: Ch 1, turn. Sc in each st, following Wide Pattern 2. On the last sc, change to A. (14 sc)
Checkpoint: 2.8 in (7.1 cm) × 0.8 in (2.0 cm).
Stem (Rows 5–18)
Row 5: Ch 1, turn. Sl st in the first 4 sts with A. The sl sts don’t count as stitches; they form the ledge. Ch 1. Sc in the next 6 sts, following Stem Pattern 1. Leave the last 4 sts unworked. (6 sc)
The 6 stem sts sit over sts 5–10 of the base, so the stem blocks line up exactly with the base blocks.
Row 6: Ch 1, turn. Sc in each st, following Stem Pattern 1. (6 sc)
Rows 7–8: Ch 1, turn. Sc in each st, following Stem Pattern 2. (6 sc)
Rows 9–10: As Rows 7–8, but follow Stem Pattern 1. (6 sc)
Rows 11–12: Follow Stem Pattern 2. (6 sc)
Rows 13–14: Follow Stem Pattern 1. (6 sc)
Rows 15–16: Follow Stem Pattern 2. (6 sc)
Rows 17–18: Follow Stem Pattern 1. On the last sc of Row 18, change to B. (6 sc)
Checkpoint: the stem is 1.2 in (3.0 cm) wide and the total height is 3.6 in (9.1 cm). The stem should have seven block rows, with blue at both outer columns on block rows 1, 3, 5, and 7.
Top Bar (Rows 19–22)
Row 19 (growth row): With B, ch 5 and turn. Sc in 2nd ch from hook and the next ch (2 B). Change to A and sc in the next 2 ch (2 A). Now you have 4 sc on the chains.
Sc across the 6 stem sts as 2 B, 2 A, 2 B.
Then work 4 ext sc off the end of the row: 2 A, then 2 B. Each ext sc goes into the base of the previous stitch.
Row 19 total: 4 sc on the chains + 6 sc on the stem + 4 ext sc = 14 sts. This follows Wide Pattern 2.
Row 20: Ch 1, turn. Sc in each st, following Wide Pattern 2. (14 sc)
Rows 21–22: Ch 1, turn. Sc in each st, following Wide Pattern 1. (14 sc)
Fasten off both colors.
Checkpoint: 2.8 in (7.1 cm) × 4.4 in (11.2 cm). The top bar is the same width as the base and sits directly above it.
Border
Border gauge: One round of sc adds 0.2 in (0.5 cm) to each edge. That makes the letter 0.4 in (1.0 cm) wider and 0.4 in (1.0 cm) taller.
The border works 1 sc into every stitch along the top and bottom edges, and 1 sc into the end of every row along the sides. At each outer corner you work 3 sc into the corner stitch. At each inner corner you sc2tog across the angle.
Round 1: With the RS facing, join A in the first free loop of the foundation chain at one bottom corner. Ch 1, then:
- Bottom edge: 3 sc in the first st, sc in the next 12, 3 sc in the last st. (18)
- Base side: 1 sc in each row-end of Rows 1–4. (4)
- Ledge: 3 sc in the outer ledge st, sc in the next 2. (5)
- Inner corner: sc2tog over the last ledge st and the row-end of Row 5. (1)
- Stem side: sc in each row-end of Rows 6–17. (12)
- Inner corner: sc2tog over the row-end of Row 18 and the first st under the top bar. (1)
- Underside of top bar: sc in the next 2, 3 sc in the outer st. Work into the free chain loops or the ext sc bases, whichever is on this side. (5)
- Top bar side: sc in each row-end of Rows 19–22. (4)
- Top edge: 3 sc in the first st, sc in the next 12, 3 sc in the last st. (18)
- Top bar side: (4)
- Underside of top bar: 3 sc in the outer st, sc in the next 2. (5)
- Inner corner: sc2tog. (1)
- Stem side: (12)
- Inner corner: sc2tog. (1)
- Ledge: sc in the next 2, 3 sc in the outer st. (5)
- Base side: (4)
Sl st to the first sc. Total: 100 sc.
Why the math works: The outline has 88 edge positions: 14 + 14 on the top and bottom, 16 + 16 for the ledges and undersides, 14 + 14 for the stem sides, and 8 + 8 for the bar sides. The 8 outer corners each add 2 sc, which is +16. The 4 inner sc2tog each remove 1, which is −4. So 88 + 16 − 4 = 100, and each half has 50. One sc per row-end matches the 1:1 row-to-stitch gauge, so the edges lie flat.
Fasten off and weave in the ends through the dense fabric.
Daisies (make 3)
Center: With D, make a magic ring. Work 5 sc into the ring and pull it closed. Fasten off D. (5 sc)
Petals: Join C in any sc. (Ch 2, 2 dc, ch 2, sl st) all in the same st, then sl st into the next st. Repeat 4 more times. (5 petals)
Fasten off, leaving an 8 in (20.3 cm) tail. Each daisy is about 0.75 in (1.9 cm) across.
Leaves (make 6)
With E, ch 5. Starting in the 2nd ch from hook, work: sl st, sc, hdc, sc. Ch 1 and rotate. On the other side of the chain, work: sc, hdc, sc, sl st. Fasten off, leaving a tail. Each leaf is about 0.5 in (1.3 cm) long.
Assembly
- Top daisy: Pin it over the top-right corner of the top bar, with about one-third of the flower hanging past the edge. Tuck 2 leaves behind it so they point outward to the right.
- Middle daisy: Pin it on the left edge of the stem at Rows 11–12, about halfway up. Point its 2 leaves to the left, past the border.
- Bottom daisy: Pin it where the stem meets the right-hand base ledge. Point its 2 leaves to the right.
- Sew the leaves on first, then the daisies, with small stitches through the center and the base of each petal. Keep your stitches inside the letter so they don’t show on the back.
- Open the jump ring with pliers and pass it through the top border, 0.4 in (1.0 cm) in from the top-left corner. Link it to the keyring chain and close it firmly.
Final Blocking
- Lightly mist the letter with water. Don’t soak it, or the colors may bleed.
- Lay it RS up on the blocking surface.
- Pin it to 3.2 in (8.1 cm) × 4.8 in (12.2 cm), with the stem at 1.6 in (4.1 cm) wide.
- Square off all 8 outer corners and press the inner corners flat with your fingertips.
- Let it dry completely before you add any weight to the keyring.
Final Quality-Control Checklist
- Every block is 2 sts × 2 rows and the colors alternate cleanly
- No carried strand peeks through the stitches
- The stem is centered above the base and below the top bar
- The border has exactly 100 sc, with no gaps at the inner corners
- The top and bottom bars are both 3.2 in (8.1 cm) wide
- All three daisies sit at the positions shown, with leaves pointing outward
- The jump ring is closed with no gap
Troubleshooting
- Blue shows through the yellow blocks: Hold the carried strand at the back of the hook and keep it snug. Switching to a more matte yarn also helps.
- The stem leans: Count to 6 on every stem row. A skipped or extra edge stitch makes the stem drift.
- The top bar is shorter on one side: Check that you worked exactly 4 ext sc and 4 chain sc.
- The border ruffles: You’ve added stitches. Recount each section against the list.
- The inner corners gape: Work the sc2tog more tightly, or add a hidden stitch from the back.
Care
Hand wash in cool water with mild soap, press out the water in a towel, and dry flat. Remove the keyring before washing.

Final Notes
Here’s the measurement chain:
- Gauge: 10 sc = 2 in (5.1 cm)
- Base and top bars: 14 sts = 2.8 in (7.1 cm)
- Stem: 6 sts = 1.2 in (3.0 cm)
- Height: 22 rows = 4.4 in (11.2 cm)
- Border: one 100-st round adds 0.2 in (0.5 cm) per side, for a finished size of 3.2 in (8.1 cm) × 4.8 in (12.2 cm)
If you hit your gauge at Row 4, every checkpoint after that will follow.
Happy crocheting!