

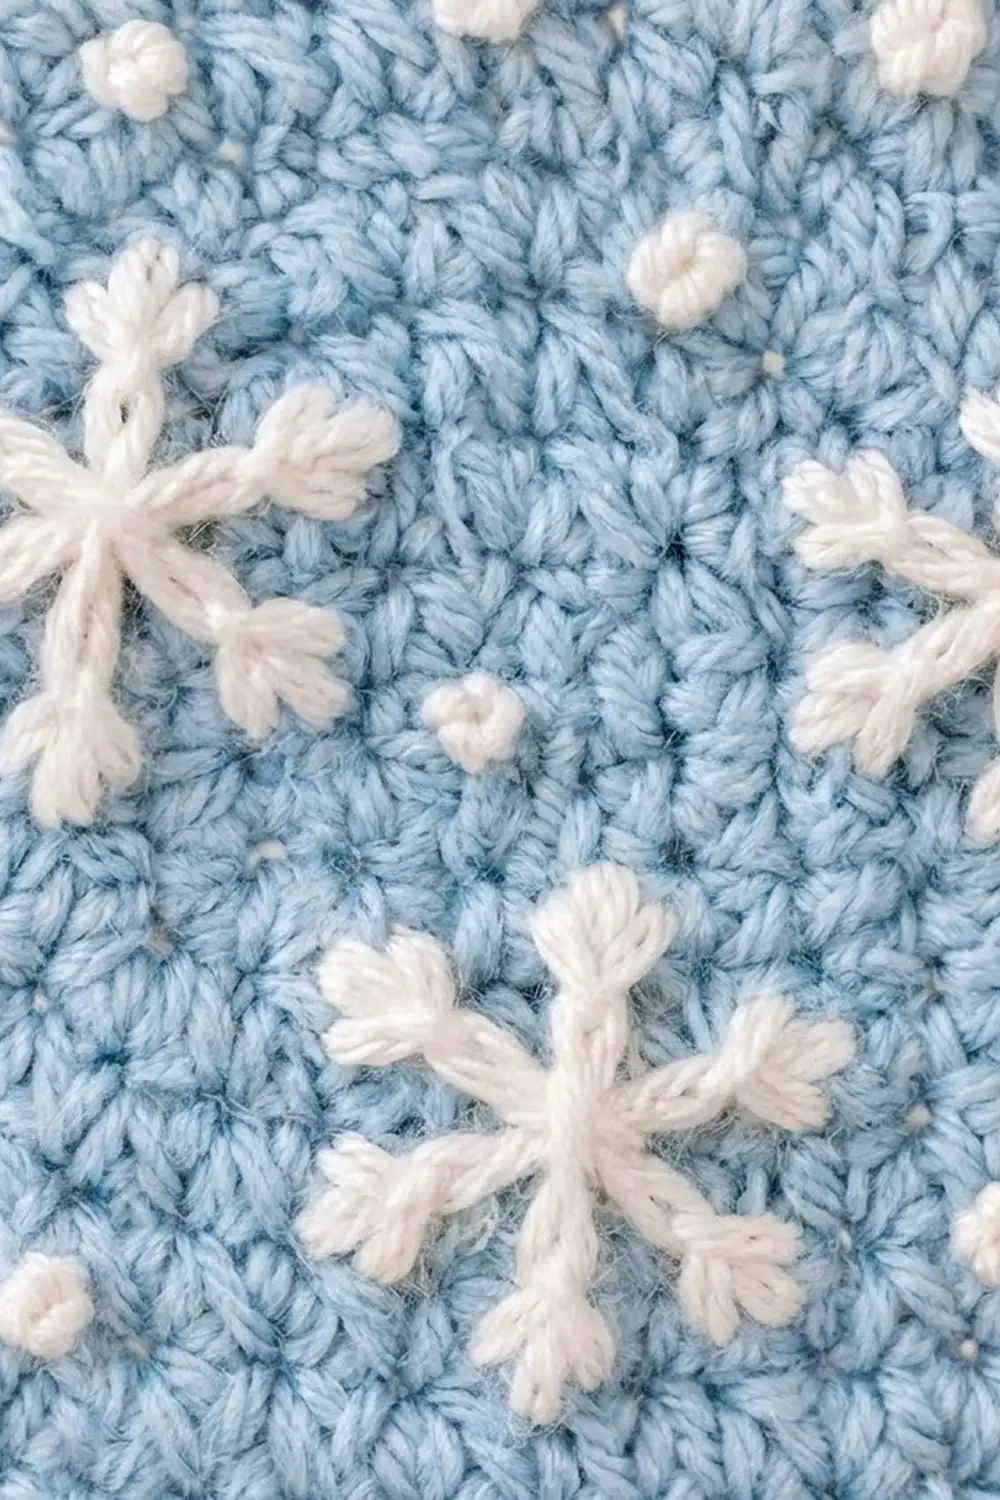
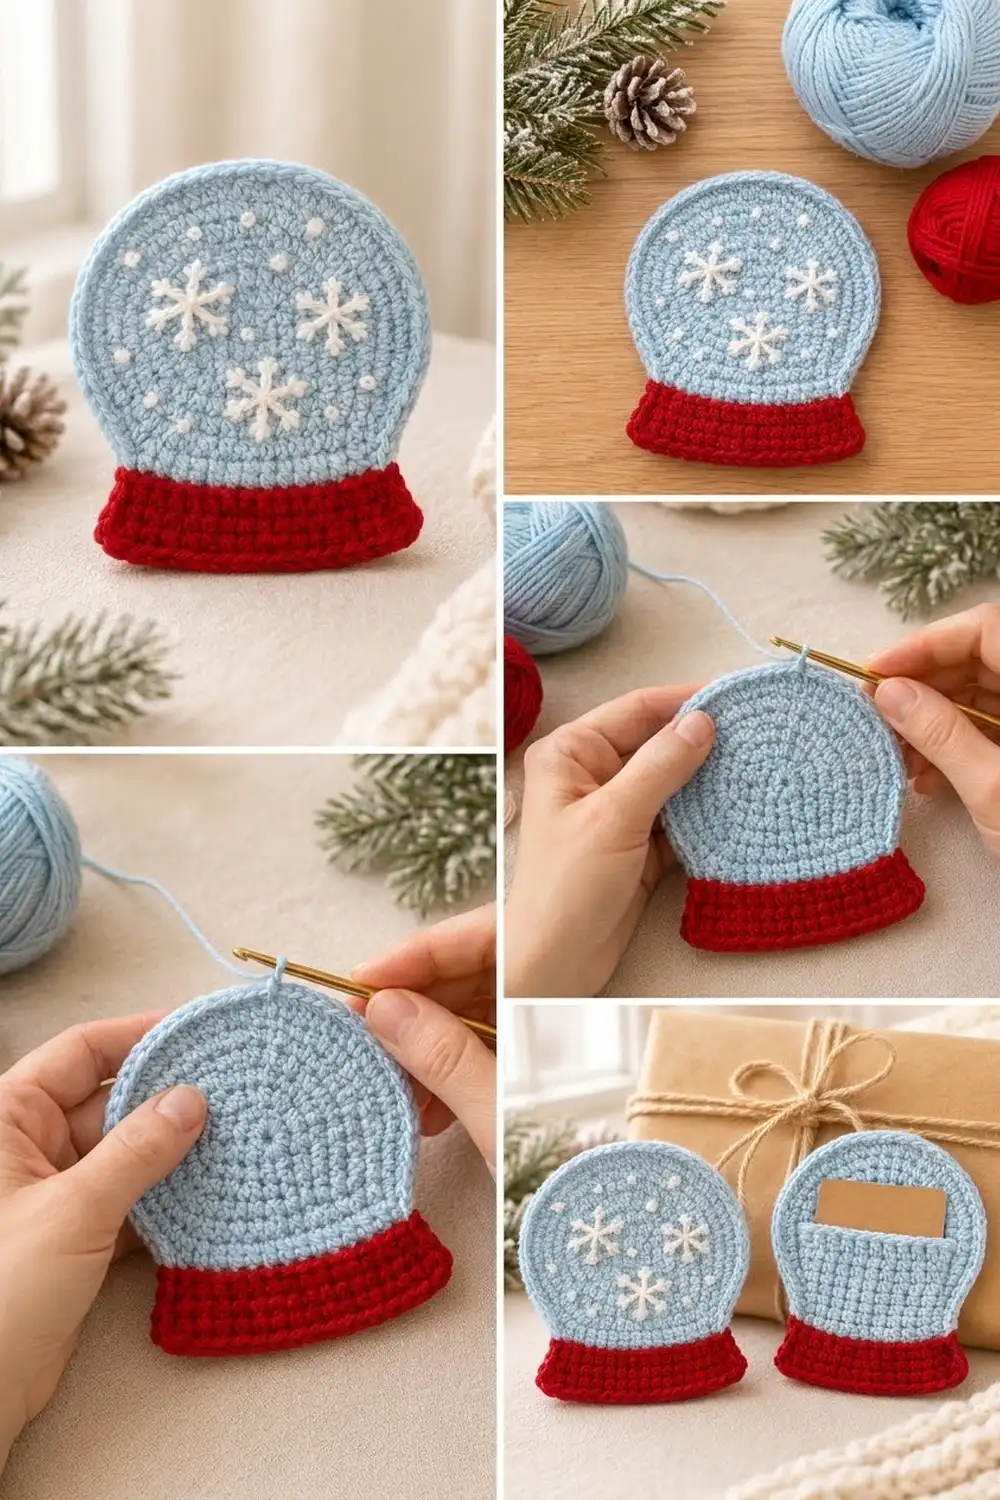
This little snow globe is a flat, two-color appliqué piece: a light blue single crochet circle with a short red base that flares at the bottom. The finished set is two separate panels. The first panel has three white embroidered snowflakes and scattered French-knot “snow.” The second has a light blue pocket sewn over its lower globe, sized to hold a standard gift card.
The style is soft and wintry, made in matte worsted cotton so the stitches look crisp and the edges sit flat. The two panels are not joined to each other. Each one is finished and bordered on its own and can be propped up, tucked into a card, or tied to a package.
This pattern uses US crochet terms. Each finished panel measures 4.4 in (11.2 cm) wide and 5.3 in (13.5 cm) tall.
Construction is simple. You work a flat circle in rounds, crochet the red base in rows straight off the bottom of the circle, then work a one-round border in matching colors. Panel A gets embroidery. Panel B gets a separately worked pocket that is whipstitched in place.
Finished Size and Construction
- Finished size (each panel): 4.4 in (11.2 cm) wide x 5.3 in (13.5 cm) tall
- Skill level: Easy / advanced beginner
- Terminology: US crochet terms
- Yarn weight: Worsted (#4), cotton or cotton blend
- Hook: 4.0 mm (US G-6)
- Number of pieces: 2 panels plus 1 pocket (3 crocheted pieces)
- Layout: 2 separate panels, displayed side by side; the pocket is sewn onto Panel B
- Globe circle: 4 in (10.2 cm) across
- Size before border: 4 in (10.2 cm) wide x 4.9 in (12.4 cm) tall
- Border depth: 1 round, 0.2 in (0.5 cm) on every side
Materials
Choose a smooth worsted-weight cotton with good stitch definition. Cotton keeps the circle flat and the base firm, and it shows embroidery clearly. Acrylic works too, but it can make the circle slightly wavier.
- Light blue: 20 g / 40 m (globe circles, blue border, pocket)
- Red: 8 g / 15 m (bases and red border)
- White: 2 g / 5 m of worsted, or 1 skein of 6-strand embroidery floss (snowflakes and dots)
Tools:
- 4.0 mm (US G-6) crochet hook
- Tapestry needle and a sharp embroidery needle
- 2 stitch markers
- Scissors
- Ruler or tape measure
- Blocking mat and rust-proof pins
- Spray bottle
- A gift card or a 3.4 x 2.1 in (8.6 x 5.3 cm) card template for testing the pocket
The quantities above include a margin of roughly 40 percent for gauge swatches, tails and differences in tension.
Abbreviations (US Terms)
- ch – chain
- sc – single crochet
- sl st – slip stitch
- st(s) – stitch(es)
- inc – 2 sc in the same st
- RS / WS – right side / wrong side
- MR – magic ring
Special technique – invisible join: after the last sc of a round, cut the yarn and pull the tail through. Thread the tail on a needle, pass it under both loops of the first st of the round, then go back down through the back loop of the last st. Use this only at the end of the globe circle so the outline stays smooth.
Gauge and Checkpoints
Gauge: 18 sc and 20 rows or rounds = 4 in (10.2 cm). That’s 4.5 sts and 5 rows per inch (2.5 cm).
Work the first globe circle through Round 10 and check it before going further. These checkpoints keep the whole design on target:
- After Round 5 (30 sts): the circle is 2 in (5.1 cm) across.
- After Round 8 (48 sts): the circle is 3.2 in (8.1 cm) across.
- After Round 10 (60 sts): the circle is 4 in (10.2 cm) across and lies flat.
- After base Row 7 (16 sts): the bottom edge is 3.6 in (9.1 cm) wide. The base adds 0.9 in (2.3 cm) below the circle, for a total height of 4.9 in (12.4 cm).
- After the border: 4.4 in (11.2 cm) x 5.3 in (13.5 cm).
If the circle is too big, go down to a 3.75 mm hook. If it’s too small, go up to a 4.5 mm hook. Don’t add or remove rounds, because the base, pocket and border counts all depend on exactly 60 sts in Round 10.
If the circle cups, your stitches are too tight for the increase rate, so go up half a hook size. If it ruffles, go down half a hook size.
Globe Circle (Make 2, Light Blue)
Work in joined rounds, closing each round with a sl st into the first sc. The ch 1 at the start of each round does not count as a stitch. Keep the RS facing you throughout.
Round 1: In a MR, ch 1, 6 sc. Sl st to the first sc. (6 sts)
Round 2: Ch 1, inc in each st around. Join. (12 sts)
Round 3: Ch 1, (sc 1, inc) 6 times. Join. (18 sts)
Round 4: Ch 1, (sc 2, inc) 6 times. Join. (24 sts)
Round 5: Ch 1, sc 1, inc, (sc 3, inc) 5 times, sc 2. Join. (30 sts)
Staggering the increases like this keeps the circle round instead of hexagonal.
Round 6: Ch 1, (sc 4, inc) 6 times. Join. (36 sts)
Round 7: Ch 1, sc 2, inc, (sc 5, inc) 5 times, sc 3. Join. (42 sts)
Round 8: Ch 1, (sc 6, inc) 6 times. Join. (48 sts)
Round 9: Ch 1, sc 3, inc, (sc 7, inc) 5 times, sc 4. Join. (54 sts)
Round 10: Ch 1, (sc 8, inc) 6 times. Finish with an invisible join. (60 sts)
Weave in the center tail. Then mark where the base will go:
- Lay the circle flat with the invisible join at the top center.
- Count the joining st as st 1, then number the rest in your working direction. Sts 30 and 31 sit on either side of the bottom center.
- Place markers in st 24 and st 37. The 14 sts from st 24 to st 37 will carry the base.
Red Base (Worked Off Each Circle)
The base is worked in turned rows, straight down from the bottom of the circle. The ch 1 at the start of each row does not count as a stitch.
Row 1 (RS): Join red in st 24. Ch 1, sc in the same st and in each of the next 13 sts, ending in st 37. Turn. (14 sts)
Rows 2–5: Ch 1, sc in each st across. Turn. (14 sts)
Row 6 (growth row): Ch 1, inc in the first st, sc in each of the next 12 sts, inc in the last st. Turn. (16 sts)
Row 7: Ch 1, sc in each st across. Fasten off. (16 sts)
Row 1 follows the curve of the circle, and Rows 2–5 straighten it, so the base reads as a flat-topped band. The increases in Row 6 create the slight flare at the foot.
Checkpoint: the base is 1.4 in (3.6 cm) tall along its sides. Because Row 1 starts 0.5 in (1.3 cm) up the curve, the base extends 0.9 in (2.3 cm) below the lowest point of the circle.
Pocket (Make 1, Light Blue)
The pocket is worked flat from the bottom up, and its shaping follows the lower half of the globe.
Row 1 (RS): Ch 13. Sc in the 2nd ch from the hook and in each ch across. Turn. (12 sts)
Row 2 (growth row): Ch 1, inc, sc 10, inc. Turn. (14 sts)
Row 3 (growth row): Ch 1, inc, sc 12, inc. Turn. (16 sts)
Row 4: Ch 1, sc in each st across. Turn. (16 sts)
Row 5 (growth row): Ch 1, inc, sc 14, inc. Turn. (18 sts)
Rows 6–8: Ch 1, sc in each st across. Turn. (18 sts)
Row 9 (trim row): Ch 1, sl st loosely in each st across. (18 sl sts: 18 worked 1 per existing st + 0 added)
Fasten off, leaving a 12 in (30.5 cm) tail for sewing. The trim row firms up the opening so it won’t stretch as cards slide in and out.
Checkpoint: the pocket is 4 in (10.2 cm) wide at the top, 2.7 in (6.9 cm) wide at the bottom and 1.7 in (4.3 cm) tall.
Make All Pieces
| Piece | Light blue | Red | White |
|---|---|---|---|
| Panel A (snowflake panel) | 1 circle + blue border | 1 base + red border | embroidery |
| Panel B (pocket panel) | 1 circle + blue border | 1 base + red border | none |
| 1 | none | none |
Layout (side by side, not joined):
+-------------+   +-------------+
|   PANEL A   |   |   PANEL B   |
| snowflakes  |   | [ POCKET ]  |
|  [ base ]   |   |  [ base ]   |
+-------------+   +-------------+
Border both panels before you sew on the pocket, so Panel B keeps exactly the same outline as Panel A.
Joining the Pocket to Panel B
Method: whipstitch with the light blue tail. Go through both loops of the pocket edge and only the front loops of the panel.
- Lay Panel B RS up and place the pocket RS up on top. Center the Row 1 edge of the pocket over Round 9 of the circle, just above the red base.
- Line up the top corners of the pocket with Round 10 at the circle’s horizontal midline, its widest point. Pin both corners and the bottom center.
- Stitch-to-stitch logic: sew each of the 12 foundation sts of Row 1 to 1 st of Round 9. Then work up each side, sewing each of the 9 row-ends to the nearest Round 10 st.
- Leave the 18-st top edge open.
Tension: pull each stitch just snug enough to close the gap. Don’t pull so tight that the panel puckers; the pocket should lie flat, not dome.
Size checkpoint: the inside opening should measure about 3.8 in (9.7 cm). A 3.4 x 2.1 in (8.6 x 5.3 cm) card should slide in sideways easily, with about 0.4 in (1.0 cm) showing above the pocket.
Snowflake Embroidery (Panel A Only)
Use white worsted split down to 2 plies, or 3 strands of floss. Embroider after the border and before blocking.
Snowflakes (make 3), each 1 in (2.5 cm) across:
- Work 3 straight stitches, each 1 in (2.5 cm) long, crossing at the center to make 6 arms.
- At the tip of each arm, add a small V of 2 straight stitches, each 0.25 in (0.6 cm) long.
Place one snowflake in the upper left, one in the upper right, and one centered in the lower globe about 0.75 in (1.9 cm) above the red base.
Snow dots: scatter 10–12 French knots (2 wraps each) in the open spaces. Keep them at least 0.25 in (0.6 cm) from the outline.
Border (Both Panels)
Border gauge: one round of sc adds 0.2 in (0.5 cm) to every side. The border is worked in two color sections, so the globe edge stays blue and the base edge stays red.
Blue section, worked along the 46 free globe sts (sts 38 through 60, then sts 1 through 23):
Join light blue in st 38 with the RS facing. Ch 1, sc in the same st and in each of the next 7 sts, then inc in the next st. Sc 8, inc; repeat from * 3 more times. Sc in the last st (st 23). Fasten off.
Count: 5 repeats of 9 sts, plus 1 st, uses all 46 sts. This makes 46 sts (1 per existing st) + 5 added = 51 sts.
Why the blue math works: a full outer round on a 60-st circle would need 6 increases. The blue section covers 46/60 of the circle, and 46/60 x 6 = 4.6, which rounds to 5 increases. That keeps the edge flat instead of cupping.
Red section, worked around the base:
Join red at the top row-end of the base on the st 37 side. Ch 1, then work:
- Side 1: 1 sc in each of the 7 row-ends going down. (7 sts)
- Bottom: 3 sc in the first st of Row 7 (corner), sc in each of the next 14 sts, 3 sc in the last st (corner). (16 sts worked + 4 added = 20 sts)
- Side 2: 1 sc in each of the 7 row-ends going up. (7 sts)
Total: 7 + 20 + 7 = 34 sts. Sl st into the first blue border st and fasten off.
Why the red math works: the base has 7 rows, so each side has 7 row-ends, and each gets 1 sc. The 16 bottom sts already include the 2 corner sts. Each 3-sc corner simply adds 2 sts there, so no corner sts are counted twice.
Checkpoint: the width is 4 in + 0.2 in + 0.2 in = 4.4 in (11.2 cm). The height is 4.9 in + 0.2 in + 0.2 in = 5.3 in (13.5 cm).
Final Blocking
- Weave in all ends on the WS, hiding each color in stitches of the same color.
- Lay both panels RS up on the blocking mat.
- Pin each globe round to 4.4 in (11.2 cm) across at the outer border, and pin the red base edges straight and square.
- Mist evenly until damp but not soaked. If the pocket needs help keeping its shape, slip a card template wrapped in plastic inside it.
- Gently press the embroidery flat with your fingertips.
- Let the panels dry completely, about 6–8 hours, before unpinning.
- Re-measure both panels: they should be 4.4 x 5.3 in (11.2 x 13.5 cm).
Final Quality-Control Checklist
- Both circles have exactly 60 sts in Round 10 and measure 4 in (10.2 cm) across.
- Each base has 14 sts in Rows 1–5 and 16 sts in Rows 6–7.
- On each panel, the blue border has 51 sts and the red border has 34 sts.
- Both panels measure 4.4 x 5.3 in (11.2 x 13.5 cm) and match each other.
- The snowflakes are evenly spaced and the French knots are secure.
- The pocket lies flat, its top edge is level, and a card slides in smoothly.
- No ends show on the RS.
Troubleshooting
- The circle looks hexagonal: check that you staggered the increases in Rounds 5, 7 and 9.
- The base pulls the circle in: Row 1 must have exactly 14 sts, from st 24 to st 37. Check that you didn’t skip a stitch.
- The globe border ruffles: you’ve added too many increases. Recount for 51 sts.
- The base corners curl: work the 3-sc corners more loosely, then block them flat.
- The pocket is too tight for a card: check that Rows 5–8 have 18 sts, and loosen your whipstitch tension.
- The embroidery puckers: split the yarn thinner and don’t pull the stitches tight.
Care
Hand wash in cool water with mild soap, then reshape to 4.4 x 5.3 in (11.2 x 13.5 cm) and dry flat. Don’t tumble dry, because heat can distort the circle and the pocket.
Final Notes
The measurement chain is short and reliable:
- 60 sts in Round 10 give a 4 in (10.2 cm) circle.
- The 14-to-16-st base extends 0.9 in (2.3 cm) below the circle, for a total height of 4.9 in (12.4 cm).
- A 51-st blue section and a 34-st red section add 0.2 in (0.5 cm) all around.
- The result is two matching panels, each 4.4 x 5.3 in (11.2 x 13.5 cm).
Check your gauge at Round 10, and everything after it falls into place.
Happy crocheting!