

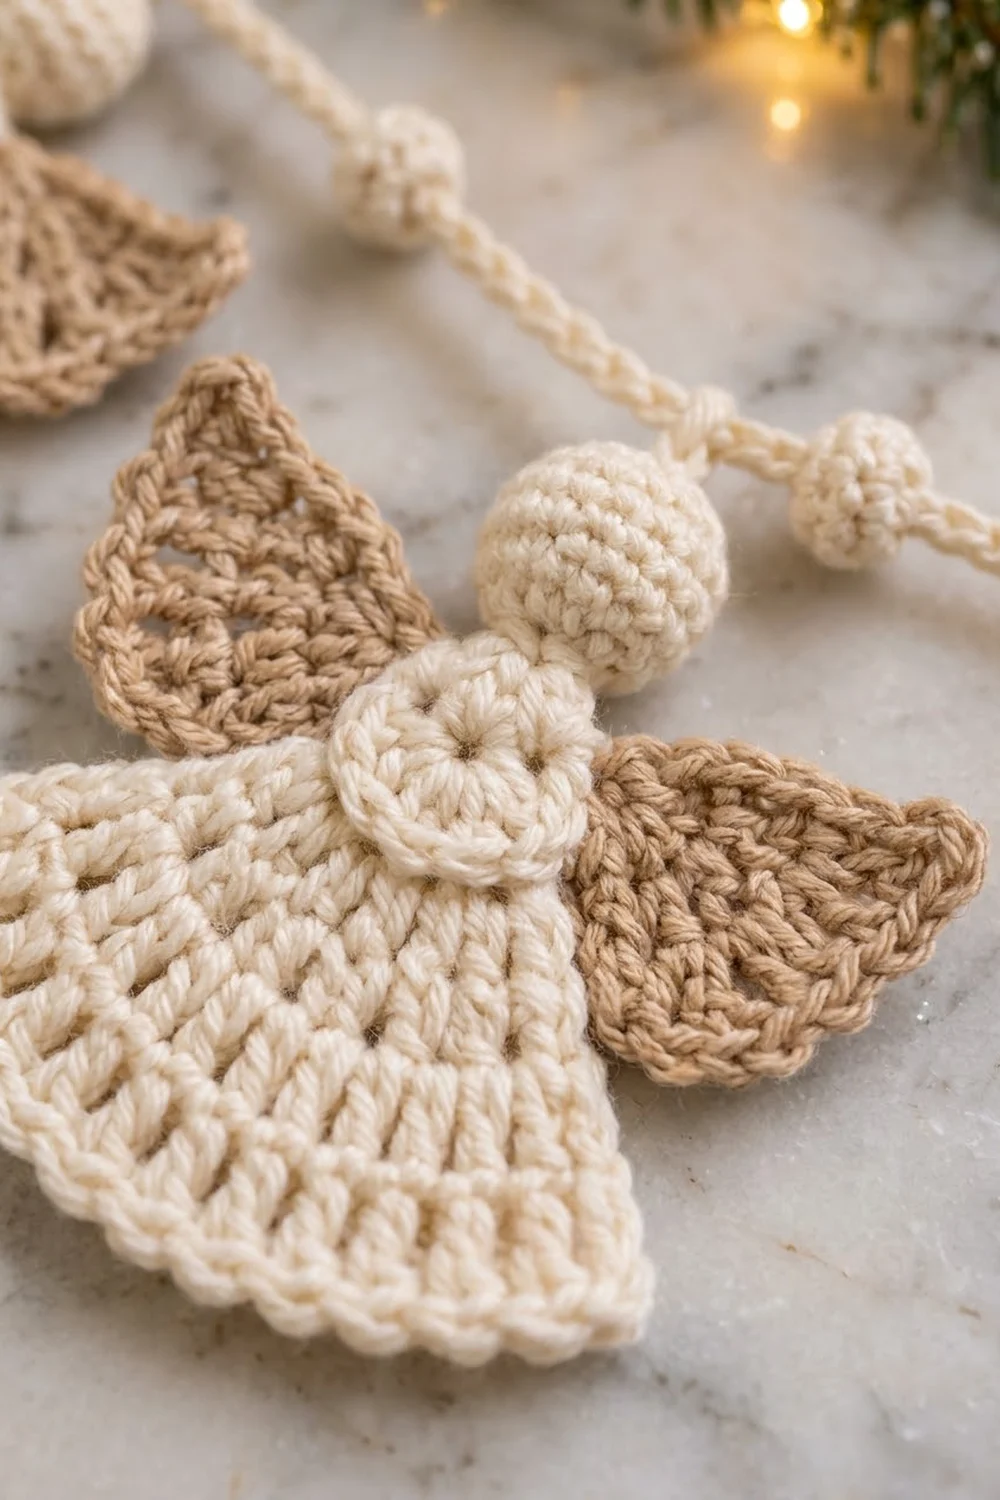
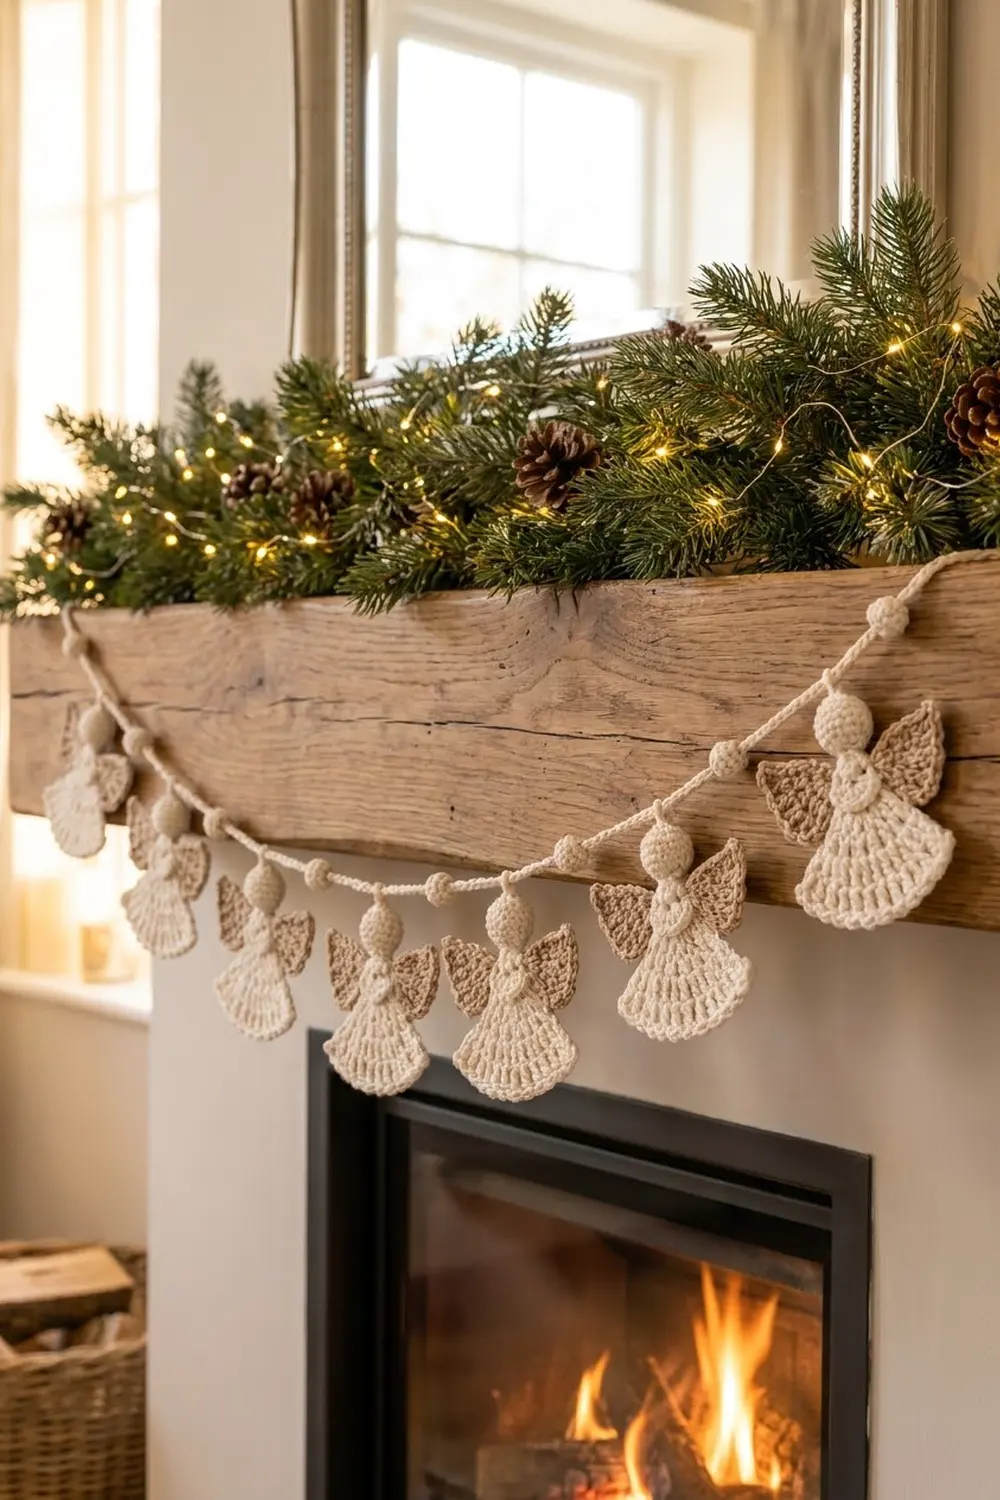
This angel garland strings seven small crocheted angels along a soft chain cord, with a little crocheted bead sitting between each pair. Each angel has a round 3D head, a small flat bodice disc, a flared double-crochet skirt with a corded hem, and two textured wings.
The palette is calm and natural. The heads, bodices, skirts, beads, and cord are cream, and the wings are a warm tan. It fits a rustic or neutral Christmas look.
The pattern uses US crochet terms. Each angel is 4.5 in (11.4 cm) tall and 4.5 in (11.4 cm) across the wings. The finished cord is 66 in (167.6 cm) long, and the decorated section between the two end beads is 42 in (106.7 cm).
You crochet the head and beads in the round, the bodice as a flat circle, and the skirt and wings in short rows. A two-round edging finishes each skirt hem. Then you sew each angel together, make one slip-stitch cord, and sew the angels and beads onto marked stitches.
Finished Size and Construction
- Finished garland: 66 in (167.6 cm) cord; 42 in (106.7 cm) decorated span
- Skill level: Easy to Intermediate (reverse single crochet on the hem)
- Terminology: US crochet terms
- Yarn weight: DK (weight 3) cotton or cotton blend
- Hook: 3.5 mm (E-4)
- Number of pieces: 7 angels (each made of 1 head, 1 bodice, 1 skirt, 2 wings), 8 beads, 1 cord
- Layout: one line of beads and angels taking turns, starting and ending with a bead
- Piece size (one angel): 4.5 in (11.4 cm) tall x 4.5 in (11.4 cm) wingspan
- Skirt size before edging: 3.3 in (8.4 cm) wide at the hem x 2.7 in (6.9 cm) tall
- Edging depth: 0.3 in (0.8 cm)
Materials
Use a smooth DK cotton or cotton blend with good stitch definition. Mercerized cotton shows the skirt columns and wing texture clearly.
- Cream (main color): 75 g, about 180 m (heads, bodices, skirts, beads, cord)
- Tan (wing color): 25 g, about 60 m (14 wings)
These amounts assume a yarn with about 120 m per 50 g. They include a margin of about 20% for a test angel and differences in tension.
Tools:
- 3.5 mm (E-4) crochet hook
- Tapestry needle
- Small amount of polyester fiberfill
- 15 locking stitch markers
- Scissors
- Tape measure or ruler
- Pins and a foam blocking mat
- Spray bottle with water
Abbreviations (US Terms)
- ch: chain
- sl st: slip stitch
- sc: single crochet
- dc: double crochet
- inc: 2 sc in the same stitch
- dec: single crochet decrease (insert in next st, pull up a loop, insert in next st, pull up a loop, yarn over and pull through all 3 loops)
- MR: magic ring
- st(s): stitch(es)
- rnd: round
- rev sc: reverse single crochet
Special stitch: reverse single crochet (rev sc, crab stitch). Work from left to right (right-handed). With a loop on the hook, insert the hook into the next stitch to the right, yarn over, pull up a loop, yarn over, and pull through both loops. This makes the rolled, corded edge on the skirt hem.
Gauge and Checkpoints
Gauge:
- 20 sc x 22 rnds = 4 in (10.2 cm)
- 18 dc x 9 rows = 4 in (10.2 cm)
- Cord: 20 sl sts = 4 in (10.2 cm)
Make one full test angel first. It shows any gauge problem before you commit to all seven.
Checkpoints:
- Head after Rnd 8: 1.1 in (2.8 cm) across
- Bodice after Rnd 2: 1 in (2.5 cm) across
- Skirt after Row 6: 3.3 in (8.4 cm) wide at the hem, 2.7 in (6.9 cm) tall
- Skirt after edging: 3.9 in (9.9 cm) wide at the hem, 3 in (7.6 cm) tall
- Wing after Row 4: 1.6 in (4.1 cm) from point to outer edge
- Assembled angel: 4.5 in (11.4 cm) tall and wide
If your angel is too big, go down to a 3.25 mm or 3 mm hook. If it is too small, go up to a 3.75 mm or 4 mm hook.
Angel Pattern
Head (make 7, cream)
Rnd 1: In MR, 6 sc. (6)
Rnd 2: Inc in each st around. (12)
Rnd 3: (Sc in next st, inc) 6 times. (18)
Rnds 4–6: Sc in each st around. (18)
Rnd 7: (Sc in next st, dec) 6 times. (12)
Stuff the head firmly.
Rnd 8: Dec 6 times. (6)
Fasten off and leave a 10 in (25.4 cm) tail. Weave the tail through the front loops of the last 6 sts and pull it closed. The magic ring side is the face, and the closed end sits against the bodice.
Hanging loop: Join cream at the top of the head. Ch 6, then sl st in the same st. Fasten off. The loop stands about 0.6 in (1.5 cm) tall.
Bodice (make 7, cream)
Rnd 1: In MR, ch 1, 8 sc. Sl st to the first sc. (8)
Rnd 2: Ch 1, inc in each st around. Sl st to the first sc. (16)
Fasten off and leave a 12 in (30.5 cm) tail for sewing. Checkpoint: 1 in (2.5 cm) across.
Skirt (make 7, cream)
The skirt is worked from the waist down in turned rows. You add 1 st at each end of every row, so the dc columns fan outward.
Row 1: Ch 7. Dc in 4th ch from hook (the skipped ch count as the first dc) and in each of the next 3 ch. Turn. (5)
Row 2: Ch 3 (counts as dc throughout), dc in the same st, dc in next 3 sts, 2 dc in the top of the turning ch. Turn. (7)
Row 3: Ch 3, dc in the same st, dc in next 5 sts, 2 dc in the top of the turning ch. Turn. (9)
Row 4: Ch 3, dc in the same st, dc in next 7 sts, 2 dc in the top of the turning ch. Turn. (11)
Row 5: Ch 3, dc in the same st, dc in next 9 sts, 2 dc in the top of the turning ch. Turn. (13)
Row 6: Ch 3, dc in the same st, dc in next 11 sts, 2 dc in the top of the turning ch. (15)
Fasten off. Checkpoint: 1.1 in (2.8 cm) wide at the waist, 3.3 in (8.4 cm) wide at the hem, 2.7 in (6.9 cm) tall.
Wings (make 14, tan)
Each wing is a quarter-circle wedge. The point sits behind the body.
Row 1: In MR, ch 3 (counts as dc), 2 dc in ring. Pull the ring tight. Turn. (3)
Row 2: Ch 3, dc in the same st, 2 dc in each of next 2 sts. Turn. (6)
Row 3: Ch 3, dc in the same st, dc in next st, (2 dc in next st, dc in next st) 2 times. Turn. (9)
Row 4 (edging): Ch 1, 2 sc in first st, sc in next 7 sts, 2 sc in last st. (11 sc along the curve) Work 2 sc in each of the 3 row-ends down to the point (6 sc), then sl st in the ring center. Work 2 sc in each of the 3 row-ends up the other side (6 sc). Sl st to the first sc. (23 sc)
Fasten off and leave a 10 in (25.4 cm) tail. Checkpoint: 1.6 in (4.1 cm) from point to outer edge, 2.2 in (5.6 cm) across the curve.
Beads (make 8, cream)
Rnd 1: In MR, 6 sc. (6)
Rnd 2: Inc in each st around. (12)
Rnds 3–4: Sc in each st around. (12)
Stuff firmly.
Rnd 5: Dec 6 times. (6)
Fasten off and close the bead the same way as the head. Leave a 10 in (25.4 cm) tail. Checkpoint: 0.8 in (2.0 cm) across.
Assemble Each Angel
- Work the skirt edging first (see the Border section).
- Pin the bodice over the top center of the skirt so it covers the top 0.6 in (1.5 cm). Whipstitch around the lower half of the bodice.
- Place the wings behind the skirt with their points meeting at the center back, angled up and out. Sew the points in place.
- Sew the head to the top of the bodice with the face forward. Go around the join twice so the head stays firm.
- Checkpoint: 4.5 in (11.4 cm) tall and 4.5 in (11.4 cm) wingtip to wingtip.
Make All Pieces
Cream:
- 7 heads with hanging loops
- 7 bodices
- 7 skirts with hem edging
- 8 beads
- 1 cord
Tan:
- 14 wings (2 per angel)
Layout grid (left to right, B = bead, A = angel):
TIE (60 sts)
ROW 1: B  A  B  A  B  A  B  A  B  A  B  A  B  A  B
TIE (60 sts)
Joining
Cord: With cream, ch 331. Sl st in the back bump of the 2nd ch from the hook and in each ch across. (330 sl sts) Fasten off.
Checkpoint: at 5 sl sts per inch, 330 sts ÷ 5 = 66 in (167.6 cm).
Marking positions: Count from one end and mark these stitches:
- Beads: sts 60, 90, 120, 150, 180, 210, 240, 270
- Angels: sts 75, 105, 135, 165, 195, 225, 255
Stitch-to-stitch logic: Each 15-st step is 3 in (7.6 cm). Every bead sits 3 in (7.6 cm) from the next angel, and the angels are 30 sts, or 6 in (15.2 cm), apart center to center.
- Sts 1–60 form the first 12 in (30.5 cm) tie.
- The decorated span runs from st 60 to st 270. That’s 210 sts, or 42 in (106.7 cm).
- The last 60 sts form the second tie (270 + 60 = 330).
Attaching beads: With the bead tail, sew through the marked st and the st on each side (3 sts), then back through the bead center. Repeat twice.
Attaching angels: Lay the top 2 ch of the hanging loop over the marked st. Whipstitch the loop to the marked st and the st on each side (3 sts).
Tension advice: Keep the slip stitches loose enough for the hook to slide through the back bumps. If the cord curls, they are too tight. Pull sewing stitches just snug so the cord doesn’t pucker.
Size checkpoint: Lay the garland flat. Angel centers should be 6 in (15.2 cm) apart and wingtips about 1.5 in (3.8 cm) apart, with a bead centered in each gap.
Border
On this garland, the border is the two-round edging on each skirt that gives the hem its rolled, corded look. Work it on every skirt before assembly.
Border gauge: 2 sc per dc row-end on the sides, 1 sc per st on the hem. The two rounds add 0.3 in (0.8 cm) to each edged side.
Rnd 1: With the right side facing, join cream with a sl st at the top corner of one side (the end of Row 1). Ch 1.
- Side A: 2 sc in each of the 6 row-ends going down. (12)
- Hem: 3 sc in the first st, sc in the next 13 sts, 3 sc in the last st. (19)
- Side B: 2 sc in each of the 6 row-ends going up. (12)
Rnd 1 total: 43 sc. Leave the top waist edge unworked.
Rnd 2: Ch 1, do not turn. Rev sc in each sc back along Side B (12), the hem (19), and Side A (12). (43) Fasten off.
Why the math works:
- A dc row is about as tall as 2 sc, so 6 rows x 2 = 12 sc per side keeps the sides flat.
- The hem has 15 sts worked 1 per stitch, plus 2 extra sts in each 3-sc corner: 15 + 4 = 19.
- Rnd 1 is 12 + 19 + 12 = 43.
- Rnd 2 works 1 rev sc into each of the 43 sts and adds none: 43 + 0 = 43.
- The hem grows from 3.3 in to 3.3 + 0.3 + 0.3 = 3.9 in (9.9 cm) wide. The height grows from 2.7 in to 3 in (7.6 cm).
Final Blocking
- Lightly mist each angel and the cord. Don’t soak the stuffed heads or beads.
- Pin each skirt to 3.9 in (9.9 cm) at the hem and 3 in (7.6 cm) tall, easing the hem into a gentle curve.
- Smooth the outer curve of each wing and keep its point tucked behind the body.
- Check that each angel is 4.5 in (11.4 cm) tall and wide.
- Pin the cord straight along the mat.
- Let everything dry completely, about 6–8 hours.
- Attach the angels and beads after blocking, then check the spacing again.
Final Quality-Control Checklist
- 7 angels, 8 beads, 1 cord
- Heads 1.1 in (2.8 cm) across, firmly stuffed, faces forward
- Skirts 3.9 in (9.9 cm) at the hem, 43 sts in each edging round
- Wing pairs match in size and angle
- Hanging loops are secure
- Angels 6 in (15.2 cm) apart
- Both ties 12 in (30.5 cm)
- All tails woven in
Troubleshooting
Skirt ruffles: Your tension is loose. Go down a hook size, and add only 1 st at each row end.
Skirt cups inward: Make sure the last 2 dc of each row go into the top of the turning ch.
Hem edging flares: Use 2 sc per row-end, not 3, and only 3 sc in each corner.
Crab stitch looks flat: Pull up a slightly taller loop before you finish each stitch.
Stuffing shows: Use a smaller hook for the heads and beads.
Wings droop: Add a tack stitch where each wing meets the edge of the bodice.
Uneven sag: Recount the markers from the same end of the cord.
Care
Hand wash in cold water with mild soap. Press the water out in a towel, reshape, and dry flat. Store the garland loosely coiled so the wings keep their shape.
Final Notes
The measurement chain is short. Gauge gives a 1.1 in (2.8 cm) head, a 1 in (2.5 cm) bodice, and a 3.3 in (8.4 cm) skirt that becomes 3.9 in (9.9 cm) after its 43-st edging. With 1.6 in (4.1 cm) wings, each angel measures 4.5 in (11.4 cm) tall and wide.
On the 330-st, 66 in (167.6 cm) cord, angels and beads sit every 15 sts, or 3 in (7.6 cm). They fill a 42 in (106.7 cm) span between two 12 in (30.5 cm) ties. Check one angel first, then trust the counts.
Happy crocheting!