
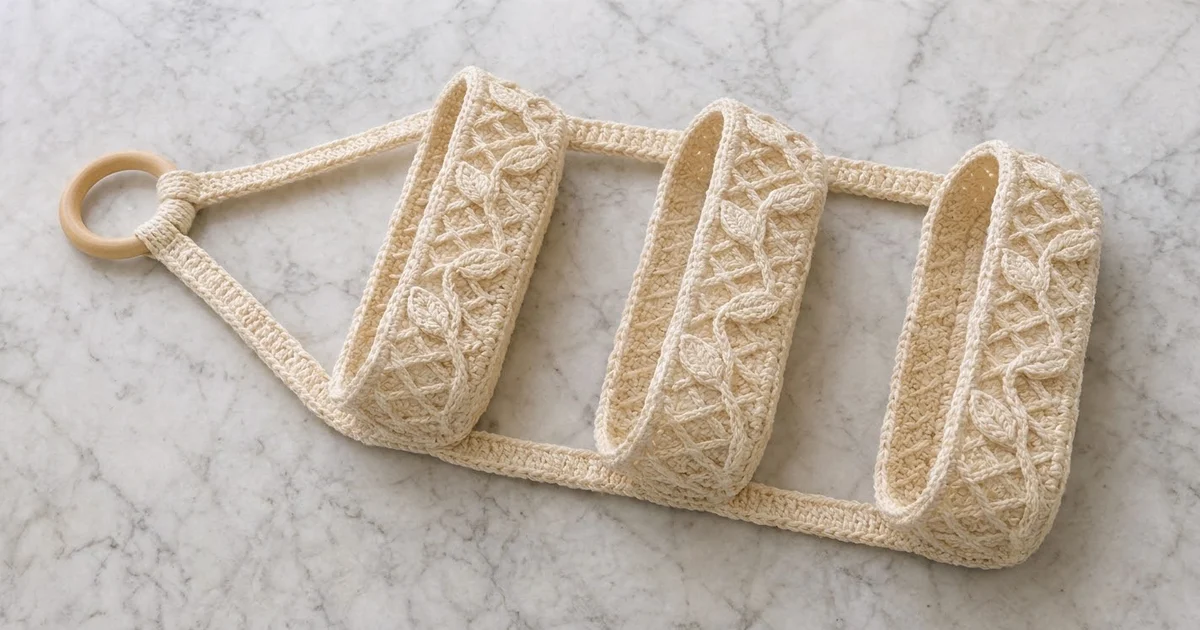
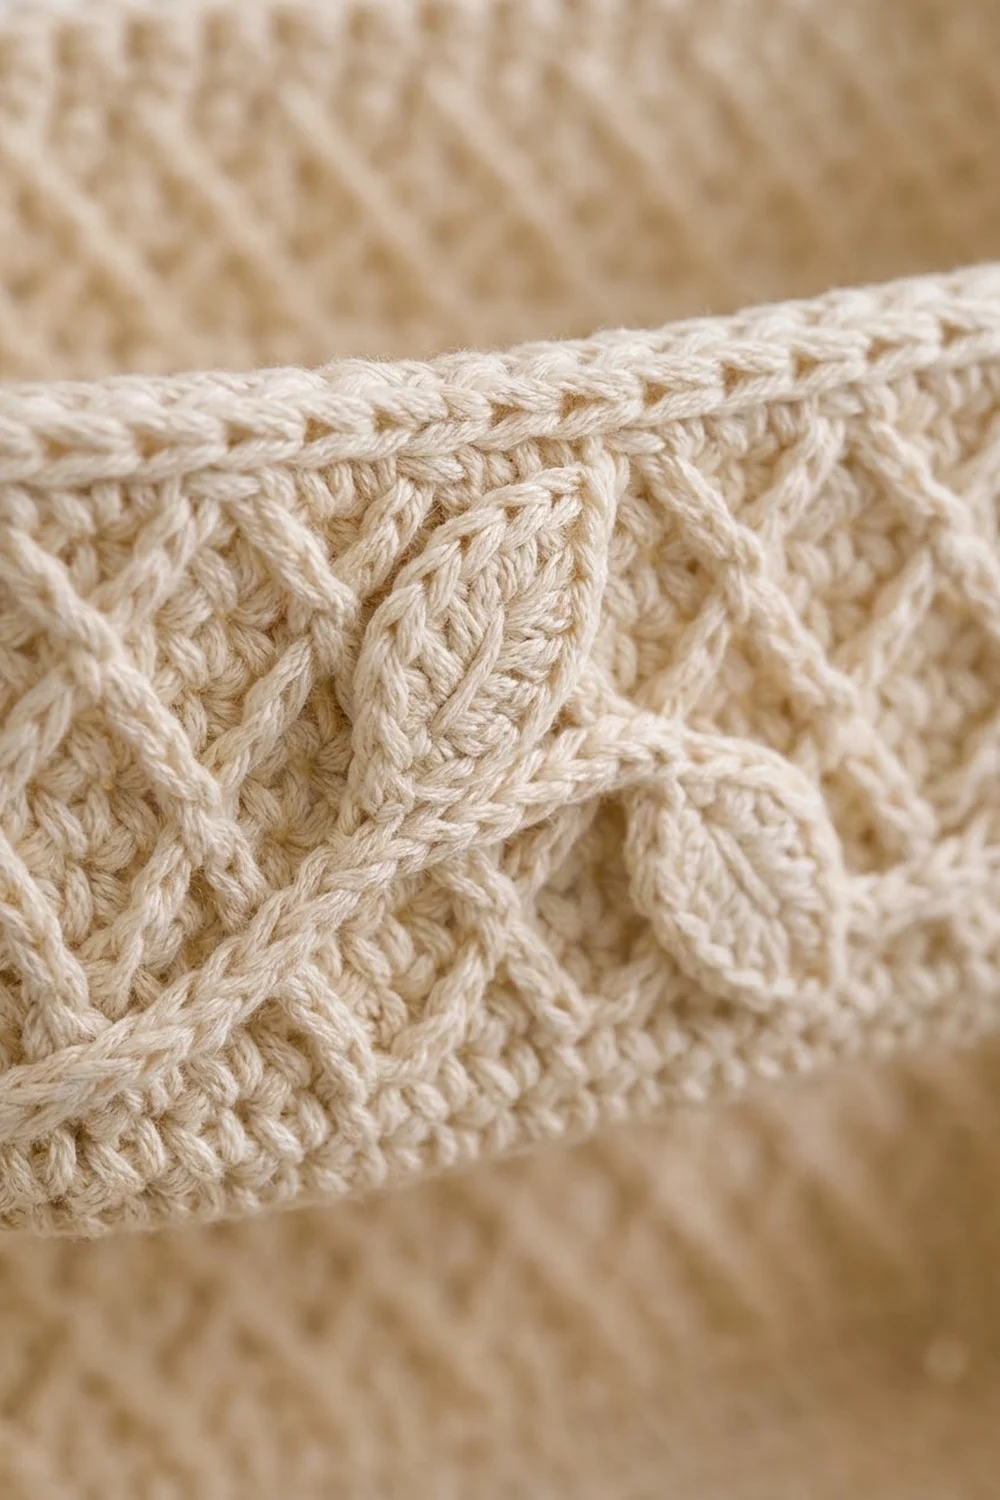
This hanging organizer has three oval baskets, one above the other, carried on two crocheted straps that meet at a wooden ring. Each basket has a smooth single crochet base, a raised diamond lattice around the walls, a rolled rim, and a trailing vine with appliqué leaves across the front. It’s sized for standard toilet paper rolls, and it works just as well for washcloths, soaps, or small craft supplies.
The sample uses one color, a soft cream cotton. With a single color, the post-stitch lattice and the leaves stand out through texture alone. The look is calm and farmhouse-simple, so it suits a bathroom, a laundry nook, or a nursery.
The pattern uses US crochet terms. Each basket measures 10¼ in (26.0 cm) long, 4 in (10.2 cm) wide, and 3½ in (8.9 cm) tall. Hung up, the organizer is about 26 in (66.0 cm) from the bottom basket to the top of the ring and about 10¾ in (27.3 cm) wide.
Construction: each basket starts as an oval base worked in joined rounds around a foundation chain. A back-loop round turns the edge upward, and the walls are worked in the lattice pattern. Three rim rounds finish the top. Two flat straps are worked lengthwise and sewn to the short ends of all three baskets. Their top ends wrap around a 3 in (7.6 cm) wooden ring. Finally, a slip-stitch vine and small leaves are sewn onto the front of each basket.
Finished Size and Construction
- Finished size: about 26 in (66.0 cm) tall × 10¾ in (27.3 cm) wide
- Skill level: Intermediate (front post stitches, working around a chain)
- Terminology: US
- Yarn weight: Worsted (#4) cotton
- Hook: 4.5 mm (US 7)
- Number of pieces: 3 baskets, 2 straps, 3 vines, 15 leaves, plus 1 wooden ring
- Layout: 3 baskets stacked vertically, 2¼ in (5.7 cm) apart, hung from 2 straps
- Piece size (one basket): 10¼ × 4 × 3½ in (26.0 × 10.2 × 8.9 cm)
- Size before border (rim): walls 2.9 in (7.4 cm) tall after Rnd 22
- Border (rim) depth: 0.6 in (1.5 cm), 3 rounds
Materials
Yarn: Use a firm, smooth worsted-weight cotton or cotton blend. Cotton holds its shape when the baskets are loaded and survives a humid bathroom. Steer clear of very soft acrylic, because the walls will sag.
- Cream (single color): 400 g, about 680 m (744 yd)
The quantity includes a margin of about 20% for your swatch, sewing tails, and any differences in tension.
Tools:
- 4.5 mm (US 7) crochet hook
- One 3 in (7.6 cm) unfinished wooden ring
- Tapestry needle
- 6 locking stitch markers
- Rustproof pins
- Measuring tape
- Scissors
- Spray bottle and blocking surface
Abbreviations (US Terms)
- ch – chain
- sl st – slip stitch
- sc – single crochet
- hdc – half double crochet
- dc – double crochet
- BLO – back loop only
- FPtr – front post treble crochet: yo twice, insert hook from front to back to front around the post of the indicated stitch, yo and pull up a loop, [yo, pull through 2 loops] 3 times
- rev sc – reverse single crochet (crab stitch): sc worked from left to right
- st(s) – stitch(es)
- Rnd – round
Special stitch – Lattice post rule: Every FPtr in the walls goes around a post stitch (or, in Rnd 12, an sc) 2 rounds below. Skip the st of the current round that sits behind each FPtr. Each FPtr counts as 1 st. “Ahead” means the next post in your working direction, and “back” means the one you have just passed.
Gauge and Checkpoints
Gauge: 16 sc and 18 rounds = 4 in (10.2 cm), worked firmly.
Make one complete basket before starting the others. Use these checkpoints:
- After Rnd 5: base is about 2¼ in (5.7 cm) wide.
- After Rnd 9: base is 10¼ × 4 in (26.0 × 10.2 cm) and lies flat.
- After Rnd 22: walls are 2.9 in (7.4 cm) tall, measured from the BLO ridge.
- After Rnd 25: walls are 3½ in (8.9 cm) tall.
If the base comes out bigger, drop to a 4.0 mm hook. If it’s smaller, go up to a 5.0 mm hook. If the base ruffles at Rnd 9, your increases are too loose, so go down a hook size. If it cups, go up one. Don’t start the second basket until the first one passes every checkpoint.
Basket (Make 3)
Work in joined rounds. Begin each round with ch 1, which does not count as a st, and join with a sl st to the first st. Don’t turn.
Base
Ch 28.
Rnd 1: 3 sc in 2nd ch from hook (end A), sc in next 25 ch, 3 sc in last ch (end B). Rotate and work along the other side of the chain: sc in next 25 ch. Join. (56 sts)
Rnd 2: [2 sc in each of next 3 sts, sc in next 25 sts] twice. (62 sts: 6 per end, 25 per side)
Rnd 3: [(sc 1, 2 sc in next) 3 times, sc in next 25 sts] twice. (68 sts: 9 per end)
Rnd 4: [(sc 2, 2 sc in next) 3 times, sc in next 25 sts] twice. (74 sts: 12 per end)
Rnd 5: [(sc 3, 2 sc in next) 3 times, sc in next 25 sts] twice. (80 sts: 15 per end)
Rnd 6: [(sc 4, 2 sc in next) 3 times, sc in next 25 sts] twice. (86 sts: 18 per end)
Rnd 7: [(sc 5, 2 sc in next) 3 times, sc in next 25 sts] twice. (92 sts: 21 per end)
Rnd 8: [(sc 6, 2 sc in next) 3 times, sc in next 25 sts] twice. (98 sts: 24 per end)
Rnd 9: [(sc 7, 2 sc in next) 3 times, sc in next 25 sts] twice. (104 sts: 27 per end, 25 per side)
Check: 27 + 25 + 27 + 25 = 104. Sts 1–27 form end A, 28–52 the front, 53–79 end B, and 80–104 the back.
Walls
Rnd 10 (turning round): sc BLO in each st. (104 sts) This makes the ridge along the base edge.
Rnd 11: sc in each st. (104 sts)
The lattice uses a 4-st repeat, so 104 ÷ 4 = 26 repeats. Every post round has 52 FPtr and 52 sc.
Rnd 12 (cross): sc 1, FPtr around the st 2 rounds below one st ahead, FPtr around the st 2 rounds below one st back (crossing in front of the first), sc 1; rep from * around. (104 sts)*
Rnd 13: sc in each st. (104 sts)
Rnd 14 (shift): FPtr around the post one st ahead, sc 2, FPtr around the post one st back; rep from * around. (104 sts)* The strands spread apart.
Rnd 15: sc in each st. (104 sts)
Rnd 16 (cross): FPtr around the post one st back, sc 2, FPtr around the post one st ahead; rep from * around. (104 sts)* The first FPtr of the round goes around the last post of Rnd 14. Neighboring strands now cross between repeats.
Rnd 17: sc in each st. (104 sts)
Rnd 18 (shift): sc 1, FPtr around the post one st back, FPtr around the post one st ahead, sc 1; rep from * around. (104 sts)*
Rnd 19: sc in each st. (104 sts)
Rnd 20 (cross): Repeat Rnd 12, working the FPtr around the posts of Rnd 18. (104 sts)
Rnd 21: sc in each st. (104 sts)
Rnd 22 (shift): Repeat Rnd 14. (104 sts)
Each strand moves one st per post round, which closes a diamond 4 sts wide every 8 rounds. Place markers in st 14 (center of end A) and st 66 (center of end B). Continue to the Border section to finish.
Straps (Make 2)
Ch 105.
Row 1: sc in 2nd ch from hook and in each ch across, turn. (104 sts)
Rows 2–4: ch 1, sc in each st across, turn. (104 sts)
The strap measures 26 × ⅞ in (66.0 × 2.2 cm). Edge it as described in the Border section.
Vine (Make 3)
Ch 41. Sl st in the back bump of 2nd ch from hook and in each ch across. (40 sl sts, about 9 in / 22.9 cm) Leave a 12 in (30.5 cm) tail.
Leaf (Make 15)
Ch 7.
Rnd 1: sc in 2nd ch from hook, hdc in next, dc in next 2, hdc in next, (sc, ch 2, sc) in last ch for the tip. Rotate and work along the other side of the chain: hdc in next, dc in next 2, hdc in next, sc in last. Join to first sc. (12 sts plus ch-2 tip)
Surface sl st a vein from the base to the tip. The leaf is about 1¼ in (3.2 cm) long. Leave a 10 in (25.4 cm) tail.
Make All Pieces
All pieces are Cream:
- Baskets: 3 (about 95 g each)
- Straps: 2 (about 15 g each)
- Vines: 3, and leaves: 15 (about 5 g per basket set)
Layout, viewed from the front:
          (  ring  )
          /        \
     strap          strap
       |  [ TOP ]   |
       |  [ MID ]   |
       |  [ BOT ]   |
Joining
Method: whipstitch with the yarn tail, working through both layers.
Positions on each strap, measured from the bottom end:
- Bottom basket: 0–3½ in (0–8.9 cm)
- Middle basket: 5¾–9¼ in (14.6–23.5 cm)
- Top basket: 11½–15 in (29.2–38.1 cm)
This leaves 2¼ in (5.7 cm) between baskets and 11 in (27.9 cm) free above the top basket.
Stitch-to-stitch logic: Center each strap on the marked center st of a basket end (st 14 or st 66). The strap covers roughly sts 12–16 of the end curve. The wall is 16 rounds tall (Rnds 10–25), and the strap section is 14 sts long. Whipstitch both long edges of the strap, catching one wall round per strap st and two wall rounds on two evenly spaced stitches (14 + 2 = 16).
Tension: Keep your sewing firm but not tight. The strap should lie flat against the curve and not dent the wall.
Ring: Fold the top 1½ in (3.8 cm) of each strap over the ring and sew it down. That leaves 9½ in (24.1 cm) of diagonal strap on each side.
Size checkpoint: Hang the organizer. The top of the top basket should sit about 8 in (20.3 cm) below the bottom of the ring.
Border
Border gauge: the same as the body, 16 sts = 4 in (10.2 cm). The rev sc round is worked slightly tighter and rolls outward.
Basket rim (work on each basket after Rnd 22):
- Rnd 23: sc in each st. (104 sts: 27 per end, 25 per side)
- Rnd 24: sc in each st. (104 sts)
- Rnd 25: rev sc in each st. (104 sts) Fasten off.
Why the math works: The walls go straight up, so the rim starts with exactly the 104 sts of Rnd 22 and keeps them. Each end still has 27 sts and each side 25: 27 + 25 + 27 + 25 = 104. Adding sts would make the rim flare, and skipping them would pull it in.
Strap edge (work on each strap after Row 4): Don’t turn. Sl st 4 along the short end (one per row), 104 along the foundation chain, 4 along the other short end, and 104 along Row 4. (216 sl sts) No extra corner sts are needed because each corner is already counted in its side.
Vine and leaves: Pin a vine in a gentle wave across the front wall, between Rnds 14 and 20. Sew it on, then sew 5 leaves along it, alternating above and below. Sew the leaves down only at their bases and centers so the tips lift slightly.
Final Blocking
- Mist each basket until it’s damp but not soaked.
- Stuff it firmly with a folded towel or a box cut to 10 × 3¾ in (25.4 × 9.5 cm).
- Push the rim straight and roll the rev sc outward.
- Pin the straps flat and straight, and the leaves open.
- Let everything dry completely, for at least 24 hours.
Final Quality-Control Checklist
- Each basket has 104 sts and measures 10¼ × 4 × 3½ in (26.0 × 10.2 × 8.9 cm).
- The lattice diamonds line up all the way around, with no broken strands.
- All three baskets hang level.
- The strap gaps are 2¼ in (5.7 cm).
- The ring is sewn securely.
- All ends are woven in.
Troubleshooting
- The base ruffles: your increases are too loose. Go down a hook size.
- The base cups upward: your tension is too tight. Go up a hook size.
- The walls flare: check for 104 sts, and remember to skip the st behind each FPtr.
- The lattice looks off: you went the wrong way on a post. Make sure you’re using “ahead” and “back” correctly, then frog back to the last correct post round.
- The baskets tilt: re-sew the straps exactly on the markers at st 14 and st 66.
- The straps stretch: use firm tension, or add Row 5.
Care
Hand wash in cool water and reshape the baskets while damp. Lay flat to dry, keeping the ring dry.

Final Notes
The measurements build on each other. A gauge of 16 sc = 4 in (10.2 cm) gives a base of 10¼ × 4 in (26.0 × 10.2 cm) with 104 sts. That gives walls of 2.9 in (7.4 cm), then 3½ in (8.9 cm) with the rim. The straps are 26 in (66.0 cm) long, and the finished organizer hangs about 26 in (66.0 cm) tall. If you hit each checkpoint, the finished piece will come out to size.
Happy crocheting!