

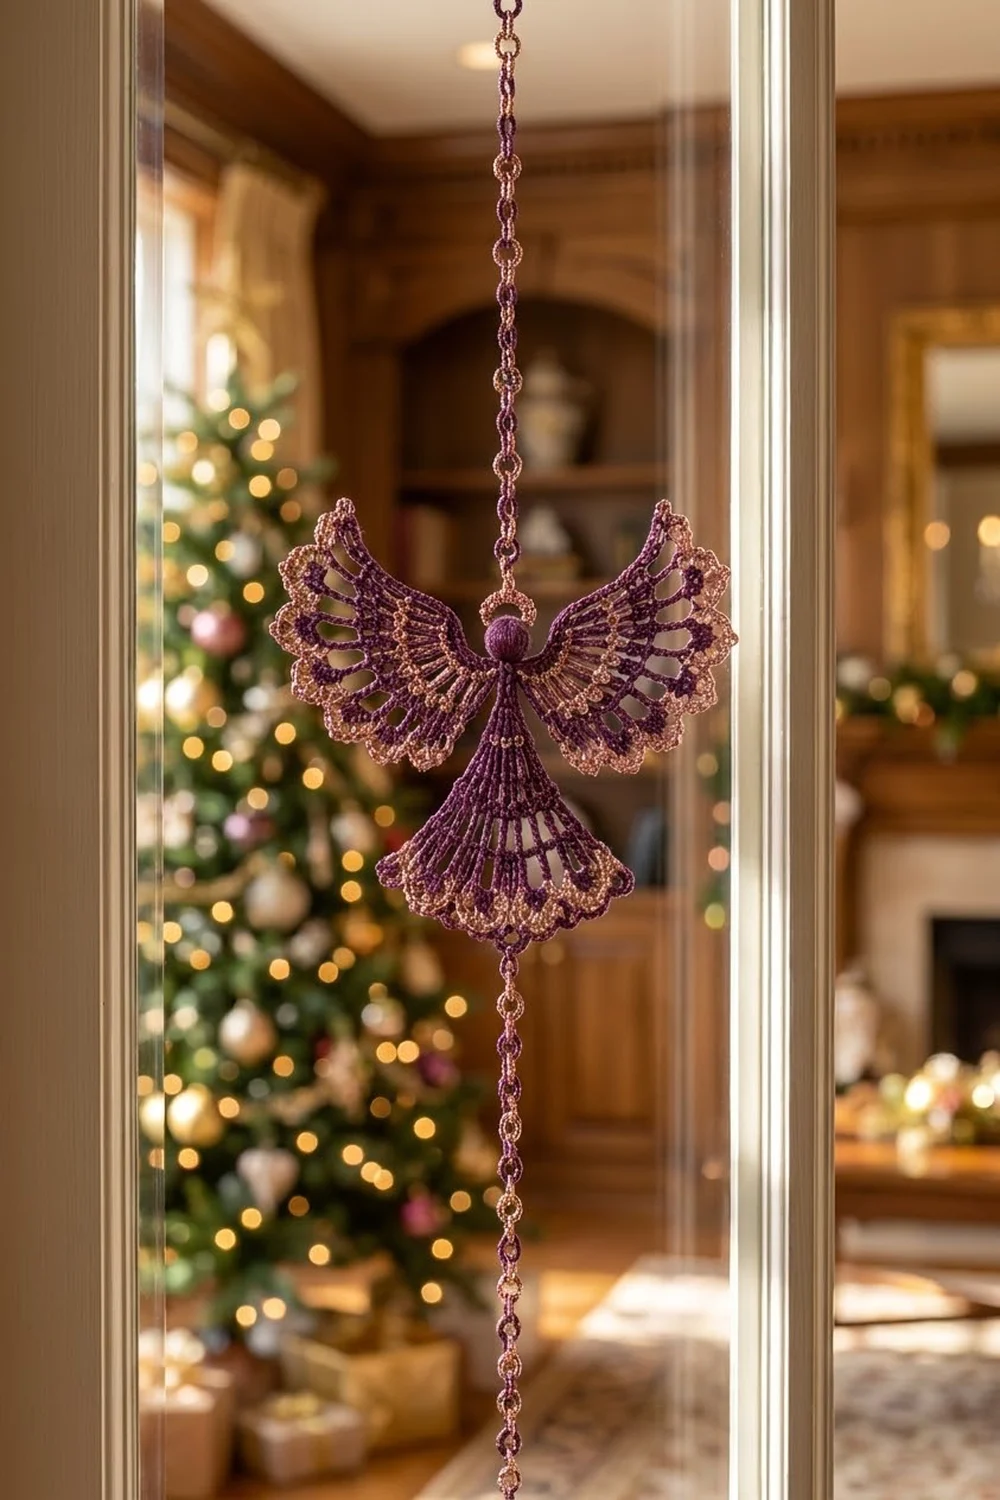
The Plum Seraph Angel is a lacy thread ornament with a fan-shaped skirt, two open feathered wings, a small round head, and a little ring halo. It looks delicate, but it’s built from simple double crochet spokes and chain spaces.
Deep plum thread makes up the body. Metallic rose gold adds one accent band in the skirt and in each wing, a picot edge on every scallop, and the halo. The style is classic heirloom lace with a warm, festive shimmer.
This pattern uses US crochet terms. The finished angel measures 6.5 in (16.5 cm) from wing tip to wing tip and 4 in (10.2 cm) tall from the top of the halo to the skirt hem, after blocking.
Construction is simple. You work the skirt in turned rows from a small neck ring. Then you work each wing directly off a shoulder, so there’s nothing to sew on. Next comes a shell-and-picot border around each edge. Finally, you sew on a stuffed head and a halo, and block the angel stiff.
Finished Size and Construction
- Finished size: 6.5 in (16.5 cm) wingspan × 4 in (10.2 cm) tall
- Skill level: Intermediate (thread work, color changes, working around a post)
- Terminology: US crochet terms
- Yarn weight: Size 3 crochet thread (Lace / Super Fine)
- Hook: 2.25 mm (US B-1)
- Number of pieces: 1 angel motif. The skirt and wings are one continuous piece, and you sew on a small head and halo.
- Layout: Skirt fanning downward, wings fanning out from each shoulder, head over the neck ring, halo standing up behind the head
- Piece size: Skirt and each wing are 2.25 in (5.7 cm) long before the border
- Size before border: 5.5 in (14.0 cm) wingspan × 3.5 in (8.9 cm) tall
- Border depth: 0.5 in (1.3 cm) on the skirt hem and each wing edge
Materials
Use a smooth, mercerized size 3 cotton thread for the plum. It gives crisp stitch definition and takes starch well. For the accent, pick a size 3 metallic or metallic-blend thread that matches the plum’s thickness. If the metallic is noticeably thinner, the picot edge will look sparse.
- Plum (main color): 16 g (25 m)
- Rose Gold (accent): 8 g (15 m)
These quantities include a margin of about 25% for swatching and color-change tails. One standard ball of each color is plenty.
Tools:
- 2.25 mm (US B-1) crochet hook
- Fine tapestry needle
- Small scissors
- A pinch of polyester fiberfill for the head
- Blocking board or foam mat and rustproof pins
- Spray starch or fabric stiffener
- Plastic wrap to protect the blocking board
Abbreviations (US Terms)
- ch – chain
- sl st – slip stitch
- sc – single crochet
- sc2tog – single crochet 2 together
- dc – double crochet
- tch – turning chain
- sp(s) – space(s)
- st(s) – stitch(es)
- RS / WS – right side / wrong side
Special stitch – picot: Ch 3, then sl st into the front loop and left vertical bar of the sc just made. This forms one small closed loop.
Shell: 7 dc worked into the same ch-3 sp.
Gauge and Checkpoints
Gauge: 24 dc and 12 dc rows = 4 in (10.2 cm) in Plum with a 2.25 mm hook. That makes one dc row about 0.33 in (0.8 cm) tall.
Test one section first. Work Skirt Rows 1–3 as your gauge piece and measure it before you continue. If it matches, keep going. The skirt and wings are identical fans, so the skirt tells you what the wings will do.
Checkpoints:
- After Skirt Row 1: the fan is about 0.75 in (1.9 cm) across.
- After Skirt Row 3: about 1.25 in (3.2 cm) from the ring center to the top of the row.
- After Skirt Row 6: 2.25 in (5.7 cm) long and about 3.75 in (9.5 cm) straight across the hem.
- After each wing’s Row 6: 2.25 in (5.7 cm) from shoulder to outer edge.
- After the border: skirt and each wing are 2.75 in (7.0 cm) long.
- Head: about 0.75 in (1.9 cm) across. Halo: about 0.75 in (1.9 cm) outer diameter.
If your piece is too big, go down to a 2.0 mm hook or tighten your chains. Loose chain spaces are the most common cause of oversizing. If your piece is too small, go up to a 2.5 mm hook. Don’t change the stitch counts, because the border math depends on them.
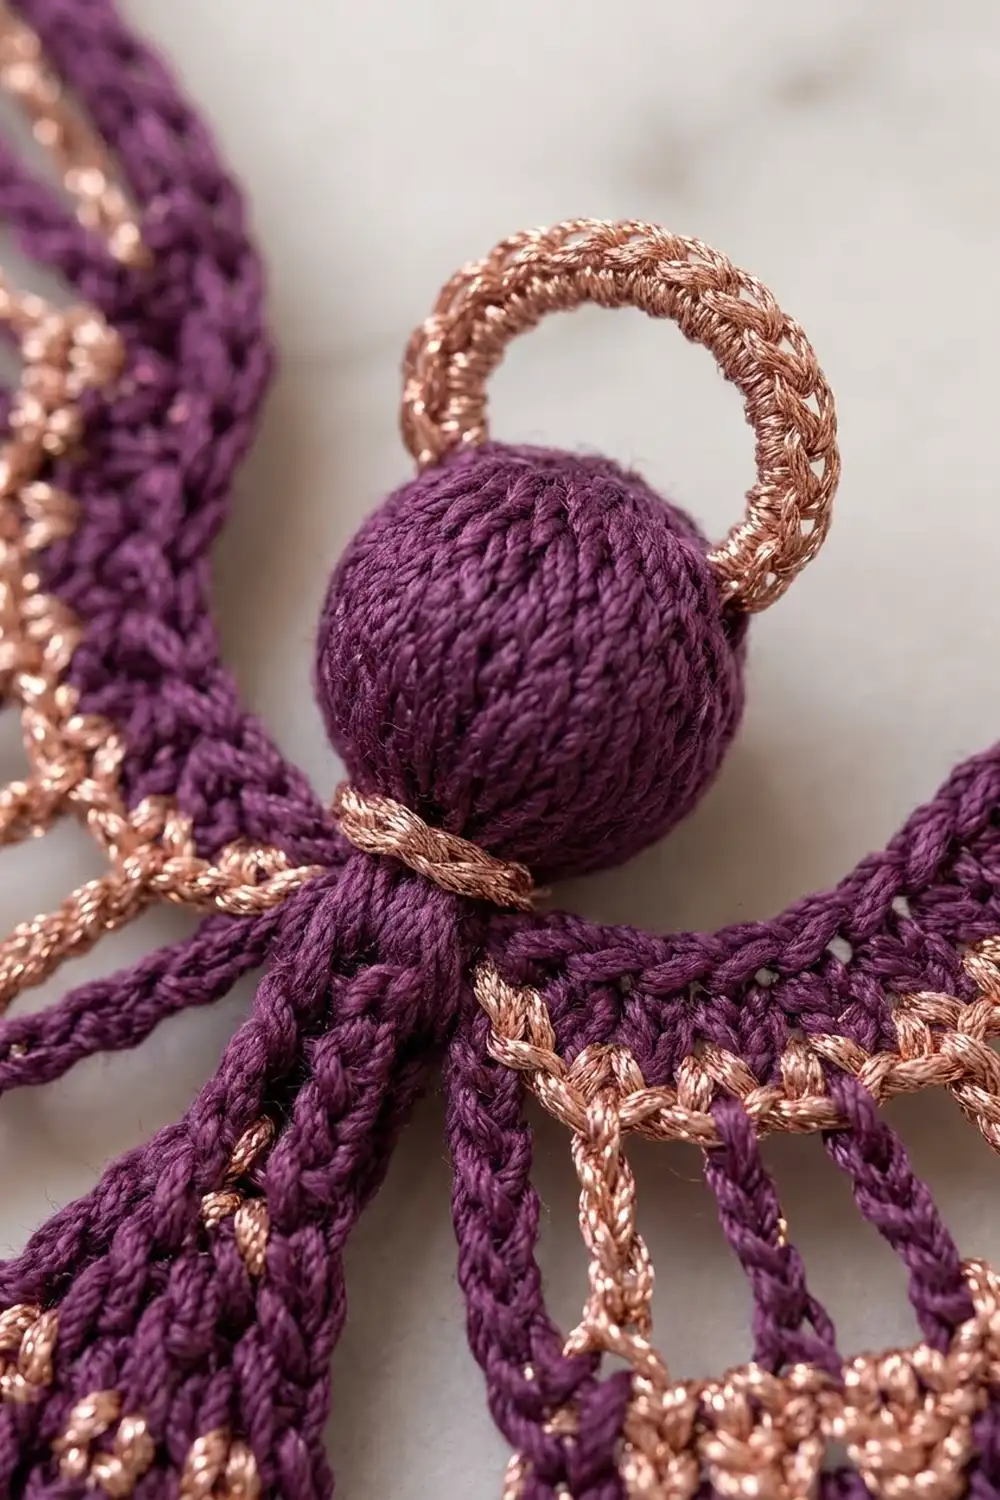
Skirt
The skirt is worked in turned rows from a ring at the neck. Each row adds length to the 7 spokes, and the chain spaces between them widen as the fan opens.
With Plum, ch 5 and sl st to the first ch to form a ring.
Row 1 (RS): Ch 3 (counts as dc), 6 dc in ring. Turn. (7 dc)
The 7 dc fan across the lower half of the ring. The upper part of the ring stays open as the neck, and the head goes there later.
Row 2 (WS): Ch 4 (counts as dc + ch 1), [dc in next dc, ch 1] 5 times, dc in top of tch. Turn. (7 dc, 6 ch-1 sps)
Row 3: Ch 5 (counts as dc + ch 2), [dc in next dc, ch 2] 5 times, dc in 3rd ch of tch. Turn. (7 dc, 6 ch-2 sps)
Row 4: Ch 6 (counts as dc + ch 3), [dc in next dc, ch 3] 5 times, dc in 3rd ch of tch. Fasten off Plum and turn. (7 dc, 6 ch-3 sps)
Row 5 (RS, Rose Gold accent band): Join Rose Gold with a sl st in the first dc. Ch 3 (counts as dc), dc in same st, [ch 2, 2 dc in next dc] 6 times, working the last pair into the 3rd ch of the tch. Fasten off and turn. (14 dc in 7 pairs, 6 ch-2 sps)
Row 6 (WS): Join Plum with a sl st in the first dc. Ch 3 (counts as dc), dc in next dc, [ch 3, dc in each of next 2 dc] 6 times. Don’t fasten off. (14 dc in 7 pairs, 6 ch-3 sps)
Check that the skirt is 2.25 in (5.7 cm) long. Then continue straight into the skirt border (see Border, below), and come back for the wings.
Wings (Make 2, Worked Directly on the Skirt)
Each wing is the same 6-row fan as the skirt, but it starts around the post of a Skirt Row 1 end stitch instead of in a ring. That’s why the wings sit level with the neck.
Wing Row 1 (RS): With the skirt’s RS facing, join Plum with a sl st around the post of the end stitch of Skirt Row 1 at one shoulder. Ch 3 (counts as dc), 6 dc around the same post. Turn. (7 dc)
Wing Rows 2–6: Work exactly as Skirt Rows 2–6, including fastening off after Row 4, Rose Gold for Row 5, and rejoining Plum for Row 6. (Row 6: 14 dc in 7 pairs, 6 ch-3 sps)
Don’t fasten off after Row 6. Work the wing border, then repeat on the other shoulder.
Wing checkpoint: Each wing is 2.25 in (5.7 cm) from shoulder to outer edge before the border. Measured flat, the unbordered angel is 5.5 in (14.0 cm) across the wings.
Border
The border goes on three edges: the skirt hem and the outer edge of each wing. All three edges end with the same Row 6 (7 dc pairs and 6 ch-3 sps), so the border counts are the same for each one.
Border gauge: A shell row is about 0.33 in (0.8 cm) tall, and the picot row adds about 0.17 in (0.4 cm). Together they give the 0.5 in (1.3 cm) border depth.
Border Row A (RS, Plum): Ch 1, sc in each of first 2 dc, *shell (7 dc) in next ch-3 sp, sc in each of next 2 dc; repeat from * 5 more times. Fasten off.
- Count per edge: 14 sc + 42 dc = 56 sts, 6 shells
- Check: 2 sc + 6 × (7 dc + 2 sc) = 2 + 54 = 56
Border Row B (RS, Rose Gold picot edge): Don’t turn. With RS facing, join Rose Gold with a sl st in the first sc of Row A. Ch 1, sc in each of first 2 sc, *sc in each of next 3 dc, (sc, picot, sc) in next dc, sc in each of next 3 dc, sc in each of next 2 sc; repeat from * 5 more times. Fasten off.
- Count per edge: (56 sts worked 1 sc per st) + (6 extra sc, 1 per center dc) = 62 sc, plus 6 picots
- Check: 2 + 6 × (3 + 2 + 3 + 2) = 2 + 60 = 62
Whole angel: 3 edges × 6 shells = 18 scalloped shells and 18 rose gold picots.
Why the math works: Every edge has exactly 6 ch-3 sps, so it gets exactly 6 shells. Each pair of dc anchors 2 sc, which pins the valleys between shells to the spokes underneath. That way the scallops line up with the lace ribs. Seven dc in a 3-ch space flares a little, which gives the outer edge the extra length it needs. The odd number gives each shell one center dc, so every picot lands at the peak of its scallop.
Head
With Plum, work in continuous rounds.
Rnd 1: 6 sc in a magic ring. (6 sc)
Rnd 2: 2 sc in each st around. (12 sc)
Rnd 3: [sc in next st, 2 sc in next st] 6 times. (18 sc)
Rnds 4–5: Sc in each st around. (18 sc)
Rnd 6: [sc in next st, sc2tog] 6 times. (12 sc)
Stuff firmly with a small pinch of fiberfill.
Rnd 7: Sc2tog 6 times. (6 sc)
Fasten off, leaving a 10 in (25.4 cm) tail. Thread the tail through the front loops of the last 6 sts and pull it closed. The head is about 0.75 in (1.9 cm) across. Sew it over the open neck ring so its lower edge rests on Skirt Row 1.
Halo
With Rose Gold, ch 16 and sl st to the first ch to form a ring.
Rnd 1: Ch 1, 24 sc in ring, sl st to first sc. (24 sc)
Fasten off, leaving an 8 in (20.3 cm) tail. The halo is about 0.75 in (1.9 cm) across. Sew its lower edge to the back of the head so it stands upright, with 0.5 in (1.3 cm) showing above the head.
Final Blocking
- Weave in all tails along the dc spokes, using matching colors, and trim them close.
- Soak the angel in lukewarm water for 5 minutes, then press it gently in a towel. Don’t wring it.
- Cover your blocking board with plastic wrap.
- Pin the skirt first. Put one pin at the neck, then pin the hem to 4.5 in (11.4 cm) across the scallop tips. The skirt should be 2.75 in (7.0 cm) long.
- Sweep each wing outward and slightly upward. Pin the wing tips 6.5 in (16.5 cm) apart. The top edge of each wing should sit about level with the halo.
- Pin each picot at its scallop peak, and pin each valley between shells. Open every chain space so the spokes run straight.
- Spray with starch or brush on fabric stiffener, front and back. Don’t let it pool in the head.
- Let it dry completely, at least 12 hours, before you unpin. Re-spray any soft area and dry it again.
Final Quality-Control Checklist
- Skirt and each wing end with 14 dc in 7 pairs and 6 ch-3 sps.
- Each edge has 6 shells (56 sts) and 62 sc with 6 picots.
- The Rose Gold accent band sits in Row 5 on all three fans.
- Wingspan is 6.5 in (16.5 cm). Height is 4 in (10.2 cm).
- Both wings match in length, 2.75 in (7.0 cm) each.
- The head is round and centered over the neck, and the halo stands upright.
- No tails, stuffing, or starch residue are visible.
Troubleshooting
- The fan cups or curls: Your chains are too tight. Loosen them, or add 1 ch to each space in Rows 4 and 6 only.
- The edge ruffles too much: Your shells are too loose. Go down a hook size for Border Row A only.
- Wings are different sizes: Check that each wing has 7 dc in Row 1. Recount Row 1, because miscounts start there.
- The metallic thread splits or frays: Work slowly, and add a tiny dab of fray check to the cut ends.
- The head flops forward: Add a few extra stitches from the back of the head into Skirt Row 1, and stiffen the neck area well.
- Picots are uneven: Make every picot exactly ch 3, and sl st into the same two loops each time.
Care
Spot clean only, then re-starch and re-pin if needed. Store the angel flat between tissue paper, away from humidity, so it keeps its shape.
Final Notes
Here’s the measurement chain. The gauge is 24 dc and 12 rows = 4 in (10.2 cm). That gives a skirt and two wings of 2.25 in (5.7 cm) each, and a 5.5 in (14.0 cm) × 3.5 in (8.9 cm) angel before the border. The 0.5 in (1.3 cm) shell-and-picot border brings each fan to 2.75 in (7.0 cm). After blocking, the angel is 6.5 in (16.5 cm) × 4 in (10.2 cm). If you check each step against these numbers, the finished angel will come out right.
Happy crocheting!