
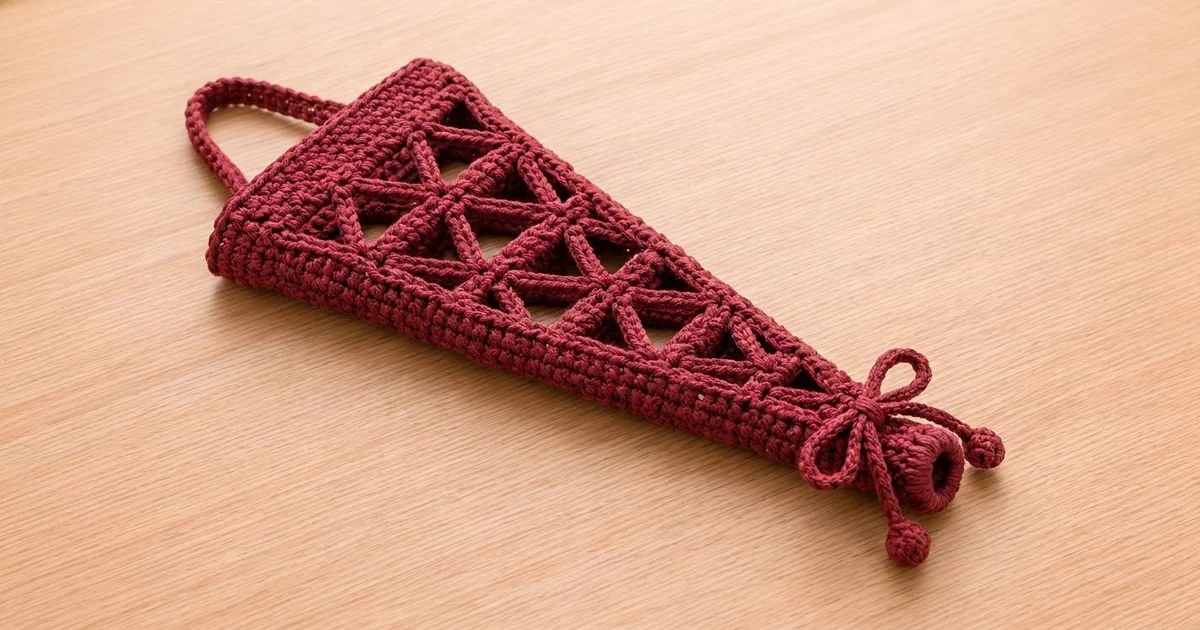
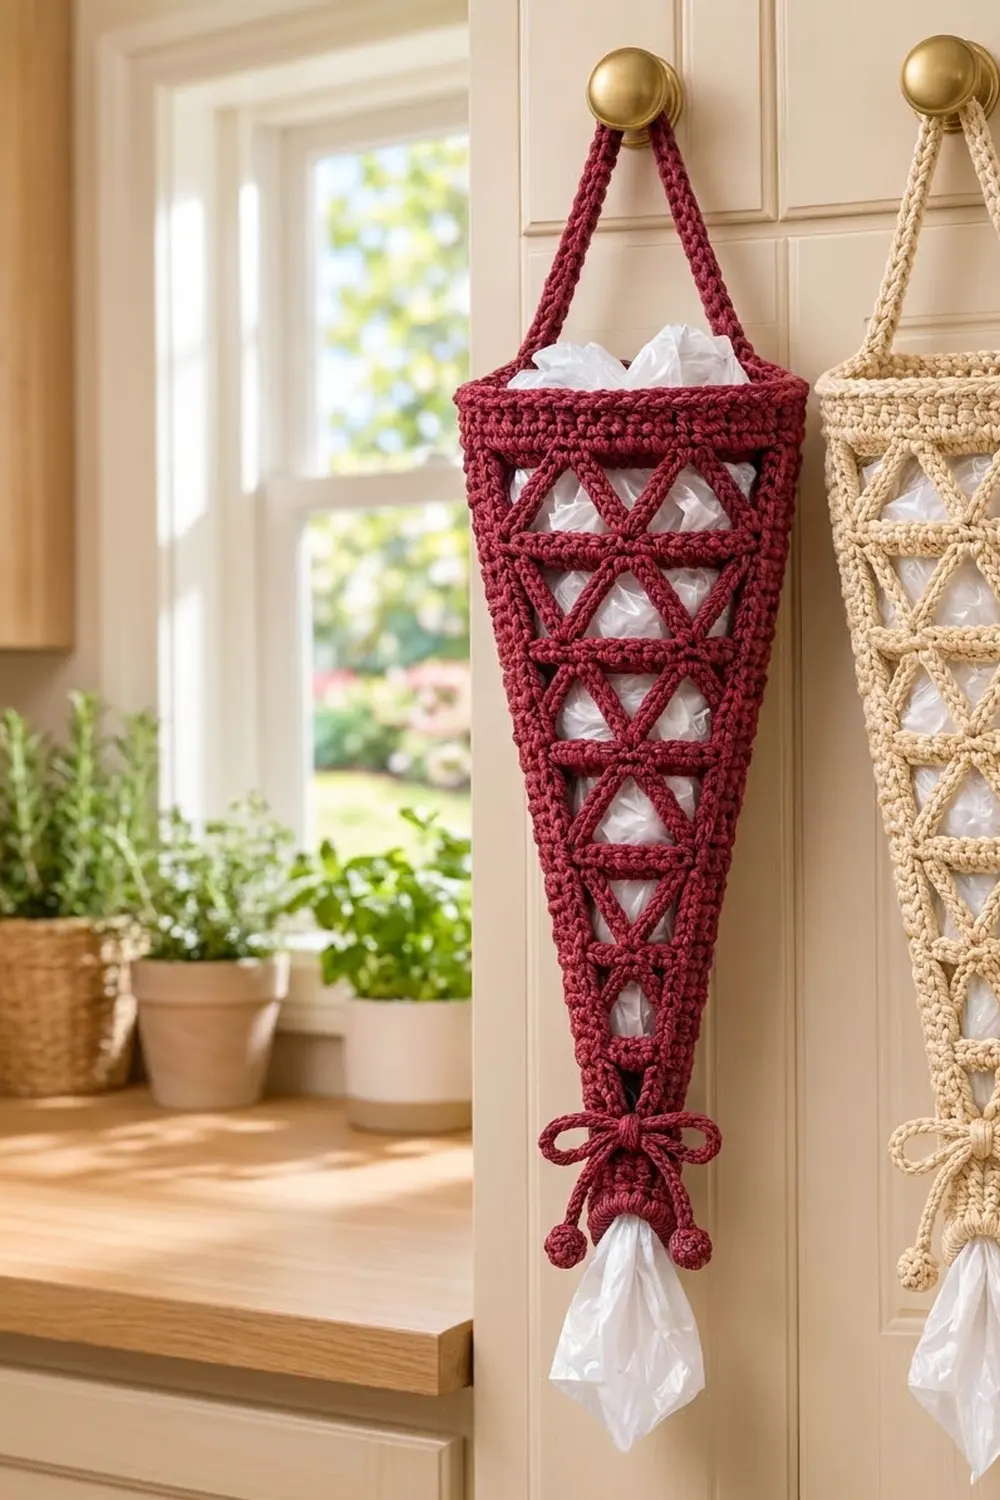
The Ruby Lattice Bag Holder is a slim cone that hangs from a cabinet knob and keeps loose grocery bags tidy. You stuff bags in through the wide top and pull them out one at a time through a firm ring at the point.
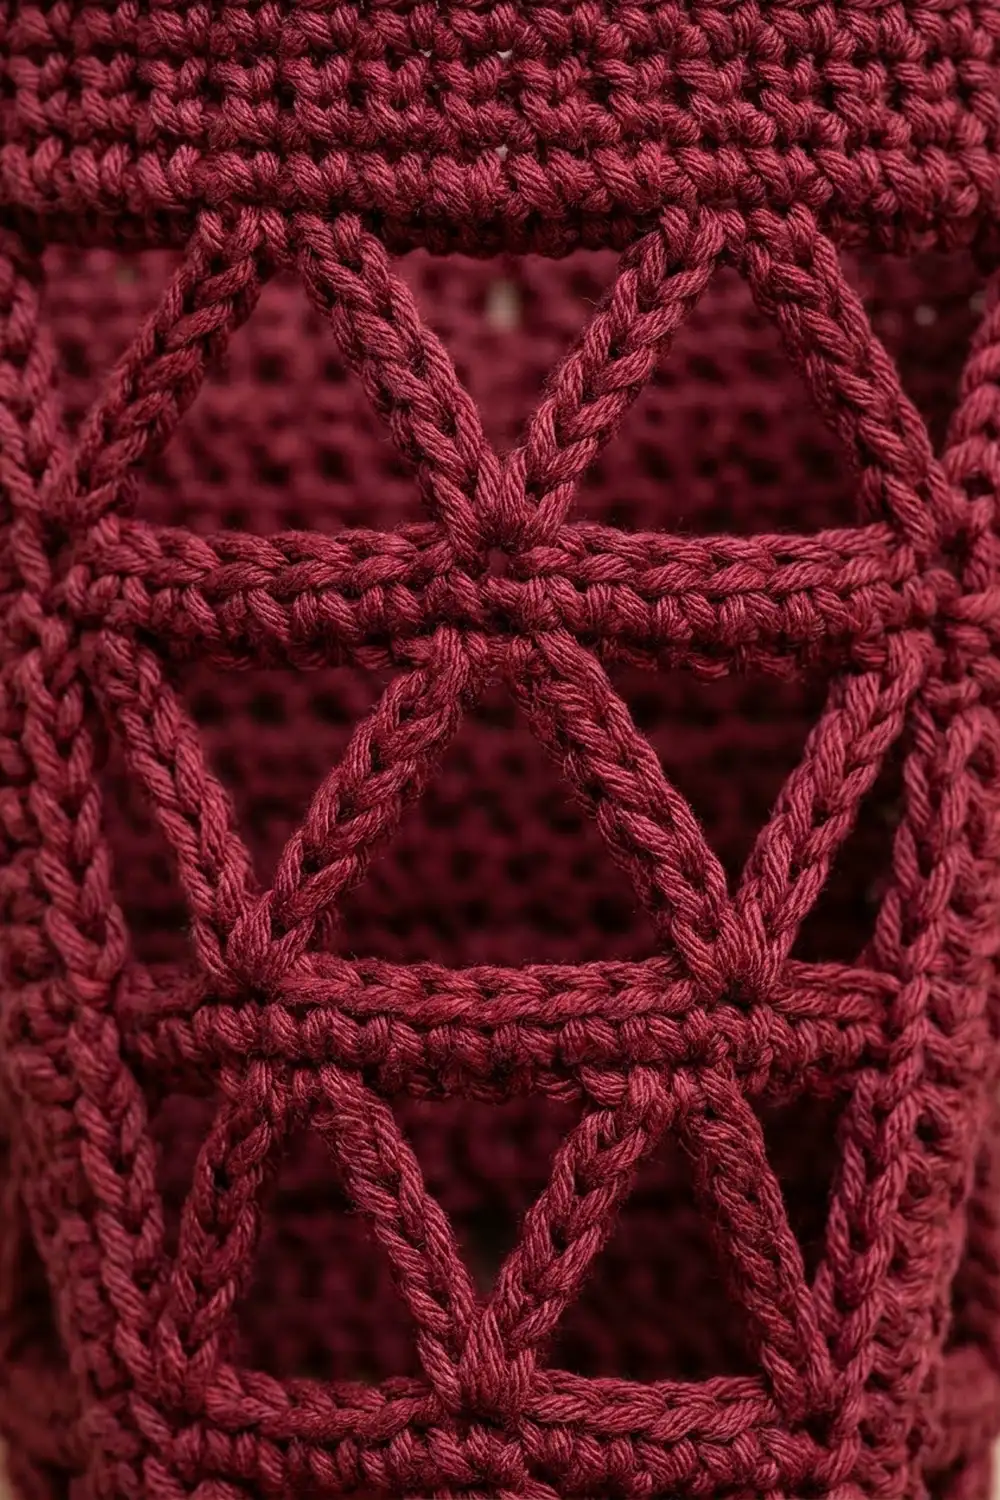
The sample is in a deep burgundy worsted cotton. Single crochet bars alternate with rows of tall clusters, and together they make a lattice of point-up and point-down triangles. A solid rim, a narrow hanging strap and a chain-cord bow with ball ends finish it off. It looks just as good in cream or any warm neutral.
The pattern uses US crochet terms. The finished holder is 6 in (15.2 cm) wide at the top when laid flat, 12 in (30.5 cm) around the rim and 13.25 in (33.7 cm) long without the strap.
You work it in one piece, in joined rounds, starting at the bottom ring and growing upward. Nine lattice bands each add 4 stitches until you reach 48. A 5-round solid rim follows. Then you add the strap, an edging on the dispensing ring and the bow cord.
Finished Size and Construction
- Finished size: 6 in (15.2 cm) flat width at the top x 13.25 in (33.7 cm) long; strap adds a 7 in (17.8 cm) loop
- Skill level: Easy-intermediate
- Terminology: US crochet terms
- Yarn weight: Worsted (#4), cotton or cotton blend
- Hook: 5.0 mm (H-8)
- Number of pieces: 1 main body with the strap worked on, plus 1 tie cord with 2 ball ends
- Layout: Single cone, worked in joined rounds without turning
- Piece size: 48 sts around the top = 12 in (30.5 cm) circumference
- Size before border: 6 in (15.2 cm) flat x 12 in (30.5 cm) long after Rnd 21
- Border depth: Solid rim of 5 rounds = 1.25 in (3.2 cm)
Materials
Use a smooth worsted cotton or a cotton/acrylic blend. Cotton holds the cone shape, doesn’t stretch under the weight of the bags and washes well. Avoid fuzzy yarn, which hides the lattice and catches on the plastic.
- Burgundy (main color): 90 g, about 166 m (182 yd)
- Optional alternate color (e.g., cream): same amount if you’re making a second holder
Tools:
- 5.0 mm (H-8) crochet hook
- 4 stitch markers
- Tapestry needle
- Scissors
- A small handful of matching yarn scraps for stuffing the ball ends
- Rust-proof pins and a rolled towel for blocking
The yarn amounts include about a 15% margin for the gauge swatch and small tension differences.
Abbreviations (US Terms)
- ch – chain
- sl st – slip stitch
- sc – single crochet
- tr – treble crochet
- sc2tog – single crochet 2 together
- BLO – back loop only
- rev sc – reverse single crochet (crab stitch)
- st(s) – stitch(es)
- sp – space
- Rnd – round
Special stitch – Lattice Cluster (LC): Yarn over twice, insert hook in the indicated st, yarn over and pull up a loop, [yarn over, pull through 2 loops] twice (2 loops left on hook). Skip the next 3 sts, yarn over twice, insert hook in the next st, yarn over and pull up a loop, [yarn over, pull through 2 loops] twice (3 loops on hook). Yarn over and pull through all 3 loops. Each LC has two slanted legs that are 4 sts apart at the base and meet at one top.
Gauge and Checkpoints
Gauge: 16 sc x 16 rounds = 4 in (10.2 cm) in sc worked in the round. One lattice band (1 LC round + 1 sc round) is 1.25 in (3.2 cm) tall.
Work Rnds 1–7 first and measure before going on. That’s the smallest section that shows both your sc gauge and your lattice height.
Checkpoints (measure flat, not stretched):
- After Rnd 3: tube 2 in (5.1 cm) wide, 0.75 in (1.9 cm) tall
- After Rnd 7: 3 in (7.6 cm) wide at the top edge, 3.25 in (8.3 cm) tall
- After Rnd 11: 4 in (10.2 cm) wide, 5.75 in (14.6 cm) tall
- After Rnd 21: 6 in (15.2 cm) wide, 12 in (30.5 cm) tall
- After Rnd 26: 6 in (15.2 cm) wide, 13.25 in (33.7 cm) tall
Up to 0.25 in (0.6 cm) off at any checkpoint is fine. If you’re more than that over, go down one hook size. If you’re under, go up one size. If the width is right but the lattice bands are short, pull up the first loop of each LC leg a little taller.
Body Pattern
Join every round with a sl st to the first st. Don’t turn. Put a marker in the first st of each round.
Dispensing Ring
Foundation: Ch 16 and sl st to the first ch to make a ring. Make sure the chain isn’t twisted.
Rnd 1: Ch 1, sc in each ch around, join. (16 sts)
Rnd 2: Ch 1, sc in each st around, join. (16 sts)
Rnd 3: Ch 1, sc in each st around, join. (16 sts)
This short tube becomes the firm ring the bags pull through.
Lattice Bands
Every odd-numbered round below is a solid sc bar. Every even-numbered round is a lattice round.
How a lattice round works: Ch 4 (doesn’t count as a st). Work the first LC with its first leg in the first st. Ch 3, then work the next LC with its first leg in the same st as the second leg of the previous LC. Repeat from * around. The second leg of the last LC goes into the first st of the round, the same st as the first leg of the first LC. Ch 3 and sl st to the top of the first LC.
Each LC makes a point-up triangle. Where two LCs share a base st, they make a V, and the ch-3 above closes it into a point-down triangle. A round over 4R sts gives R clusters and R ch-3 sps.
How an sc bar works: Ch 1. Work 1 sc in the top of each LC and either 3 or 4 sc in each ch-3 sp as written. A 3-sc sp keeps the count. A 4-sc sp adds 1 st.
Rnd 4 (lattice): Work over 16 sts. (4 LC, 4 ch-3 sps)
Rnd 5 (sc bar): [Sc in LC, 4 sc in sp] 4 times. (20 sts)
Rnd 6 (lattice): (5 LC, 5 ch-3 sps)
Rnd 7 (sc bar): [Sc in LC, 4 sc in sp] 4 times, sc in LC, 3 sc in sp. (24 sts)
Rnd 8 (lattice): (6 LC, 6 ch-3 sps)
Rnd 9 (sc bar): [Sc in LC, 4 sc in sp, sc in LC, 4 sc in sp, sc in LC, 3 sc in sp] 2 times. (28 sts)
Rnd 10 (lattice): (7 LC, 7 ch-3 sps)
Rnd 11 (sc bar): [Sc in LC, 4 sc in sp, sc in LC, 3 sc in sp] 3 times, sc in LC, 4 sc in sp. (32 sts)
Rnd 12 (lattice): (8 LC, 8 ch-3 sps)
Rnd 13 (sc bar): [Sc in LC, 4 sc in sp, sc in LC, 3 sc in sp] 4 times. (36 sts)
Rnd 14 (lattice): (9 LC, 9 ch-3 sps)
Rnd 15 (sc bar): [Sc in LC, 4 sc in sp, sc in LC, 3 sc in sp] 4 times, sc in LC, 3 sc in sp. (40 sts)
Rnd 16 (lattice): (10 LC, 10 ch-3 sps)
Rnd 17 (sc bar): [Sc in LC, 4 sc in sp, sc in LC, 3 sc in sp] 2 times, sc in LC, 3 sc in sp, [sc in LC, 4 sc in sp, sc in LC, 3 sc in sp] 2 times, sc in LC, 3 sc in sp. (44 sts)
Rnd 18 (lattice): (11 LC, 11 ch-3 sps)
Rnd 19 (sc bar): [Sc in LC, 4 sc in sp, sc in LC, 3 sc in sp, sc in LC, 3 sc in sp] 3 times, sc in LC, 4 sc in sp, sc in LC, 3 sc in sp. (48 sts)
Rnd 20 (lattice): (12 LC, 12 ch-3 sps)
Rnd 21 (sc bar): [Sc in LC, 3 sc in sp] 12 times. (48 sts)
Count check: An sc bar always has R sc on the LC tops plus 3 sc in every sp, which gives 4R. Each increase bar adds 4 more by putting a fourth sc in exactly 4 sps, so the total is 4R + 4. Every bar lands on a multiple of 4, so the next lattice round always comes out even.
Border
The border is the solid rim at the top plus an edging on the dispensing ring.
Border gauge: 16 sc = 4 in (10.2 cm). Flatten the cone so the beginning of the round sits on the left fold. Put markers in st 1 and st 25. That gives 24 sts per side, front and back, and each side measures 6 in (15.2 cm).
Rnd 22: Ch 1, sc in BLO of each st around, join. (48 sts: 24 per side) The unused front loops make a neat ridge where the lattice ends.
Rnds 23–26: Ch 1, sc in each st around, join. (48 sts: 24 per side) Fasten off after Rnd 26.
Why the math works: Rnd 21 has no increases, so the rim starts at exactly 48 sts. 48 sts at 4 sts per inch is 12 in (30.5 cm) around, or 6 in (15.2 cm) flat. Keeping the count steady through 5 rounds gives a straight band that doesn’t flare and holds the opening round.
Strap: With the outside facing you, join yarn in st 1. Turn your work so you can work rows.
- Row 1: Ch 1, sc in sts 1–4. (4 sts)
- Rows 2–28: Ch 1, turn, sc in each st. (4 sts)
Don’t fasten off. Bring the strap over to the opposite fold without twisting it. Holding it against the inside of the rim, sl st through each strap st and rim sts 25–28 together. (4 sl sts) Fasten off. The strap is 1 in (2.5 cm) wide and makes a 7 in (17.8 cm) loop.
Ring edging: Join yarn in any free loop on the underside of the foundation chain. Ch 1 and rev sc in each of the 16 free loops (8 per side). Join and fasten off. (16 rev sc) This rolls the bottom edge into the thick, firm ring you can see in the photo.
Tie cord: Ch 60, about 15 in (38.1 cm) long. Fasten off and leave a tail. Starting at the front center, weave the cord over and under every 2nd st of Rnd 3.
Ball ends (make 2): Make a magic ring.
- Rnd 1: 6 sc in the ring. (6 sts)
- Rnd 2: 2 sc in each st. (12 sts)
- Rnd 3: Sc in each st. (12 sts)
- Rnd 4: Sc2tog 6 times. (6 sts)
Stuff the ball with scraps, close the opening and sew one ball to each cord end. Each ball is about 0.75 in (1.9 cm) across. Tie the cord in a bow.
Final Blocking
- Weave in all ends inside the cone along the sc bars.
- Wet the holder in lukewarm water and gently squeeze out the extra. Don’t wring it.
- Roll it in a towel to take out more water.
- Lay it flat with the folds at sts 1 and 25. Pin the top to 6 in (15.2 cm) wide and the length to 13.25 in (33.7 cm).
- Open each triangle with your fingertips so the cluster legs sit straight and even.
- When it’s almost dry, unpin it, slip a rolled towel inside to round out the cone, and let it finish drying.
Final Quality-Control Checklist
- Rnd 21 and every rim round count 48 sts.
- Each lattice round has the same number of clusters and ch-3 sps.
- The lattice has no doubled or missing triangles.
- The top is 6 in (15.2 cm) flat. The length is 13.25 in (33.7 cm).
- The strap isn’t twisted and is joined at the opposite fold.
- The ring edging is firm and lets a bag pull through without much force.
- The cord is evenly woven and the bow sits at the front.
- All ends are secure on the inside.
Troubleshooting
The cone is twisting. Joins drift if you sl st into the wrong st. Keep the marker in the first st of each round and always join to it.
A lattice round ends with a leftover st. The sc bar below has the wrong count. Recount it. It must be a multiple of 4.
The rim flares. Your rim tension is looser than your body tension. Work Rnds 23–26 a little tighter, or go down half a hook size.
The triangles look squashed. Your LC legs are too short. Pull up the first loop of each leg to the full height of the stitch.
Bags stick in the ring. Weave the cord more loosely or tie the bow higher. Don’t add stitches to the ring.
Care
Machine wash on a cool, gentle cycle inside a mesh bag, then reshape it and dry it flat. Don’t tumble dry, because heat shrinks cotton and tightens the lattice.
Final Notes
The measurements build on each other. A 16-st ring is 4 in (10.2 cm) around. Nine 1.25 in (3.2 cm) lattice bands, each adding 4 sts, bring you to 48 sts. That’s a rim 12 in (30.5 cm) around and 6 in (15.2 cm) flat. A 1.25 in (3.2 cm) solid rim finishes the cone at 13.25 in (33.7 cm). If you hit each checkpoint, the finished holder will match. Hang it on a knob, fill it up and enjoy a tidier cupboard.
Happy crocheting!