

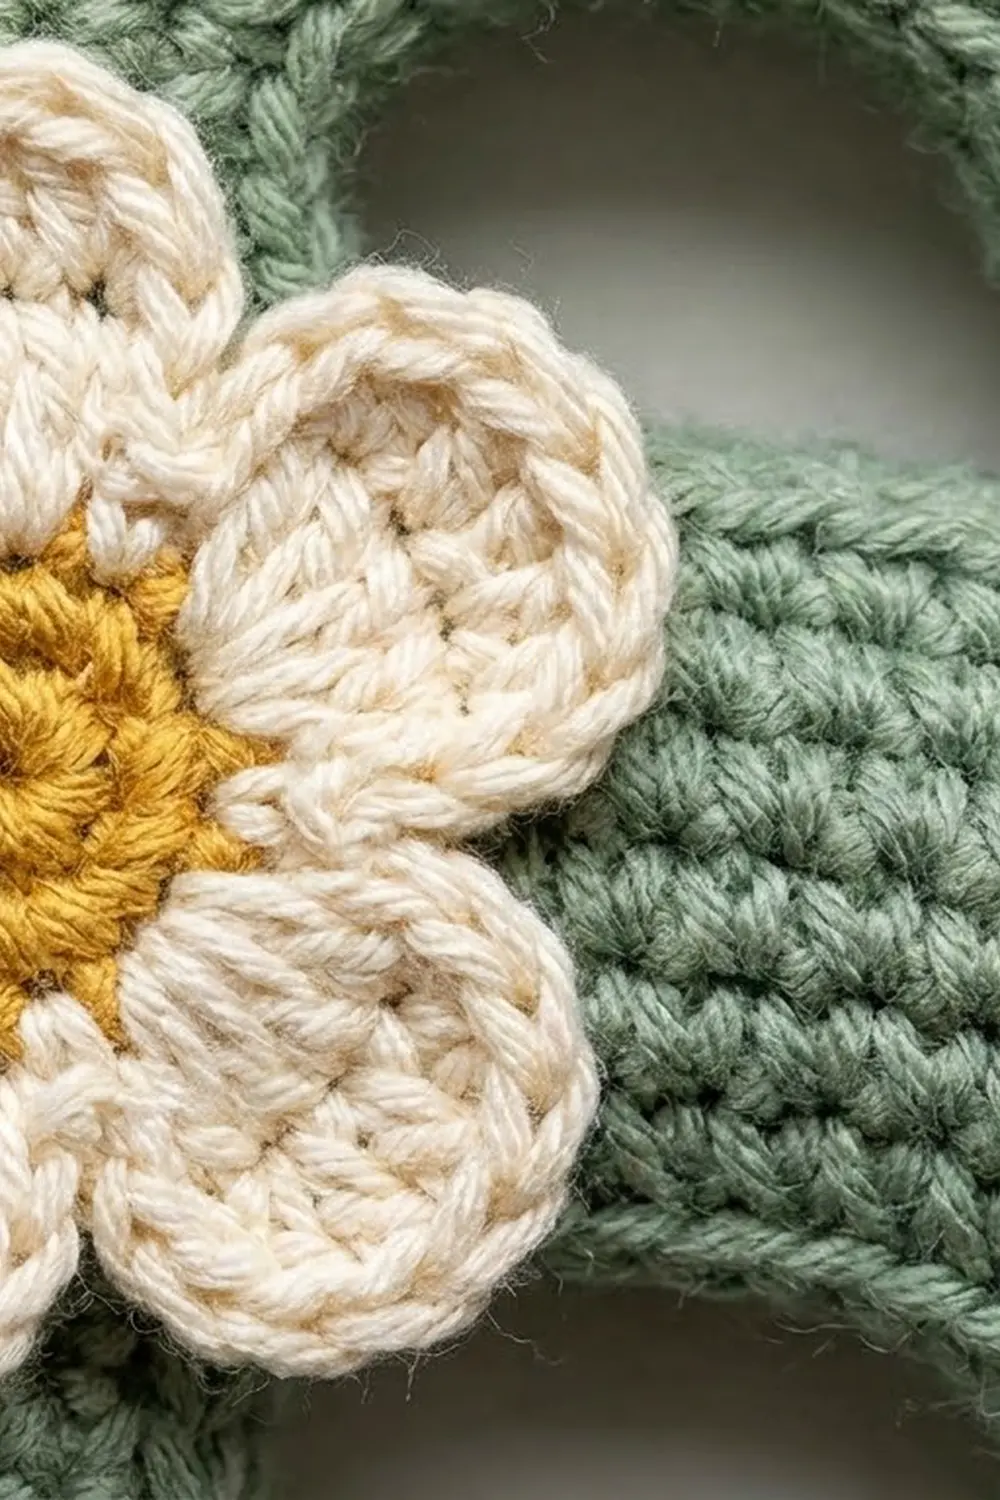
This little letter S keychain is a soft sage-green initial with a tiny spring garden climbing up its left side. Two cream daisies with golden-yellow centers, three round peach buds, and three pointed green leaves are sewn along the edge. A gold split ring and chain turn it into a bag charm or key fob.
The colors are calm and natural: sage green for the letter, cream and golden yellow for the flowers, blush peach for the buds, and a slightly deeper leaf green for the leaves. The style is gentle and cottage-like. Dense stitches keep the letter firm enough to hang without curling.
This pattern uses US crochet terms. The finished letter is about 4.2 in (10.7 cm) tall and 3 in (7.6 cm) wide, with a stroke about 1.2 in (3.0 cm) wide. With the hardware attached, the charm hangs about 5.5 in (14.0 cm) long.
Construction is simple. You chain a straight “spine” and work single crochet rounds around both sides of it. Increases along the outer edge of each curve and decreases along the inner edge bend the strip into an S. One edging round and one slip-stitch round neaten the outline. The flowers, buds, and leaves are made separately and sewn on.
Finished Size and Construction
- Finished size: 4.2 in x 3 in (10.7 cm x 7.6 cm)
- Skill level: Easy-intermediate
- Terminology: US
- Yarn weight: DK (#3) cotton or cotton blend
- Hook: 3.5 mm (E-4)
- Number of pieces: 1 letter piece, plus 8 small appliqués sewn on (2 flowers, 3 buds, 3 leaves)
- Layout: single letter, with the appliqués running down the left edge
- Stroke width: 0.8 in (2.0 cm) before the border, 1.2 in (3.0 cm) after
- Size before border: 3.8 in x 2.6 in (9.7 cm x 6.6 cm)
- Border depth: about 0.2 in (0.5 cm) per edge
Materials
Choose a smooth, mercerized or combed DK cotton. Cotton shows each stitch clearly, holds its shape on a keyring, and won’t pill against the inside of a bag. Avoid fuzzy or stretchy yarns, because the letter’s curves depend on firm stitches.
- Sage green (letter): 10 g / 25 m
- Cream (petals): 3 g / 8 m
- Golden yellow (flower centers): 1 g / 3 m
- Peach (buds): 2 g / 5 m
- Leaf green (leaves): 2 g / 5 m
Tools:
- 3.5 mm (E-4) crochet hook
- Tapestry needle with a sharp tip
- 4 locking stitch markers
- Gold split key ring, 1 in (2.5 cm) across
- Short gold chain (3 to 4 links) and one 6 mm jump ring
- Two pairs of flat-nose pliers
- Blocking mat, rust-proof pins, and a spray bottle
- Scissors
All quantities include a small extra amount for your gauge swatch and sewing tails.
Abbreviations (US Terms)
- ch – chain
- sl st – slip stitch
- sc – single crochet
- hdc – half double crochet
- dc – double crochet
- sc2tog – single crochet 2 stitches together
- inc – 2 sc in the same stitch
- MR – magic ring
- st(s) – stitch(es)
- rnd – round
Special stitch – 5-dc bobble: [Yarn over, insert hook in the stitch, yarn over and pull up a loop, yarn over and pull through 2 loops] 5 times in the same stitch (6 loops on hook). Then yarn over and pull through all 6 loops.
Gauge and Checkpoints
Gauge: 10 sc and 14 rows = 2 in x 2 in (5.1 cm x 5.1 cm) in sc with a 3.5 mm hook. This gauge is tight on purpose, because a firm fabric keeps the S from rippling.
Make the letter once as a test piece before you make the appliqués. Measure at each checkpoint:
- After Rnd 1: a straight strip about 7.25 in (18.4 cm) long.
- After Rnd 3: the strip curls into an S about 3.8 in x 2.6 in (9.7 cm x 6.6 cm), with a stroke about 0.8 in (2.0 cm) wide.
- After the border: 4.2 in x 3 in (10.7 cm x 7.6 cm), with a stroke about 1.2 in (3.0 cm) wide.
If your letter is more than 0.25 in (0.6 cm) too big in either direction, change to a 3.25 mm hook. If it is too small, change to a 3.75 mm hook. Don’t change the stitch counts, because the curve shaping depends on them.
The Letter S
The spine runs from the top tail of the S (end T) to the bottom tail (end B). Each round is written in four sections: Tip T, Side A, Tip B, and Side B.
Side A becomes the outer edge of the upper curve and the inner edge of the lower curve. Side B is the opposite: it becomes the inner edge of the upper curve and the outer edge of the lower curve. Because the S changes direction halfway, each edge is long in one half and short in the other.
Each side has three zones: an outer-curve zone, a 3-stitch middle zone, and an inner-curve zone.
Use sage green.
Foundation: Ch 36 (35 working chains plus 1 turning chain).
Rnd 1: Sc in 2nd ch from hook (this is end T), sc in each of next 33 ch, 3 sc in last ch (Tip B). Turn the work and continue along the other side of the chain: sc in each of next 33 ch, 2 sc in the last ch (the same ch as the first sc). Join with sl st to first sc. (72 sts)
- Count: Tip T 3 (first sc + last 2 sc), Side A 33, Tip B 3, Side B 33.
- Place a marker in the 16th and 18th sts of Side A and of Side B. On each side, sts 1–15 are the first zone, sts 16–18 are the middle zone, and sts 19–33 are the last zone.
Rnd 2: Ch 1. The ch 1 does not count as a st in this or any later rnd.
- Tip T start: inc in first st. (2)
- Side A, upper outer zone (15 sts): [sc 1, inc] 7 times, sc 1. (22)
- Side A, middle (3 sts): sc 3. (3)
- Side A, lower inner zone (15 sts): [sc 3, sc2tog] 3 times. (12)
- Tip B (3 sts): inc in each st. (6)
- Side B, lower outer zone (15 sts): [sc 1, inc] 7 times, sc 1. (22)
- Side B, middle: sc 3. (3)
- Side B, upper inner zone (15 sts): [sc 3, sc2tog] 3 times. (12)
- Tip T finish: inc in each of last 2 sts. (4)
- Join with sl st to first sc. (86 sts: Tip T 6, Side A 37, Tip B 6, Side B 37)
As you work, move the markers up to the first and last sts of each middle zone.
Rnd 3: Ch 1.
- Tip T start: sc 1, inc. (3)
- Side A, upper outer (22 sts): [sc 2, inc] 7 times, sc 1. (29)
- Side A, middle: sc 3. (3)
- Side A, lower inner (12 sts): [sc 2, sc2tog] 3 times. (9)
- Tip B (6 sts): [sc 1, inc] 3 times. (9)
- Side B, lower outer (22 sts): [sc 2, inc] 7 times, sc 1. (29)
- Side B, middle: sc 3. (3)
- Side B, upper inner (12 sts): [sc 2, sc2tog] 3 times. (9)
- Tip T finish: [sc 1, inc] 2 times. (6)
- Join. (100 sts: Tip T 9, Side A 41, Tip B 9, Side B 41)
Checkpoint: lay the piece flat and ease it into an S. The upper curve should open to the right and the lower curve to the left. If you see a backward S, turn the piece over and use the other side as the front. It should measure about 3.8 in x 2.6 in (9.7 cm x 6.6 cm). Don’t fasten off.
Border
The border is worked at the same tight sc gauge as the body: 5 sts per 1 in (2.5 cm). It is one round of sc and one round of slip stitches, and it adds about 0.2 in (0.5 cm) to every edge.
Rnd 4 (sc edging): Ch 1.
- Tip T start: sc 2, inc. (4)
- Side A, upper outer (29 sts): [sc 6, inc] 4 times, sc 1. (33)
- Side A, middle: sc 3. (3)
- Side A, lower inner (9 sts): sc 9. (9)
- Tip B (9 sts): sc 2, inc, sc 3, inc, sc 2. (11)
- Side B, lower outer (29 sts): [sc 6, inc] 4 times, sc 1. (33)
- Side B, middle: sc 3. (3)
- Side B, upper inner (9 sts): sc 9. (9)
- Tip T finish: sc 3, inc, sc 2. (7)
- Join. (112 sts = 100 worked 1 per st + 12 increases. Tip T 11, Side A 45, Tip B 11, Side B 45)
Rnd 5 (slip-stitch finish): Working loosely, sl st in each st around. (112 sl sts = 112 worked 1 per st + 0 added) Fasten off and weave in the ends.
Why the math works: As the edge grows outward, an outward curve gets longer and an inward curve gets shorter. The 12 extra stitches go only where the edge gets longer: 2 on each rounded tip and 4 along each outer curve (2 + 2 + 4 + 4 = 12). The inner curves already went down from 15 to 9 sts in Rnds 2–3, so in the border they are worked with no increases or decreases, which keeps them from puckering. The middle zones stay at 3 sts in every round because that short diagonal is almost straight. The slip-stitch round adds no stitches; it just firms up the edge.
Appliqués
Leave an 8 in (20.3 cm) tail on every appliqué for sewing.
Large Flower (make 1)
Rnd 1 (yellow): MR, 5 sc in ring, pull the ring closed, join with sl st to first sc. Fasten off. (5 sts)
Rnd 2 (cream): Join cream in any st. [(Sl st, ch 2, 3 dc, ch 2, sl st) in next st] 5 times. (5 petals) Fasten off.
The flower is about 1.25 in (3.2 cm) across.
Small Flower (make 1)
Rnd 1 (yellow): MR, 5 sc, join. Fasten off. (5 sts)
Rnd 2 (cream): Join cream in any st. [(Sl st, ch 1, 3 hdc, ch 1, sl st) in next st] 5 times. (5 petals) Fasten off.
The flower is about 0.9 in (2.3 cm) across.
Buds (make 3, peach)
Ch 3, 5-dc bobble in 3rd ch from hook, ch 1 to close. Fasten off. Push the tails to the back so the bobble puffs up into a round bud about 0.4 in (1.0 cm) across.
Leaves (make 3, leaf green)
Ch 7. Sc in 2nd ch from hook, hdc in next ch, dc in next ch, hdc in next ch, sc in next ch, (sc, ch 2, sc) in last ch for the pointed tip. Continue along the other side of the chain: sc in next ch, hdc in next ch, dc in next ch, hdc in next ch, sc in next ch, sl st into the base. (12 sts plus the ch-2 tip) Fasten off.
Each leaf is about 1 in (2.5 cm) long. The foundation chain shows as a center vein.
Placement and Sewing
Pin every piece in place before you start sewing. From the top of the letter down along the left edge:
- Leaf 1: base under the spot for the large flower, tip pointing up and out to the left.
- Buds 1 and 2: stacked at the top left of the upper curve, just above the large flower and touching each other.
- Large flower: on the left side of the upper curve, with two petals hanging past the edge by about 0.2 in (0.5 cm).
- Leaf 2: directly below the large flower, tip pointing left.
- Small flower: lower left, where the middle diagonal meets the lower curve.
- Bud 3: touching the right side of the small flower.
- Leaf 3: tucked under the small flower at the bottom left, tip pointing down.
Sew each piece with its own tail. Use small stitches through the back loops only so nothing shows on the back. Sew the leaves first, then the flowers over them, then the buds. Stitch down each petal tip and leaf tip so they won’t snag.
Hardware
Open the jump ring sideways with pliers. Pass it through the Rnd 4 stitch at the top of the upper curve, which is about the 15th st of Side A’s outer zone. Add the end link of the chain and close the ring. Thread the split ring onto the top link of the chain.
Final Blocking
- Lightly spray the letter with water until it is damp but not wet.
- Lay it face up on the blocking mat and shape the S so both curves and both tips are evenly rounded.
- Using the grid on the mat, pin around the outer curves and tips to 4.2 in x 3 in (10.7 cm x 7.6 cm).
- Press the petals and leaves flat with your fingertips, but keep the buds round.
- Let it dry completely, for at least 6 hours.
- Unpin it and measure again.
Final Quality-Control Checklist
- Rnd 4 has 112 sts and Rnd 5 has 112 sl sts.
- The letter measures 4.2 in x 3 in (10.7 cm x 7.6 cm).
- The stroke is an even 1.2 in (3.0 cm) wide all the way along.
- Both tips are smoothly rounded, not pointed.
- The S reads the right way from the front, not backward.
- All 8 appliqués are sewn down at their tips and edges.
- No sewing stitches show on the back.
- The jump ring is fully closed with no gap.
- All yarn ends are woven in for at least 1 in (2.5 cm).
Troubleshooting
The letter ripples: Your stitches are too loose. Use a smaller hook and block again.
The curves won’t close into an S: Check the sc2tog repeats on the inner curves in Rnds 2–3. A missed decrease leaves the inner edge too long.
The inner curve puckers: You may have increased there by mistake in Rnd 4. The inner zones have no increases or decreases in that round.
The tips look pointed: Space the tip increases exactly as written, and pin the tips into a round shape when blocking.
The petals curl forward: Steam them lightly and press flat, or tack each petal tip down.
A bud looks flat: Push both tails into the center behind the bobble to fill it out.
The letter is backward: Turn the piece over. Either side can be the front.
Care
Spot clean with cool water and mild soap, then reshape and dry flat. Don’t put it in the washing machine or dryer, which can loosen the appliqués and tarnish the hardware.

Final Notes
The measurements are easy to check as you go. A 35-chain spine gives a straight strip about 7.25 in (18.4 cm) long. Three shaped rounds curl it into a 100-stitch S of 3.8 in x 2.6 in (9.7 cm x 6.6 cm). Then a 112-stitch sc edging and a slip-stitch round bring it to 4.2 in x 3 in (10.7 cm x 7.6 cm). If you match those numbers, your Sage Blossom S will hang neatly from any bag or keyring.
Happy crocheting!