

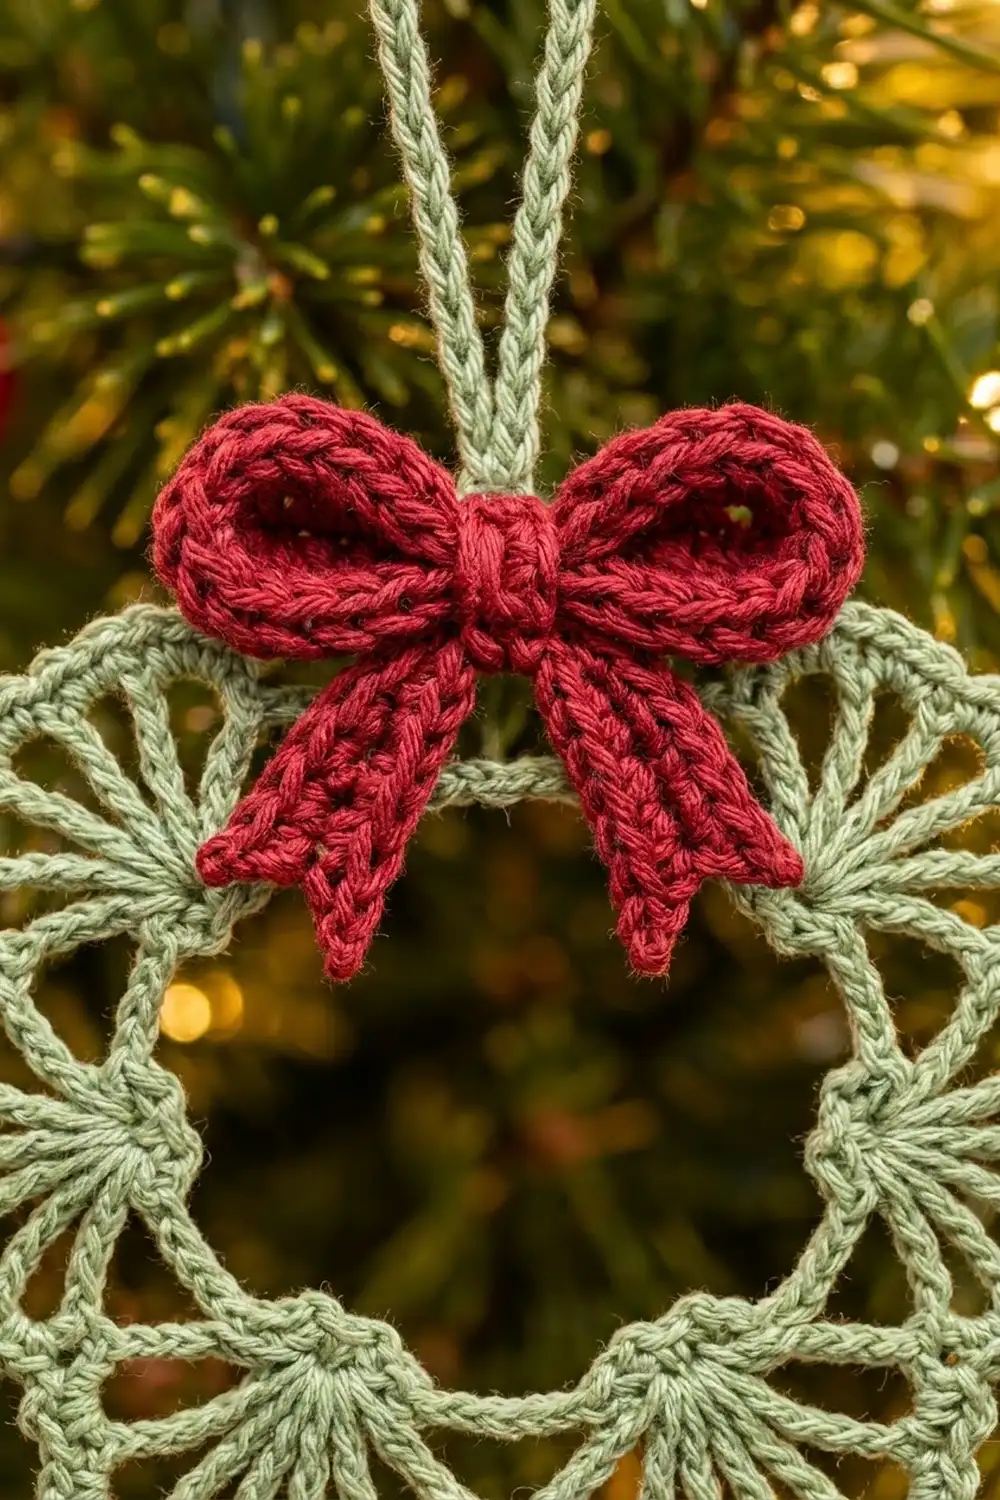
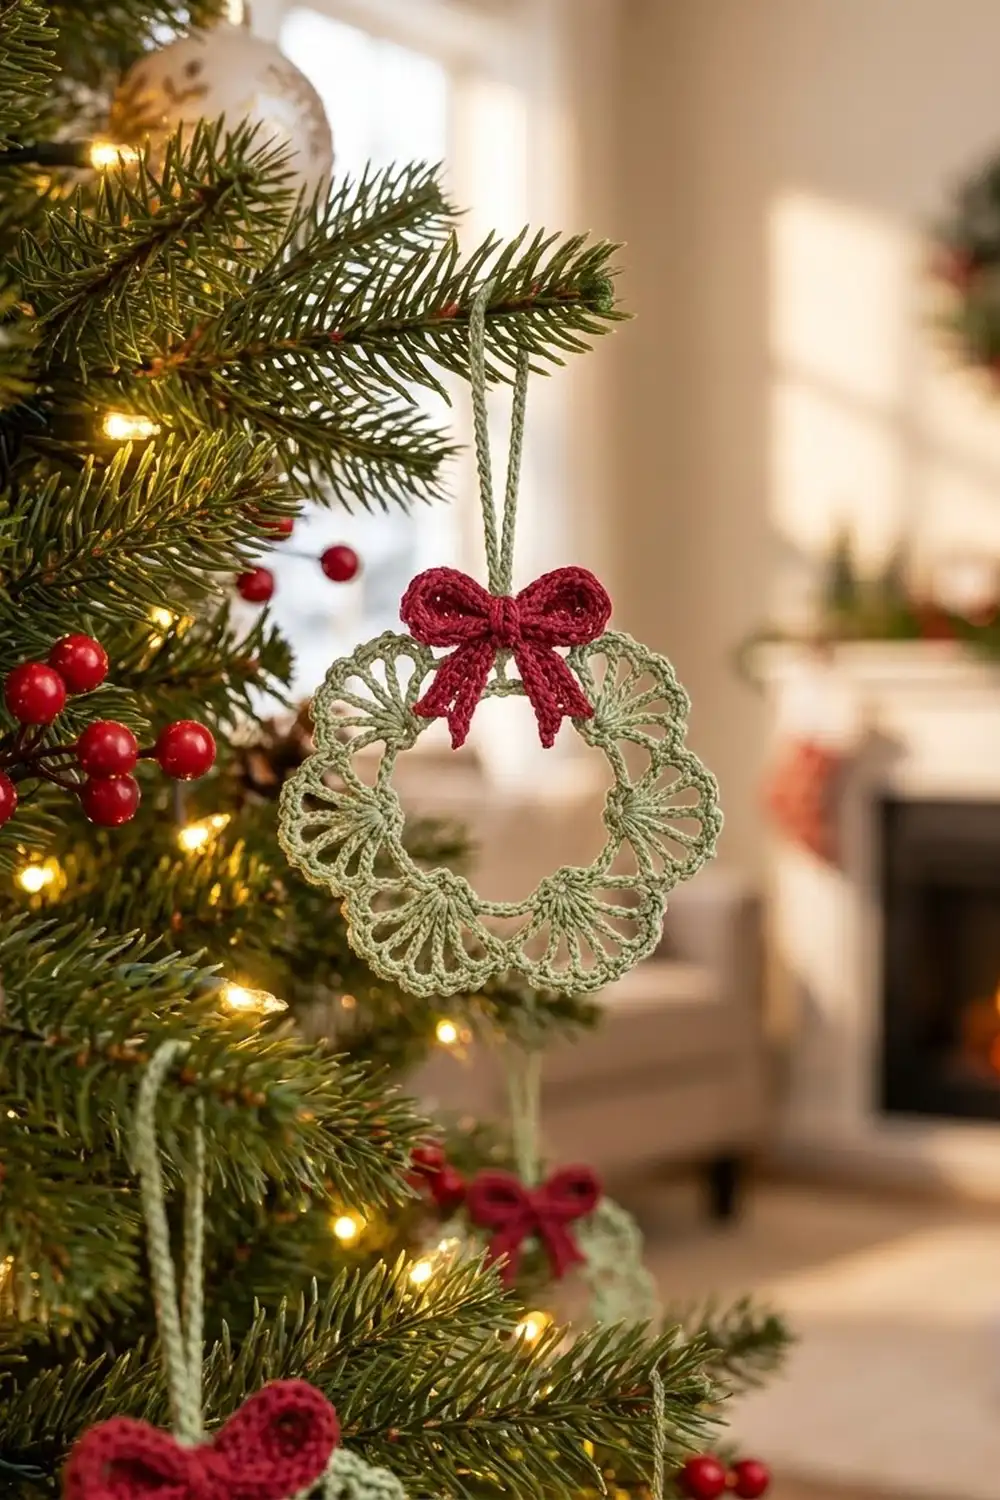
This little wreath ornament is a ring of eight open fan scallops in soft sage green, topped with a cranberry-red bow and a sturdy hanging loop. The lace is light and airy, so the tree lights and branches show through it. The red bow gives it a classic Christmas finish.
The style is vintage and lacy, but the stitches are simple. You’ll use chains, single crochet, treble crochet and slip stitches. All instructions use US crochet terms.
The finished ornament is about 4.25 in (10.8 cm) across, not counting the hanging loop. The open center is about 2.25 in (5.7 cm) across, and the bow is about 1.75 in (4.4 cm) wide.
Construction is quick. First you work a foundation ring of single crochet. Next comes one round of eight treble-crochet fans, then a round of edging that outlines each scallop. The bow is three small red pieces stacked and sewn together. Last, you add the hanging loop and sew the bow over the top of the wreath.
Finished Size and Construction
- Finished size: 4.25 in (10.8 cm) across
- Skill level: Easy
- Terminology: US crochet terms
- Yarn weight: Fingering / Super Fine (#1) cotton
- Hook: 2.5 mm (US B-1 or C-2, depending on the brand)
- Number of pieces: 1 wreath, plus 3 small bow parts sewn on
- Layout: Single round motif with 8 fan scallops, bow at top center
- Ring size (Round 1): 2.5 in (6.4 cm) across
- Size before edging (after Round 2): 3.75 in (9.5 cm) across
- Edging depth: about 0.25 in (0.6 cm) on every side
- Hanging loop: about 2.5 in (6.4 cm) tall
Materials
Yarn: Use a smooth, tightly twisted mercerized cotton in fingering weight, about 170 m per 50 g. Cotton holds the fan shapes well and doesn’t fuzz. A soft acrylic will work, but the fans won’t be as crisp.
- Sage green (wreath and hanging loop): 6 g, about 20 m
- Cranberry red (bow): 4 g, about 14 m
These amounts include a margin for your gauge swatch and weaving in ends. One 50 g ball of each color makes several ornaments.
Tools:
– 2.5 mm crochet hook
– Tapestry needle
– Scissors
– 4 stitch markers
– Rust-proof pins and a foam blocking mat
– Spray bottle with water
– Ruler or measuring tape
Abbreviations (US Terms)
- ch – chain
- sl st – slip stitch
- sc – single crochet
- tr – treble crochet (yarn over twice, insert hook, pull up a loop, [yarn over, pull through 2 loops] 3 times)
- sp – space
- st(s) – stitch(es)
- RS – right side
Special stitch – Fan: In the same stitch, work (tr, [ch 1, tr] 6 times). Each fan has 7 tr and 6 ch-1 spaces.
Gauge and Checkpoints
Gauge: 24 sc and 28 rows = 4 in (10.2 cm) in sage cotton with a 2.5 mm hook. That works out to 6 sc and 7 rows per 1 in (2.5 cm).
Since this is a single small piece, the first wreath can be your test piece. Check it at each stage below.
- Checkpoint 1 (after Round 1): The ring measures 2.5 in (6.4 cm) across its outer edge and lies flat without twisting.
- Checkpoint 2 (after Round 2): The piece measures 3.75 in (9.5 cm) across. Each fan sticks out about 0.6 in (1.5 cm) from the ring.
- Checkpoint 3 (after Round 3): The wreath measures 4.25 in (10.8 cm) across and lies flat with no ruffling.
- Checkpoint 4 (bow loop strip): The strip measures 3.25 in (8.3 cm) long and about 0.5 in (1.3 cm) tall.
If your piece is too big: Use a hook one size smaller, such as 2.25 mm. Don’t remove stitches, because the 48-stitch ring is what sets up the 8-fan repeat.
If your piece is too small: Use a hook one size larger, such as 2.75 mm.
If the fans cup or ruffle while the ring is the right size: Your treble stitches are probably too short or too tall compared with your single crochet. Change the hook size for Round 2 only, and use your main hook for Rounds 1 and 3.
Wreath
Use sage green.
Foundation: Ch 48. Make sure the chain isn’t twisted, then sl st to the first ch to form a ring.
Round 1 (RS): Ch 1. Work 1 sc in the same ch as the join and 1 sc in each ch around. Sl st to the first sc. (48 sc)
Lay the ring flat and check Checkpoint 1. Place a marker in every 6th stitch, starting with the first sc, so you can see the 8 repeats. Move the markers up as you work.
Round 2 (fans): Ch 1. Work 1 sc in the same st as the join. Skip 2 sts, work a Fan in the next st, skip 2 sts, work 1 sc in the next st. Repeat from * to * 6 more times. Then skip 2 sts, work a Fan in the next st, skip the last 2 sts, and sl st to the first sc.
Count after Round 2: 8 fans and 8 sc. That makes 56 tr, 48 ch-1 sps and 8 sc.
Check the math: Each repeat uses 6 stitches of Round 1: 1 sc, 2 skipped, 1 fan stitch, 2 skipped. Eight repeats × 6 sts = 48 sts, so the round closes exactly.
Each fan opens out from one stitch on the ring. That’s what makes the spokes point outward in a sunburst. The sc between fans holds each scallop down to the ring and creates the deep dips between scallops. Check Checkpoint 2 now.
Round 3 (scallop edging): Ch 1. Work 1 sc in the same sc as the join. Work 1 sc in the first tr of the next fan. [Ch 1, sc in the next tr] 6 times. Work 1 sc in the next sc between fans. Repeat from * to * 7 more times. On the last repeat, leave out the final sc between fans and sl st to the first sc instead.
Count after Round 3: Each scallop has 7 sc on top of the tr plus 1 sc between fans, for 8 sc per repeat. The total is 8 × 8 = 64 sc and 48 ch-1 sps.
This round makes the beaded outline around each fan. Fasten off, leaving a 4 in (10.2 cm) tail. Weave in the ends.
Border
Round 3 is the border of this ornament. It is a light outline, not a wide frame, and it adds about 0.25 in (0.6 cm) on every side.
Border gauge: The edging follows the fan stitch for stitch: 1 sc on top of each tr, and 1 ch-1 over each ch-1 space below. The edge ends up the same length as the fan top, so it adds no extra fullness.
Counts per scallop (each “side” of this round motif):
– 7 sc, one on each tr
– 6 ch-1 sps, one over each ch-1 sp of the fan
– 1 sc in the sc between fans
That gives 8 sc and 6 ch-1 sps per scallop. For 8 scallops, the total is 64 sc and 48 ch-1 sps.
Why the math works: No stitches are added at the dips between fans, so the edging pulls slightly at those points and keeps the scallops clearly separated. The tops of the fans get exactly as many stitches as there are tr and spaces, so they curve smoothly instead of waving. The 3.75 in (9.5 cm) piece plus 0.25 in (0.6 cm) of edging on each side gives 4.25 in (10.8 cm), which matches the finished size.
Bow
Use cranberry red for all three parts. Leave a 6 in (15.2 cm) tail at the end of each part for sewing.
Bow Loop Strip
Foundation: Ch 21.
Row 1: Sc in the 2nd ch from the hook and in each ch across. Turn. (20 sc)
Rows 2–4: Ch 1, sc in each st across. Turn. (20 sc in each row)
Fasten off. The strip measures about 3.25 in (8.3 cm) long and 0.5 in (1.3 cm) tall.
Shaping: Fold both short ends in so they overlap about 0.25 in (0.6 cm) at the center back. Sew through all layers at the center. This makes two loops about 1.75 in (4.4 cm) wide in total. Pinch the center together.
Tails
Foundation: Ch 13.
Row 1: Sc in the 2nd ch from the hook and in each ch across. Turn. (12 sc)
Row 2: Ch 1, sc in each st across. (12 sc)
Fasten off. The strip measures about 2 in (5.1 cm) long.
Shaping: Fold the strip in half at an angle to make an upside-down V. Each tail should hang about 1 in (2.5 cm) down and out to the side. Tack the fold.
Center Knot
Foundation: Ch 5.
Row 1: Sc in the 2nd ch from the hook and in each ch across. Turn. (4 sc)
Rows 2–5: Ch 1, sc in each st across. Turn. (4 sc in each row)
Fasten off.
Assemble the Bow
- Place the tails behind the pinched center of the loop strip, with the point of the V at the center.
- Wrap the center knot around both layers and sew its short ends together at the back.
- Make a few stitches through every layer so nothing slides.
The finished bow is about 1.75 in (4.4 cm) wide and 1.5 in (3.8 cm) tall, including the tails.
Hanging Loop and Bow Placement
- With the wreath RS facing, find the sc between the two top fans on Round 3. That point is the top center.
- Join sage with a sl st in that sc. Ch 30, which is about 5 in (12.7 cm) of chain. Sl st into the same sc to close the loop.
- Work a sl st into the back bump of each of the 30 ch around the loop, then sl st into the starting sc again. This makes the loop thicker and stops it from stretching. Fasten off and weave in the ends. The loop stands about 2.5 in (6.4 cm) tall.
- Center the bow over the base of the loop. The knot should sit on the ring, and the bow loops should cover the top parts of the two upper fans.
- Sew the bow on from the back, going through the knot and the Round 1 ring. Weave in all the red tails.
Final Blocking
- Lightly spray the wreath with water until it’s damp but not dripping. Keep the bow as dry as you can.
- Lay it RS up on the blocking mat.
- Pin the center into a circle 2.25 in (5.7 cm) across.
- Pin the outer edge at the middle of each fan, 8 pins in total, so the piece measures 4.25 in (10.8 cm) across.
- Gently spread the spokes of each fan so the ch-1 spaces open evenly.
- Shape the bow loops with your fingers and push the tails into their V angle.
- Let it dry completely, at least 6 hours, before unpinning.
- For a firmer ornament, use a light spray starch before drying.
Final Quality-Control Checklist
- Round 1 has 48 sc, and the ring isn’t twisted.
- Round 2 has 8 fans with 7 tr each, for 56 tr in total.
- Round 3 has 64 sc and 48 ch-1 sps.
- The wreath measures 4.25 in (10.8 cm) across and lies flat.
- The center opening is round and about 2.25 in (5.7 cm) across.
- All 8 scallops are the same size.
- The bow is centered at the top and covers the base of the loop.
- The hanging loop is about 2.5 in (6.4 cm) tall and firmly attached.
- All ends are woven in securely.
Troubleshooting
The ring twisted when it was joined: Undo the join, flatten the chain, and join again. If Round 1 is already done, you’ll need to start over.
One fan has too many spokes: Count the tr. Each fan needs exactly 7. Undo back to the fan and rework it.
The edging ruffles: You probably worked ch 2 instead of ch 1, or added extra sc in the spaces. Rework with 1 sc per tr and ch 1 between.
The scallops look flat and don’t separate: Make sure you worked the sc between fans in Round 3. That stitch creates the dips.
The bow droops forward: Add a stitch from the top of each bow loop to the wreath behind it.
The hanging loop stretches: Add the slip-stitch round from step 3 of the hanging loop, or work a second one.
Care
Hand wash in cool water with mild soap. Press out the water in a towel and lay flat to dry, pinning back into shape if needed.
Final Notes
The measurements build on each other. The 48-stitch ring measures 2.5 in (6.4 cm). The eight fans bring it to 3.75 in (9.5 cm). The scallop edging adds 0.25 in (0.6 cm) on every side for a finished 4.25 in (10.8 cm) wreath. Then the 1.75 in (4.4 cm) bow and the 2.5 in (6.4 cm) hanging loop complete it. If you check your gauge at each checkpoint, every ornament you make will match. Make one, or a whole set for your tree.
Happy crocheting!